Welcome to another GAP tutorial. This will be a two part tutorial. In part 1, we will make the following simple animation:

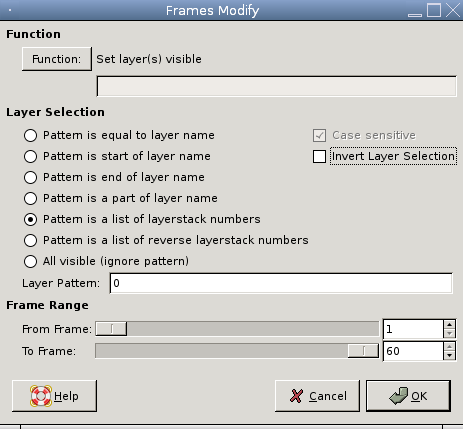
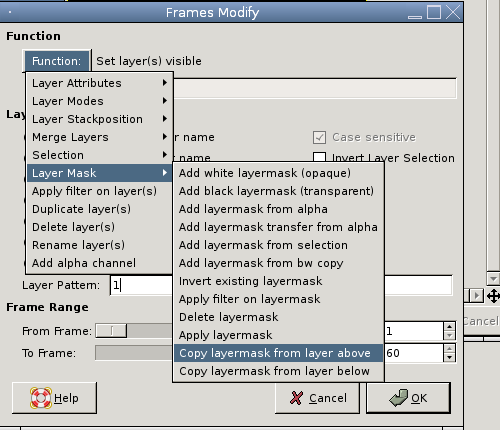
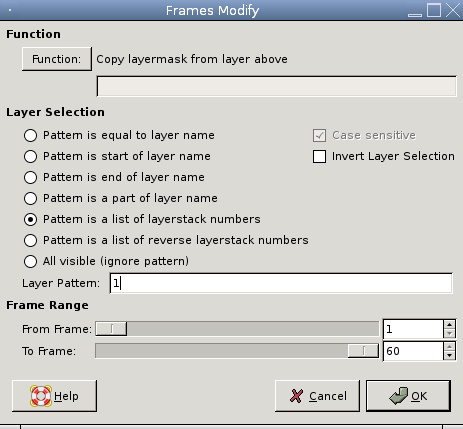
In part 2, we will apply a
layer mask to our animation:
And arrive at this result:

[highlight]
Beginning Notes:[/highlight] Layermasking can be used to add complexity to your animations. This tutorial shows a very simple example of a static layermask being applied to an animation to achieve a particular result. Layermaks can also be animated to achieve even more complex animations. The result achieved here can be accomplished other ways also, so this is by no means a unique method.
It does help to have some familiarity with Gimp and GAP. I have tried to make the tutorial as new user friendly as possible. However, without some familiarity, you may not completely understand why certain steps are taken, or why a given result occurs when some method is applied.
[highlight]
Let's begin.[/highlight]
Start by opening a new 300x300 image window by selecting:
File | New from the main Gimp toolbar window (the one with all the tool icons)
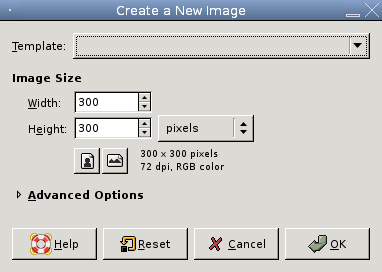
After setting up the image dimensions in the
New Image window as shown above, press
OK.
Next, fill the image with a bluish green color. To follow along exactly with this tutorial, use color:
00ffffYou can do this using the
Bucket Fill tool, or by just dragging the color from the
Foreground Color showing on the main Gimp toolbar window to the image window.
We need to
save the image to a format that GAP can work with. That general format is
filename_000001.xcf. I usually use
background_000001.xcf (XCF is the native Gimp image format). Save it into a working folder of your choice. It is always best to make a separate working folder to keep all of your work files in one place. I am saving all of my work files into a folder named gap_layermasking_tutorial (you choose the name of the folder/directory you want to add your files to).
I'm going to make a 60 frame animation. There is nothing special about using 60 frames. When you are doing this on your own, you could experiment with using more or less frames. Usually more frames produces a smoother animation, but a larger final file size, while less frames has the advantage of a smaller final file size, but less smooth animation.
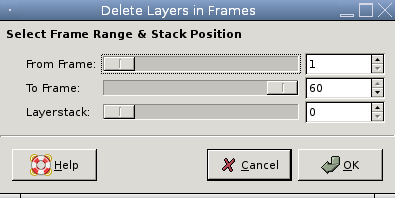
We need 60 base frames for our animation. We have one already which is background_000001.xcf. We need 59 more. So from our background_000001.xcf image window select:
Video | Duplicate Frames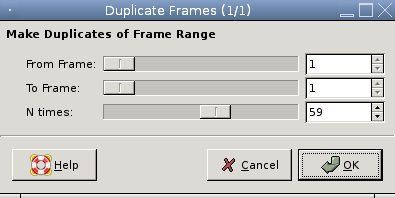
As shown in the above image, leave
From Frame and To Frame set to 1. You can't use any other value in those boxes since we only have one frame, our background_000001.xcf image. Set
N times to 59. This is how many more duplicate frames we want to make for the animation. Then press
OK.
You will now have 60 sequentially numbered xcf image files in your working folder.
Open another new 300x300 image just as was done above. Save it as
parts.xcf in your working folder.
Set your foreground color to Black.
Select the
Text tool:
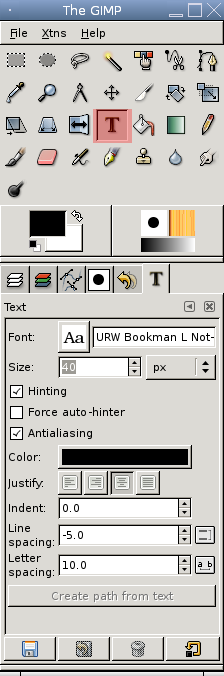
The text tool icon (highlighted in red above) looks like an upper case letter T. In the Text tool Dialog window (usually a tabbed window at the bottom of the main Gimp toolbar window), the selected font is URW Bookman L Not-Rotated with a size of 40px. No need to be concerned about any of the other font settings for this tutorial.
Click somewhere inside the parts.xcf window and type the word "
Text" (without the quotation marks) in the Gimp Text Editor window that opens:
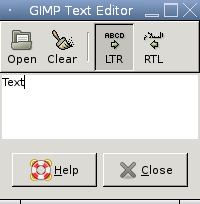
Then click on
Close.
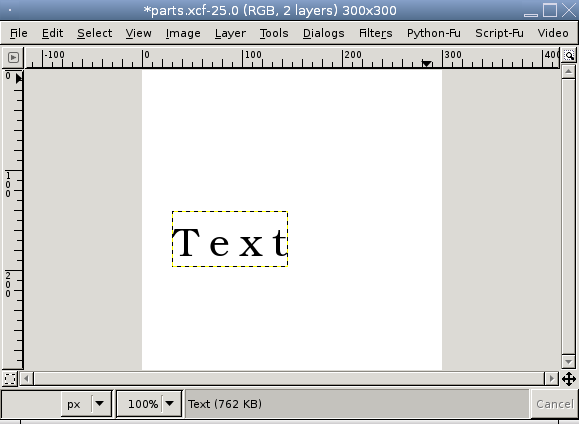
You now have a new Layer added to your parts.xcf image with the word Text somewhere in it:
In order to work more easily with any object using GAP, it is best to center that object in it's image window. Here is a quick method to do that for the Text Layer:
Check your
Layers dialog window (should also be a tabbed window at the bottom of your main Gimp toolbar window) to see if the
Text Layer is selected. Since you just added it, by default it should be selected. If it is not, just click on the Text Layer in your Layers dialog window to make sure it is selected.
Then in your parts.xcf window select:
Edit | CutThe Text Layer disappears. Don't worry, it's in a memory buffer.
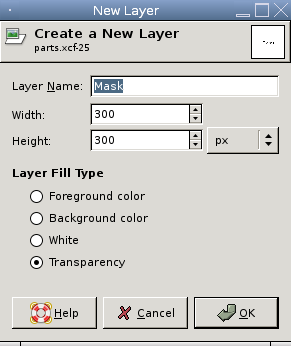
Next add a
New Transparent Layer to your image by either clicking on the New Layer button at the bottom of your Layers dialog window, or by selecting:
Layer | New Layer from your parts.xcf window.
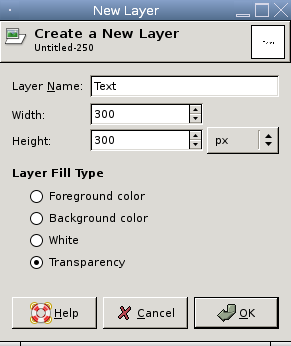 Change the Layer Name
 from the default New Layer to Text in the window that opens and click on OK.
Then select:
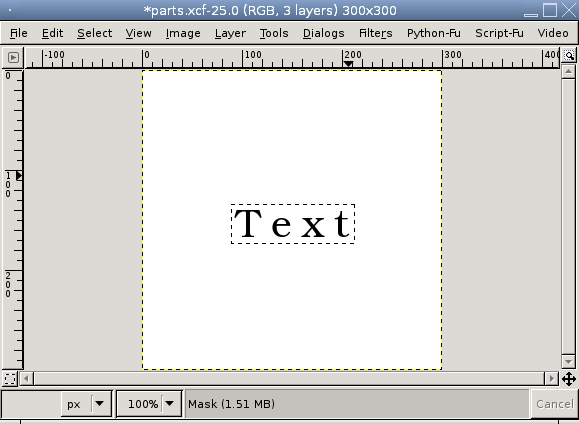
Edit | PasteThe Text Layer reappears and it's centered. It is just a
floating selection at this point though, not
anchored to any Layer. So select:
Layer | Anchor Layer (or just click on the little anchor icon at the bottom of the Layers dialog window)
The word text is now centered in the image, and the layer has been anchored to the transparent
Text Layer that was added previously.
Next let's
crop that layer so it just fits to the size of the typed word "Text". Do this by selecting:
Layer | Autocrop LayerNow return to your background_000001.xcf image and select:
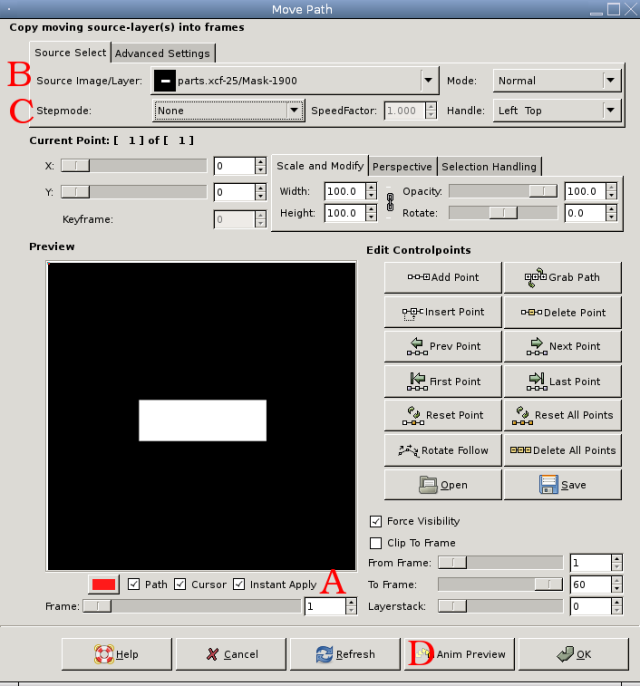
Video | Move Path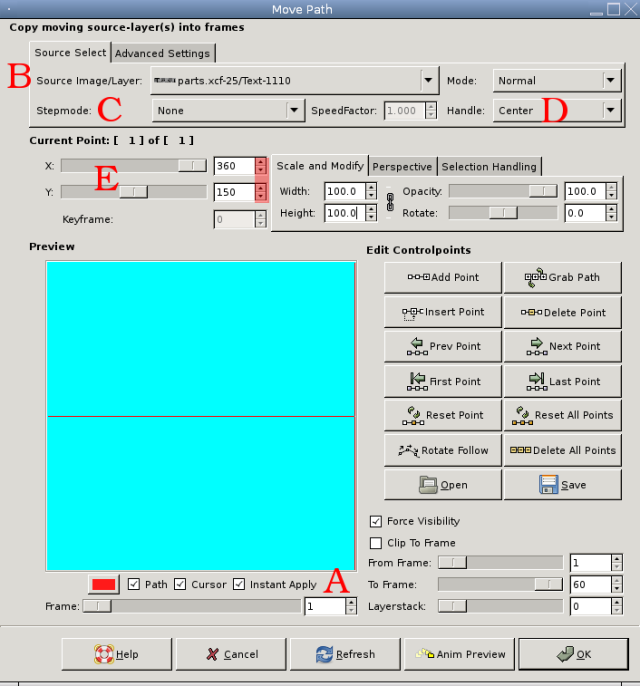
In the
Move Path window that opens, first make sure
Instant Apply is selected (letter
A in the image above). For the
Source Image/Layer (B) choose parts.xcf/Text by clicking on the drop down window tab if it is not already selected.
([highlight]
Note [/highlight]that the Source Image/Layer have numbers after them as shown in the image. Those are numbers that Gimp uses to keep track of objects and are unique to each instance of Gimp, so your numbers may not be the same as the one's in the image above.)
Stepmode (C) needs to be selected as
None. For
Handle (D) select
Center. For the
X and Y position values (these represent the position to place the Source Image/Layer on the background_000001.xcf image),
set X to be 360 and Y to be 150.
[highlight]
Explanation: [/highlight] The Source Image/Layer (which is the Text Layer selected as parts.xcf/Text in the image above) is placed at a value of 150 for Y to be at the horizontal center of the image. (I'm not going to explain this fact. If you understand Cartesian coordinates this hopefully will not be an issue for you.) I have set the X value to be 360 to move the Text Layer beyond the right side of the image. (Try setting X to say 200 and you will see it moved into view. For the purposes of this tutorial and animation, the text begins beyond the right border of the image and moves across the screen disappearing beyond the left border of the image.)
If you use the slider to move the Text Layer, it will only go up to the value of the right border of the background_000001.xcf window. In that case, you can
use the little up/down arrows (highlighted in red above) to adjust the value higher. You can also just double-click in the little box where the number is and delete the number in there and type in 360 and then hit the Tab key.
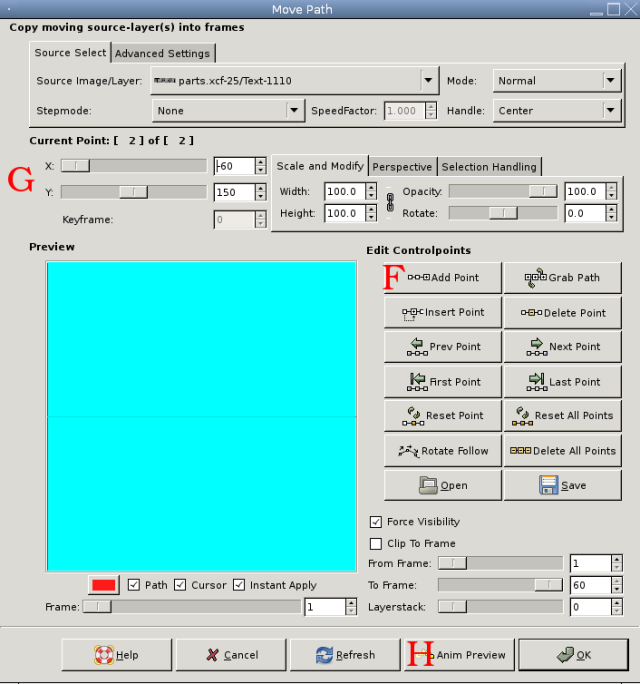
With the
Move Path window still open, next click on the
Add Point button (F). This adds a second
keyframe to the animation and sets the
first keyframe with the original values we inserted for our Text Layer, which in this case was just setting it at position X:360 and Y:150. After clicking the Add Point Button, we will set the final position for our animation (G). Set the
X value to -60 (minus 60) (G). This moves the Text Layer beyond the left side of the background_000001.xcf image.
Again, if you use the sliders to change the X value, it will stop at a value of 0. Use either the little up/down arrows to the right of the X value or just double-click in the box where the X value is and change it to -60 (again, that is minus 60). We have told GAP the starting and ending values of the Text Layer. The value of GAP is that it will calculate and position all of the in between positions for each frame of the animation for the Text Layer.
Since
Undoing with GAP is not trivial, it is always best to Preview your animation prior to clicking the OK button. So click on the
Anim Preview button (H):
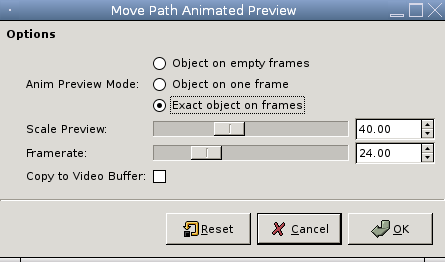
In the window that opens, select
Exact Object on frames as shown above and then click
OK. A little
multilayered image and a preview window will be created. Watch the preview to see if the animation goes as expected. If so, close the preview window and then delete the little multilayered image that gets created and select
Don't Save from the window that opens.
If your animation goes the same as the first animation shown at the beginning of this tutorial, then click
OK on your Move Path window and let GAP place the Text Layer into the appropriate position in each of the 60 frames to give the appearance of motion by the text.
Our first animation has been created. Let's save it to a
GIF file:
Select:
Video | Frames to Image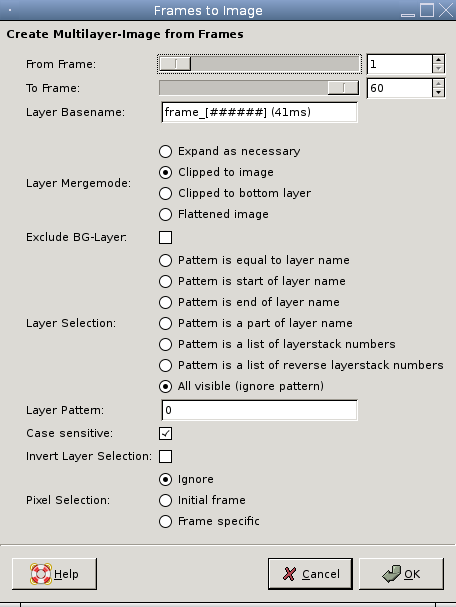
Accept the default values here and click OK. A new multilayered image will be created. If you select:
Filters | Animation | Playback from the newly created multilayered image, you will see the animation. We need to try to optimize this file to reduce the final file size before saving it. Select:
Filters | Animation | Optimize (for GIF)Another new multilayered (and optimized) image gets created. From this new image select:
File | Save AsIn the window that opens, type in the name
anim_unmasked.gif for the name to save the file and then click the
Save button.
The
Export File selector window then opens:
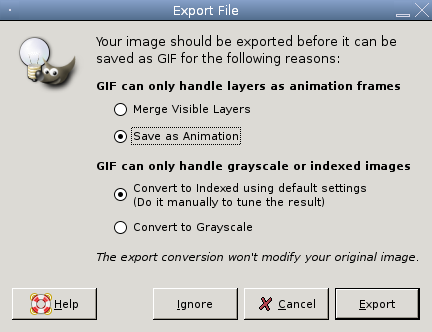
Make sure that you select
Save as Animation as shown above then click the
Export button.
In the next Save window that opens, you can just accept the values there and click on the
OK button. Your
GIF image has been saved.
Close out the anim_unmasked.gif image window as well as the other multilayered image window that was created from the Frames to Image dialog previously. When asked select Don't Save.
This ends part 1 of the tutorial.


 Hopefully I can combine it with Mission Gimpossible to burn that fuse across the image.