Issabella wrote:
Wallace, I'd appreciate your help telling your steps to get so attractive outcome.
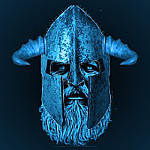
Hopefully with this tutorial, you'll be able to create the 3D Spherical text as shown below.
The
Spherical Zoom Script is needed in order to complete this tutorial.
You can pick up the
Spherical Zoom script here...
http://gimpscripts.com/2015/09/spherical-zoom/The
Luce plugin is also needed.
You can download the Luce plugin for most systems using the link below.
Ignore the huge download button at the top of the page. The
actual downloads are near the bottom of the page.
http://reddog.s35.xrea.com/wiki/Luce%20for%20GIMP.html Attachment:
 exam.png [ 243.06 KiB | Viewed 10098 times ]
Step #1Create your text layout so it looks like the images below.
I accomplished this by using Trandoductin's text image as a guide and placed 2 guide lines on either side of the text.
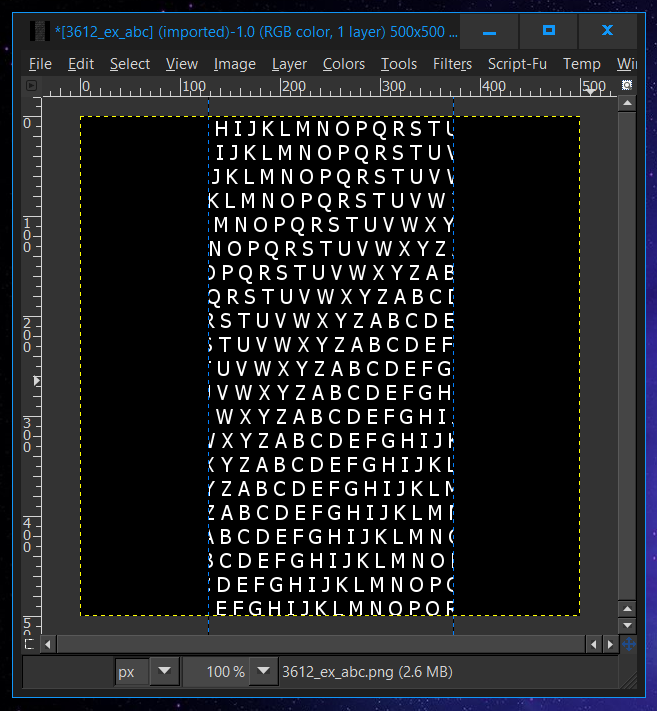
I enlarged the text box, to roughly fit around the text image guide.
Type out a few lines of your text, without a space.
I typed out
"GIMPCHAT" about 5 times, using a purple color.
Then copied this text and pasted it into the text box, until it filled the text box.
Making sure to add a little
Text Spacing in the
Text Tool Options Dialog.
Also making sure the text is as close to the same size as the text in the image guide.
Remove any text from outside the guidelines, remove guidelines,
right-click your text layer and select
Layer To Image Size and your ready to run the
Spherical Zoom script.
 Step #2
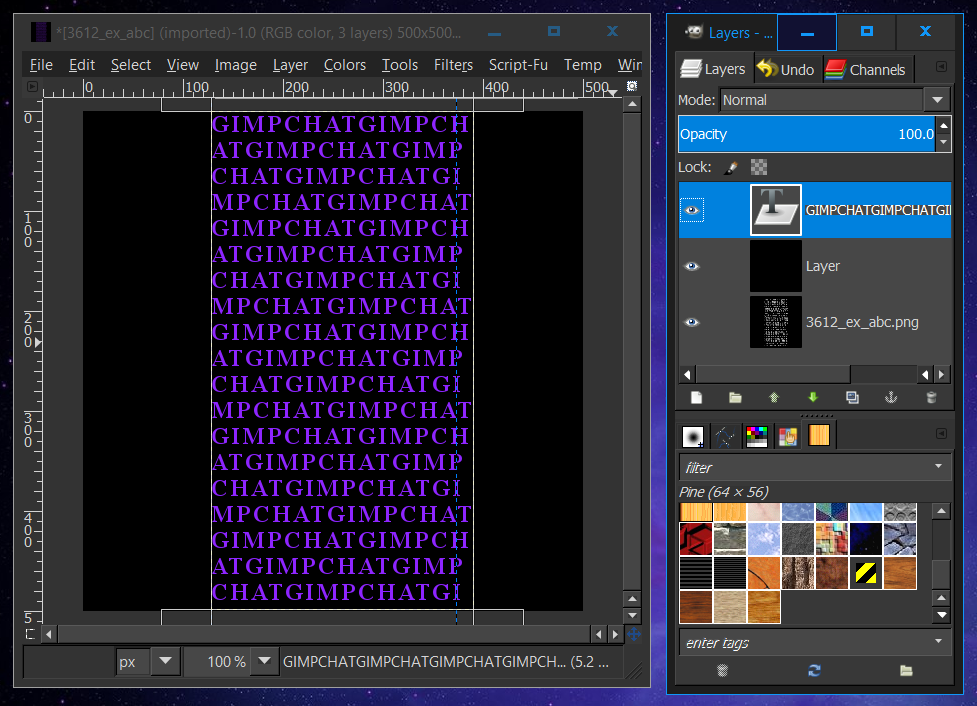
Run the
Spherical Zoom script on your text layer.
I used a
Map object iteration of 16 for this image.
I also added 2 guidelines, to accurately find the center of my canvas.
Once the
Spherical Zoom script has completed.
Merge all the layers produced by the
Spherical Zoom script and you should have something like the image below.
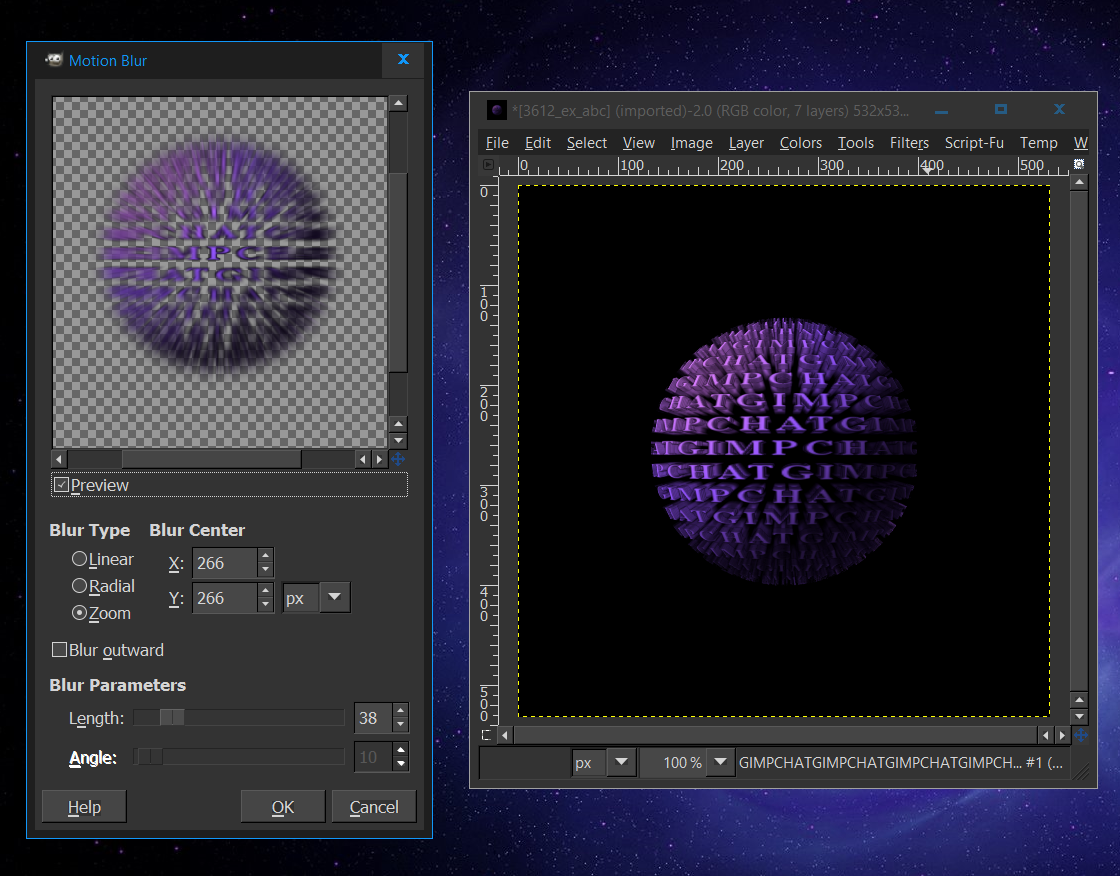
 Step #3Duplicate
 the
merged spherical zoom layer and apply a
Motion Blur to this duplicate layer.
Use the cross-hair guidelines put down earlier, to measure form the center to the edge of your canvas.
My canvas measured 266 form center to canvas edge.
If needed, use your measurement as the
X and
Y values in the
Motion Blur Dialog.
I started with a blur of
38,
Zoom selected and
Blur outward unchecked.
This is the result below.
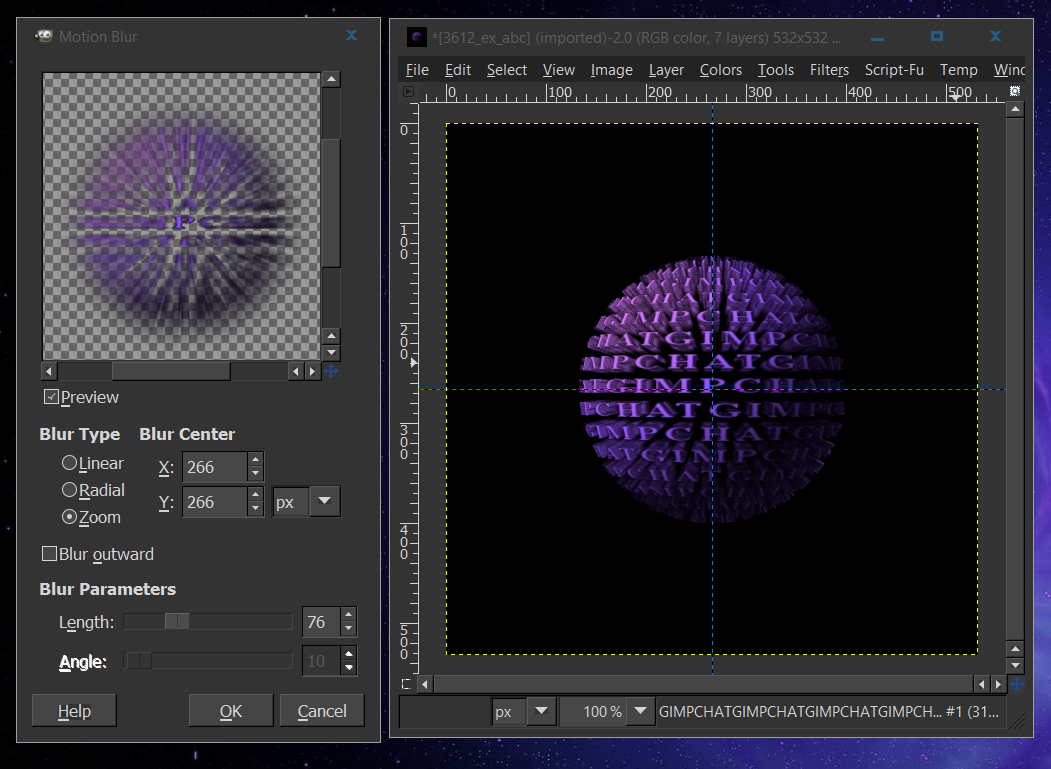
 Duplicate
 the
Motion Blur layer, run
Motion Blur on this duplicated layer and
double the
blur length.
From
38 to
76. Using the same values, except for
Blur Length.
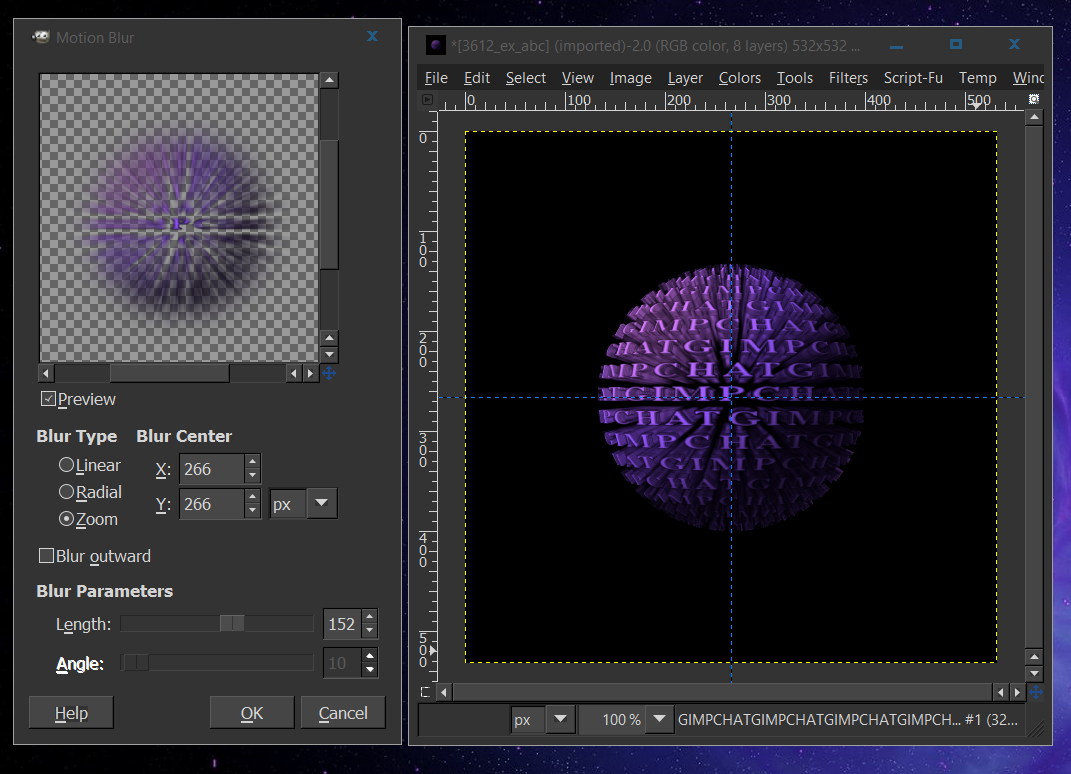
 Duplicate
 this new motion blur layer, run
Motion Blur on this layer, this time increase the
blur length form 76 to 152.
Duplicate this last motion blur layer and
merge all the blur layers and the
original Spherical Zoom layer together.
Now we're ready to apply the lighting effect.
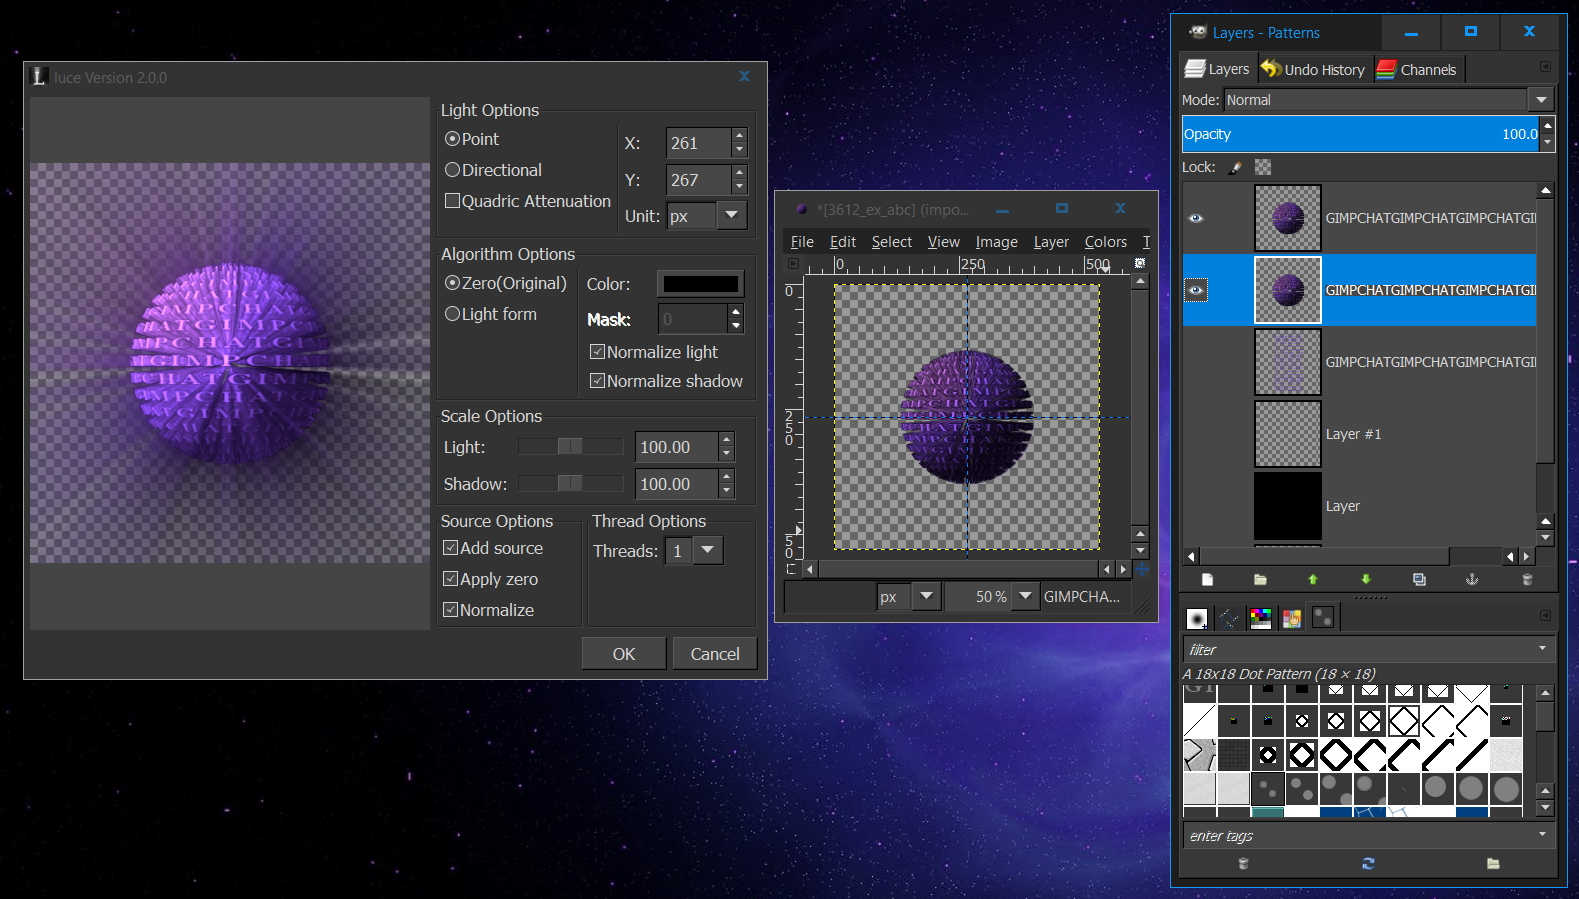
 Step #4
Applying the lighting plugin
Luce.
You can download the Luce plugin for most systems using the link below.
Ignore the huge download button at the top of the page. The downloads are further down near the bottom.
http://reddog.s35.xrea.com/wiki/Luce%20for%20GIMP.html Once the Luce plugin is installed, it can be found under,
Filter>
Light and
Shadow>
Luce.
Duplicate your spherical text layer, run the Luce plugin on this duplicated layer.
I used the
default Luce values on my image, with the
X and
Y values being slightly off, but I went with it anyway.
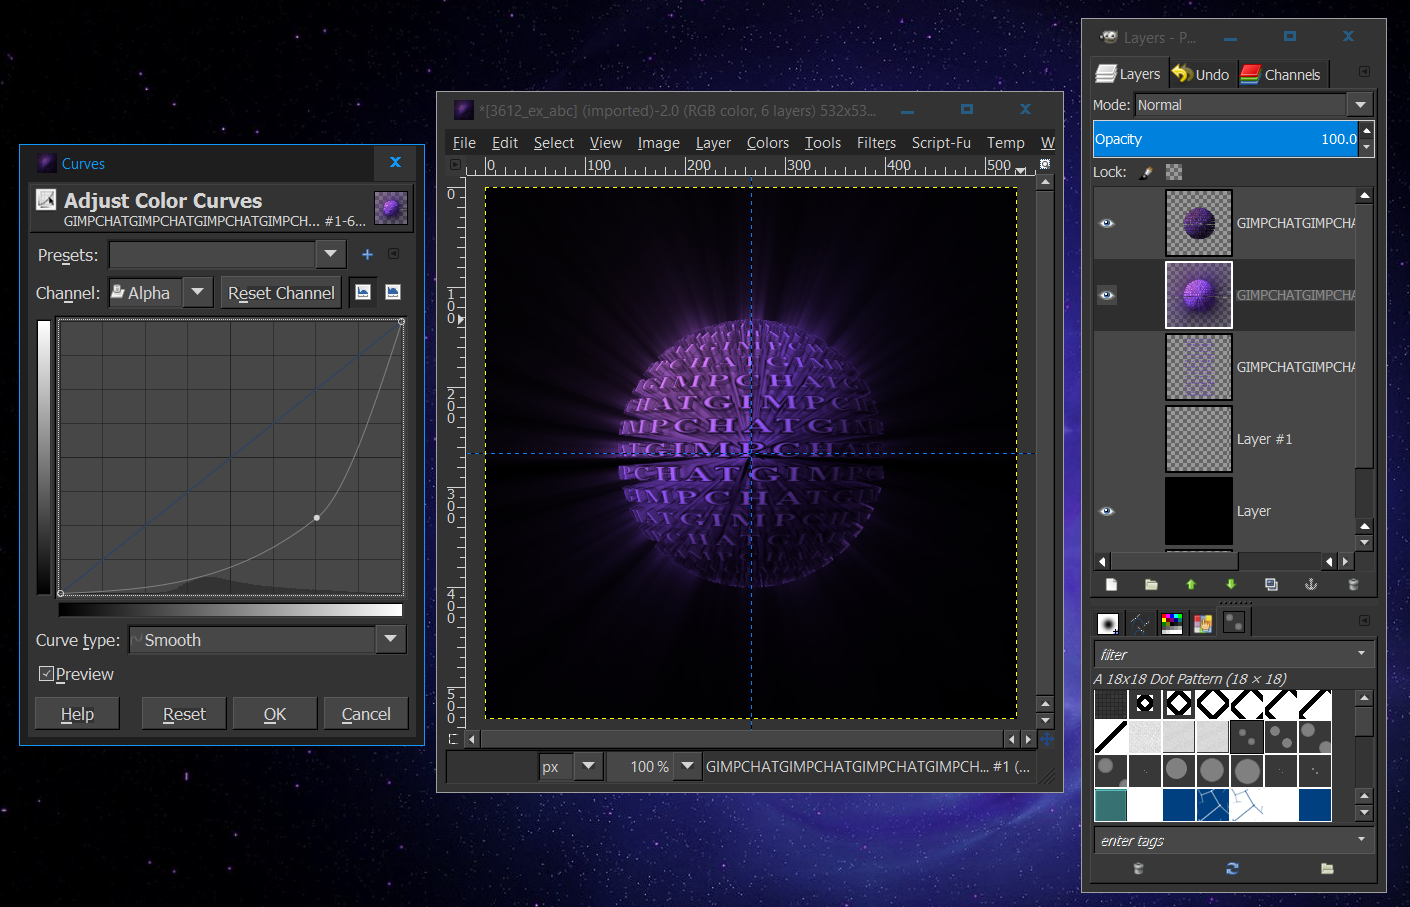
 Step #5
Using
Color Curves to adjust the light ray layer.
Open the
Color Curves dialog, with the
Luce lighting layer selected.
Change to
Channel to Alpha and adjust the curve as shown in the image below.
Experiment with the curve by moving the line around, until you like what you see.
If you haven't created a dark background yet,
do so to get a better feel for the lighting changes made when applying the alpha curve to the Luce lighting layer.
 Conclusion Merge
 the Luce lighting layer and the original spherical zoom layer, together with a dark background and you're done.
If anyone has any question, let us know.
ENJOYAttachment:
 exam II.png [ 243.06 KiB | Viewed 10098 times ]


 I have practice.