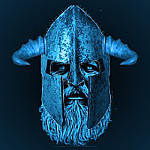
Did this one for The Warrior.
The Map Object filter is EXTREMELY temperamental! Sometimes it won't work with 'Filter All Layers"
so I am giving the manual way of doing it first, which generally gives better results because you
can use images that don't include an alpha channel. Plus you can select transparent background
which I highly recommend. (My included image was done manually, with transparent background,
manually added drop shadow on each layer and used FX Foundry to combine the blue background
to each layer. [
FX Foundry>Animation>Combine with Background] )
1) Create a square image (No Alpha Channel Required)
2) Duplicate the layer 35 times (total of 36 layers)
3) Select top layer
4) Filters>Map>Map Object
5) Select Map to: "Box"
6) Click "Orientation" tab
7) Rotation slider 'X' rolls the cube towards or away from you.
Rotation slider 'Y' rotates the cube left or right.
Rotation slider 'Z' spins the cube clockwise or counterclockwise.
Set all three sliders to the left (-170)
Position slider 'Z' adjusts the size of the cube
Set it for 0.00000 (You can choose a larger size, but may go off screen at some point.)
8) Click 'Ok'
9) Repeat steps 4 through 8, for each layer increasing X, Y and Z Rotations sliders by 10.
(Eg. -170, -160, -150, etc.)
10) Make sure all layers are visible
11) Video>Utils>AnimSettings with Semi-Flatten
Un-click Semi-Flatten and set Mode to 'Replace'
Click 'Ok'
12) Filters>Animation>Playback
Attachment:
 EyeSpinner.gif [ 1.02 MiB | Viewed 7272 times ]
Here is the "Filter All Layers" method if you want to experiment.
1) Create a square image
2) Add an Alpha Channel if your image doesn't have one or else your plug-in will crash.
3) Duplicate the layer 36 times (total of 37 layers)
4) Filters>Filter All Layers (near the bottom of the 'Filters' list.
5) Choose plugin-map-object
6) Click "Apply Varying"
7) Map Object plugin should start.
8) Select Map to: "Box"
9) Click "Orientation" tab
10) Rotation slider 'X' rolls the cube towards or away from you.
Rotation slider 'Y' rotates the cube left or right.
Rotation slider 'Z' spins the cube clockwise or counterclockwise.
Set all three sliders to the left (-180)
Position slider 'Z' adjusts the size of the cube
Set it for 0.00000 (You can choose a larger size, but may go off screen at some point.)
11) Click 'Ok'
12) When prompted "2nd call of plug-in-map-object (define end setting) click 'Continue' button
13) The Map Object box should come up again and click the "Orientation" tab
14) Set all three sliders to the right (180)
15) Click 'Ok'
16) When "Non-Interactive call of plug-in-map-object (for all layers in between)", click continue.
17) When done, delete layer #37 (it's a duplicate of layer 1)
18) Make sure all layers are visible
19) Video>Utils>AnimSettings with Semi-Flatten
Un-click Semi-Flatten and set Mode to 'Replace'
Click 'Ok'
20) Filters>Animation>Playback