It is currently Tue Apr 16, 2024 8:08 am


All times are UTC - 5 hours [ DST ]


Post new topic Reply to topic  [ 7 posts ] 
Author Message
 Post subject: Manually Lomoizing an Image
PostPosted: Sun Jul 25, 2010 4:01 pm  (#1) 
Offline
Retired Staff
User avatar

Joined: May 22, 2008
Posts: 6947
Location: Somewhere in GIMP
I found this tutorial about how to manually lomoize an image.
http://chetanism.blogspot.com/2009/01/add-colors-to-your-pics.html

Here is the text of the tutorial. I've added some notes of my own to it.

  1. Open your image in GIMP.
  2. Select whole photo using 'Select | All'
  3. Shrink the selection by 75 pixels My note: This depends upon the size of your image.
  4. Feather the selection by 300 pixels (Select | Feather) This too depends upon size
  5. Invert the selection (Select | Invert)
  6. Create a new transparent layer and select it
  7. Take the gradient tool, set shape to 'Radial', and add a white to black gradient from center of photo to the bottom side. You can use other colors in your gradient to get interesting effects, too.
  8. Set the gradient layer mode to overlay. Try other layer modes.
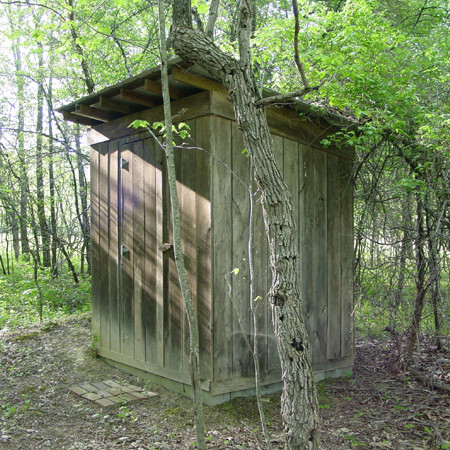
  9. If the border looks too dark, reduce the opacity of the gradient layer or ifs less dark then duplicat the gradient layer (make sure the duplicate layer is also set to overlay mode). I got the following result after duplicating the layer.

This is easy to do and quite fun.
Image

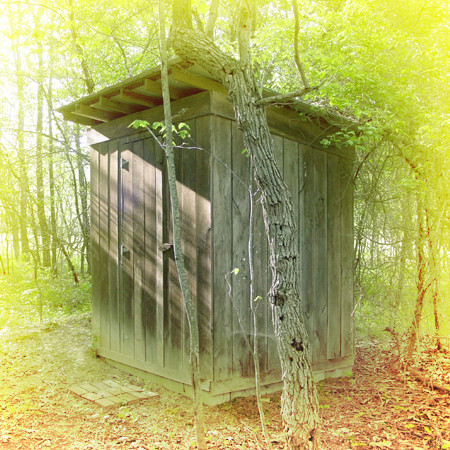
For the gradient I used gold (FFDA800) for the FG color and medium brown (A26E2B) for the BG color and set the layer mode to Dodge.
Image

_________________
Image
World War IV will be fought with sticks and stones. - Albert Einstein


Share on Facebook Share on Twitter Share on Orkut Share on Digg Share on MySpace Share on Delicious Share on Technorati
Top
 Post subject: Re: Manually Lomoizing an Image
PostPosted: Sun Jul 25, 2010 6:11 pm  (#2) 
Offline
Global Moderator
User avatar

Joined: Apr 07, 2010
Posts: 14182
that is very pretty "O".....

_________________
Image


Top
 Post subject: Re: Manually Lomoizing an Image
PostPosted: Sun Jul 25, 2010 8:12 pm  (#3) 
Offline
Retired Staff
User avatar

Joined: May 22, 2008
Posts: 6947
Location: Somewhere in GIMP
Thank you, Molly. :-D

_________________
Image
World War IV will be fought with sticks and stones. - Albert Einstein


Top
 Post subject: Re: Manually Lomoizing an Image
PostPosted: Sun Jul 25, 2010 8:27 pm  (#4) 
Offline
GimpChat Member
User avatar

Joined: Apr 08, 2010
Posts: 5420
Location: Northwest Ohio
makes it look like a dreamy place...but it still makes me thing of spiders lurking inside, just waiting to freak me out.


Top
 Post subject: Re: Manually Lomoizing an Image
PostPosted: Mon Jul 26, 2010 11:25 am  (#5) 
Offline
Retired Staff
User avatar

Joined: May 22, 2008
Posts: 6947
Location: Somewhere in GIMP
LOL. Yeah. Outhouses are notorious for flies and spiders. Don't like them either. ~shudder~

_________________
Image
World War IV will be fought with sticks and stones. - Albert Einstein


Top
 Post subject: Re: Manually Lomoizing an Image
PostPosted: Mon Jul 26, 2010 1:18 pm  (#6) 
Offline
GimpChat Member
User avatar

Joined: May 16, 2010
Posts: 14709
Location: USA
Sorry my wife will still not use it. =(
But it looks real cool! =)

_________________
Image
Edmund Burke nailed it when he said, "The only thing necessary for the triumph of evil is for good men to do nothing."


Top
 Post subject: Re: Manually Lomoizing an Image
PostPosted: Sun Aug 01, 2010 3:12 am  (#7) 
Offline
GimpChat Member

Joined: Jul 01, 2010
Posts: 75
Quite successful photo.nice!


Top
Post new topic Reply to topic  [ 7 posts ] 

All times are UTC - 5 hours [ DST ]


   Similar Topics   Replies 
No new posts Attachment(s) Turn photo to cartoon manually

6

No new posts Retexture an image with another image as "Image Pattern" Plug-in

4

No new posts GIMP XCF image plug-in could not open image; File is Not 0 Bytes

4

No new posts Show image on web browser to fill 100% width AND image map

2

No new posts Assembling to look like image while using up tiles from another image.

1


* Login  


Powered by phpBB3 © phpBB Group