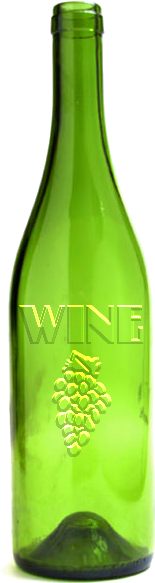
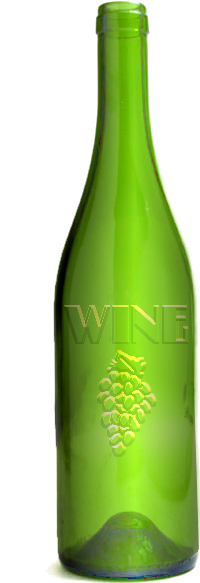
Open the image you want to put the text on. Feel free to download this bottle image. Make a new layer, name it bump, fill it with white and move it below the bottle layer.
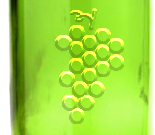
Foreground color black, click the Text tool. Write the text you want on the bottle and size it and position it over the bottle image where you want it. The grapes are a dingbat in a font named FOOD!. I browsed daFont and wrote 'food' in the search box and the font I have isn't there, however this font has grapes I like much better. Since I already had a finished bottle I didn't want to re-do it. I recommend
this font for the grapes. Here is part of the bottle with those grapes bump mapped onto it.
If you are adding a dingbat, click the bottle layer and then the Text tool and add the dingbat. The text and the dingbat will be on two separate layers. After you have them positioned where you want them merge the text and dingbat layers (DO NOT merge to the bottle).
Move the text/dingbat layer below the bottle and merge it to the white bump layer. Select the bottle layer.
Filters > Map > Bump Map
In the dropdown at the top of the Bump Map dialog, choose the bump layer.
Experiment with the settings. The settings in the Bump Map screen are the ones I used. Inverting makes the darker shadow area fall below the text.
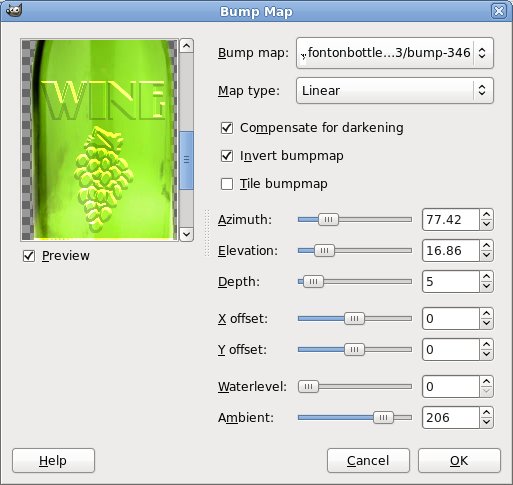
After you have adjusted the settings to how you want them, click the OK button. Delete the bump layer.
This method can be used on other surfaces. Check out the discussion in
this thread for more ideas.
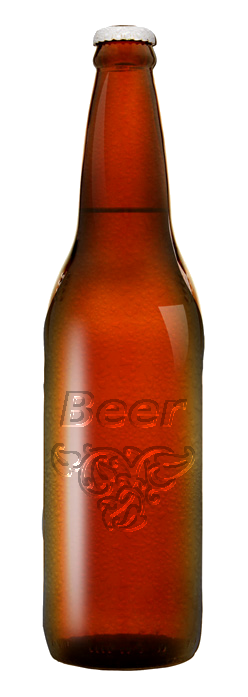
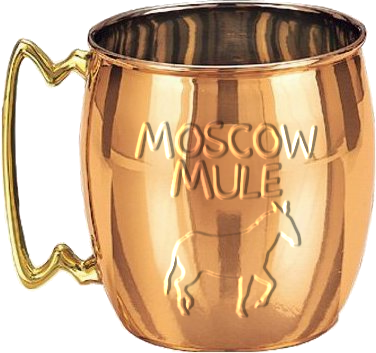
Here is a beer bottle using the same technique.
Download a pdf document of this tutorial.


 ... for the tutorial and the results...


