This tutorial is fast and easy to do.
Make a large canvas. Your rainbow will end up about 56% of the width. I started with a canvas of 750 x 750px. The resulting rainbow circle was 414px x 414px.
Fill the background layer with white. The background layer can be deleted later but it helps you to see the colors.
Make a new transparent layer.
Using the Rectangle Select Tool, make a rectangle about halfway down on the canvas that fills the width of the canvas and as high as you want your rainbow thick. For this rainbow I made the height of the selection 75px.
Fill the selection with the rainbow gradient by holding down the
Ctrl key and dragging from top to bottom of the selection.
Unselect.
Attachment:
 rbwselect.jpg [ 69.43 KiB | Viewed 11105 times ]
Filters > Distorts > Polar Coordinates.
Settings:
Circle depth in percent:
100Offset angle:
180Preview and
To Polar =
checked.
Map backwards and
Map from top =
unchecked.
You will see a circle in the preview window.
Attachment:
 polarcoord.jpg [ 72.61 KiB | Viewed 11104 times ]
Click OK.
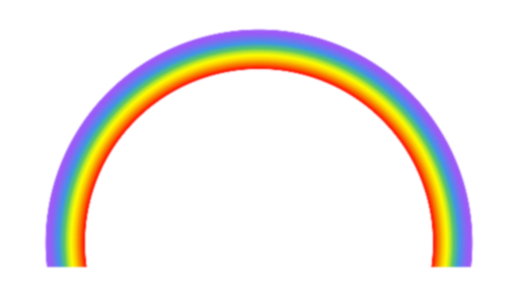
You will have a rainbow circle on your canvas.
Use the Rectangle Select Tool and select the bottom half of the circle. A little more than half looks a little better. Delete. You have a rainbow arc.
Using the Crop Tool, roughly crop around your rainbow, leave some canvas around it so you have room to work around your rainbow. After you have selected the area around the rainbow, click in the center of the selection. You may have click twice. It will crop to the size of your selection.
Ctrl + E will remove excess canvas around your image.
Filters > Blur > Gaussian Blur. Blur your rainbow just a little - a setting of 1 or 2. I used 2 on this rainbow.
Decorate your rainbow with what you want.
Attachment:
 rainbow.png [ 50.87 KiB | Viewed 11117 times ]
Download the pdf file of this tutorial (MakeARainbow.pdf).
Download my rainbow gradient (Rainbow.ggr).