NOTE: This tutorial was taken in part from
here. At the time, I had a little trouble sorting through those particular instructions on Flickr, so that inspired me to create the tutorial that follows below. However, Lucidlook had since created a more up-to-date tutorial (I am uncertain if he is the original author on Flickr) that can be found
here. Although the steps shown below are the result of me hashing it out, I can't take credit for the original effect.
I'm a GIMP noob. Yeah, I admit it. Albeit, quickly becoming a hardcore GIMP'er and salivating over the upcoming release of version 2.8. Enough about that, let's get on with the tutorial… Let me first say, if you ever find yourself attempting a tutorial and you just "don't get it" as you're following along, or even worse – you download a script and have NO clue as to what to do with it, FRET NOT! Usually script authors will say something to the effect of "this script is based on a Photoshop tutorial, click link here…" If they do mention a tutorial, try to follow that tutorial as best you can – or – check my sitemap on Mahvin.com to see if I have covered it. I downloaded the
Displacement Water.scm filter, followed the links offered by the author, and went over the instructions a few times. Not reading the instructions carefully makes a difference in whether you're going to succeed or fail in accomplishing the use of the script. That being said, because there was so much input on various links, it all got mixed and garbled in my mind, so I spent a few hours sorting it all out. If you don't have the
Displacement Water script and want to follow along, follow the link to get it, but while you're at it, grab this
mirror script by Saul Goode, too. The mirror script will save a ton of steps in doing the tutorial. Remember, this is the "noob version" of water displacement. The general purpose is to get everyone understanding how best to use it. Once you accomplish it, feel free to modify your colors or add new layer effects, etc.
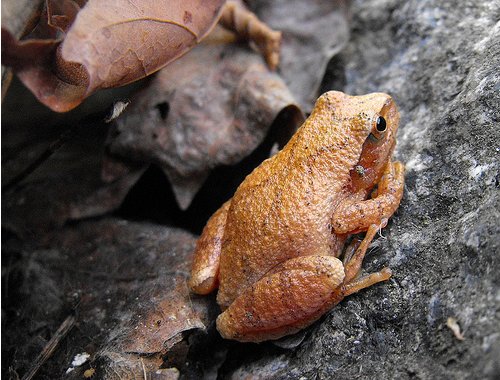
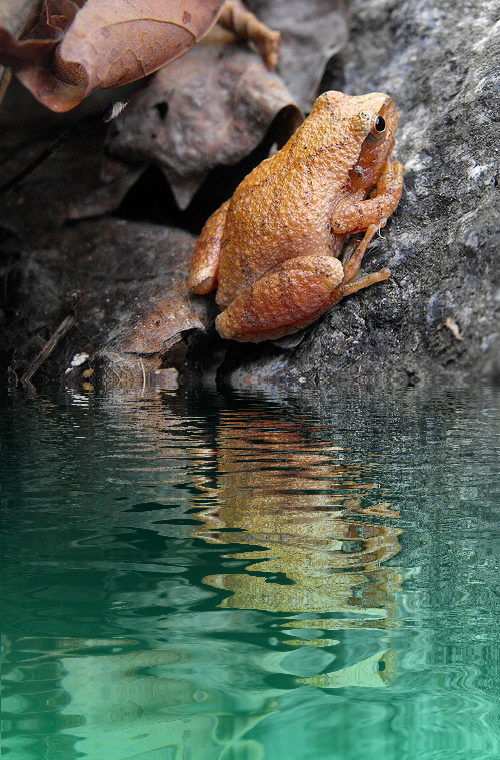
The following image (found under Vignette script on the GIMP Registry) will be used in this tutorial, copy and paste it into GIMP:
 STEP 1:
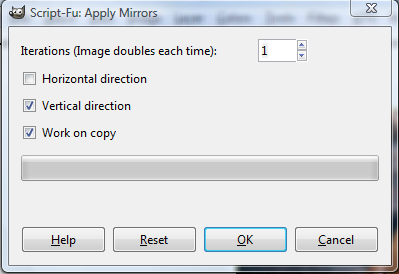
If you haven't added the
mirror-dup.scm script to GIMP, do it now. Once you refresh the scripts, you will find it under
Filters/Map/Mirror on the menu bar. You'll see this (use the same selections as shown):
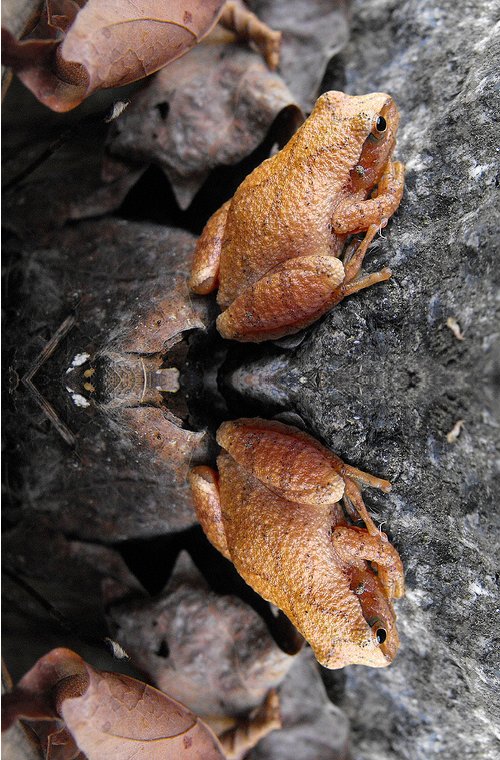
You should now have an even vertically mirrored image of a frog:
 STEP 2:
Make a duplicate layer of the mirrored image.
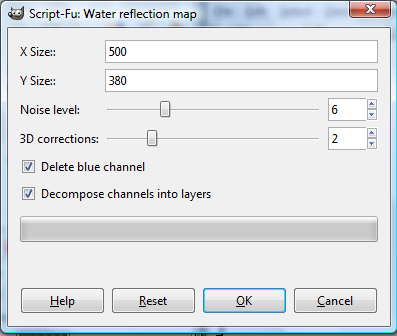
STEP 3:It's time to make the water displacement map. Select
Script-Fu/Map/Water Reflection map on the menu bar. You'll see the following (use the selections shown):
For my Polish friends…
Dla moich znajomych polskim: Czy próbowali za pomocą Google Translate na wychowawczy?The original frog image was
500 x 380, so that is what x and y should be in the selections above. Remember this whenever you create new water reflections
(X and Y are the width and height of your original image before you alter it). You should end up with a displacement map that looks like this:
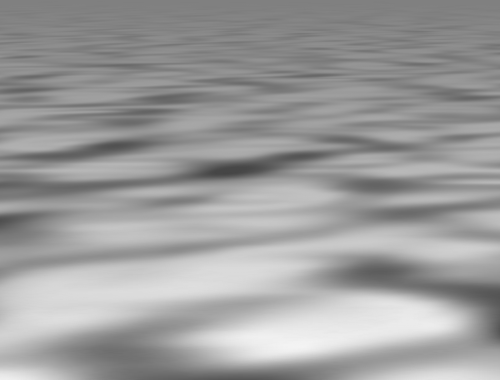
You'll notice the name of this image is
red.# and it is a separate image from your frog image. We'll be pasting this map into a new layer on the frog image.
My displacement script threw errors a few times, so if it throws an error for you, try it a few more times. If errors persist,
leave a comment for the script author indicating what those errors are. If you correctly identified the image width and height, you shouldn't have any problems.
STEP 4:You should have two layers on your mirrored frog image,
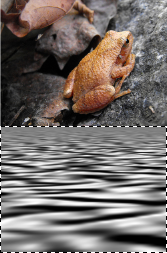
add a new layer to the top. With the new layer highlighted, copy the displacement map (layer X) we just made and paste it into the new layer. Use the
Move tool 
to move the displacement map over the
bottom area of the mirrored image before you anchor the floating selection. When you're happy with the location,
anchor the layer. Note the image below:
 (TIP: After you paste the displacement map into the new layer, you can use your arrow keys to move it sideways or up and down).STEP 5:
Add another new layer. Select the
Rectangle Select tool.

Select the bottom half of the picture with the displacement map.
Add a layer mask (White – Full Opacity) to the new layer.
Select the
Gradient tool 
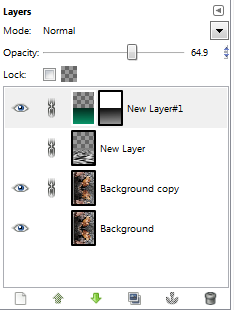
using the default black & white gradient and drag a gradient from the halfway point to the bottom. Your layers should look like this:
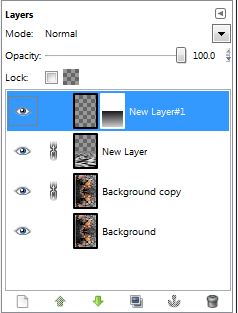
Notice that there are links on the displacement map and the background copy? You need to do the same thing. All you are doing is linking the displacement map to the background copy so that when you finally map the water displacement, it will show the layers for the displacement map in the lists.
I didn't name my layers, which I should, and you should make a practice to name your layers as well.
STEP 6:Select and highlight the background copy layer just under the displacement map, and go to
Filters/Map/Displace. Note the selections in the image below:
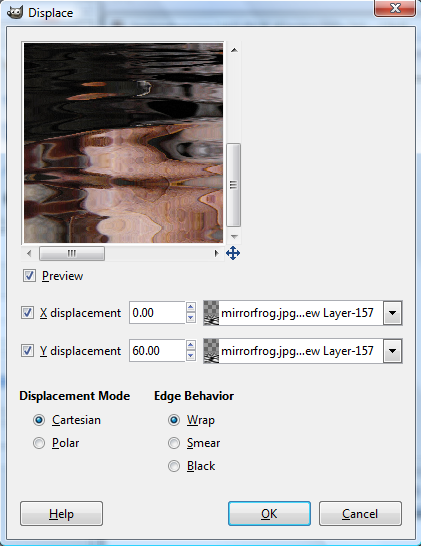
For small image reflections like this one, the only way to utilize an X displacement is to make your image selection area wider. Otherwise, you'll have to leave it at zero to avoid it leaving blank areas in your reflection area. (Check the preview when adding X displacement, you'll see what I mean). Y displacement is usually twice the displacement of X. We'll make an exception here.

To see the result of what the displacement achieved, click the eye on the displacement layer to off.
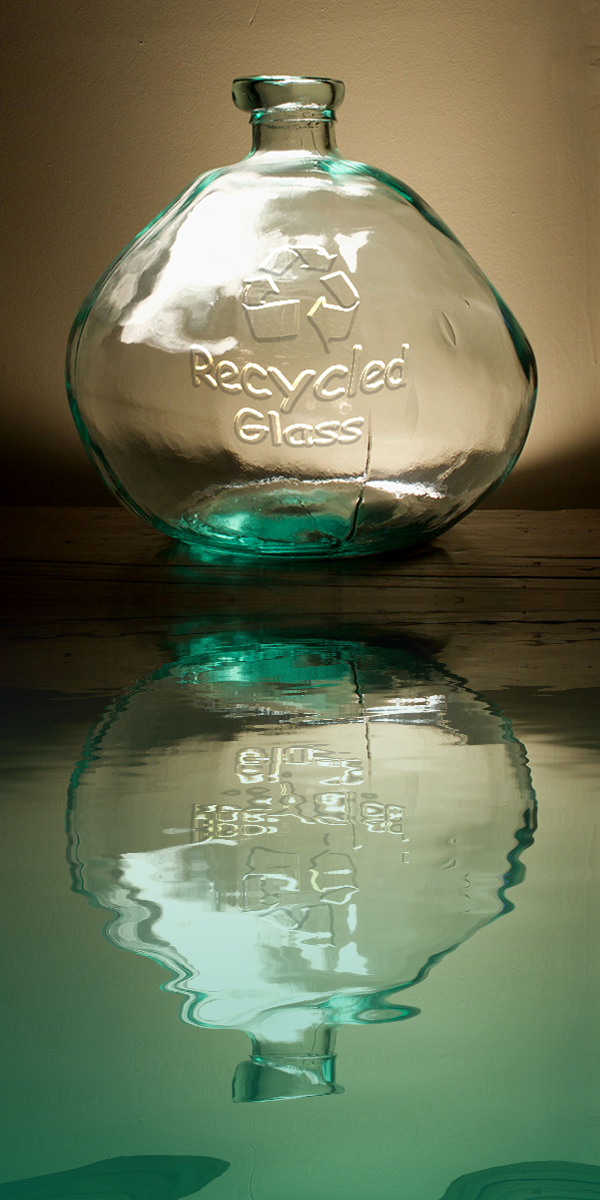
STEP 7:Adding color is fairly simple, just remember two things:
1) Create a selection for the lower half of the image when using colored gradients, and 2) the sky is the limit on color choices or blend effects.
Select and highlight the top most layer (with layer mask), link it to the displacement map and background copy, then select the bottom half of the image using the
Rectangle Select tool if it's not already selected.
Select the
Gradient tool and pick a darker emerald green color
06936d and a lighter shade of emerald green
0ccf91. See my color choices below:
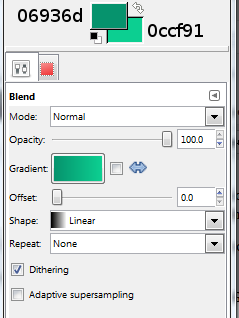
Drag the
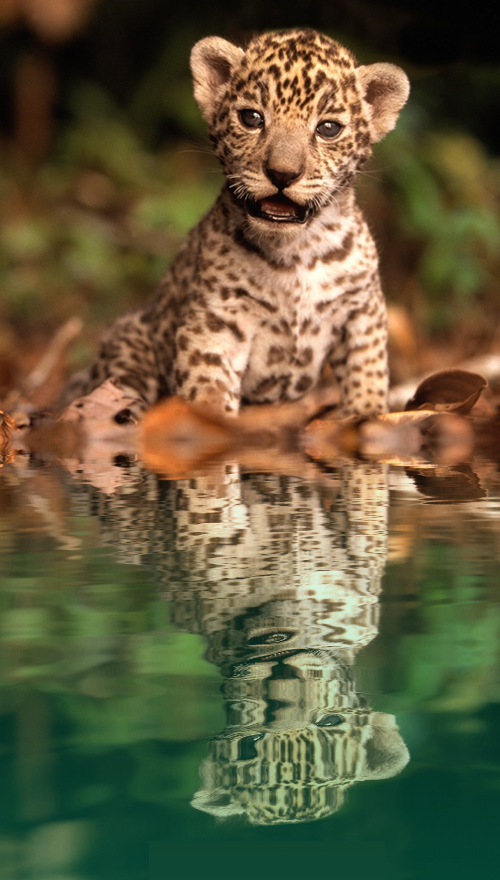
Gradient tool down from the halfway point to the bottom. You can reduce the transparency, if needed. That's it, you're done!
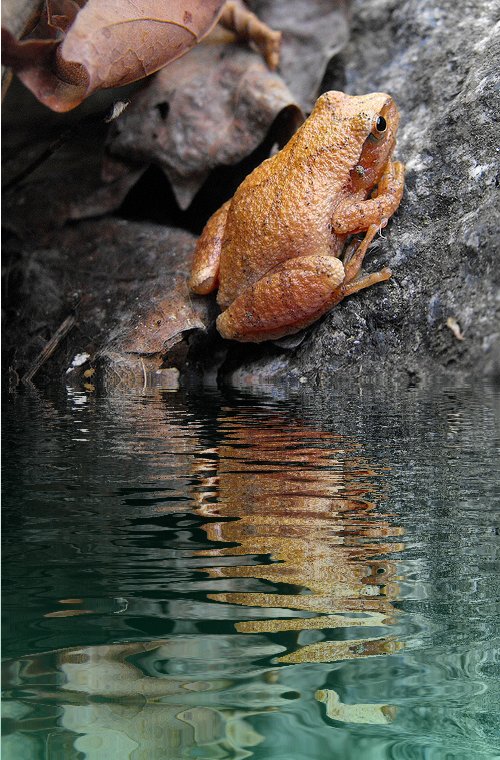
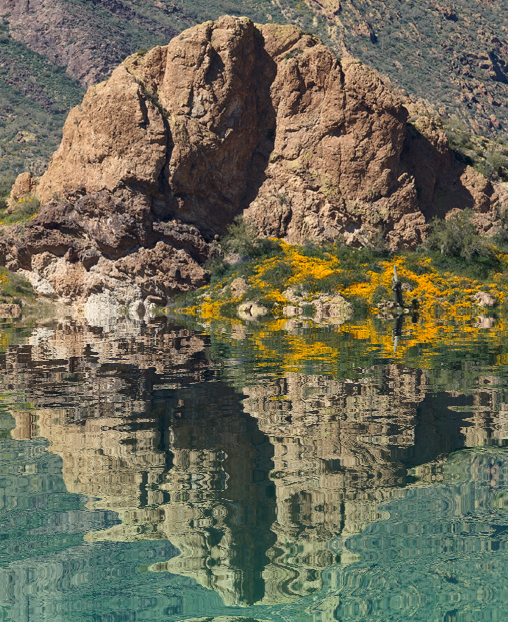
The final product:ENJOY!
Download a pdf file of this tutorial.


