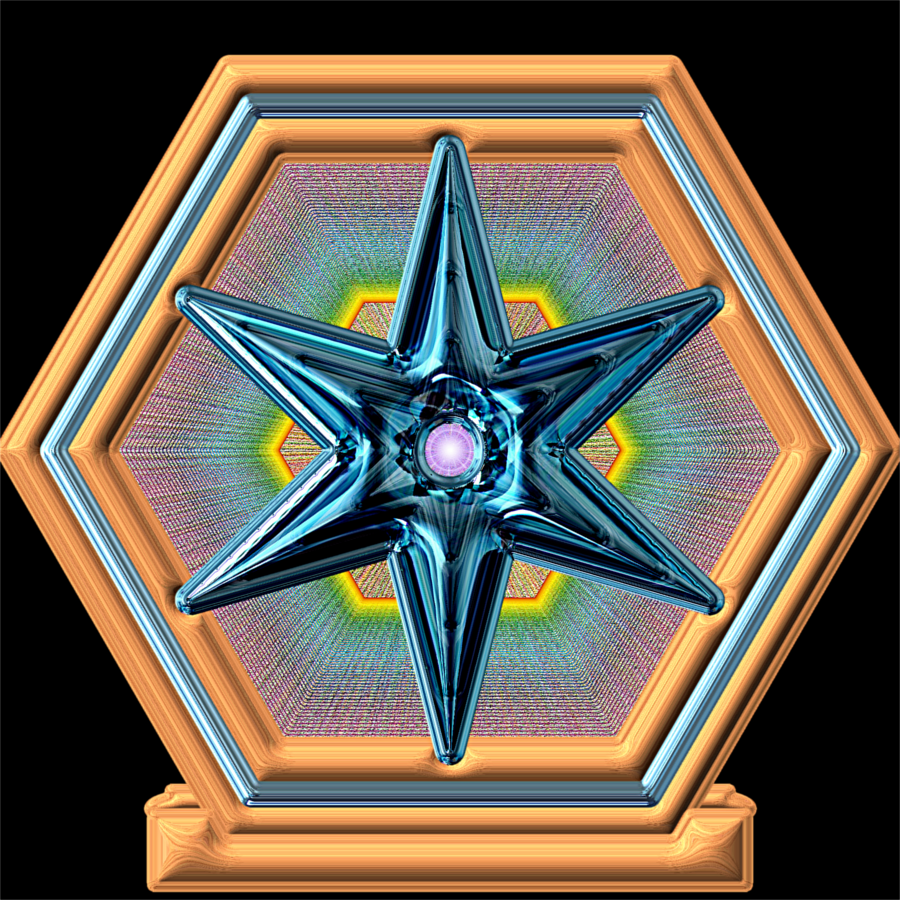
2-ton - thought I would put some pictures and words together to help answer your questions on my BRL blending for glass effect and the background method for the star.
Firstly I use both 'Arakne path shape creator' and various 'Ofnuts path tool' plug-ins to help me build the shapes and paths I need to create the final image. I also work on a large size image (2000 x 2000) and then scale it down later.
So lets start with the work flow for the background to the star, shown in the first composite image below:
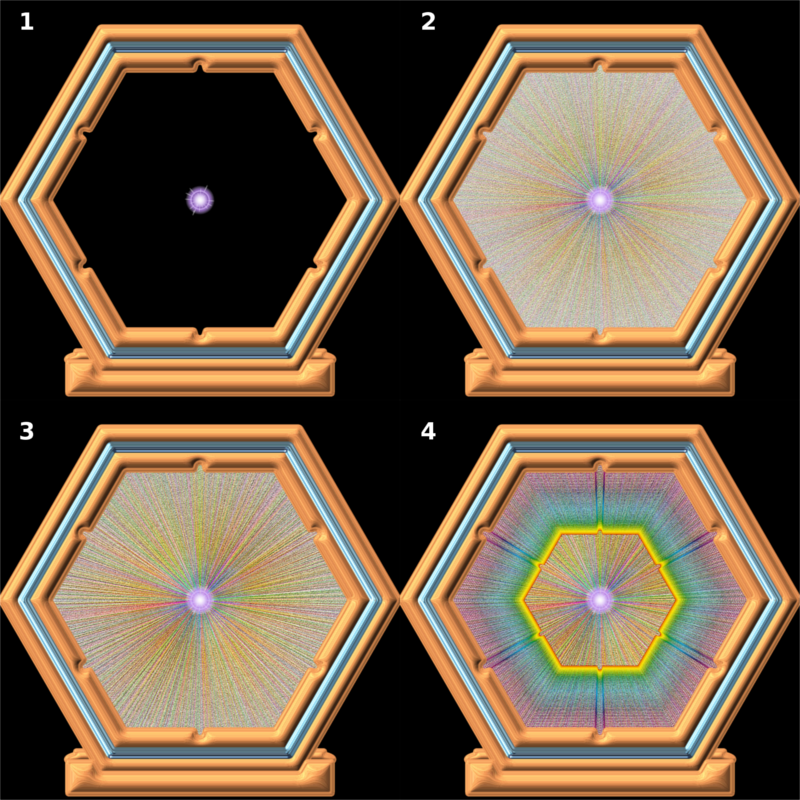
1. Starting point – you can see the empty background with a standard GIMP gradient flare which will show though the centre of the star
2. Result of using Dinasset's 'glass frame/gradient flare' option inside a selection enclosed by the wooden frame – set to normal mode
3. Result of creating a new layer from exposing the Dinasset layer in 2 above to GMIC>Testing>Samj>colors>couleurs metalliques – in grain merge mode above the Dinasset layer. This gives the background some texture.
4. Result of creating a new layer using Ofnuts path generation tools from the path defining the inside of the frame to a 50% duplicate of that path positioned in the centre of the background - about 75 paths I think it was. Those multiple paths were then stroked (Ofnuts multi path stroke tool) using a gradient, with brush of hardness 100 set to 5 pixels size. The gradient used was Anmal's 'hard spectrum many shades'. This layer was set to normal mode and provides some depth in the background.
Now for the star itself. The full star shape and interim smaller star shapes for BRL were again created using Ofnuts path generation tools.
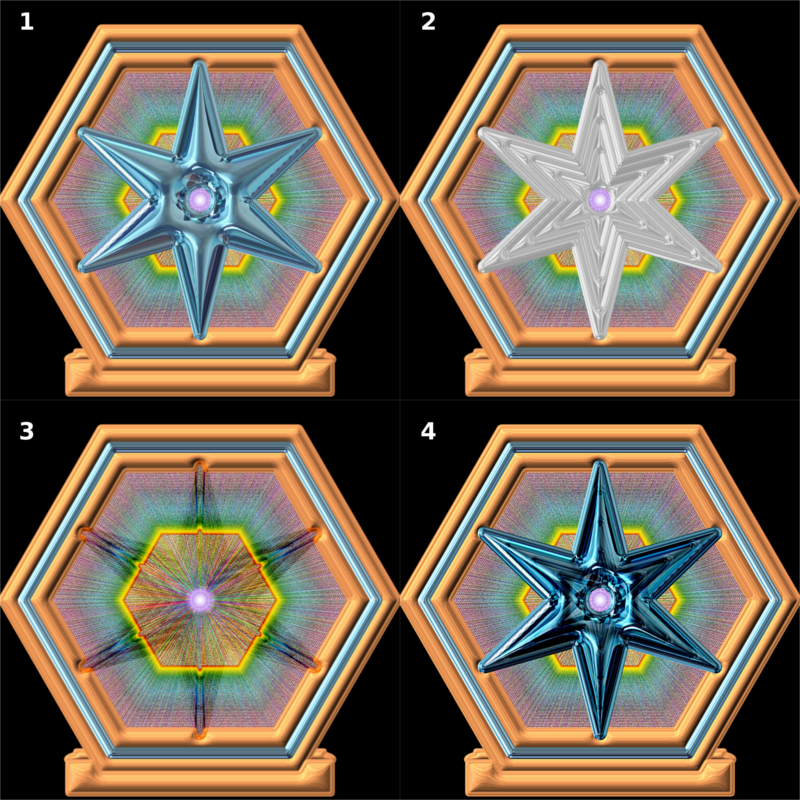
1. The full star shape with a hole in the middle was first put through BRLusing Round 2 bevel with a linear contour parameter using the standard 'gem.png' spherical emap. This layer was set to normal mode.
2. I then created 4 interim layers of progressively smaller star shapes, did a BRL with Round 1 and linear contouring using my 'gemclear' emap on each one. These are used to provide depth and shape within the final glass star image
3. I then set all these interim star shapes to 'burn' mode; all these layers are above the blue star from step 1 which is set to not visible in this image just to show the effect
4. The blue star is then made visible and 'voila', a darker, shinier star with more depth!!
I hope this is useful for you.