Tools:
Gimp 2.8 or 2.10
G'mic 2.3 or 2.4
Selective Color Blur 0.6.2
Preparation
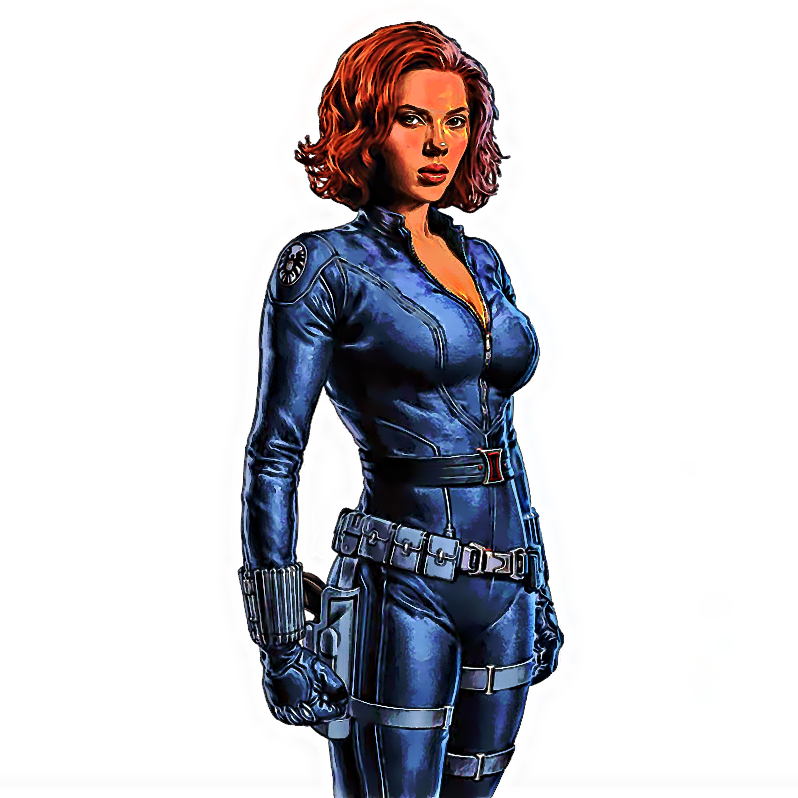
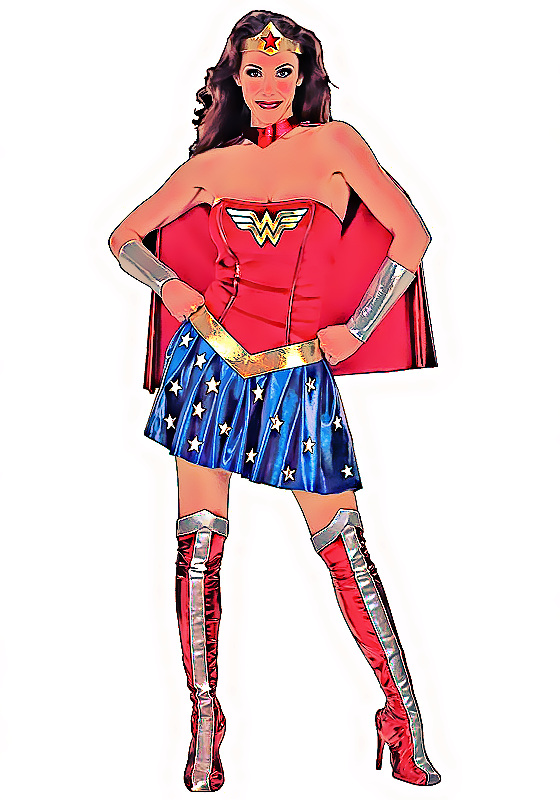
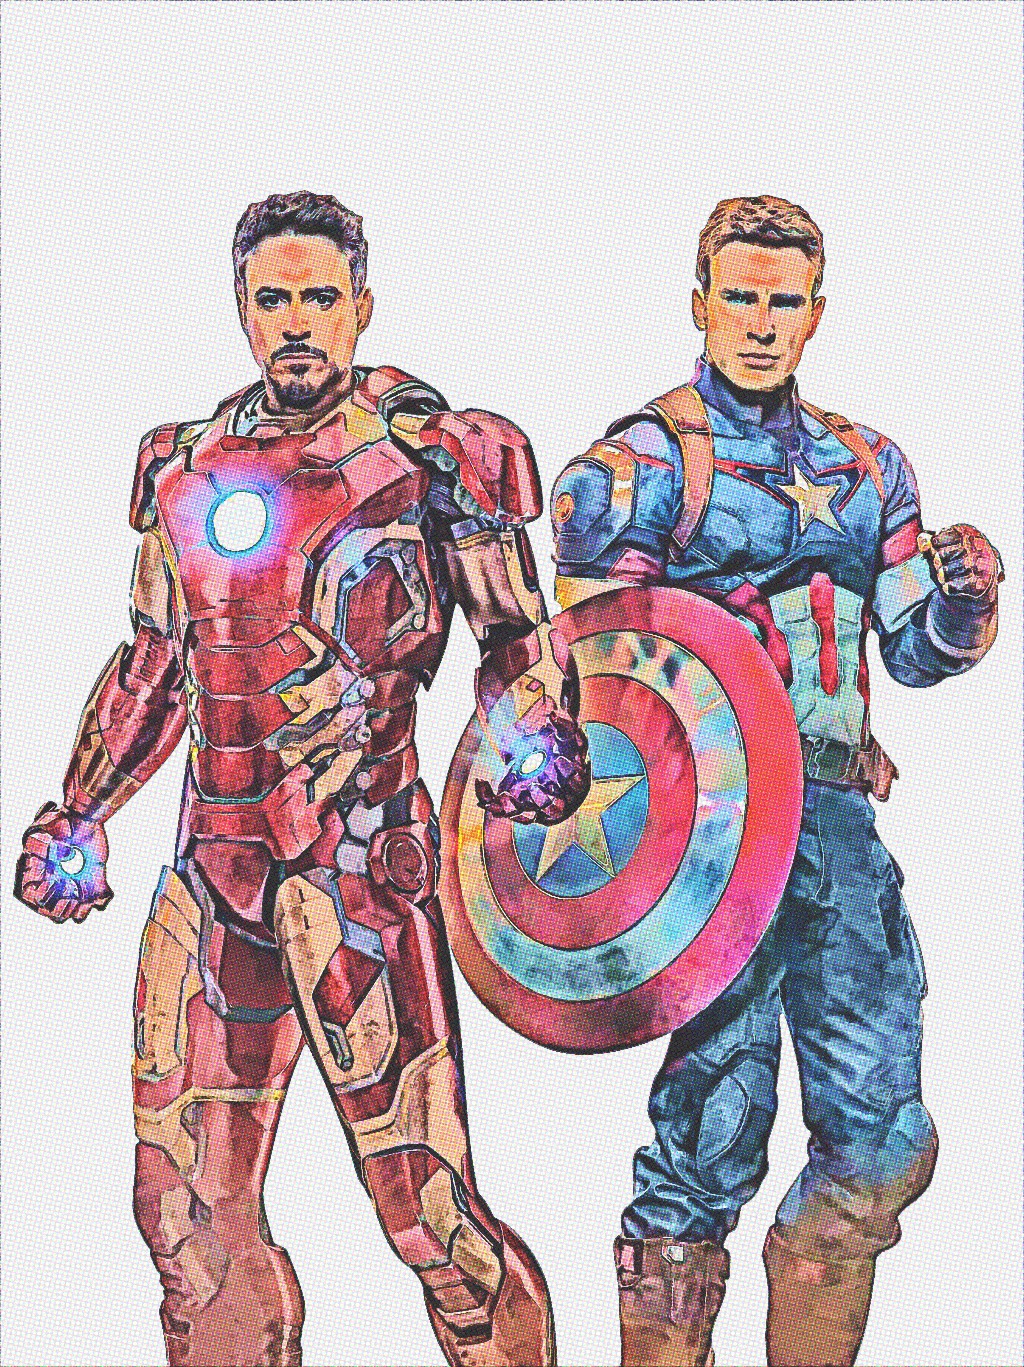
This workflow yields best results with similar images than the Black Widow example.
Fantasy/superhero costumes, leather, PVC etc.
It's not aiming to be a cartoon style, but more like game cover art images and similar stuff.
I've attached the .xcf file if you want to check it out, it includes the layers after each step.
But please test with some other image.
Create a transparent png version of your model.
Or alternatively make sure it has perfectly pure white background.
The tone mapping setting I'll be using will otherwise
boost the jpg artifacts or the pixels that even slightly
differ from white, near the edges.
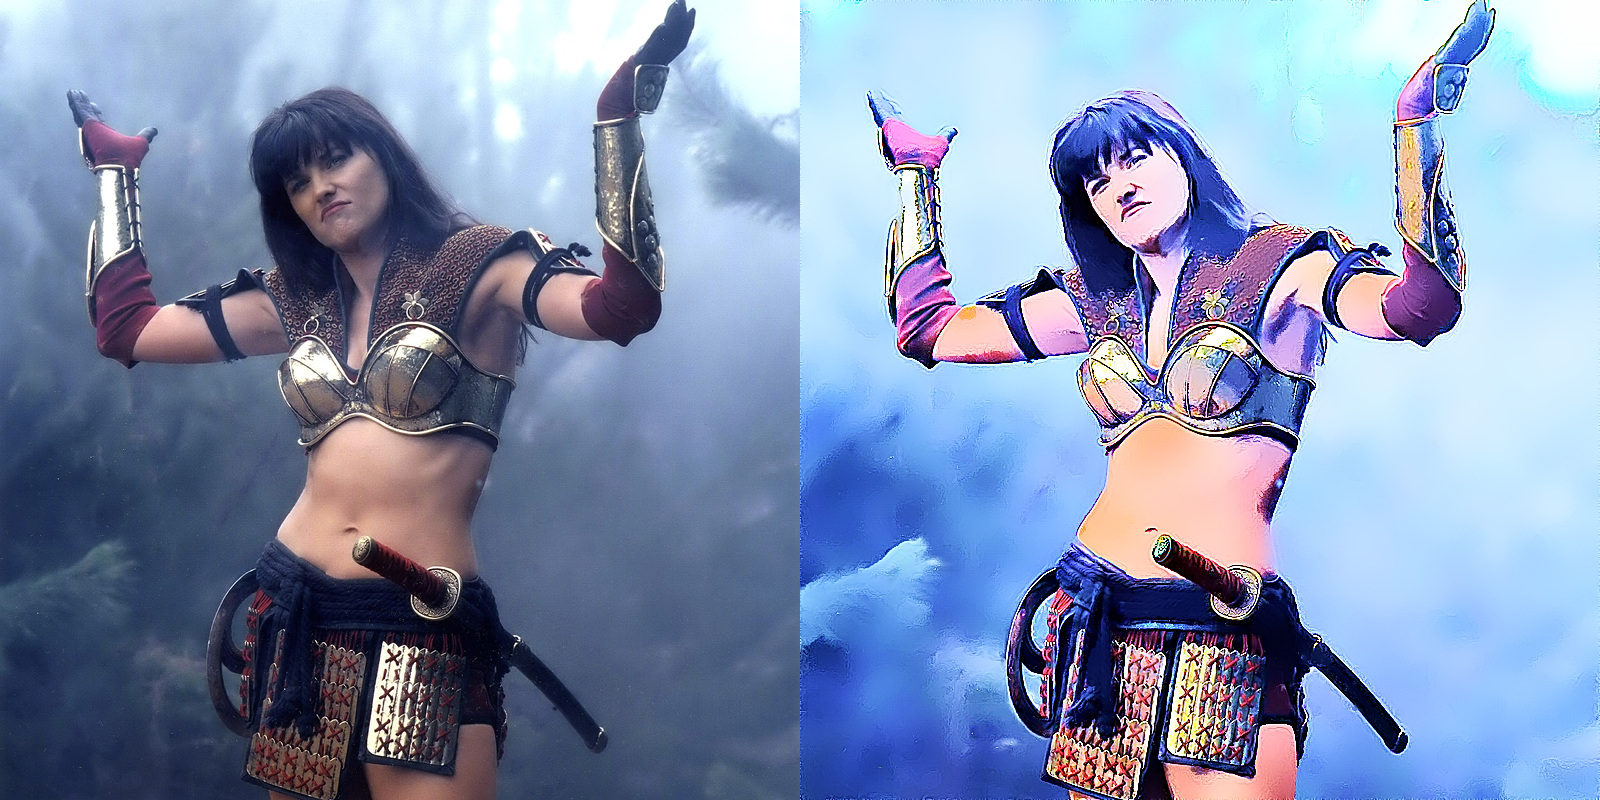
Original
Having the png done, create new white layer below and merge the png down.
Launch G'mic.
Step 1: Details/Mighty Details. These are default settings
Amplitude: 25
Details amount 1
Details Scale: 25
Details Smoothness: 1
Channel(s): YCbCr [luminance]
Click Apply.
Step 2: Details/Tone Mapping [fast].
Radius: 0,70
Power: 0,80
Channel(s): Linear RGB [all]
Click Apply.
Step 3: Artistic/Graphic Boost. (None of the options are skipped.)
Unsharp Mask Controls: Radius 16, Darken 0,82
BW_Pencil Controls: Pencil Size: 0,80, Pencil Amplitude 162
Activate "Pencil Smoother" (yes)
Pencil Smoother Sharpness 1,50
Pencil Smoother Edge Protection 0,30
Pencil Smoother Smoothness 7,00
Merging Options, SWAP Layers (yes)
Merging Option: Hard Light
Opacity 1, Intensity 1.
Add Painter's Touch (yes)
Painter's Touch Sharpness 1,40
Painter's Edge Protection Flow 0,24
Painter's Smoothness 3,00
Click OK.
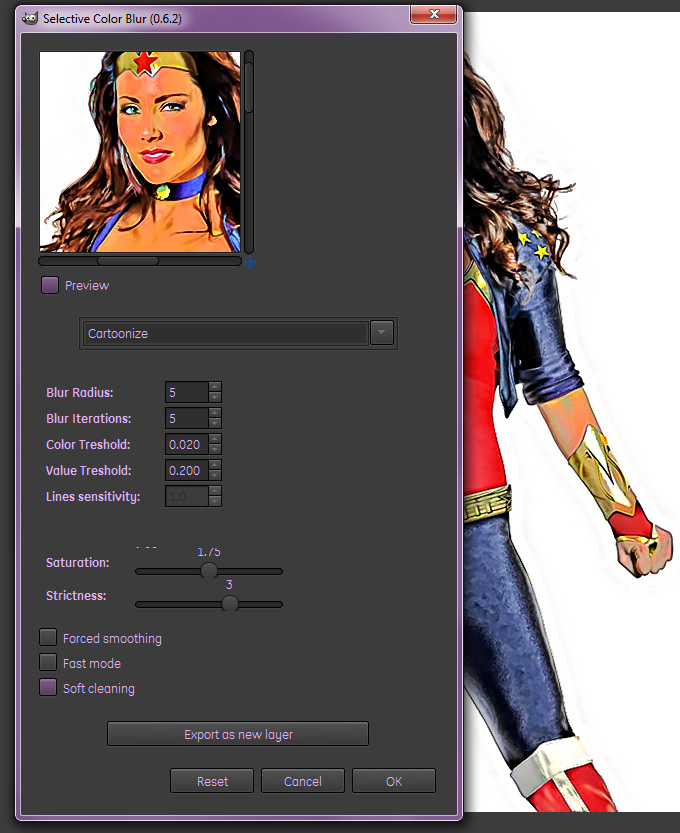
Filters/Blur/Selective Color Blur
Cartoonize, Radius 5, Iterations 5.
Color treshold 0,020, Value treshold 0,2.
Saturation 1,45-1,80 (depending how colorful you want to go, used 1,75), strictness 3.
Soft Cleaning on.
Click OK.
At this point, if you zoom near the edges there will be small leftovers here and there around the edges.
It's imperceptible at 1:1, you can clean it with small white brush.
Once done, duplicate the result. This last step is additional, to create the edges.
I suggest resizing all layers to image size prior to this step, or they may move on the canvas.
Launch G'mic again.
Testing/Jayprich/JPR line edges.
Angles per quadrant 8, Blurring 3, Gradient Threshold 24, Anti-Alias on.
Click OK.
Activate the resulted layer on top.
Color/Color to alpha. White is default, so you only need to click OK.
The JPR line edges effect will leave 1px black frame around the image,
which we can fix from selection menu.
Select all, shrink 1. Image/crop to selection.
Or you could make some fancy frame on top.
Happy gimping and merry Xmas to all CimpChat folks!
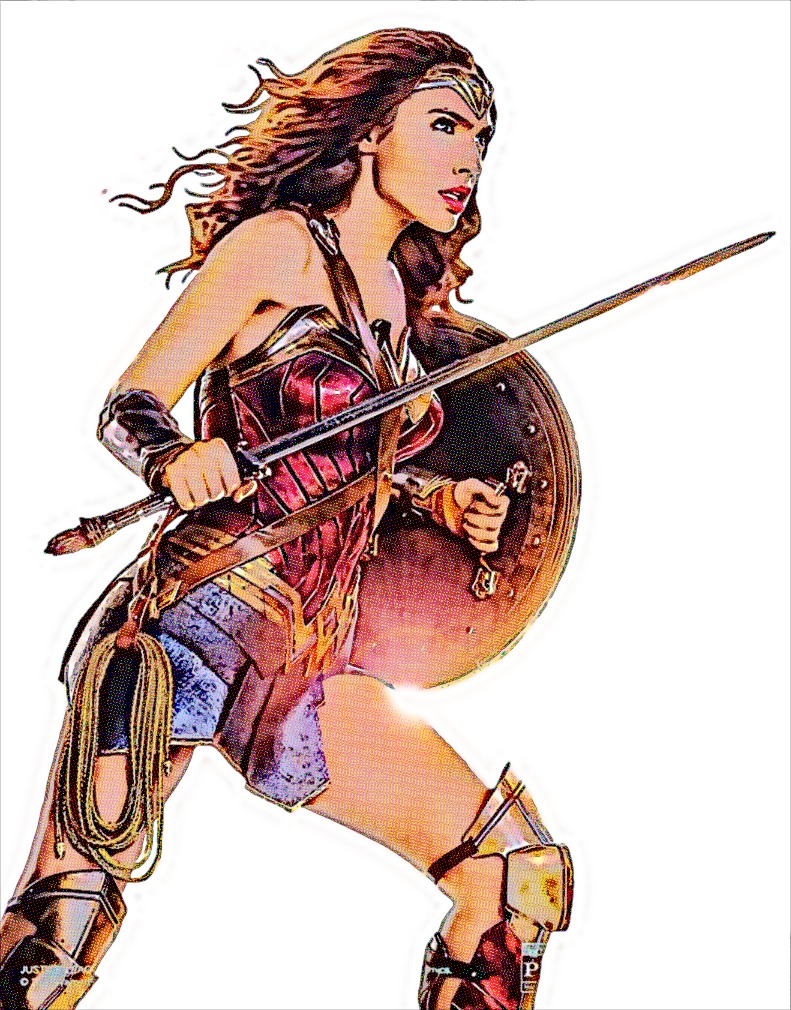
Final