It is currently Wed Jul 03, 2024 11:33 pm


All times are UTC - 5 hours [ DST ]


Post new topic Reply to topic  [ 11 posts ] 
Author Message
 Post subject: Tigerdots
PostPosted: Mon Feb 20, 2023 12:47 am  (#1) 
Offline
GimpChat Member
User avatar

Joined: Sep 24, 2010
Posts: 12531
ref: https://images.pexels.com/photos/205510 ... jpg&fm=jpg

Might have over-compensated for the shadows. lol

Believe I figured out a better way to create the dot mask by running G'MIC's b/w dither and using that result to run Shapism. :)


Attachments:
tigerdots.jpg
tigerdots.jpg [ 3.39 MiB | Viewed 583 times ]

_________________
Lyle

Psalm 109:8

Image
Share on Facebook Share on Twitter Share on Orkut Share on Digg Share on MySpace Share on Delicious Share on Technorati
Top
 Post subject: Re: Tigerdots
PostPosted: Mon Feb 20, 2023 2:06 am  (#2) 
Offline
GimpChat Member
User avatar

Joined: Jan 06, 2020
Posts: 345
Location: The Netherlands
I really like this one... How do you make something like this?(Maybe I missed something)


Top
 Post subject: Re: Tigerdots
PostPosted: Mon Feb 20, 2023 2:40 am  (#3) 
Offline
GimpChat Member
User avatar

Joined: Sep 24, 2010
Posts: 12531
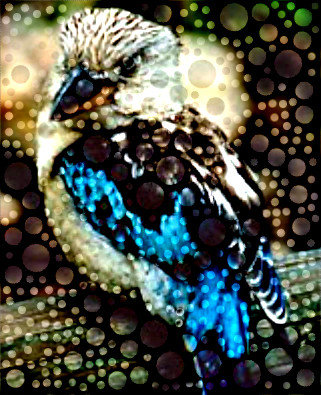
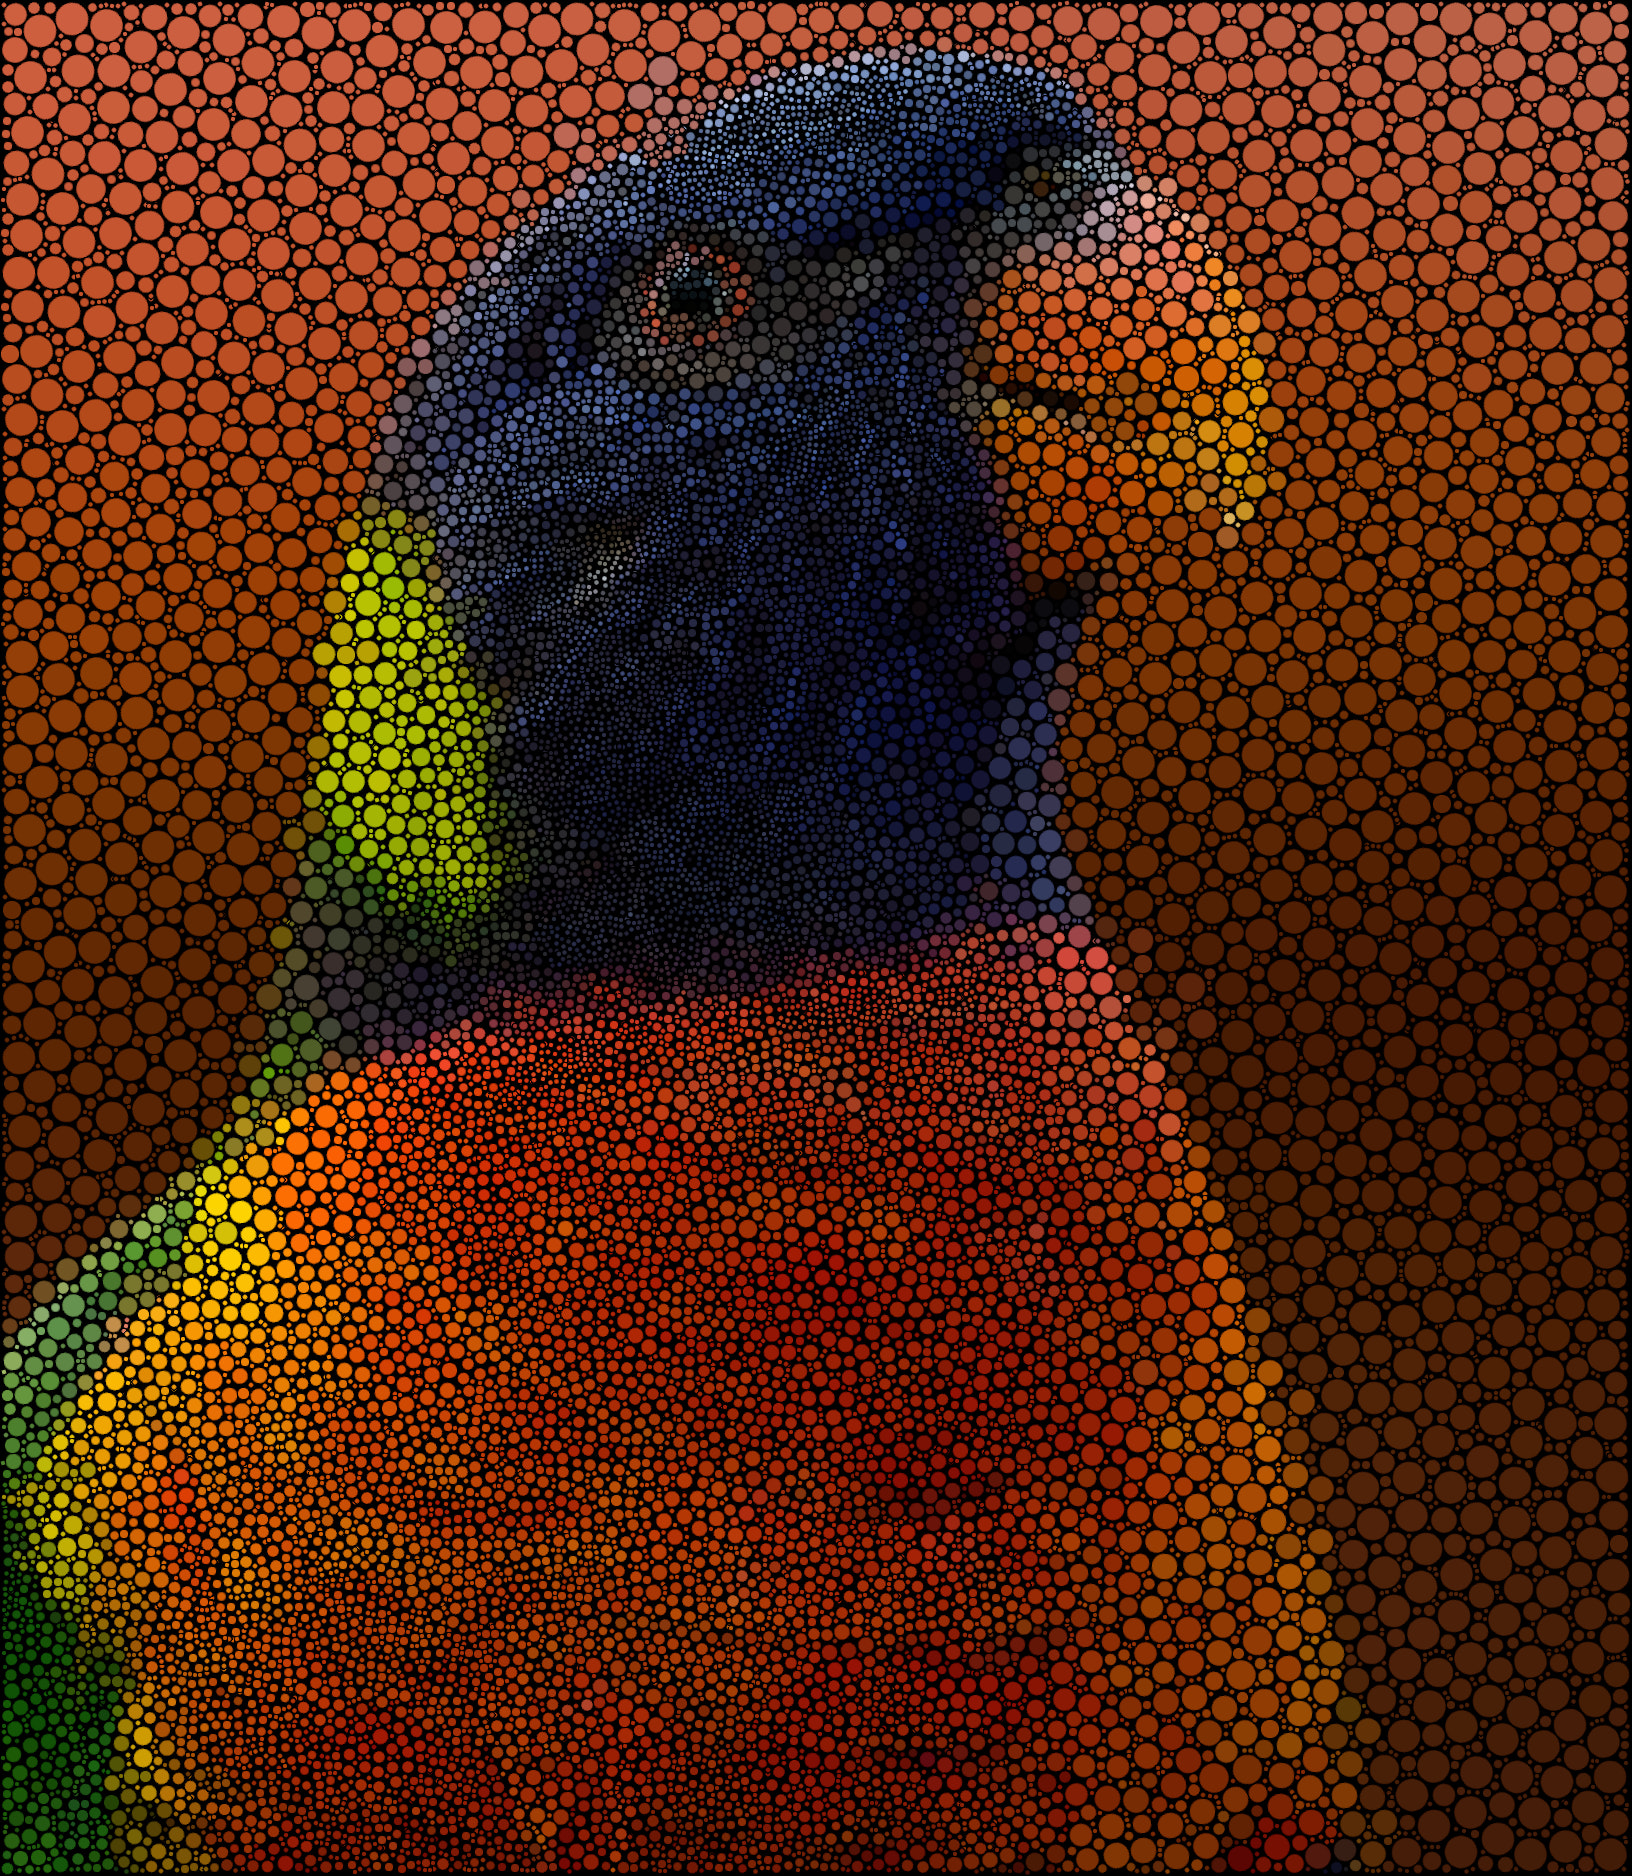
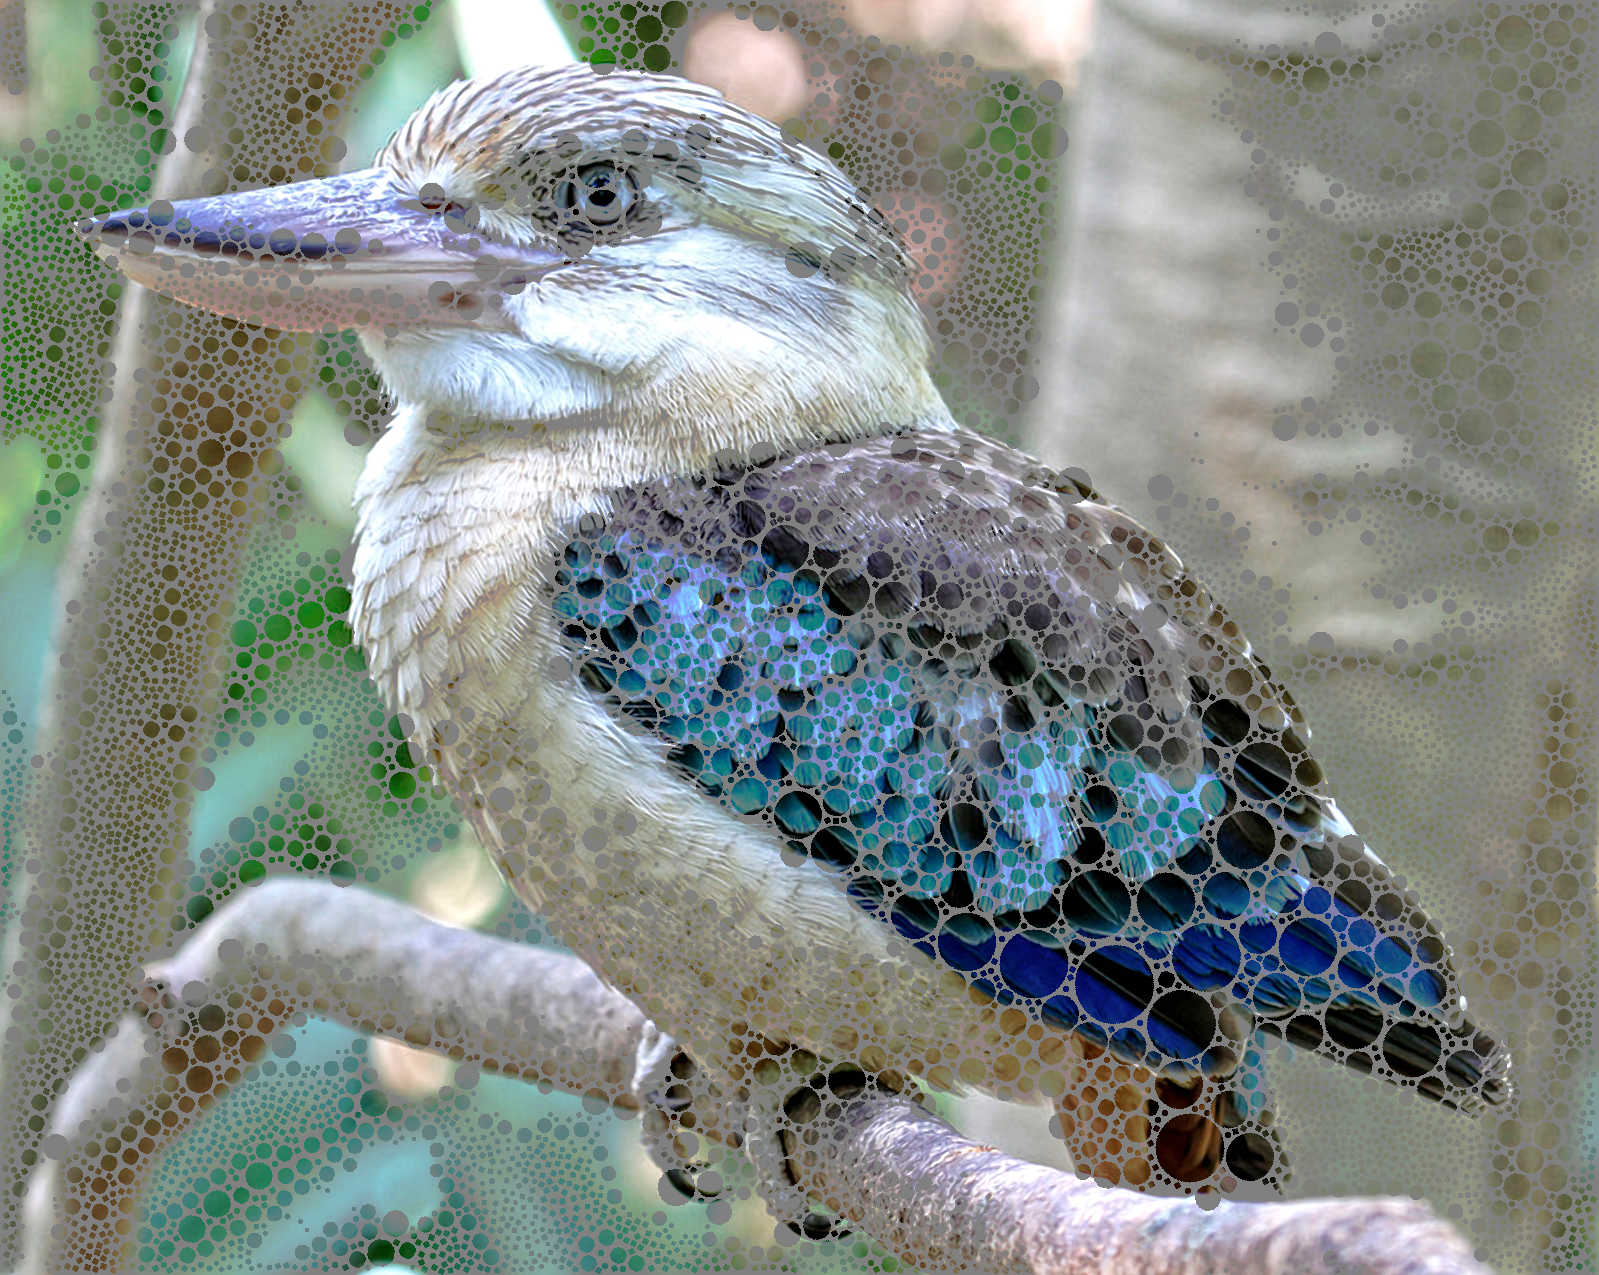
In G'MIC, there is a preset (under Art subdirectory) called Shapism. The problem with that preset is it usually yields unfocused results. I use another G'MIC preset called b/w dither and feed that into Shapism instead (using transparent background color instead of the default black). Create a mask by chosing Alpha to Selection and highlighting the GIMP toggle selection option, I copy that and then untoggle and selection none. I then paste for the mask. I then run Threashold (moving slider left to brighten) for the mask and run Blend (Shape Average) with original image (Blend (Shape Average) is located in Testing folder>Lylejk; David saved this preset for me when he went another direction with the preset; I like the original behavior better, and definitely appreciate that David saved this preset under the Testing section). I then add layer mask and past the mask in that to smooth out the dots. Maybe the programmer gurus here can automate this flow. I do use a copy of the threshold mask and apply a convolution layered dot set to grain merge to push more details, but that's part of the secret sauce I use. lol

Create the convoluton layer by duplicating the original, and on the base layer I run Sharpen (Gradient) and set the top layer to Grain extract and merge down. I then used Blend (Shape Average) on the convolution layer with the threshold mask as mentioned to convert it to dots which I then set to Grain Merge over the colored dot result. This step, again, adds more perceived contrast/details to the dots as a whole (globally that is). :)

_________________
Lyle

Psalm 109:8

Image


Top
 Post subject: Re: Tigerdots
PostPosted: Mon Feb 20, 2023 2:55 am  (#4) 
Offline
Global Moderator
User avatar

Joined: Apr 01, 2012
Posts: 7745
Location: On the other side of this screen
:coolthup

Oops, :oops: I didn't do your last step
Image


by the way, How do you choose transparency instead of black?

_________________


Top
 Post subject: Re: Tigerdots
PostPosted: Mon Feb 20, 2023 7:44 am  (#5) 
Offline
GimpChat Member
User avatar

Joined: Sep 24, 2010
Posts: 12531
Also, you used original as base layer which gives you more perceived details (but cheating). lol

Nice birdy, though. :)

_________________
Lyle

Psalm 109:8

Image


Top
 Post subject: Re: Tigerdots
PostPosted: Mon Feb 20, 2023 7:47 am  (#6) 
Offline
GimpChat Member
User avatar

Joined: Sep 24, 2010
Posts: 12531
Also, wasn't going to share this Gorilla, but why not. Only a clickable link to see it (and didn't want to start yet another thread). lol

hirez: https://www.flickr.com/photos/163034485 ... 83/sizes/o

https://www.flickr.com/photos/163034485 ... 1658479894

_________________
Lyle

Psalm 109:8

Image


Top
 Post subject: Re: Tigerdots
PostPosted: Mon Feb 20, 2023 9:25 am  (#7) 
Offline
GimpChat Member
User avatar

Joined: Sep 24, 2010
Posts: 12531
OK; will share Mufasa with you all; working on bringing out finer details such as the whiskers; still a work in progress. :)

https://www.flickr.com/photos/163034485 ... 47/sizes/o

Image

_________________
Lyle

Psalm 109:8

Image


Top
 Post subject: Re: Tigerdots
PostPosted: Mon Feb 20, 2023 2:55 pm  (#8) 
Offline
GimpChat Member
User avatar

Joined: Jan 06, 2020
Posts: 345
Location: The Netherlands
Thank you for your explanation...and this one is also beautiful!


Top
 Post subject: Re: Tigerdots
PostPosted: Tue Feb 21, 2023 8:40 am  (#9) 
Online
GimpChat Member
User avatar

Joined: May 24, 2021
Posts: 792
Location: SEA - South East Asia
Very cool lylejk, love your Mufasa :clap

So I did a try
I like this effect :hehe
Image

_________________
Patrice


Top
 Post subject: Re: Tigerdots
PostPosted: Thu Feb 23, 2023 12:21 am  (#10) 
Offline
Global Moderator
User avatar

Joined: Apr 01, 2012
Posts: 7745
Location: On the other side of this screen
ok tried it again
Not sure I got the lines the right colour
Image

Worked out why the colour but it isn't working for me. Will try another day

_________________


Top
 Post subject: Re: Tigerdots
PostPosted: Thu Feb 23, 2023 5:43 am  (#11) 
Offline
GimpChat Member
User avatar

Joined: Sep 24, 2010
Posts: 12531
Really cool results Pix/Sallyanne. Instead of using dither, I tried using Stamp with 50% grain and got ever closer results to what I'm going for (not sharing those plays since I'm still tweaking). :)

edit (12 minutes later).

OK, here's the same tiger using the new masking technique (and increased the big dot size to 50 from 35). :)


Attachments:
Tigerdots Revisited.jpg
Tigerdots Revisited.jpg [ 2.97 MiB | Viewed 401 times ]

_________________
Lyle

Psalm 109:8

Image
Top
Post new topic Reply to topic  [ 11 posts ] 

All times are UTC - 5 hours [ DST ]


* Login  


Powered by phpBB3 © phpBB Group