Thanks for all the lovely comments people, just want to pick up on some bits.
The paper itself intially used the original paper texture (Top left hand corner)
also I created a map from a satin tutorial (Top right hand corner)
I used this map to displace the paper by 5*5px (Bottom left hand corner)
Finally, and this was an accident because when I went to first run the displace filter clicked on bump map by mistake but like the results.
So using the map I bump mapped the image using the default settings, this just added the light and shadow to really lift the crinkled paper (Bottom right corner)

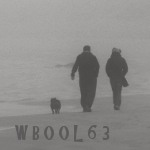
The paper chain people started off as indiviuals but soon found themselves following the crowd. Basically it was a case of overlapping each image slighty and just repeating until the chain was made to the desired lenght. The reflection is bacically the image inverted and the adding a layer mask and blending the mask from light grey to dark grey. Lastly I made sure the whole layer was square and the people where central to layer prior to running the map object filter, Just as a side note the cylinder option uses your selected layer as a top and bottom for the the cylinder, so you will need to create a completely transparent layer and in the tab that is called cylinder change the selected layer for top & bottom to the transparent layer.
Here is the intially chain prior to the mapping, it is half the original size.


 - that's a great idea well realised. beautiful work, brother. i just keep trying to figure out how to fold the paper to be able to cut those...