It is currently Wed Jul 24, 2024 4:17 pm


All times are UTC - 5 hours [ DST ]


Post new topic Reply to topic  [ 12 posts ] 
Author Message
 Post subject: Photo Restoration
PostPosted: Sat Apr 24, 2010 12:15 pm  (#1) 
Offline
GimpChat Member
User avatar

Joined: Apr 24, 2010
Posts: 9
Dear Gimpees and Gimpettes,

I am familiar with cloning and smudging and the like for small photo restoration projects, but here is my question to anyone that can help.. In the photo below you will see there are digital some artifacts left over from being poorly scanned or over processed. Due to the fact these photos were destroyed during Hurricane Ike they are all I have left.

Image

Now the question is through masking or some other magical way in GIMP is there a way to remove all these artifacts without going over each spot independently? This is only about 20% of the original photo and I have a many photos with the exact problem I want to restore to surprise my father in a visit later this year. Problem is if I have to do it spot for spot it will take forever. Any suggestions?

Thanks in advance,
Joseph

Thanks everyone for the suggestions so far.. Hmmmm If only someone had the power and could summon that 'Goddess of Gimp' to make a tutorial on an issue like this (he says whilst kneeling at her tutorial prayer alter :hehe ) I have seen some great tutorials but nothing on photo restoration with problems like I have with this artifact issue, also with gray scale and or slightly out of focus issues.
Image
Above is a photo that I have done before I just felt I lost detail in my work, but maybe there is no way to help that, and I still have some contrast issues on bottom right and left (perhaps burn?) as I would like to pull some more detail out of grandpas shirt and right arm etc.. I have yet to clone off the piece of scotch tape I have to remove on the larger original. The main problem with these old B&W photos is that they often are way too exposed in places. Perhaps it is just the wrath of time on the silver oxide paper... If only I had a time machine and a RAW DSLR


Last edited by me4bs on Sun Apr 25, 2010 12:03 pm, edited 3 times in total.

Share on Facebook Share on Twitter Share on Orkut Share on Digg Share on MySpace Share on Delicious Share on Technorati
Top
 Post subject: Re: Photo Restoration
PostPosted: Sat Apr 24, 2010 1:52 pm  (#2) 
Offline
GimpChat Founder
User avatar

Joined: May 22, 2008
Posts: 5242
Location: Gimpville
You can try using the despeckle filter located under Filters/Enhance/Despeckle. It can remove many of the scanner artifacts. You'll need to experiment with the despeckle settings to determine the parameters which are best for a given photo.The downside is that you may lose a little sharpness. You may be able to re-sharpen after you despeckle.

Here's your image desaturated, despeckled and sharpened.

Image

_________________
“If you reach for the stars, you just might land on a decently sized hill.” - Stuart Hill


Top
 Post subject: Re: Photo Restoration
PostPosted: Sat Apr 24, 2010 2:18 pm  (#3) 
Offline
GimpChat Member
User avatar

Joined: Apr 24, 2010
Posts: 9
Thanks for the prompt suggestion and even working on the image :coolthup .. I should have mentioned I did try the despeckle but indeed I got a sort of water color effect and seemed to loose all of my (already bad) detail.. Any more suggestions from anyone appreciated. Perhaps if I increase the photo by 300% before despeckle and then reduce it I can gain better resolution. I know when I worked in graphic arts at NASA we would always make a larger working image then reduce it at publication. Anyway thanks again


Top
 Post subject: Re: Photo Restoration
PostPosted: Sat Apr 24, 2010 3:16 pm  (#4) 
Offline
GimpChat Founder
User avatar

Joined: May 22, 2008
Posts: 5242
Location: Gimpville
Yes, you definitely want to have as large an image as is feasible when you start, especially if you plan on printing the image on a hi-res printer, but scaling up a a smaller image may make any artifacts worse and possibly introduce new artifacts.

Your best bet might be to tweak the despeckle settings get rid of most of the noise and then correct what is left by hand.

I seem to remember some photo plugins that were available for older versions of GIMP but I'm not sure if they are still available or if they might have better tools for removing this kind of noise.

Maybe someone else will chime in on this..

_________________
“If you reach for the stars, you just might land on a decently sized hill.” - Stuart Hill


Top
 Post subject: Re: Photo Restoration
PostPosted: Sun Apr 25, 2010 6:03 am  (#5) 
Offline
GimpChat Member

Joined: Apr 12, 2010
Posts: 5870
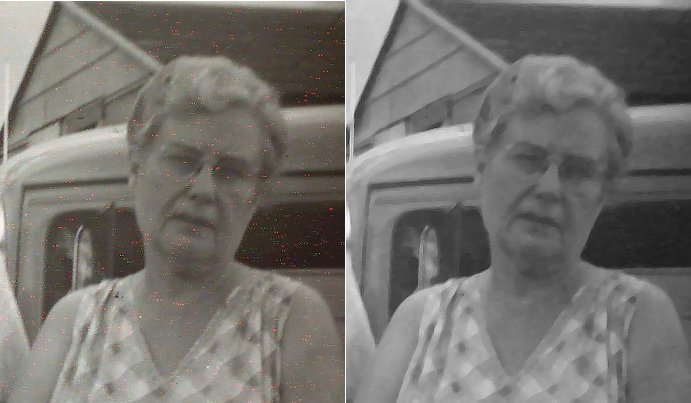
I try but i am not too happy with the result

No much for the noise i could eliminate most
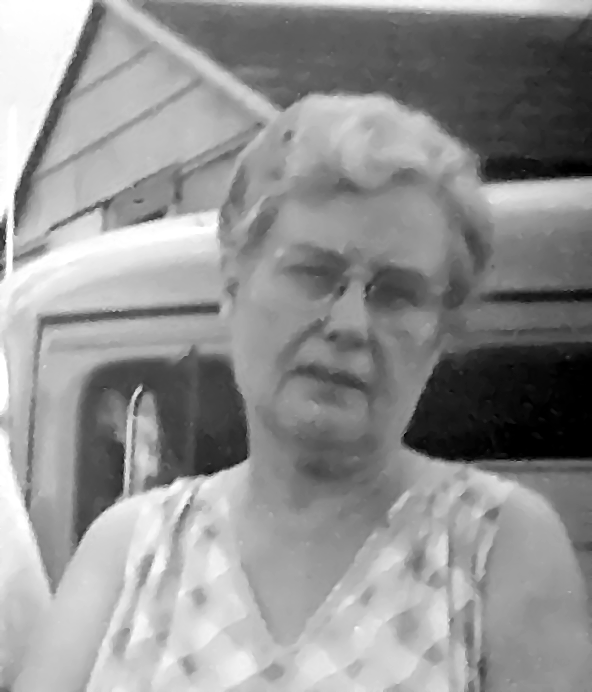
but the contrast at least the sample has a very poor contrast (there is not a pure white not a full black ) and that make harder get a good result.

For the noise first you should desautrate Color/desaturate, i get here better result with luminosity option
then you may use despeckle or a bit better use the wawelet denoise plugin (from http://www.registry.gimp.org )

once you get out of most of noise then you may duplicate the layer, set the dup in darken only mode
Run now the Unsharpmask2 plugin http://photocomix-resources.deviantart. ... 2-73998572

Now for the setting , starting from the default raise the value of the slider called " -" , that as default is set to 0

having that layer set to dark only will avoid to sharpen also the noise (that in your case once desuturated is close to white )

here i used despeckle not the wavelet plugin (but only because i had no time to install it again )

i added on the top a slighly orange layer, with low opacity and in color mode to give a warmer tint
I didn't any manual work ...here as example would be badly needed on the lip where at the center there is a washed out line that somehow made the expression of the woman very sad

But manual edit will differ for each pic, while the basic routine may be similar for all the pics


Attachments:
Untitled.jpg
Untitled.jpg [ 120.42 KiB | Viewed 6179 times ]

_________________
My 3D Gallery on Deviantart http://photocomix2.deviantart.com/
Main gallery http://www.flickriver.com/photos/photocomix-mandala/
Mandala and simmetry http://www.flickriver.com/photos/photocomix_mandala/

Image

Mrs Wilbress
Top
 Post subject: Re: Photo Restoration
PostPosted: Tue May 18, 2010 7:17 am  (#6) 
Offline
GimpChat Member

Joined: May 18, 2010
Posts: 14
how about this... ?


Attachments:
untitled.jpg
untitled.jpg [ 40.02 KiB | Viewed 6134 times ]
Top
 Post subject: Re: Photo Restoration
PostPosted: Tue May 18, 2010 9:49 am  (#7) 
Offline
Retired Staff
User avatar

Joined: May 22, 2008
Posts: 6947
Location: Somewhere in GIMP
:welcome to Gimp Chat, jenx.

Thank you for your input. Nice job on that photo.

_________________
Image
World War IV will be fought with sticks and stones. - Albert Einstein


Top
 Post subject: Re: Photo Restoration
PostPosted: Mon Sep 13, 2010 5:37 am  (#8) 
Offline
GimpChat Member

Joined: May 18, 2010
Posts: 14
Thanks Oregonian.

That was a quick one, so a few spots remain in the photo.
I haven't had the time to remove them, but they easily could be "healed" afterwards.

If anyone is interested in details, let me know...


Top
 Post subject: Re: Photo Restoration
PostPosted: Mon Sep 13, 2010 5:42 am  (#9) 
Offline
GimpChat Member
User avatar

Joined: Apr 24, 2010
Posts: 9
I bumped this because I am looking for anymore suggestions on these old photos, and another problem I failed to mention is the contrast issue on bottom left and right, the high contrast being so un even.

So I am looking for any suggestions on how to level those areas, and blending them in smooth, so that it looks more natural. I am hoping some of you might have some ideas or can guide me to tutorials that you know of that deal with maximizing the quality of these old pictures. Burning? Dodging? Layering?

Perhaps some of you might know of some other restoration tutorials for old black and white photographs that can help with this as I have many pictures I must process.

Thanks in advance!

Joseph


Top
 Post subject: Re: Photo Restoration
PostPosted: Mon Sep 13, 2010 11:37 am  (#10) 
Offline
GimpChat Member
User avatar

Joined: May 16, 2010
Posts: 14729
Location: USA
There is a filter in G'MIC that takes care of these spots too.here is one i did a while back.
The frame was also created in GIMP.
before:
Image
After:
Image

i forget which filter it is though.But its in there try them all!

_________________
Image
Edmund Burke nailed it when he said, "The only thing necessary for the triumph of evil is for good men to do nothing."


Top
 Post subject: Re: Photo Restoration
PostPosted: Mon Sep 13, 2010 11:39 am  (#11) 
Offline
GimpChat Member
User avatar

Joined: May 16, 2010
Posts: 14729
Location: USA
HAHAHA! ... i just noticed my arrow cursor is in there from my mouse. =)
Shame on me!

_________________
Image
Edmund Burke nailed it when he said, "The only thing necessary for the triumph of evil is for good men to do nothing."


Top
 Post subject: Re: Photo Restoration
PostPosted: Thu Feb 07, 2013 9:01 pm  (#12) 
Offline
GimpChat Member
User avatar

Joined: Jan 10, 2013
Posts: 863
I think we have better results if restoration is edited manually. Here I used filters, and until the result was interesting. But in some ways it is noted a loss of image quality.
Image

_________________
bbbbbbbbbbbImage
bbbbbbbbbbb Be patient, English is not my language.


Top
Post new topic Reply to topic  [ 12 posts ] 

All times are UTC - 5 hours [ DST ]


   Similar Topics   Replies 
No new posts REAL ESRGAN and GFPGAN open sourc (Face and Image restoration AI)

3

No new posts Attachment(s) Photo To Painting

6

No new posts Attachment(s) Photo To Anime

5

No new posts Attachment(s) Photo To Comic

62

No new posts Attachment(s) Photo To Logo

0


* Login  


Powered by phpBB3 © phpBB Group