This tutorial was originally created in an earlier version of GIMP (2.2 or 2.4). Hopefully, the menu locations are still the same. Enjoy!
If you don't have your own scanline pattern used for this tutorial, you can download one here:
http://www.deviantart.com/deviation/39512748/Just download the pattern, extract it to your GIMP patterns folder (typically somewhere like this on your hard drive: C:\Program Files\GIMP-2.0\share\gimp\2.0\patterns), then either start up GIMP or hit the refresh button in your Patterns Dialog Window to access it.
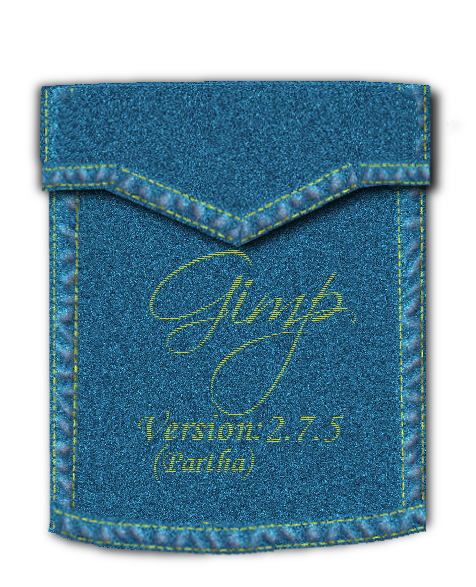
Step 1 Open up a new GIMP document and fill the background layer with a blue color. Choose any blue that you want. I used 2B6C7E.
 Step 2
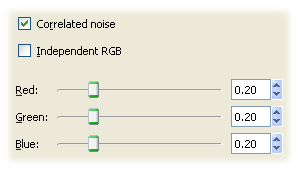
 Now, on this layer, let's add some noise.
Go to Filters | Noise | Scatter RGB...and use the following settings:
 Step 3
 Add a transparent layer above your background and fill it with your scanline pattern (the scanline pattern is included in the tutorial zipfile). Because the scanlines are difficult to see, I'm not going to give you a screenshot for this step.
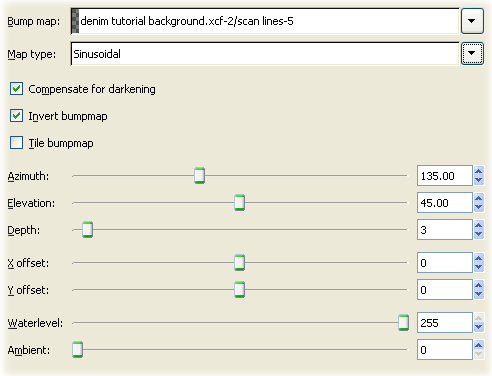
Step 4 Let's add some texture by using the Bump Map tool.
With you background layer selected, go to:
Filters | Map | Bump Map...
and use the following settings. Make sure you select the scanline layer as the bump map. These are the settings that looked most realistic to me.
Experiment to see if you find something you like better.
 Step 5
 Now, turn off your scanline layer (or delete it if you don't need it anymore.)
Step 6 I like to go back to Step 2 and add more noise at this time, but it's not required.
Here's my result:
 Step 7
With your
denim layer in place, add a new layer and fill it with black.
On this new layer, make a selection along the edge for a seam and fill it with white. The image below shows the selected area highlighted in red and already filled with white. Obviously, your selected area won't be red. I've done this for demonstration purposes only.
 Step 8
The purpose for this layer will be to give our
denim the appearance of a raised seam, which will be accomplished through the Bump Map Menu. Before we proceed with that however, let's blur the interface between the white and black just a bit.
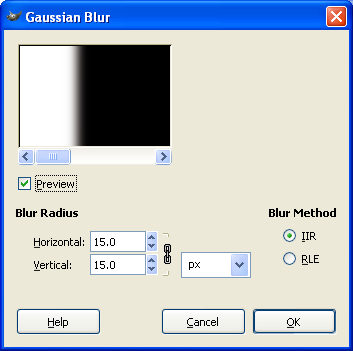
Click on the new black and white layer in the layer dialog window, then go to Filters Menu > Blur > Gaussian Blur
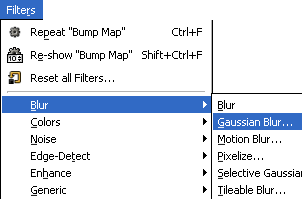
and fiddle with the settings. Here's mine:
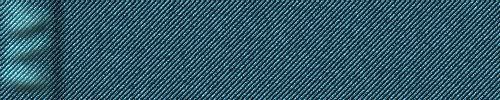
This should make your layer look something like so:
 Step 9
Next, Click on you
denim layer again and go to Filters Menu > Map > Bump Map...

and experiment with the settings. Make sure you select the black and white layer as the Bump Map layer. Here's my settings:

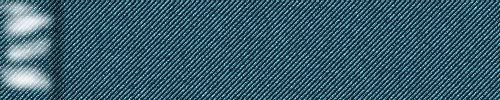
Here's the results of that action:
Now, you can either discard your black and white layer or save it in case you want to redo it later. That choice is entirely up to you. I'm deleting mine.
Step 10With our seam in place we need add some wrinkles to bring it to life.
To do that add a new transparent layer and place it above your
denim layer.
Grab a small, soft brush and paint in some strokes like I've shown below. I like the airbrush tool for this as it adds just a dash of color with each click of the mouse button and really makes the wrinkles come to life.
Looks pretty good, but not good enough!
We're going to use this 'Wrinkle Layer' to bump the
denim layer.
Step 11Click on your
denim layer again in the layer dialog window.
Then, go back to the Bump Map Filter again (Filters Menu > Map > Bump Map...) and bump your
denim layer using the Wrinkles Layer as the bump map (No screenshot this time...I think you get the point). Experiment with the settings, but I was able to use the same numbers as I did in the previous bump map step. If your edges look a bit rough when you do the bump map, you may need to perform a Gaussian Blur on the Wrinkle Layer before you do the bump map.
Now, this time, rather than discard our bump map layer as we did with the black and white seam layer, we're going to use the Wrinkle Layer to our advantage. Click on the Wrinkle Layer and change its Blend Mode to some like Overlay or Dodge. I like Dodge myself, but you'll most likely need to reduce the opacity. Here's what I used:
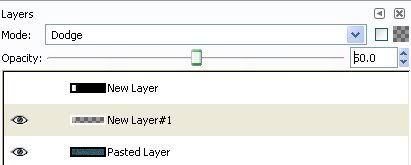
and here's the output of that action:
Before we move on to the next step, let's add one more nice little touch to add to the realism. Click on the
denim layer and go to Filters Menu > Map > Displace...
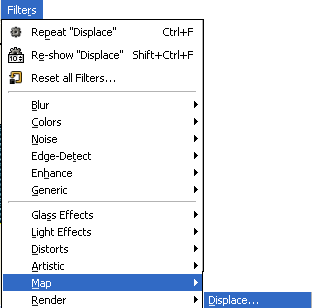
and choose the Wrinkle Layer in the boxes and experiment with the values to get something you like. I used these:

This will move our
denim to contour around the wrinkles a little bit.
Step 12Now, let's add some stitching to our seams.
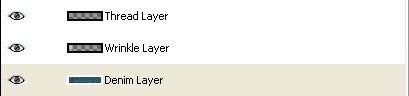
Add a new transparent layer and place it at the top of the stack. I'm calling it 'Thread Layer' and here's my layer dialog window:
Grab your path tool

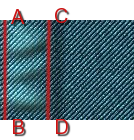
and, Using the Image Below as a guide, click once for Point A, then again for Point B.
Before adding Point C, hold down the Shift Key and then click for Point C. Let go of the Shift Key and Click Point D. By holding down the Shift Key when creating Point C, you'll create a multi-component point and each will be stroked individually. If all the Points of the Path were connected, you wouldn't like the stroke results! Trust me!
 Step 13
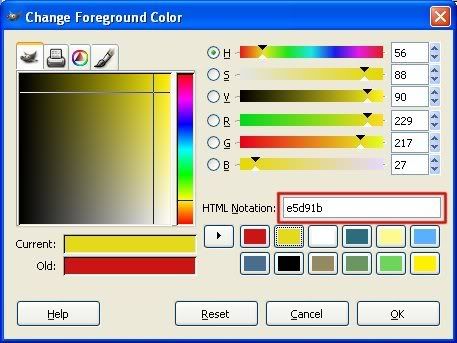
With your Paths in place, let's change the foreground color to something 'gold'. Double-click the color swatch as shown

and find you a nice gold color. This is what I chose:
Next, go to Edit Menu > Stroke Path...
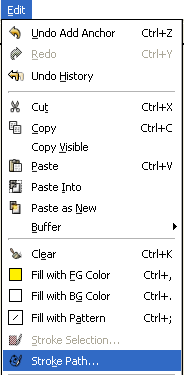
The following dialog will appear. Click the settings as shown, paying particular attention to what's highlighted in red....
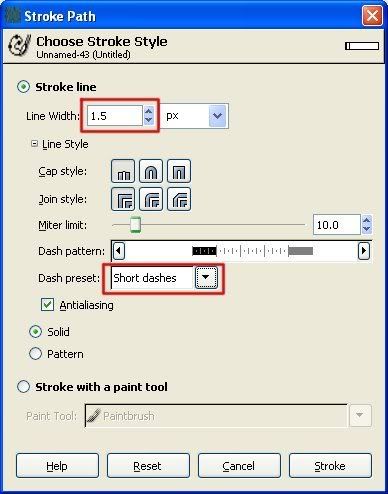
With that dialog still open, take your cursor and modify the Dash Pattern as shown in red:
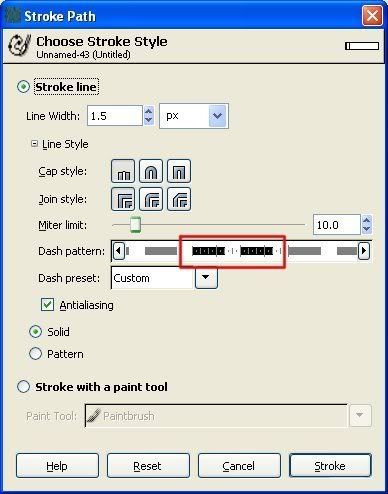
Click 'Stroke' to Stroke that two paths. Here's the outcome of that step....
 Step 14
As a final step, you might want to use the bump map and displace map filters on the Thread Layer using the Wrinkle Layer for bump/displacement.
Here's the settings I've used. Experiment and see what you can come up with.
Bump Settings: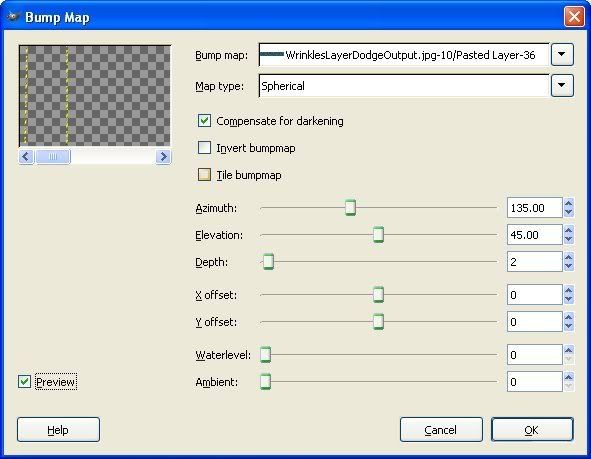 Displace Settings:
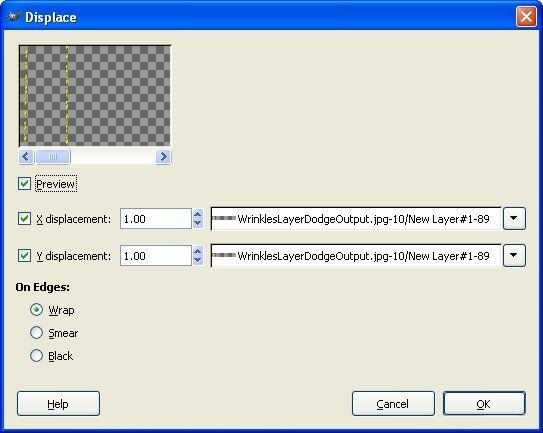
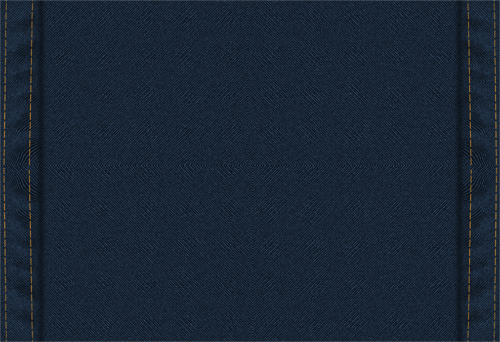
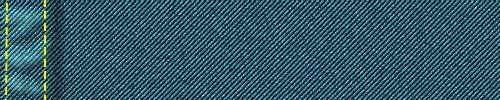
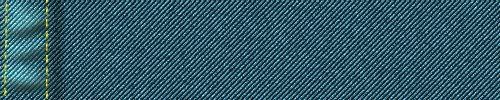
If you've done everything correctly, you should have something that appears like this:
As always, experimentation is the key. Try adding folds to the
denim itself, using the brushing technique we used for the seams. Add curved paths to make nice thread patterns instead of straight up/down threads. Use multiple paths to make nice thread designs, etc. Make some pockets, add snaps, rivets, etc. Just DON'T try to wear it!
I hope this tutorial has been beneficial. As always, let me know if you have any questions or need clarification.
Happy GIMPing!
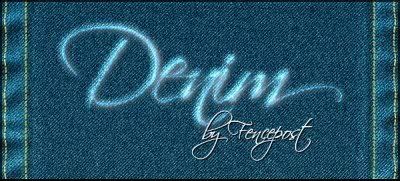
Art