Making Metallic Gradients
I haven’t seen a lot of metallic gradients for Gimp so I decided to include this segment for those that need a quick and easy way to get a semi metallic effect. First, I’m going to show you how to take any gradient, and turn it into a metallic gradient in just a few simple steps.
Included with this tutorial, you will find 24 different metallic gradients in the attached zip file. Some were a collaboration between myself and Rod to convert some Photoshop “styles” into GIMP .ggr gradient files. Others are variations derived from some of the default gradients that come with GIMP, and still others that were created from scratch. A special thanks to Rod for his Steel_Pencil_RD gradient that got me started on these.
Step 1.
Open a new image 800x600 and use 300 ppi for the resolution.
Step 2.
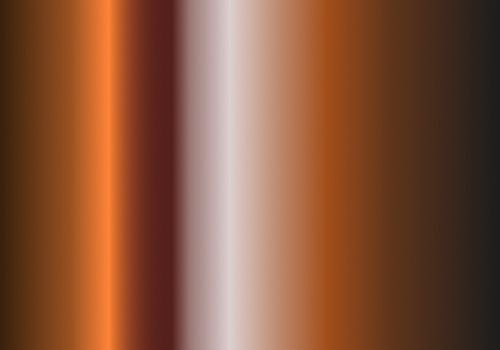
Create a transparent layer and name it Gradient. Delete the background layer and select the Blend tool. Set the gradient to the Shadow 1 gradient and check the little box next to the gradient to reverse it. Make a horizontal stroke across your image, using the Control key to make it perfectly straight, and apply your gradient.
Step 3.
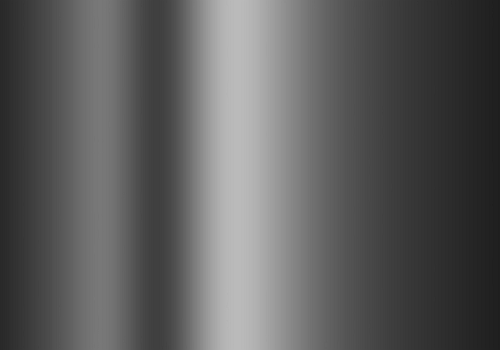
On the Gradient layer, Go to Colors>Desaturate, select the Luminosity option, then click OK. Next, click on the little box at the top of the layers dialog to lock the alpha channel, then go toFilters>Blur>Gaussian Blur, set both values to 100 and click OK.
This will make our gradient a little more blended and smoother looking.
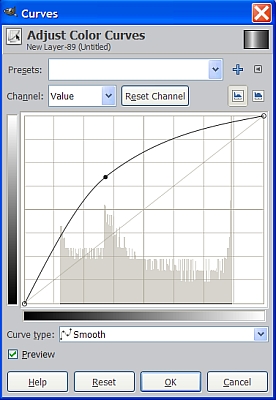
Our gradient is still too dark, so go to Colors>Curves and move your curve up somewhere between one to two squares from the middle, in the curves dialog, and click OK. Different gradients will require different curve adjustments. I used this one.
Here’s what the gradient looks like after the curve adjustment.
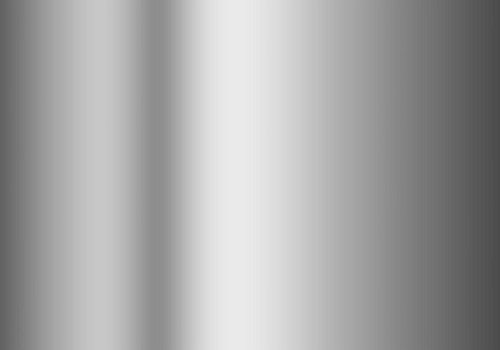
We have now transformed an existing gradient into a metallic gradient. The best part is since it is a grayscale image, we can apply any color we choose to make different metals.
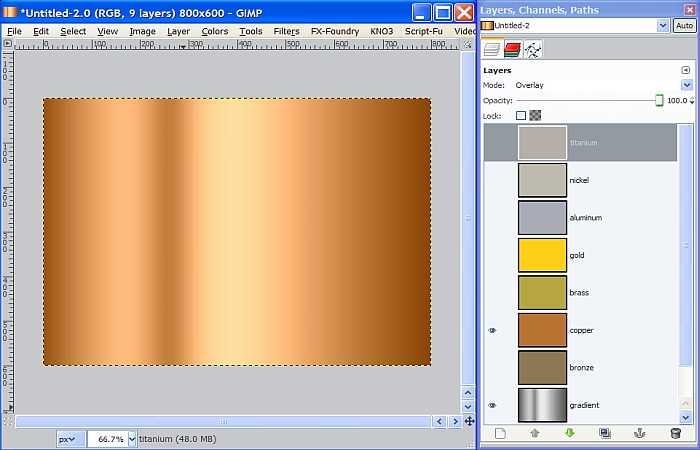
Step 4.
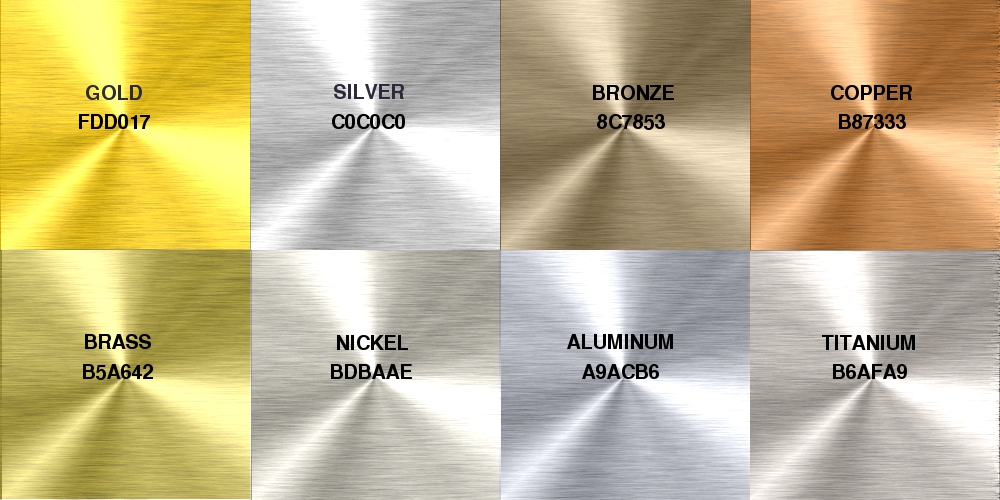
Create a new transparent layer, and set the layer Mode to Overlay. Now duplicate it seven times, for a total of eight layers including our gradient layer. What we are going to do is create some basic metal colors and then apply them one at a time to our object by controlling the visibility for each layer. Start naming the layers according to the list below. After you rename each layer, change your FG color to the corresponding Hex number, and fill each layer in turn with the corresponding color.
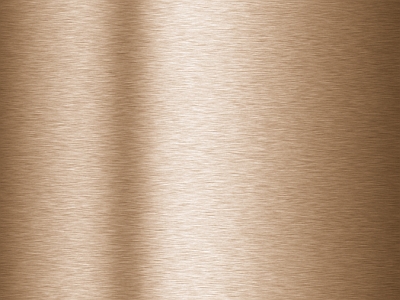
Bronze 8C7853
Copper B87333
Brass B5A642
Gold FDD017
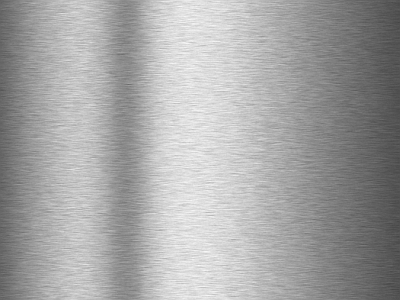
Aluminum A9ACB6
Nickel BDBAAE
Titanium B6AFA9
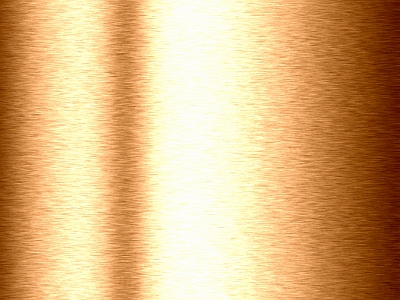
Don’t worry about how the colors appear just yet, but once you get the colors and names applied to all the layers, turn off the visibility to all the colored layers except the copper layer and they should look like this.
Step 5.
Duplicate the Gradient layer and create a brushed metal texture on the duplicated layer using RGB Noise and Motion Blur like we did in Metal Wurx - Part I, and name it Brushed Metal. If you don’t already know how to make brushed metal, go back and review my tutorial for brushed metal here: http://www.gimpchat.com/viewtopic.php?f=23&t=3750
We now have a nice custom metallic gradient, and we can see what it looks like used with a simple brushed metal texture layer.
Step 6.
Change the layer mode of the Copper layer to Grain Merge and take a look at the results.
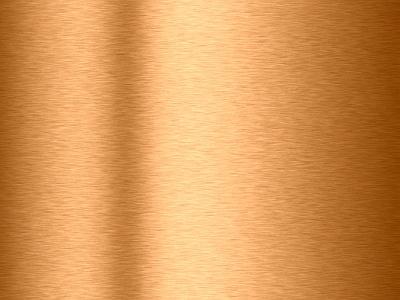
The color is quite a bit richer.
Now look at each metal color layer, one at a time, by turning the visibility on for the selected layer, turning the others off and changing the layer mode. Just for grins, you might also try duplicating the Brushed Metal layer and placing it at the top of the layer stack, changing the layer Mode to Grain Merge for a more intense effect.
Just play around with layer Modes and Opacities to get all kinds of results
Well, we just created 8 different metallic finishes, with numerous variations. Make sure you save the list of metallic colors because they will be used in future tutorials. Here are some metal sample finishes using a conical setting for a gradient overlay to the brushed metal and a metallic colored layer with various layer modes.
These colors can be applied to any type metal whether it is brushed, hammered, pitted, smooth or shaped, bumped and a curve applied for making highly reflective surfaces like chrome. Have fun experimenting!
I hope you enjoyed this tutorial. Metal Wurx – Part XIII will explore several different methods for creating awesome chrome effects. I have included a ton of resources as well as links to several other great tutorials by others using even more methods for making chrome and other metals. You won’t want to miss this one!
Edit: Metallic Gradients moved to viewtopic.php?p=94723#p94723
Metallic Gradients moved to here viewtopic.php?p=94723#p94723
