This tutorial is a request to be shown how to create something similar to the link posted
Fuzzy Felt Image
Although we wont be creating the above image, this tutorial will show you how a basic shape, as done in the above pic is achieved.
Before we start you will need to download and install the texture below into your pattern folder, which you should find somewhere like this.
file:///home/user/.gimp-2.6/patterns/
Attachment:
Open gimp and create a new Image doesn't really matter what size, but I'll be using 512px * 512px, then fill this layer with Green "008000".
Create a new layer and fill this layer with the download pattern, select this layer and change layer mode to "Grain Merge" and Opacity to 75%
then go layers>merge down. Turn off the background layer.
Create a new black layer and call it "Shape Mask" on this layer draw any shape using the selection tools and fill selection with white. Don't remove the selection just yet.
Go to your brush dialogue window and select the brush "Pencil Sketch ( 16 * 16 ) and change spacing to 1.
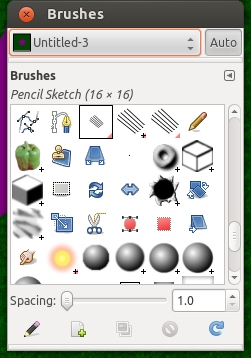
If your version of gimp dosen't included this brush then you can download the file below and place the brush into your brush folder.
Attachment:
Go to your selection window Dialogue and click the paint along path icon
 in the new pop up window select "Stroke with paint tool" make sure paint tool is set to Paintbrush then click stroke. Go select>None.
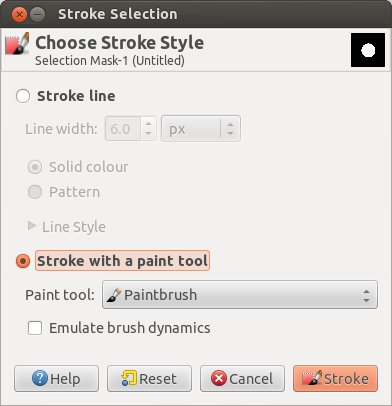
Go edit>copy then turn off that layer, Create a new Layer called "Shape Colour" and fill with desired colour. Go Layer>Mask>Add Layer Mask, then go edit>Paste into and click the anchor in the layers dialogue to anchor layer in place.
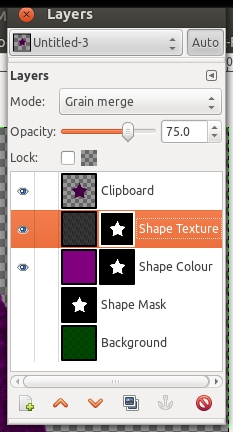
Create a new Layer called "Shape texture" and fill with the felt pattern.Go Layer>Mask>Add Layer Mask, then go edit>Paste into and click the anchor in the layers dialogue to anchor layer in place. Change layer mode to "Grain Merge" and Opacity to 75%.
Just make sure the only layers you have on are the layers named "Shape Colour" and "Shape Texture" then go Edit>Copy Visible then Edit>Paste As>New Layer.
Make sure this new layer is selected and then go Filters>Light and Shadow>Drop Shadow, Change X and Y settings to 2 and click ok.

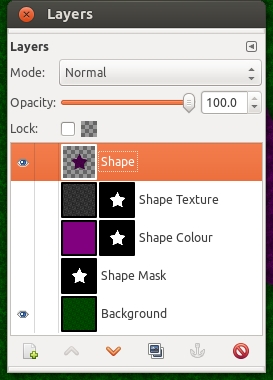
Then merge the copied shape layer with the drop shadow layer and rename to "Shape", turn off all layers expect shape and background.
That it, you just have to create all the shapes you want in your image this way then just position them where you want.
P.S Esper I shall be expecting something from southpark
