It is currently Sat Oct 10, 2026 5:50 pm


All times are UTC - 5 hours [ DST ]


Post new topic Reply to topic  [ 22 posts ]  Go to page 1, 2  Next
Author Message
 Post subject: Re: Make your images POP with 3 easy steps!
PostPosted: Wed Mar 07, 2012 6:27 pm  (#11) 
Offline
GimpChat Member
User avatar

Joined: Mar 05, 2012
Posts: 7
does saving in .jpg or .xcf make any difference?

gychang

Daemon wrote:
Ever take a pic and think, "Man, why aren't the colors there?"

Image

Once you have the blur set the layer mode to overlay.

Then merge the layers and save as a .png file.

Before Image After Image

You end up with this subtle, yet noticeable difference. I hope this is helpful.


Top
 Post subject: Re: Make your images POP with 3 easy steps!
PostPosted: Thu Mar 08, 2012 4:50 am  (#12) 
Offline
GimpChat Member
User avatar

Joined: Apr 07, 2010
Posts: 14182
When you save as xcf, your image will still be in the Gimp format. You will have all your layers. You can go back and make changes when it is still in xcf. If you save to png, all the layers will export into one layer.

_________________
Image


Top
 Post subject: Re: Make your images POP with 3 easy steps!
PostPosted: Fri Mar 09, 2012 12:30 pm  (#13) 
Offline
GimpChat Member
User avatar

Joined: Nov 09, 2011
Posts: 726
Interesting.
I think that not only blur filter can be used with this method. For example, if you want:
Only highlight colors: no filter, just duplicate the layer and set layer mode to Overlay.
Enhance images with a large grain or noise: Duplicate layer, apply Blur or Despeckle filter and set layer mode to Overlay.
Improve blurred images or highlight details: Duplicate layer, apply Sharpen filter and set layer mode to Overlay.
In all cases if the image results dark or overexposed, you can improve from "Colors" - "Levels".

I'm supposing because I really do not understand well how Overlay mode works.

_________________
Image
Be patient, English is not my language.


Top
 Post subject: Re: Make your images POP with 3 easy steps!
PostPosted: Fri Mar 09, 2012 6:38 pm  (#14) 
Offline
GimpChat Member

Joined: Mar 14, 2011
Posts: 998
YAFU wrote:
Interesting.
I think that not only blur filter can be used with this method. For example, if you want:
Only highlight colors: no filter, just duplicate the layer and set layer mode to Overlay.
Enhance images with a large grain or noise: Duplicate layer, apply Blur or Despeckle filter and set layer mode to Overlay.
Improve blurred images or highlight details: Duplicate layer, apply Sharpen filter and set layer mode to Overlay.
In all cases if the image results dark or overexposed, you can improve from "Colors" - "Levels".

I'm supposing because I really do not understand well how Overlay mode works.

Overlay is simply an S-curve applied to the image. Which means darker parts become darker and lighter parts become lighter. Of course, if you change the opacity, you can control this effect.


Top
 Post subject: Re: Make your images POP with 3 easy steps!
PostPosted: Fri Mar 09, 2012 11:33 pm  (#15) 
Offline
GimpChat Member
User avatar

Joined: Nov 09, 2011
Posts: 726
Thanks for the explanation, partha

_________________
Image
Be patient, English is not my language.


Top
 Post subject: Re: Make your images POP with 3 easy steps!
PostPosted: Mon Jul 29, 2013 8:26 am  (#16) 
Offline
New Member

Joined: Jul 29, 2013
Posts: 1
I tried the 3 different ways. Works great. Love it.


Top
 Post subject: Re: Make your images POP with 3 easy steps!
PostPosted: Mon Jul 29, 2013 10:40 pm  (#17) 
Offline
GimpChat Member
User avatar

Joined: Jun 25, 2011
Posts: 914
Location: Mount Olive, North Carolina
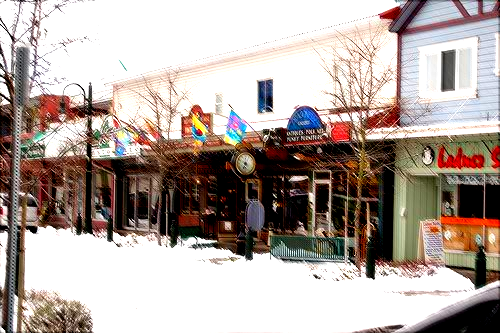
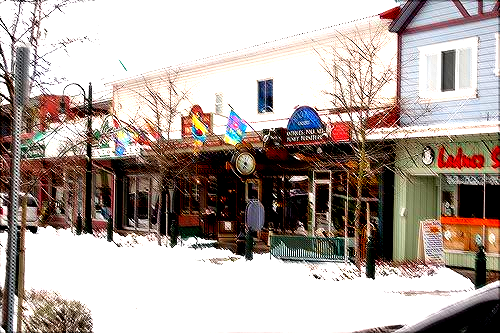
I tried it with a couple photos. I think the result looks pretty good.

Image

Image


Top
 Post subject: Re: Make your images POP with 3 easy steps!
PostPosted: Tue Jul 30, 2013 1:41 am  (#18) 
Offline
Script Coder
User avatar

Joined: Feb 18, 2011
Posts: 4826
Location: Bendigo Vic. Australia
One more method is by using the Convolution Matrix, here is my result using Vivid light with default settings

Image

perhaps set a little to high

Image

Sharpened a tad using the Convolution Matrix

_________________
Image
No matter how much you push the envelope, it'll still be stationery.


Top
 Post subject: Re: Make your images POP with 3 easy steps!
PostPosted: Sun Aug 04, 2013 5:36 pm  (#19) 
Offline
GimpChat Member
User avatar

Joined: Jan 10, 2013
Posts: 863
One more method
This is the way i do it!

1-Open your image
2-Duplicate it (name it Blur)
3-On the duplicate select: filters>blur>gaussian blur
"add enough blur to where you start losing the lines, but can still see the general shapes of the image."
4-Once you have the blur, set the layer mode to Grain Extract.
5-Do Layer - New from visible

Now you have 3 layers. (Original, Blur, Visible).

6-In top layer (Visible) set mode to Grain merge.
7-In layer "Blur" change mode to Overlay, e brinque com a opacidade se desejar.
8-Then merge the layers and save as a .png file

Before
Image

After
Image

_________________
bbbbbbbbbbbImage
bbbbbbbbbbb Be patient, English is not my language.


Top
 Post subject: Re: Make your images POP with 3 easy steps!
PostPosted: Sun Aug 04, 2013 10:14 pm  (#20) 
Akros wrote:
One more method
This is the way i do it!

1-Open your image
2-Duplicate it (name it Blur)
3-On the duplicate select: filters>blur>gaussian blur
"add enough blur to where you start losing the lines, but can still see the general shapes of the image."
4-Once you have the blur, set the layer mode to Grain Extract.
5-Do Layer - New from visible

Now you have 3 layers. (Original, Blur, Visible).

6-In top layer (Visible) set mode to Grain merge.
7-In layer "Blur" change mode to Overlay, e brinque com a opacidade se desejar.
8-Then merge the layers and save as a .png file

Before
[ Image ]

After
[ Image ]

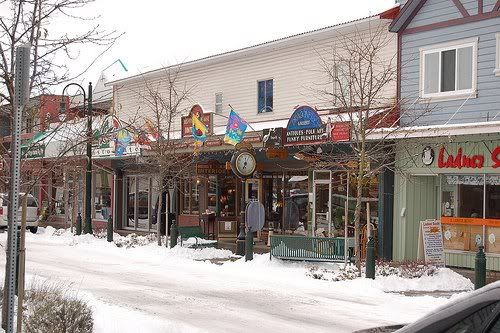
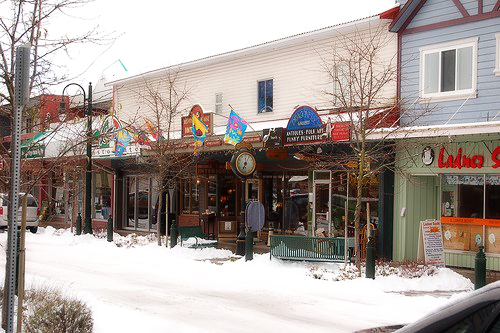
@Akros: Tried your method on this image. Works well. :bigthup
Original
Image
Popped
Image


Top
 Post subject: Re: Make your images POP with 3 easy steps!
PostPosted: Mon Aug 05, 2013 4:45 am  (#21) 
Offline
GimpChat Member
User avatar

Joined: Jan 20, 2013
Posts: 14835
Location: roma, italy
for landscapes (or seascapes) you may also try:
-G'mic : freaky details (just ONE click)
Attachment:
2005ago55_orig.jpg
2005ago55_orig.jpg [ 383.51 KiB | Viewed 1645 times ]

Attachment:
2005ago55_freaky.jpg
2005ago55_freaky.jpg [ 531.83 KiB | Viewed 1645 times ]


(normally not suitable for portrait, unless it is a portrait of an old men!)

_________________
"Where am I ?"


Top
 Post subject: Re: Make your images POP with 3 easy steps!
PostPosted: Mon Aug 05, 2013 4:20 pm  (#22) 
Offline
GimpChat Member
User avatar

Joined: Jan 10, 2013
Posts: 863
fluffybunny wrote:
@Akros: Tried your method on this image. Works well. :bigthup
Original
Image
Popped
Image

Fluffybunny cool, thanks for trying! :hi5
Reading the steps the method seems long, but in practice as you saw, is very simple and with great result!

_________________
bbbbbbbbbbbImage
bbbbbbbbbbb Be patient, English is not my language.


Top
Post new topic Reply to topic  [ 22 posts ]  Go to page 1, 2  Next

All times are UTC - 5 hours [ DST ]


cron

* Login  


Powered by phpBB3 © phpBB Group