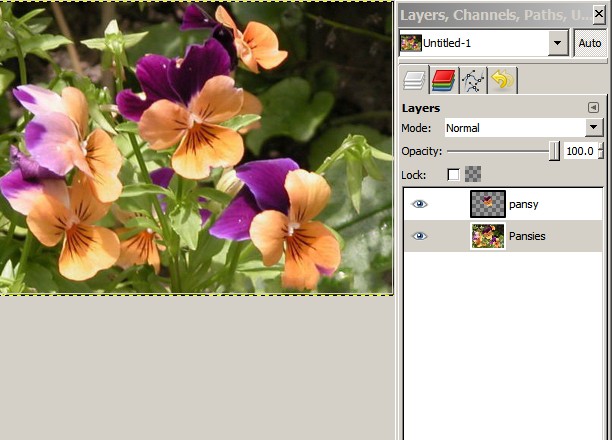
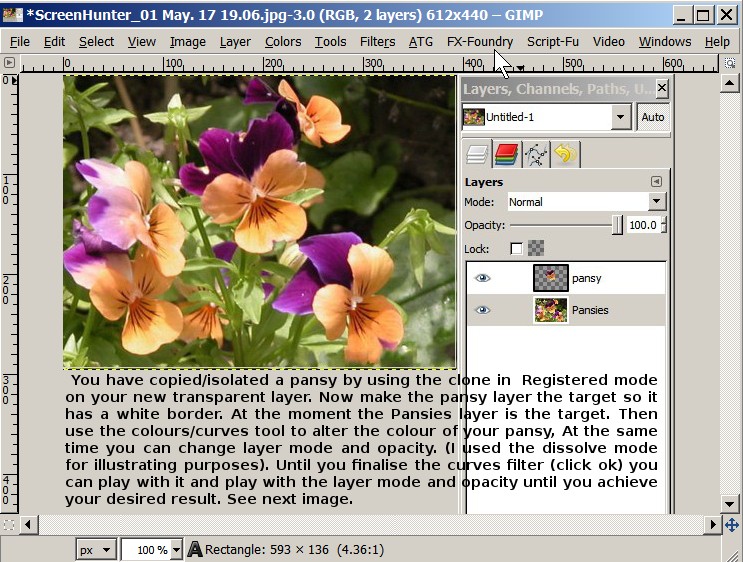
Recently, one of our members needed to alter an area of an image but leave some other part of the image untouched. There are many ways to do this. One of the ways to do this is using the Clone tool in registered mode.
The clone tool is described in detail in Gimp Help. It is not my intention to repeat the excellent write up in the Help section, rather I wish to briefly show some of the practical uses of the clone tool and act as a reminder for the different modes.
Most cloning operations are on the same layer to hide or fix an imperfection. In the hands of a skilled operator it is a very powerful tool. You can clone from any open target image or layer onto another image or layer. You simply select your "from" source and use Ctl to set your cloning start point.
You can clone from a pattern or an image, however I see very little use for the clone pattern option.
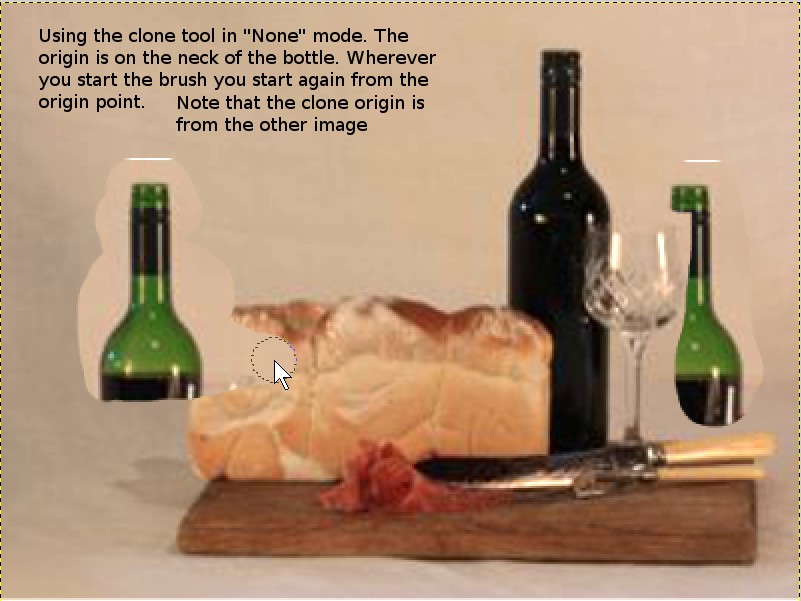
There are four modes of cloning; none, aligned, registered and fixed. I see very little use for the fixed mode.

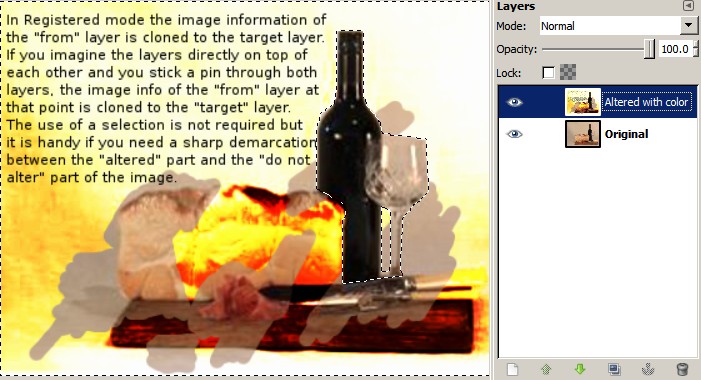
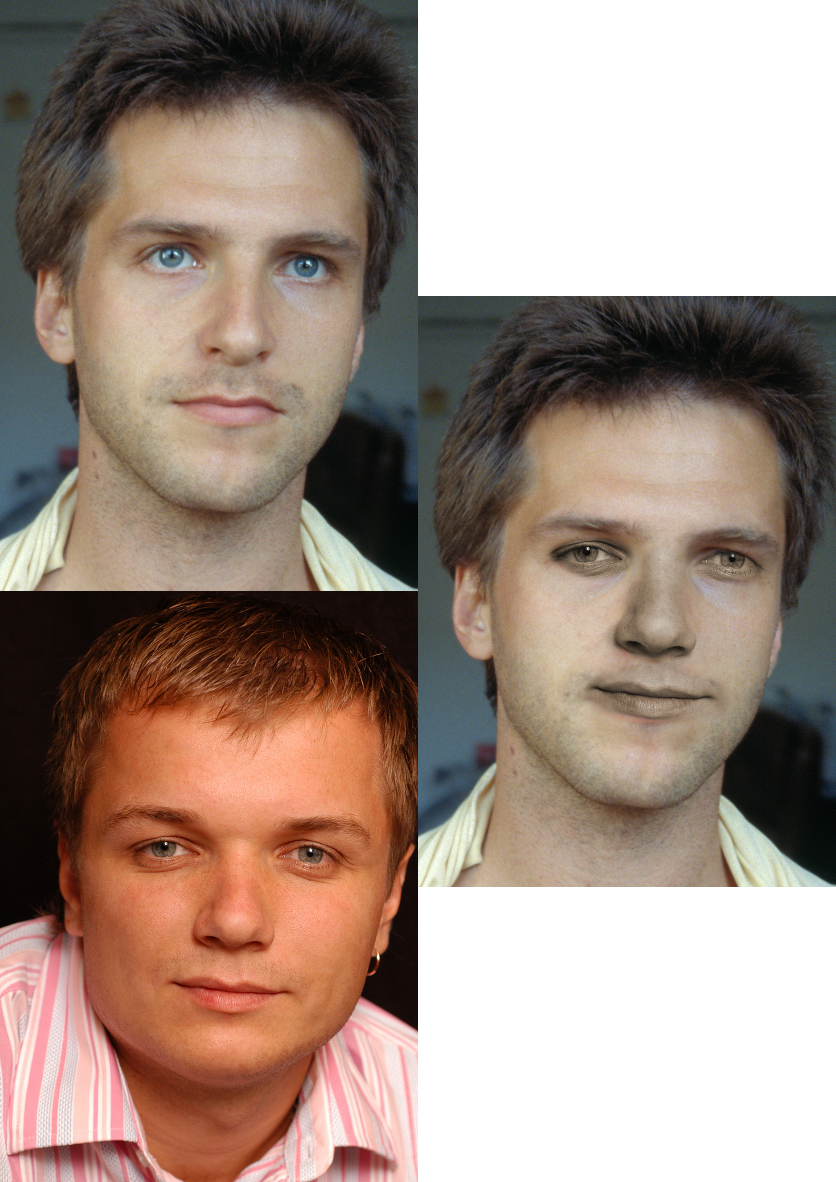
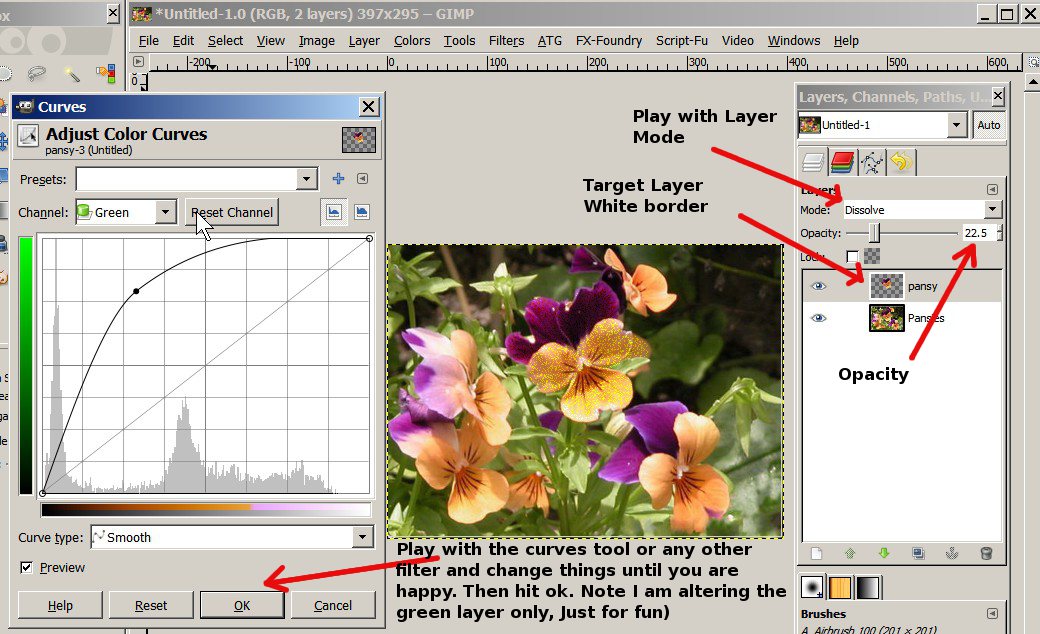
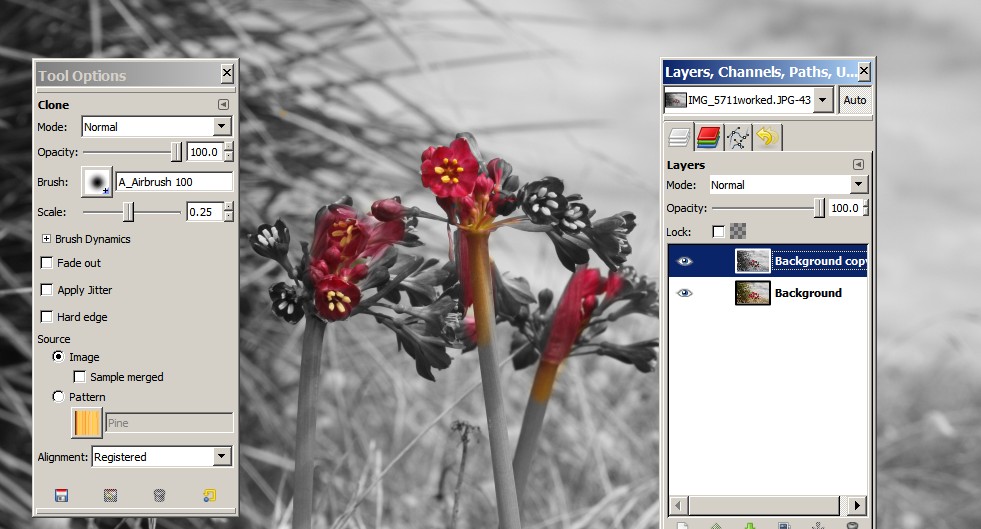
Obviously, this an extreme example to show the workings of the Registered mode. In most cases the altered image is more subtle. The selection is sharp. and as you can see the alteration brushstrokes did not occur on the "do not alter" selection. Depending on your requirements you can use a soft brush , alter the layer mode and opacity to suit. This clone mode is very handy to bring out some colour in a b/w image. If you make a mistake you can use the undo history to reset where you made the mistake. Here I duplicated the image , desaturated it, set my "from point" on the coloured image and cloned on the b/w layer to bring back the colour in selected spots.
I hope this has jogged your memory or made you think a bit more about the "humble" clone tool and its uses!