After posting some images on this subject I was asked to make a tutorial (my first!). So here it is.
ACKNOWLEDGEMENT: This is an extended tutorial based on a ‘starter tutorial’ in the Gimp Chat Dream multifrac views thread by Fran6, whereby users are invited to create and “view fractals as a relief map”. It was this particular thread that introduced me to what I now call ‘fractal relief’ images. I enjoyed them so much that I pursued them with a variety of GIMP options and I thank Fran6 for that.
NOTE 1: The ‘GMIC fractalize’ filter comes with a note that it utilises multiple random values to generate the fractal impression of the original image against which it is run. Therefore every time it is run there will be a different result. Please allow for this factor when comparing your results to those in this tutorial; whilst artistic content is important, the key element here is the process work flow.
NOTE 2: The ‘GMIC fractalize’ filter can be processed against any image to produce an outstanding effect. For the purposes of this ‘fractal relief’ tutorial and its desired outcomes, only typical GIMP gradient blends and line art images are used. However, the work flow described below for tutorial 1 can be applied against any image.
NOTE 3: This PDF tutorial comes in a zip file (below) that also contains:
1.The line art image used in the tutorial - but of course you can use your own preferred items.
NOTE 4: This tutorial has two separate parts being:
1.This tutorial -
Fractal relief images made using typical GIMP gradient blends - simple.
2.A second tutorial post,
Sculpture Framed Fractal relief images that contain foreground objects and a sculptured background ‘frame’, each separately actioned with GIMP gradient blends, fractalised and merged to produce the final image - still simple but more fiddly!!
In each case some additional suggestions are proposed that may add to or improve the outcome result to meet your personal preferences, particularly in respect of colour, saturation and brightness. Having completed these tutorials it is highly recommended that you try out different options and settings to those defined in the tutorial. That is exactly what I did in the first place!
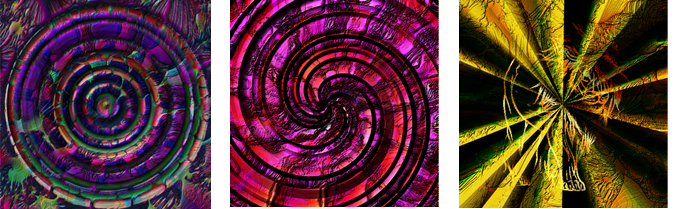
As a result of completing this tutorial, you will be able to produce something similar to the images below but please remember results will be different every time!
Tutorial 1 - fractal relief image from a GIMP gradient blend
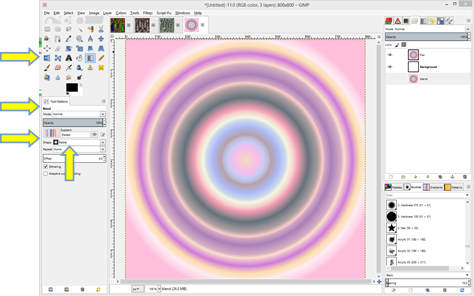
Step 1:1.Open a new image 800 x 800 pixels
2.Create a new transparent layer
3.Select the new layer
4.Select the blend tool
5.Select a Gradient - preferably one with multiple vertical colours
6.Select a Shape - Radial (yes you can use other blend shapes too!)
7.Position cursor at 400 x 400 pixels and draw horizontally across and just past the edge of the canvas after which you should now have something like this -
 Step 2:
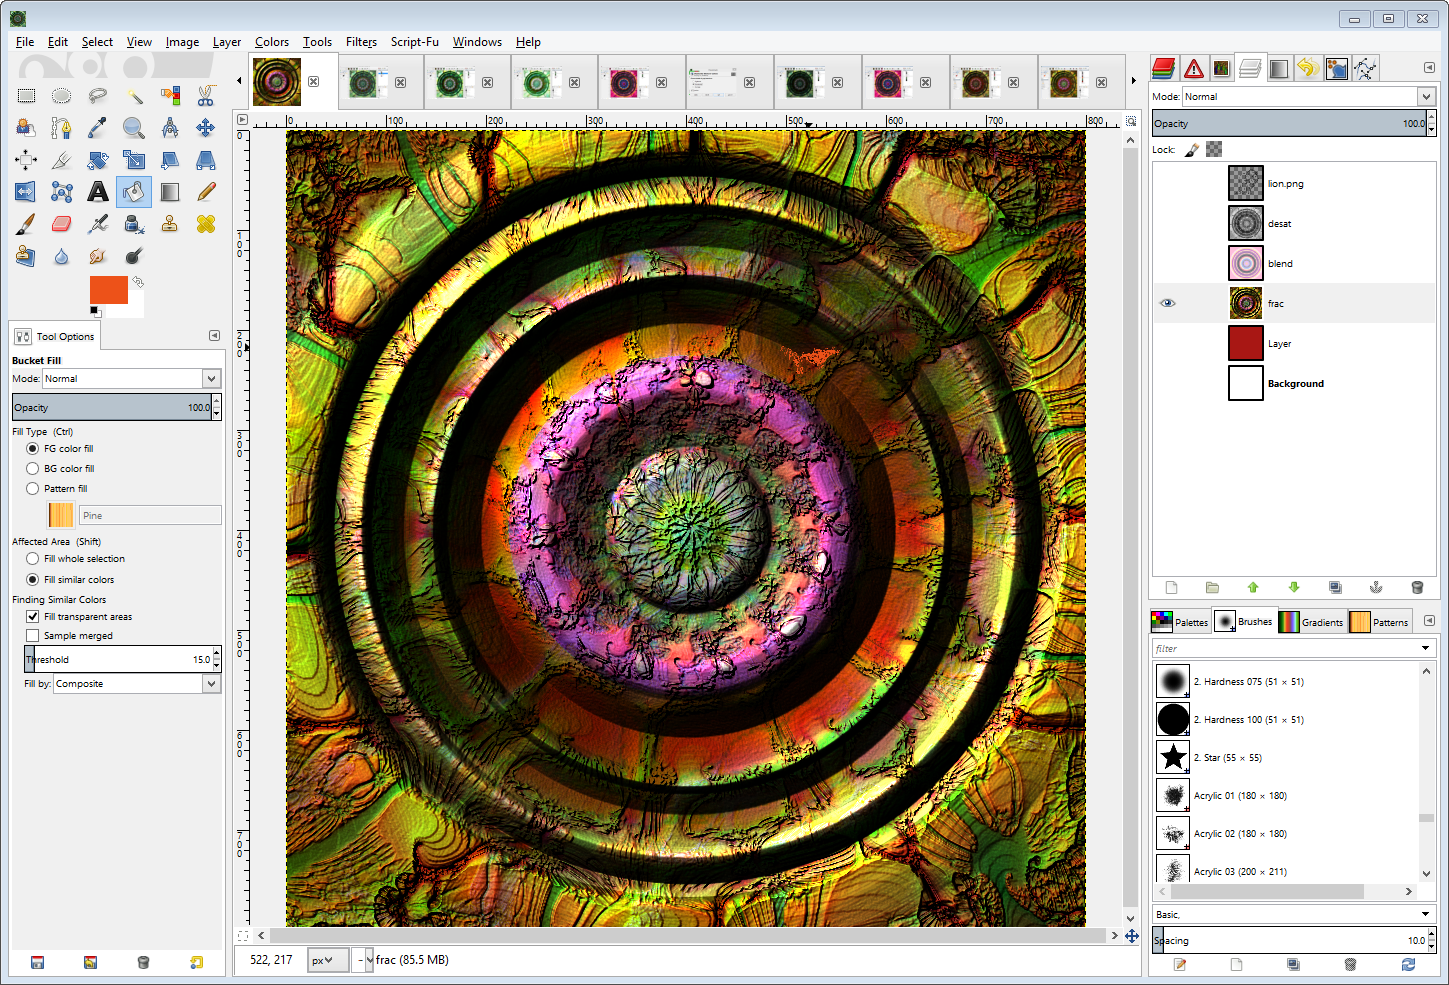
8.Rename ‘Layer’ to ‘frac’ - (for fractal)
9.Duplicate the ‘frac’ layer
10.Re-name the duplicated lay as ‘blend’ and re-position it below the ‘background’ layer - we may need it later!
11.Ensure the selected layer is now the ‘frac’ layer
12.Select Filters>GMIC - a new GMIC window opens - select >Artistic>Fractalize
13.Click ‘OK’ - the GMIC window will close as processing continues on the image - at the end of which you should have something like this -
 Step 3:
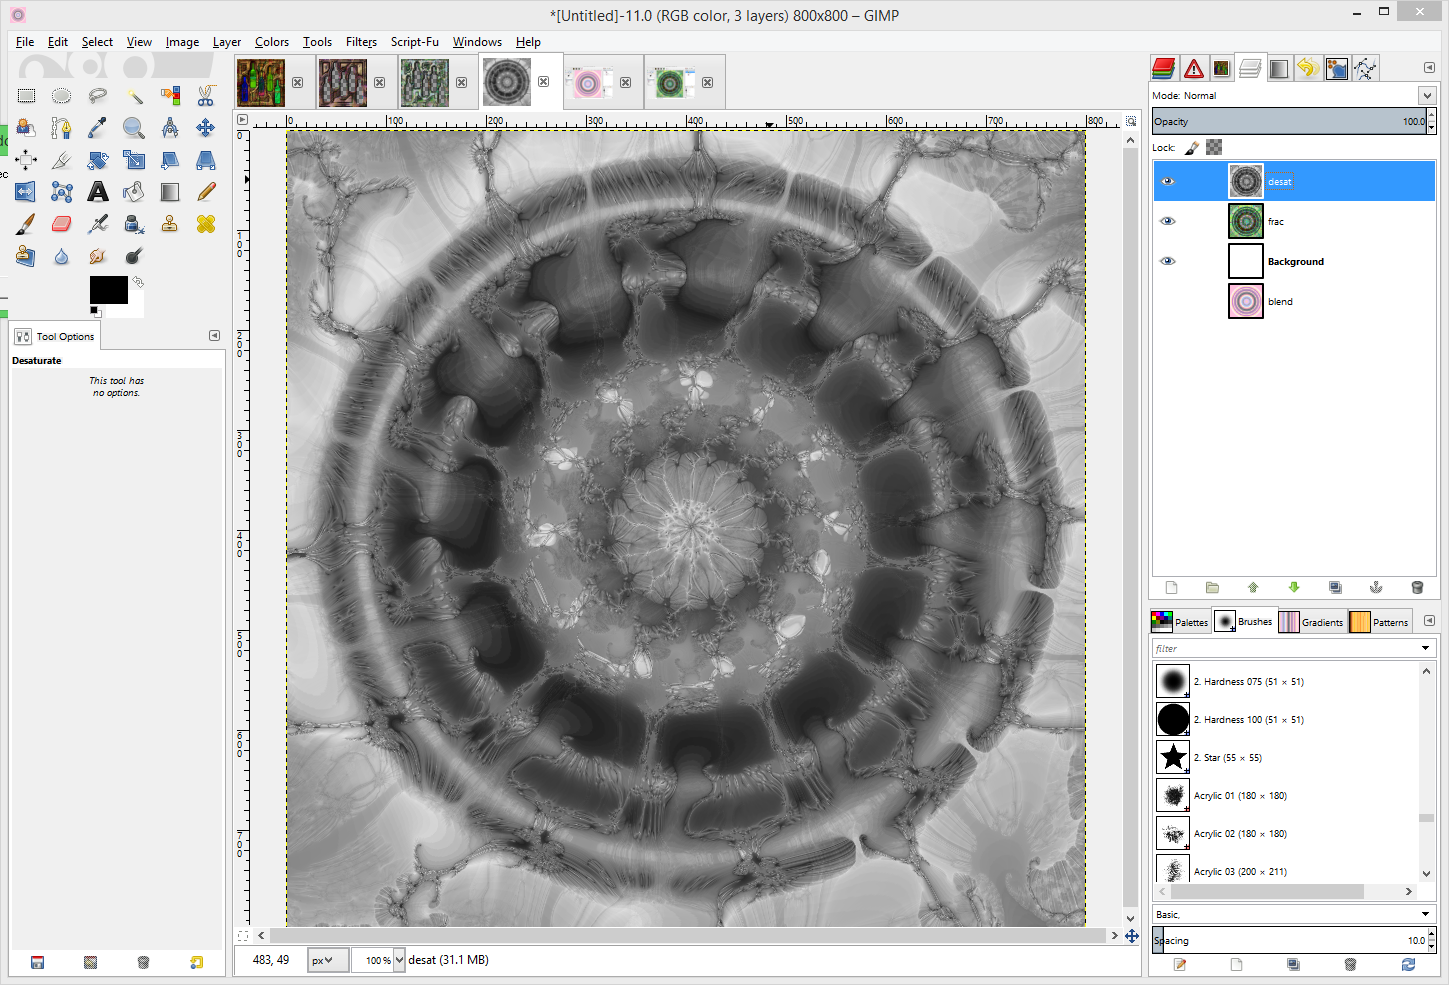
14.Select ‘frac’ layer and duplicate it
15.Rename this new layer from ‘frac copy #1’ to ‘desat’ for desaturated
16.Ensure layer ‘desat’ is selected
17.Select Gimp menu item Colours>Desaturate to open the Desaturate window**
18.In the Desaturate window select the ‘luminosity’ option as shown below
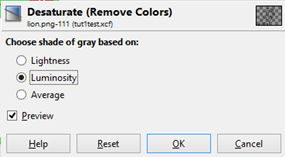
19.Click ‘OK’ to apply the effect and close this window - this creates your bump map after which you should have something like this -
 Step 4:
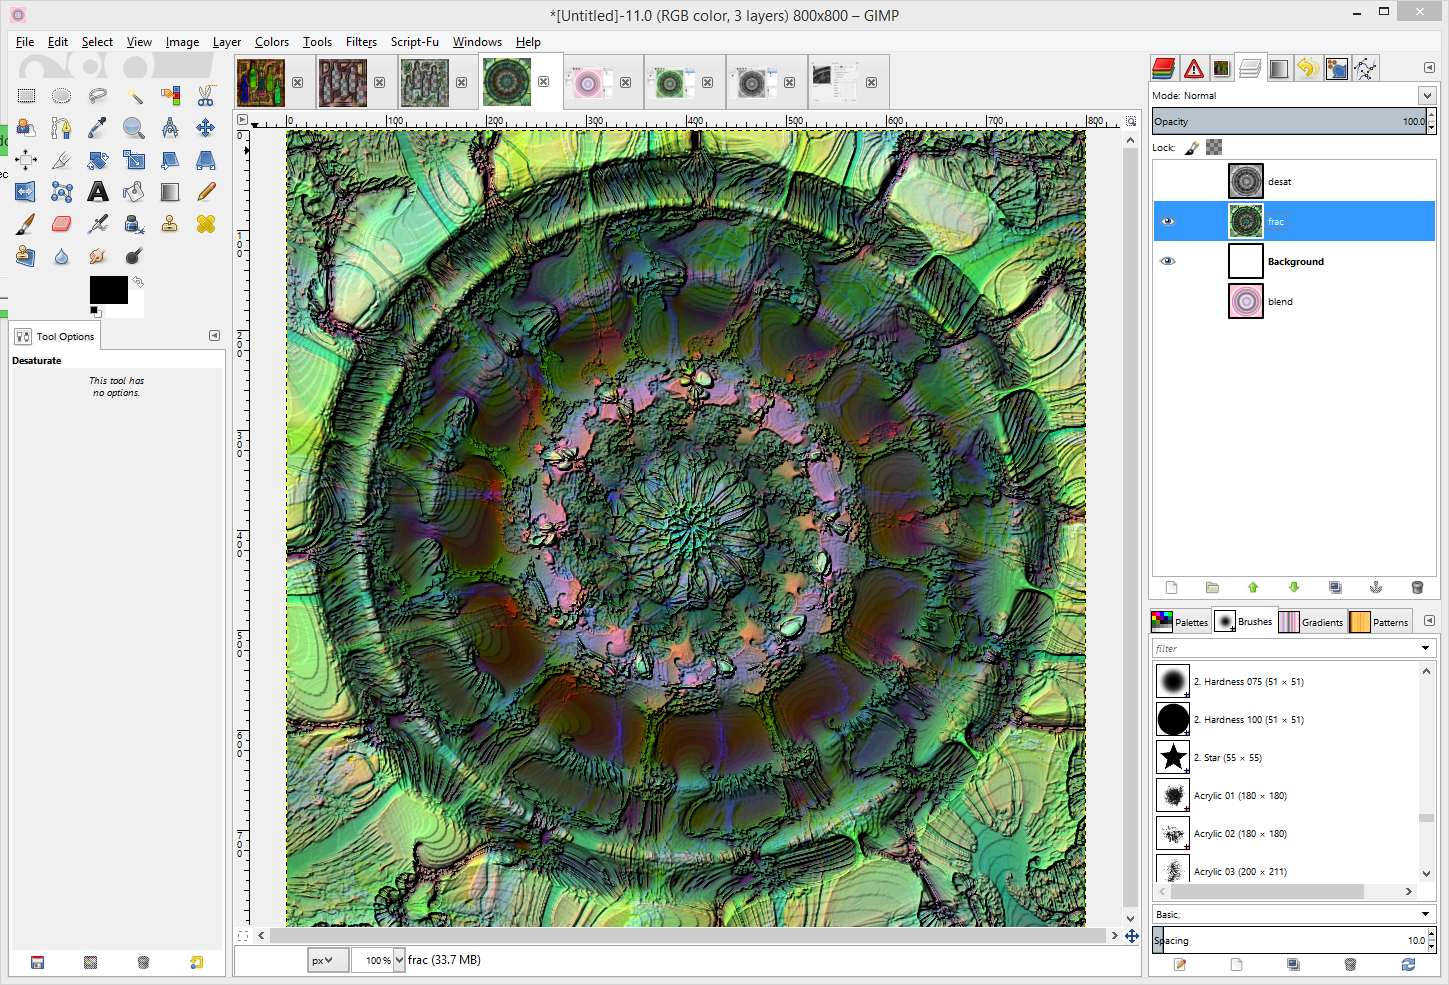
20.Ensure the ‘frac’ layer is selected
21.Select Gimp menu item Filters>Map>Bump Map to open the Bump Map window as below -
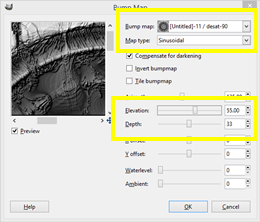
22.Select the layer ‘desat’ from the Bump map selection drop down
23.Select ‘Sinusoidal’ from the’ Map type’ selection drop down
24.Select ‘55’ on the ‘Elevation’ slider
25.Select ‘33’ on the ‘Depth’ slider - try other depths for effect in the preview pane
26.Click ‘OK’ to apply the bump map and close the window
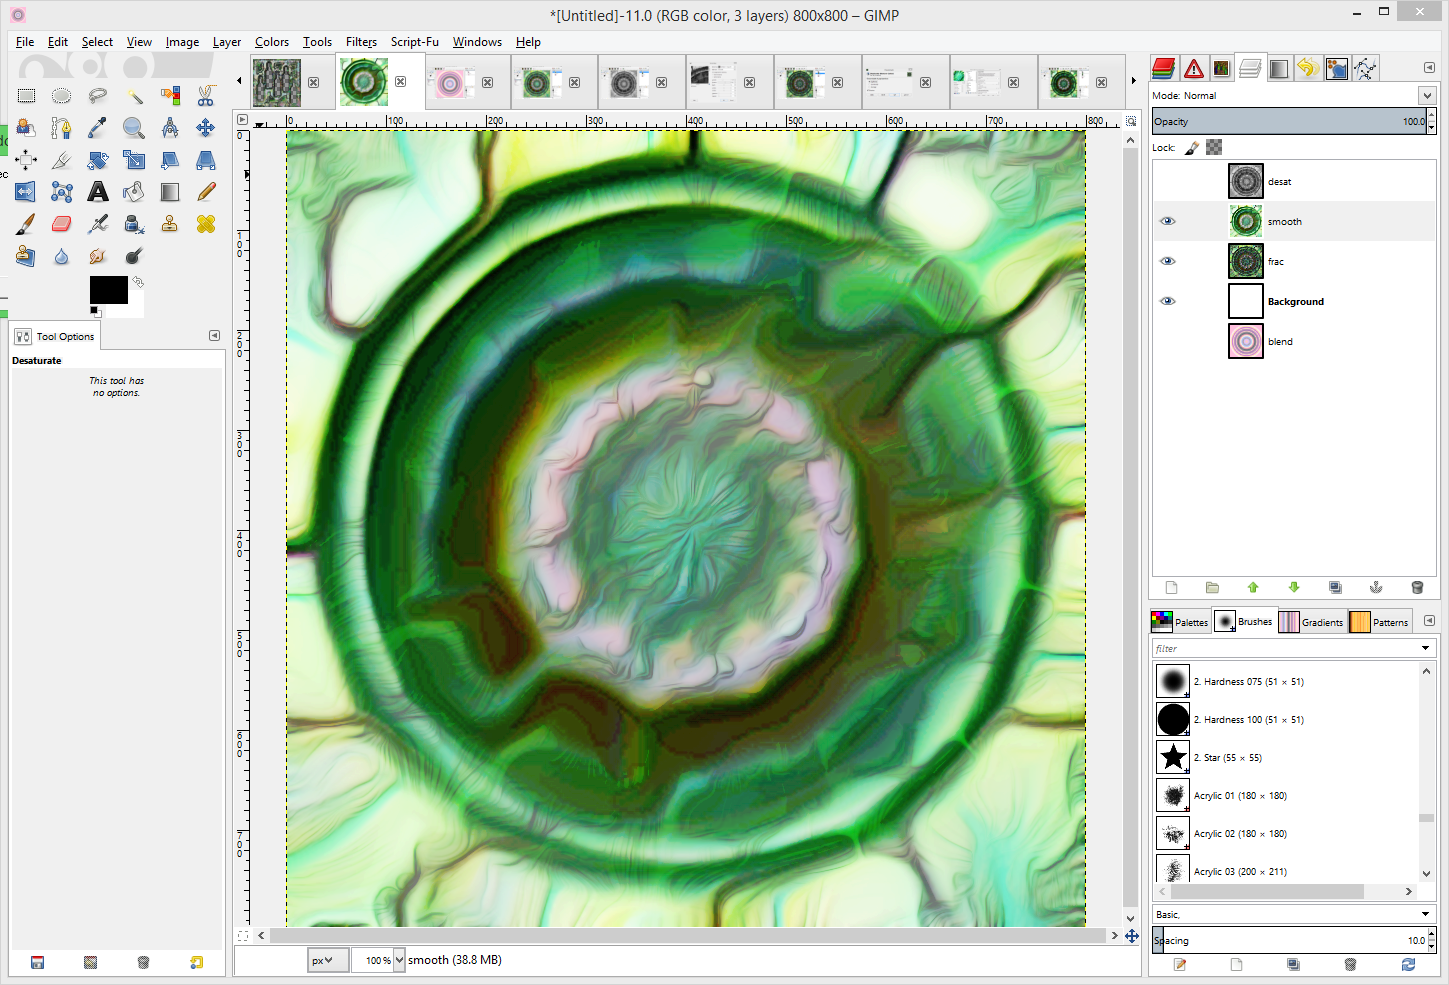
27.Click the ‘eye’ symbol on the ‘desat’ layer to hide it and reveal the now bumped ‘frac’ layer, which should look something like this -
 Step 5:
28.Select the ‘frac’ layer and duplicate it
29.Rename this ‘frac copy #1’ layer as ‘smooth’
30.Select Gimp menu item Filters>GMIC>Artistic>Dream smoothing to open that window as below
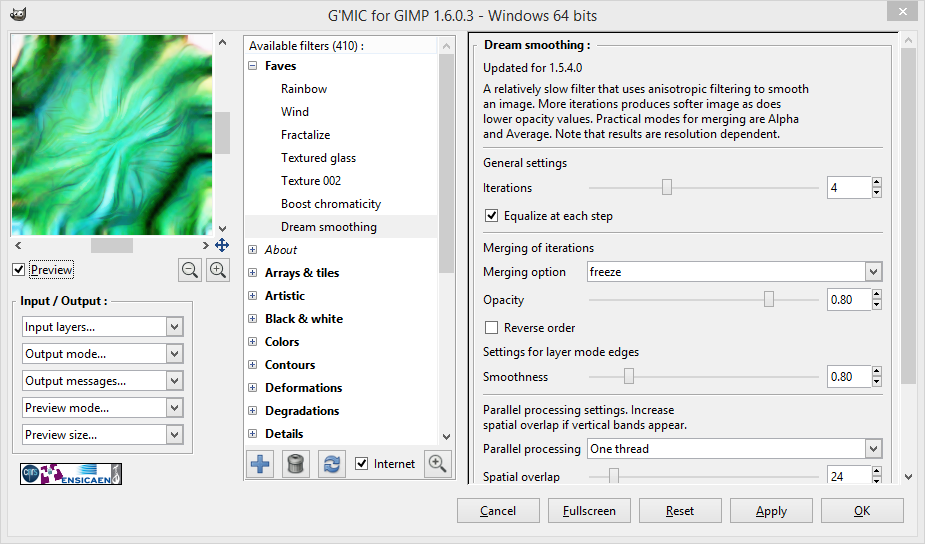
31.Click ‘OK’ to apply the smoothing effect and close the GMIC window - note that it may take a few seconds for this smoothing action to complete. You should now have something like this -
32.With the ‘smooth’ layer selected change the blend mode to Multiply (or say Darken only or Overlay depending on your personal preferences) and you should now have something that looks like this -
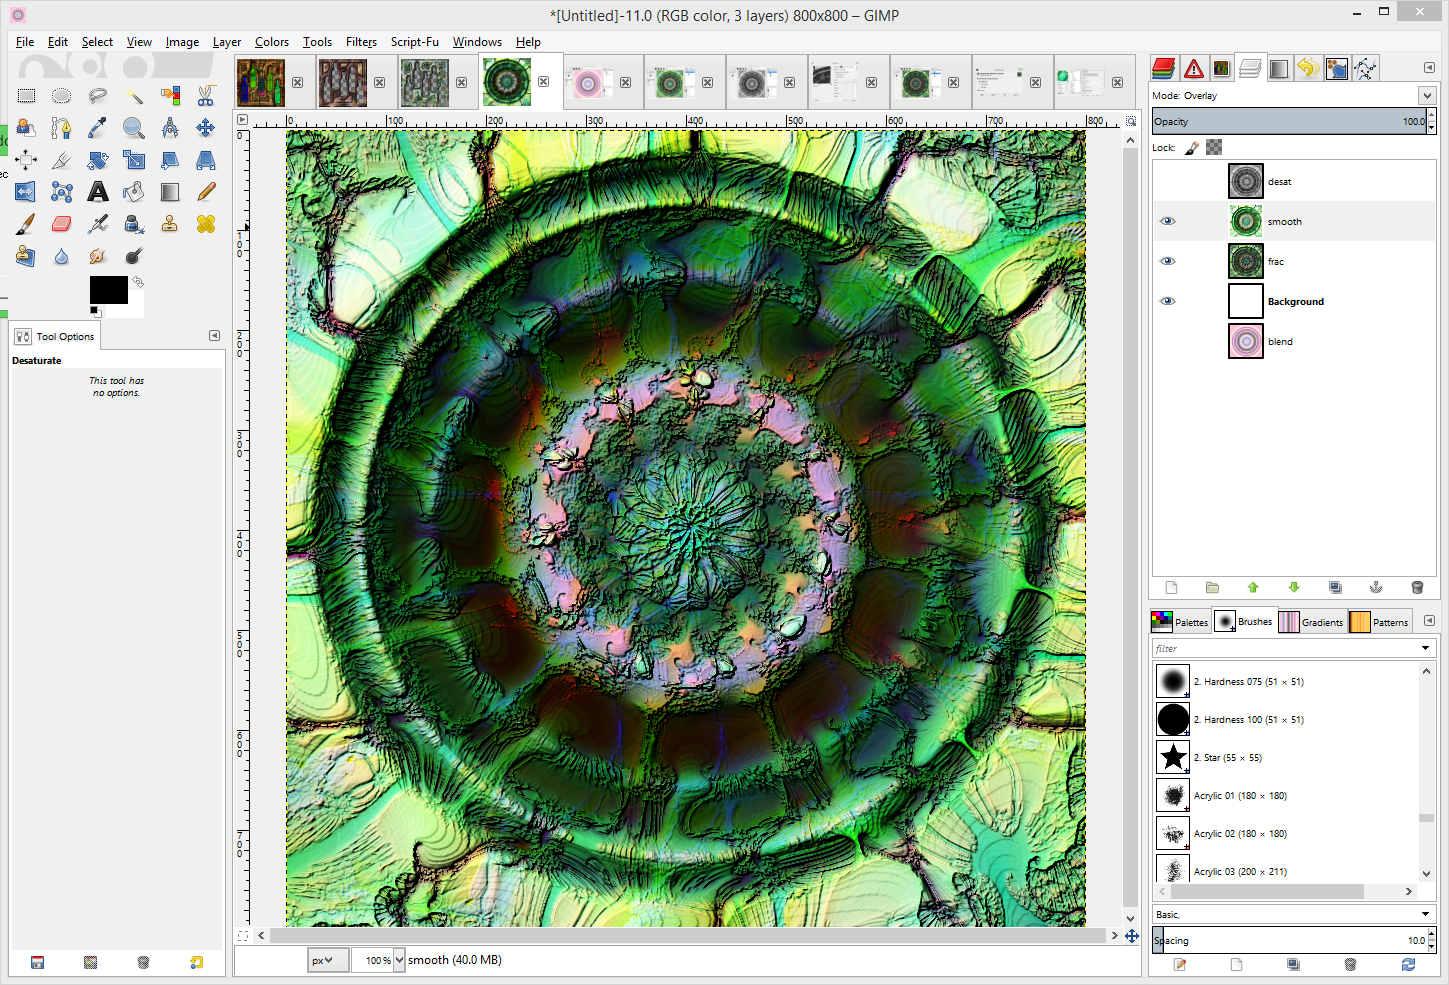
You have now completed the basic tutorial and should have a ‘fractal relief’ image looking something like this (although with a different pattern and colours!)
Step 6: (Additional tweaks - optional)Typically though, to suit my preferences, I like to embellish or brighten this final image with a tweak or two which can include one or more of the following simple but quick tweak types:
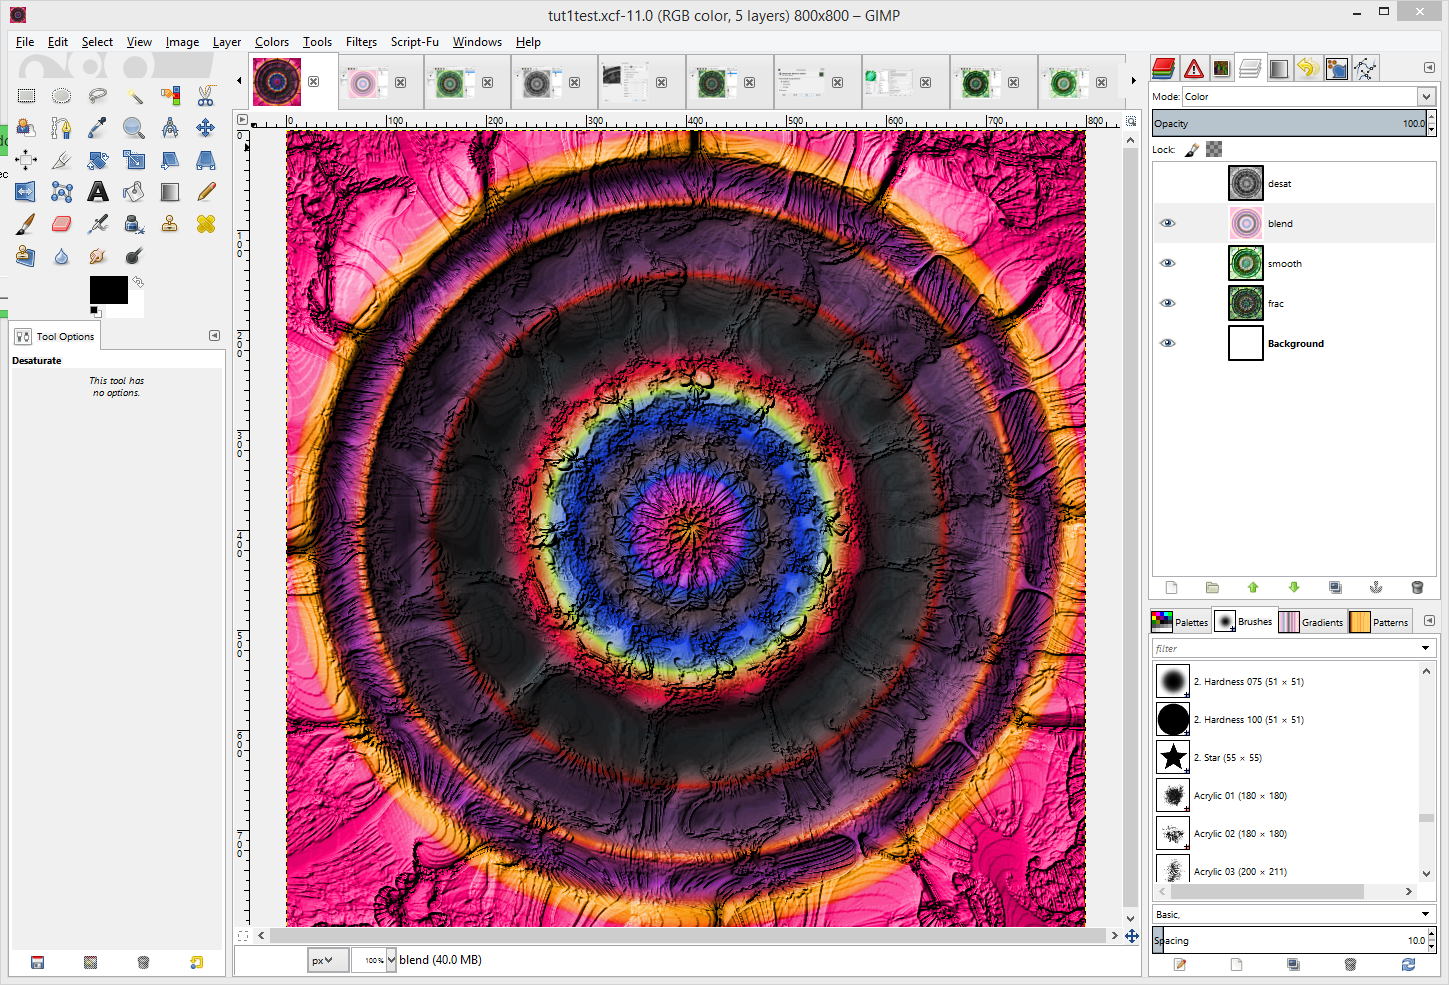
Make the ‘desat’ layer visible, change its mode to Overlay or Grain merge or Multiply to suit -
Or relocate the original blend layer above the ‘smooth’ layer and change its mode to suit
Or place a black, white or other coloured layer, even with quick ‘cut outs’ above the fractal images and change their mode to Overlay (or other) to act as a colour filter

Or use the original radial blend layer to Bump Map the fractal relief image; the image below had visible layers merged then was re-bumped 5 times
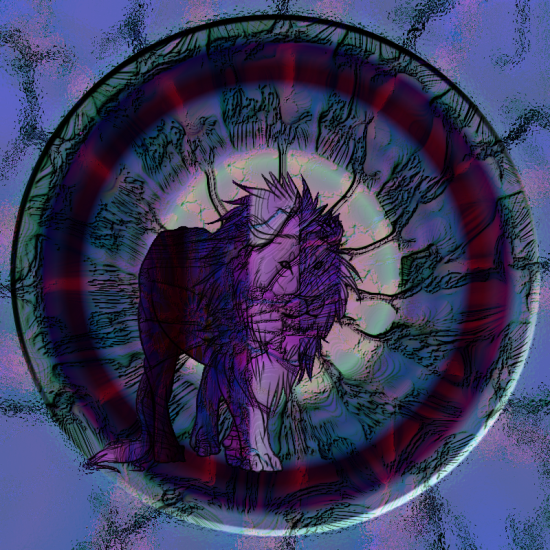
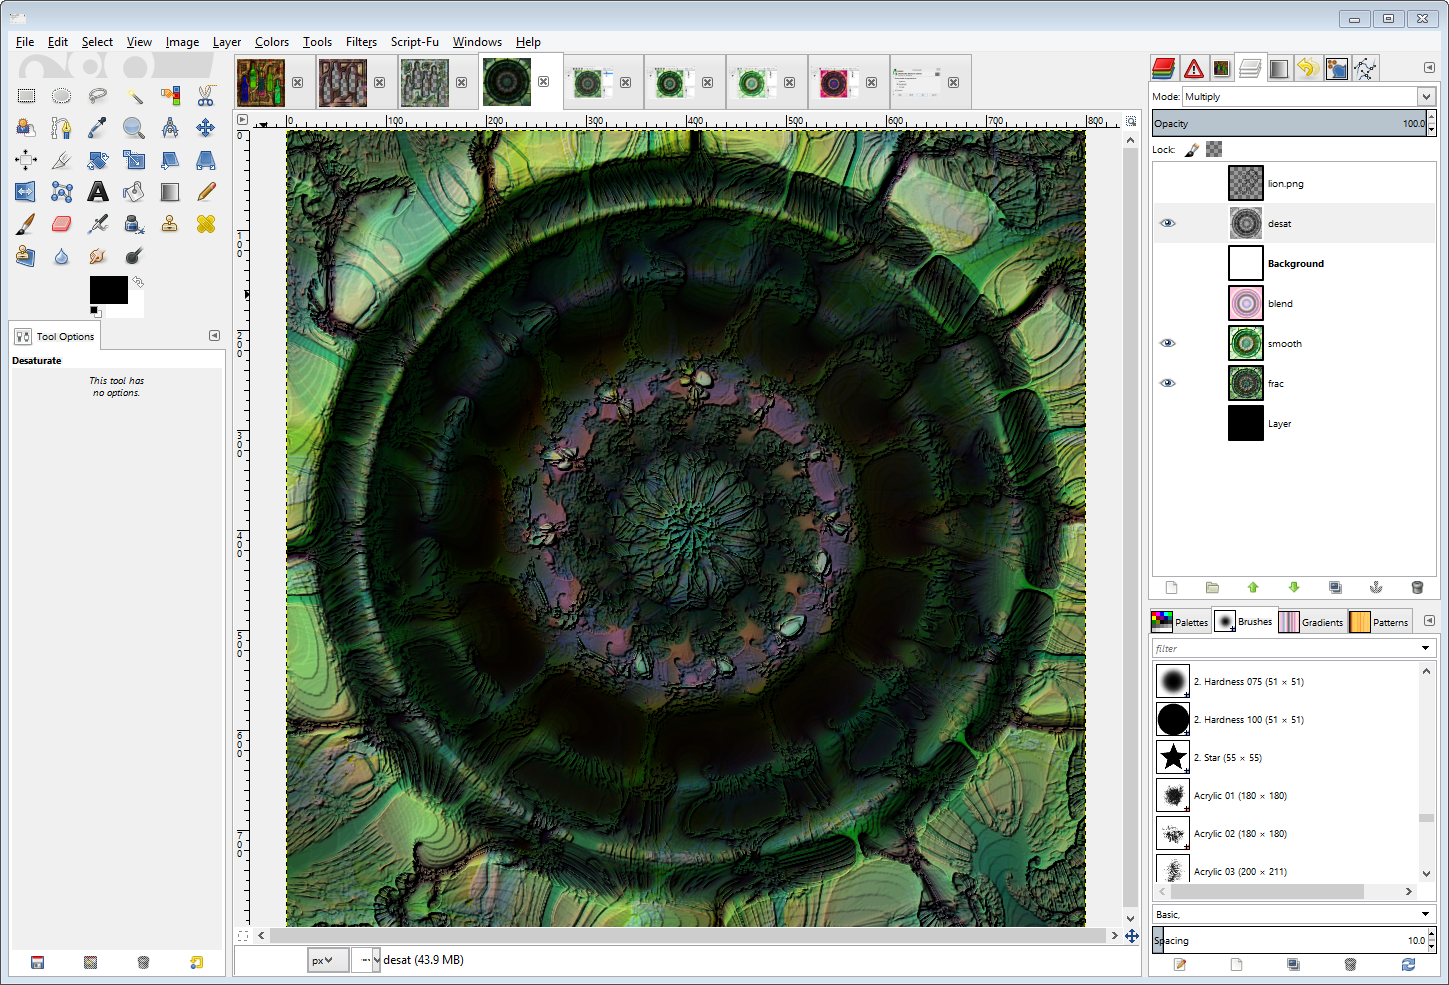
My current favourite tweak is to place another (line art) object on top of a suitable fractal relief image. You can apply the line art by itself or use the same technique as above for this line art object, that is:
Open the selected line art image as a layer above the fractal relief; apply a a linear blend, then a fractal effect to the image (my favourite lion!)
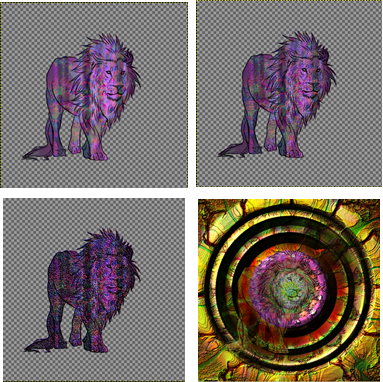
Possibly bump map the fractalised image; then maybe even apply a GMIC>Samj> Couleurs metalliques or Texture 001, then apply a suitable blend mode to achieve the desired final effect.
There are of course also many other tweaking options in the GIMP Colors, Layer Effects and Filters menus.
So please experiment and enjoy GIMP!!