BLANK CD
a GIMP tutorial by dietmar
Please notice:
Red arrows/lines/etc. are not part of the image and are only intended to
clarify some technical issues!
I also recommend activating "View -> Snap to grid" for better selection
management.
I used GIMP 2.8.14 on Win7 64Bit for this, so I am not sure whether it will
work on older versions of GIMP.
And remember: Save often, perhaps with different filenames for the different
steps, to make reproducing or changing afterwards easier!
Here we go...
Because I tried to reproduce the dimensions of an original blank cd here, I
recommend to use my values in this tutorial. If you want to create a bigger
image, calculate the dimensions accordingly!
* Create a new image, 600x600px, with a white background.
BASE SHAPE
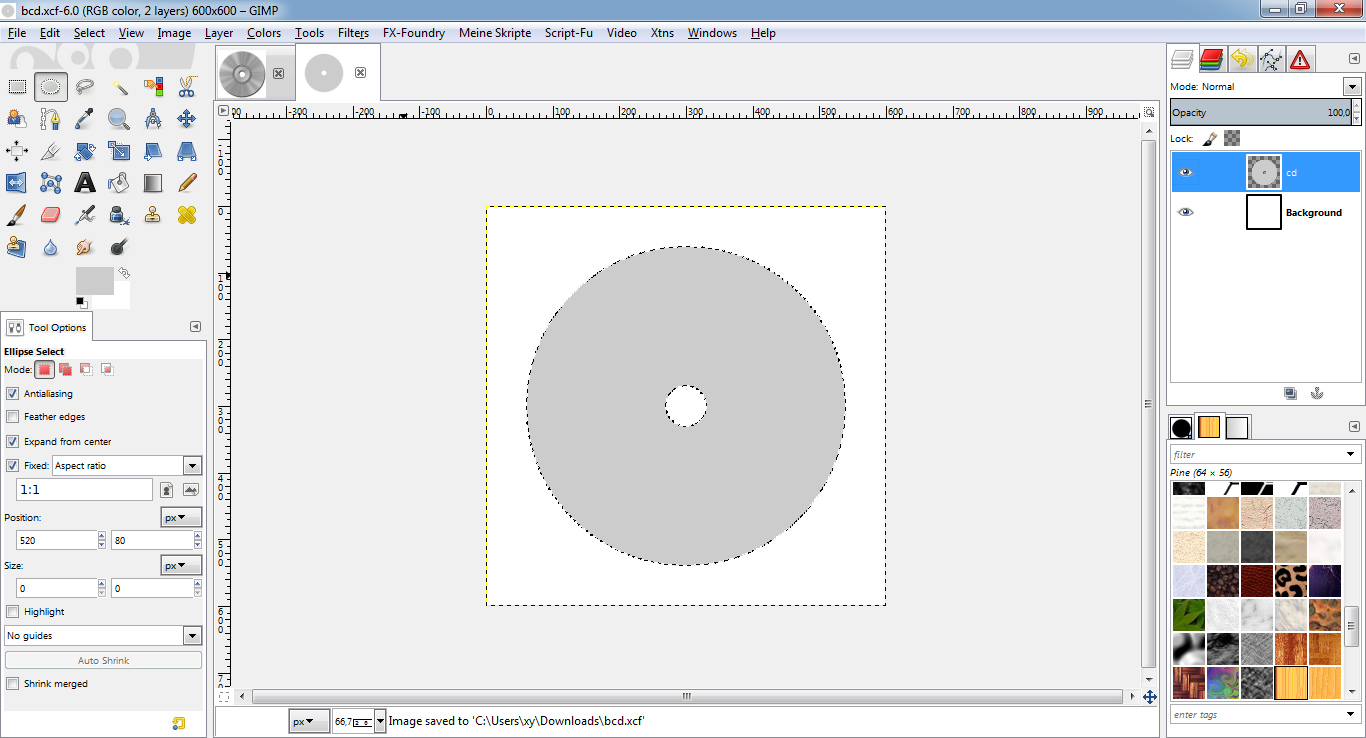
* New layer "cd".
* Click in the center of your image (here: at 300:300) and drag a circular
selection with the ellipse select tool ("expand from center", "fixed
aspect ratio 1:1". My selection is 480x480px.
* Select -> To path "outer circle".
* Fill selection with a light grey (#cccccc).
* Click in the center of your image (here: at 300:300) and drag a circular
selection with the ellipse select tool ("expand from center", "fixed
aspect ratio 1:1". My selection is 60x60px.
* Select -> To path "hole".
* Hit "Del" to delete the selection from the layer.
* "cd" layer -> Alpha to selection.
* Select -> To path "cd shape".
* This is what it should look like:
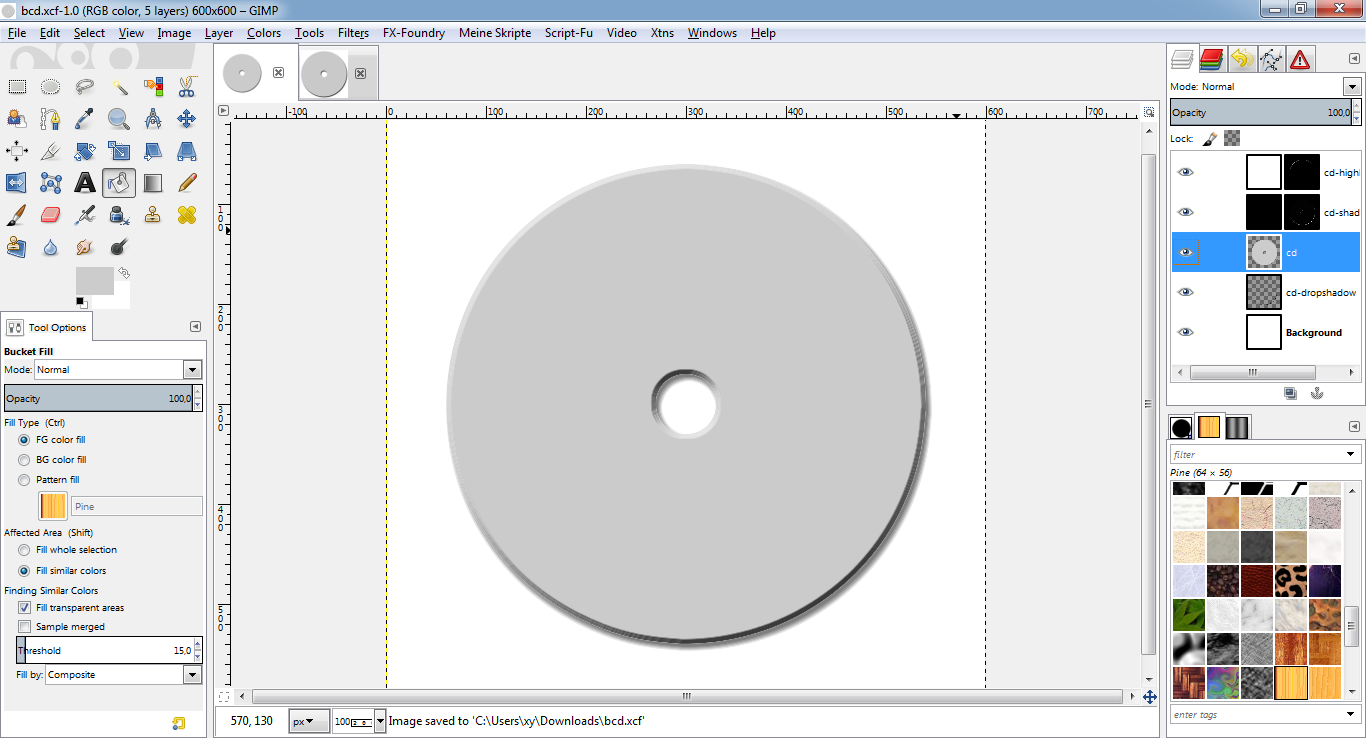
SHAPE EFFECTS
* Select -> None.
* Script-Fu -> Layer effects -> Drop Shadow, color black (#000000), opacity
50%, blending mode "multiply", size 5, angle 120, distance 5, "layer knocks
out drop shadow".
* Select the "cd" layer again.
* Script-Fu -> Layer effects -> Bevel and emboss, "Inner bevel", "Up", size
5, rest stays default.
* This is what it should look like:
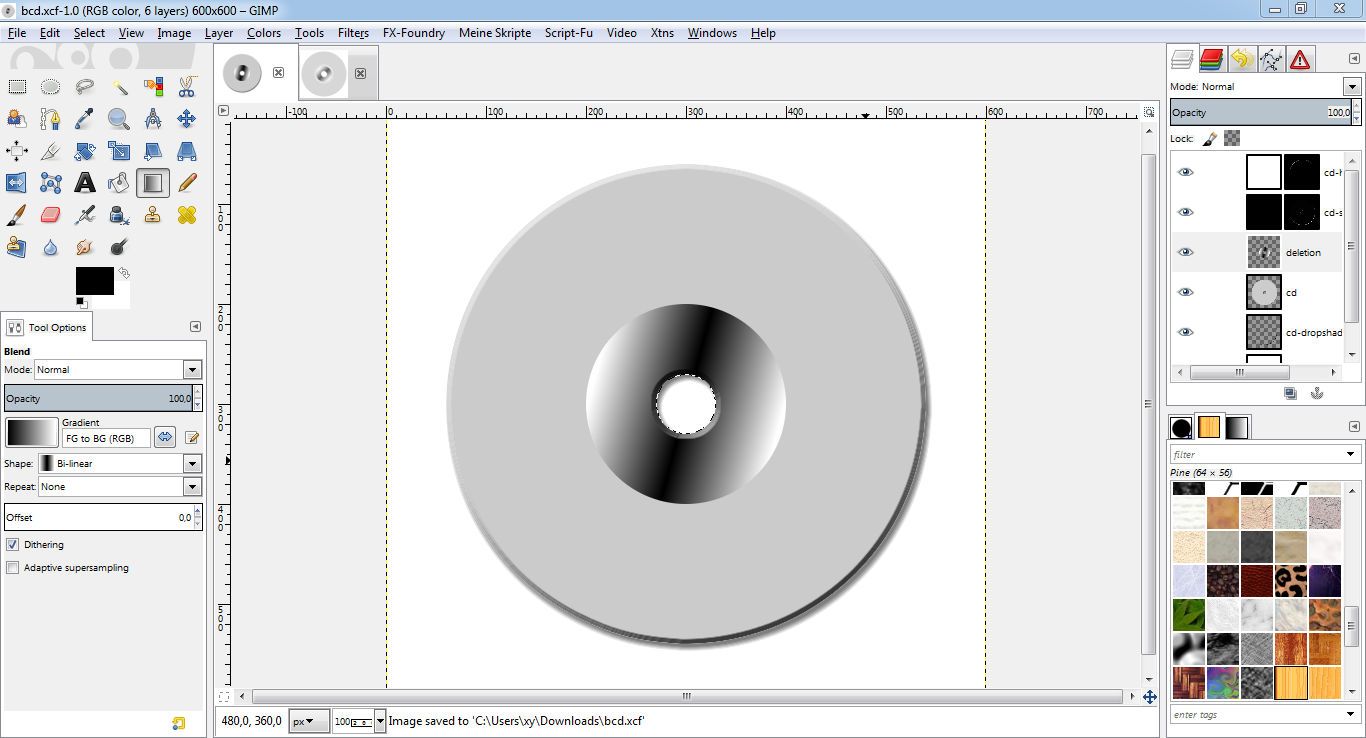
SURFACE
* New layer "deletion" above the "cd" layer.
* Click in the center of your image (here: at 300:300) and drag a circular
selection with the ellipse select tool ("expand from center", "fixed
aspect ratio 1:1". My selection is 200x200px.
* Select -> To path "inner circle".
* Drag a bi-linear gradient FG black (#000000) to BG white (#ffffff), as
shown:
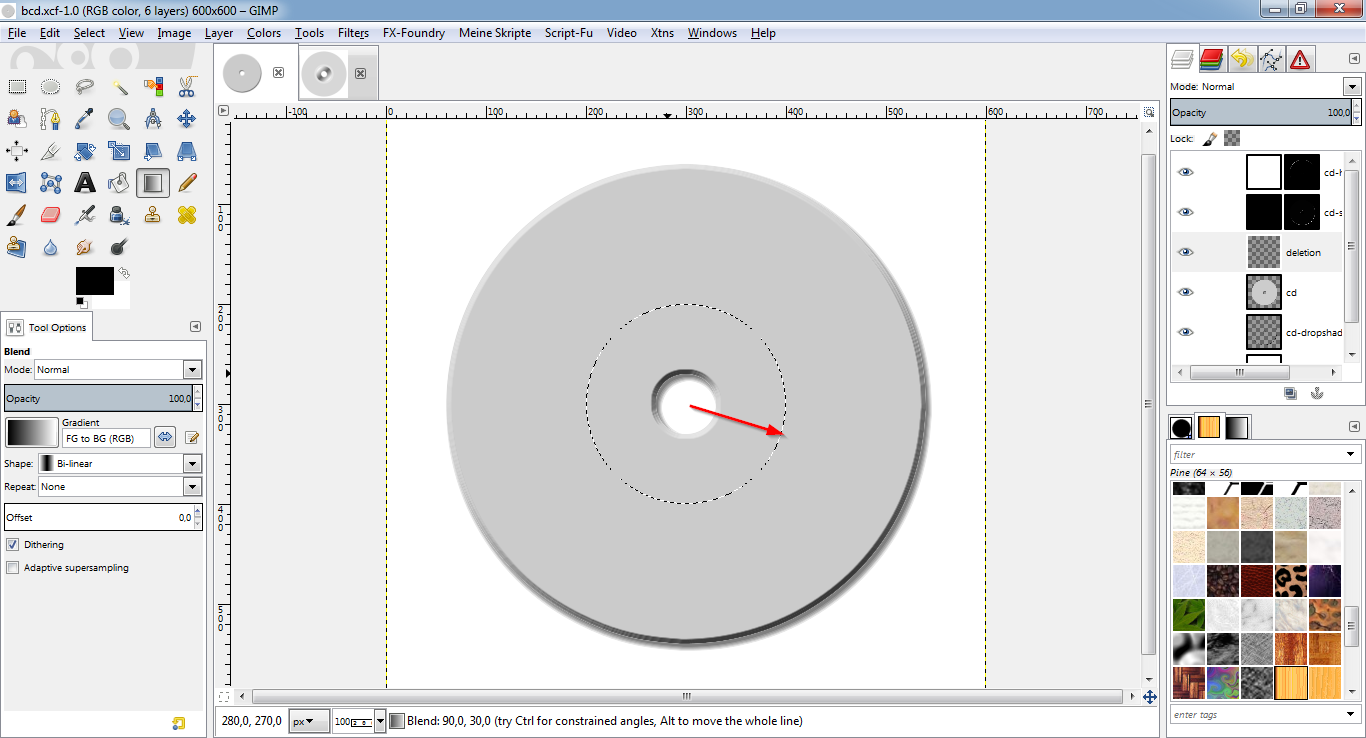
* Path window: "hole" -> Path to selection.
* Hit "Del" to delete the selection from the layer.
* Set the opacity of the layer to 20%.
* This is what it should look like:
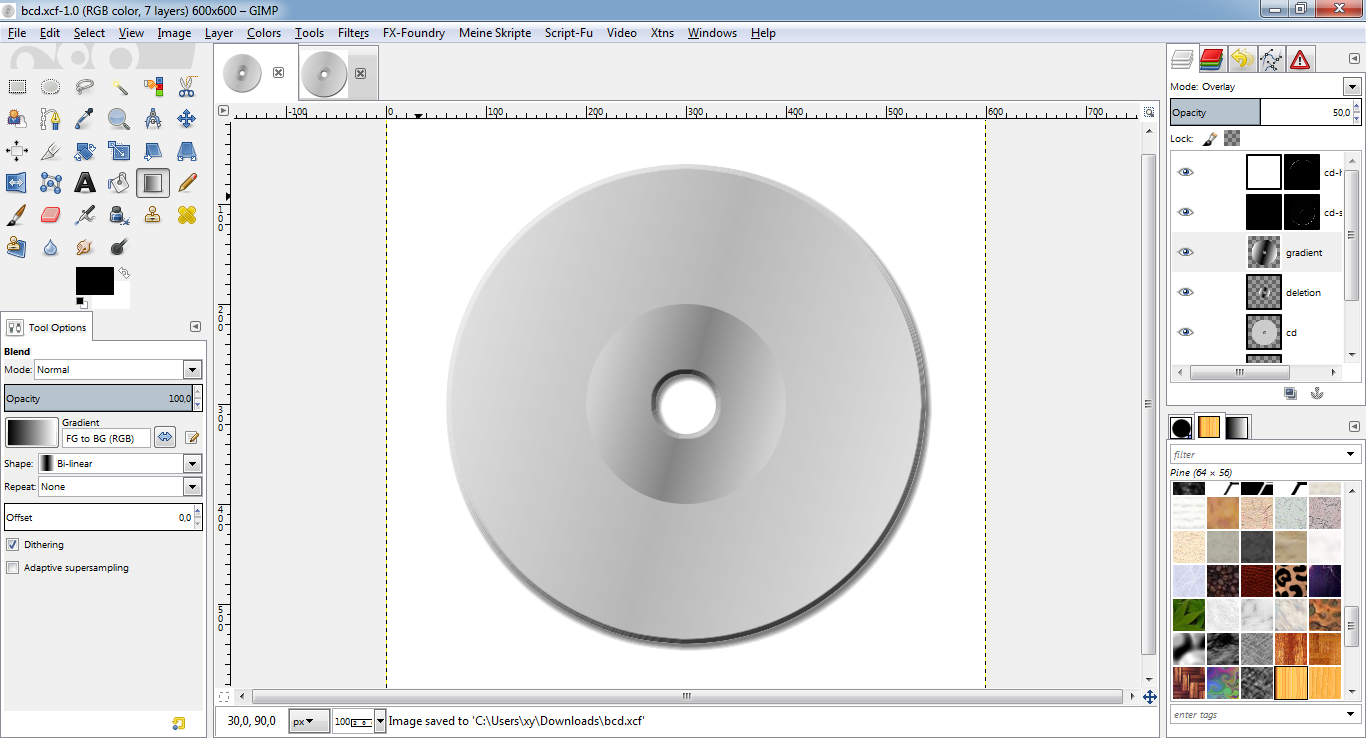
GRADIENT
* New layer "gradient" above the "deletion" layer.
* Path window: "cd shape" -> Path to selection.
* Drag a bi-linear gradient FG black (#000000) to BG white (#ffffff), as
shown:

* Change the layer mode to "overlay".
* Change the opacity to 50%.
* Select -> None.
* This is what it should look like:
* New layer "gradient2" above the "gradient" layer.
* Path window: "outer circle" -> Path to selection, "inner circle" ->
subtract from selection.
* Drag a conical sym gradient (I used "Flare Rays Size 1"), as shown:
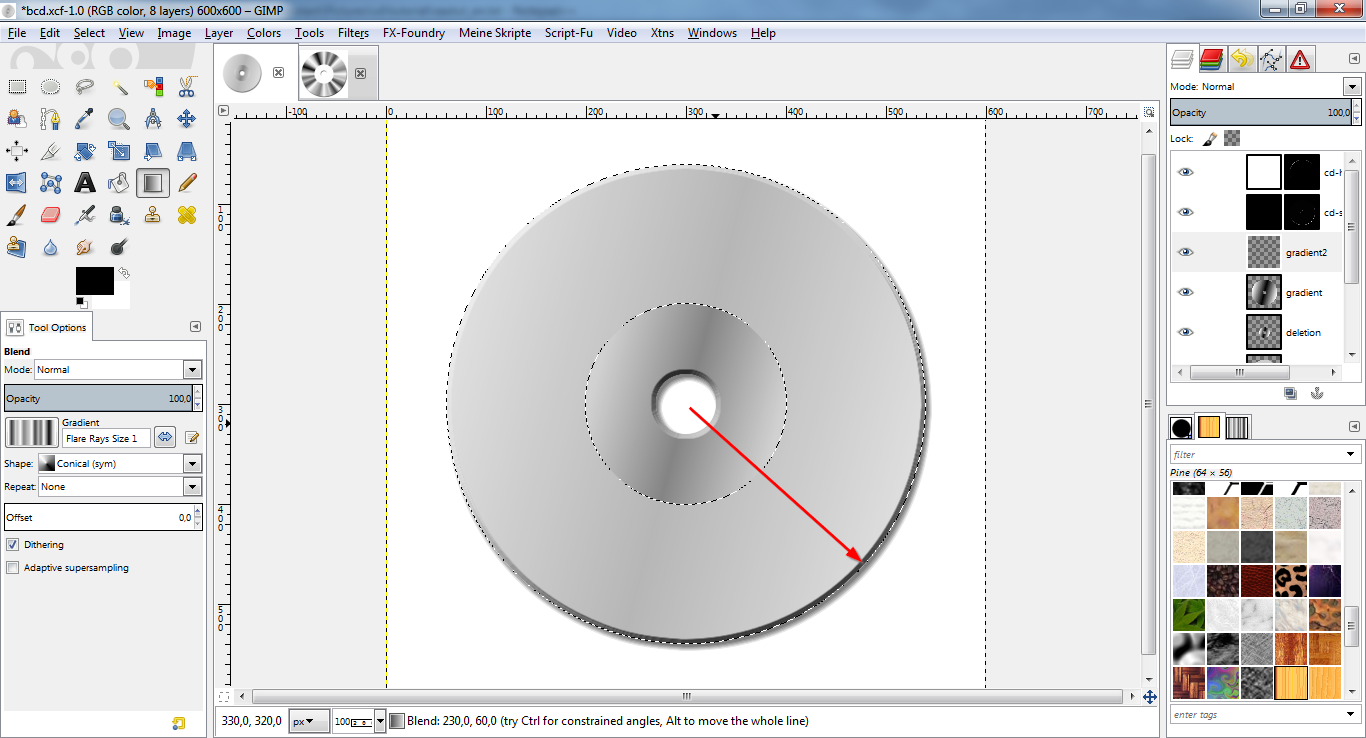
* This is what it should look like:
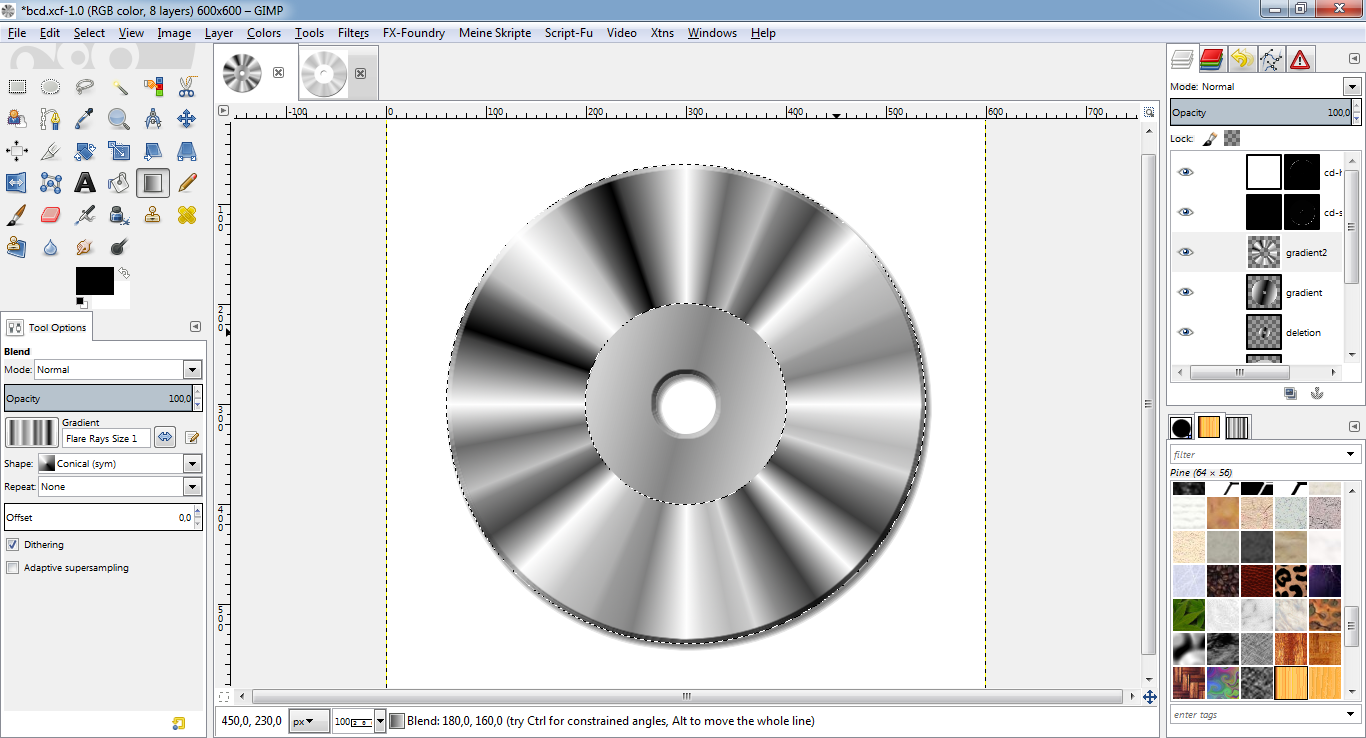
* Set layer mode to "difference".
* Set opacity to 25%.
* Select -> None.
* Duplicate this layer.
* Rotate this layer by 180% (Layer -> Transform -> Rotate 180.
* This is what it should look like:

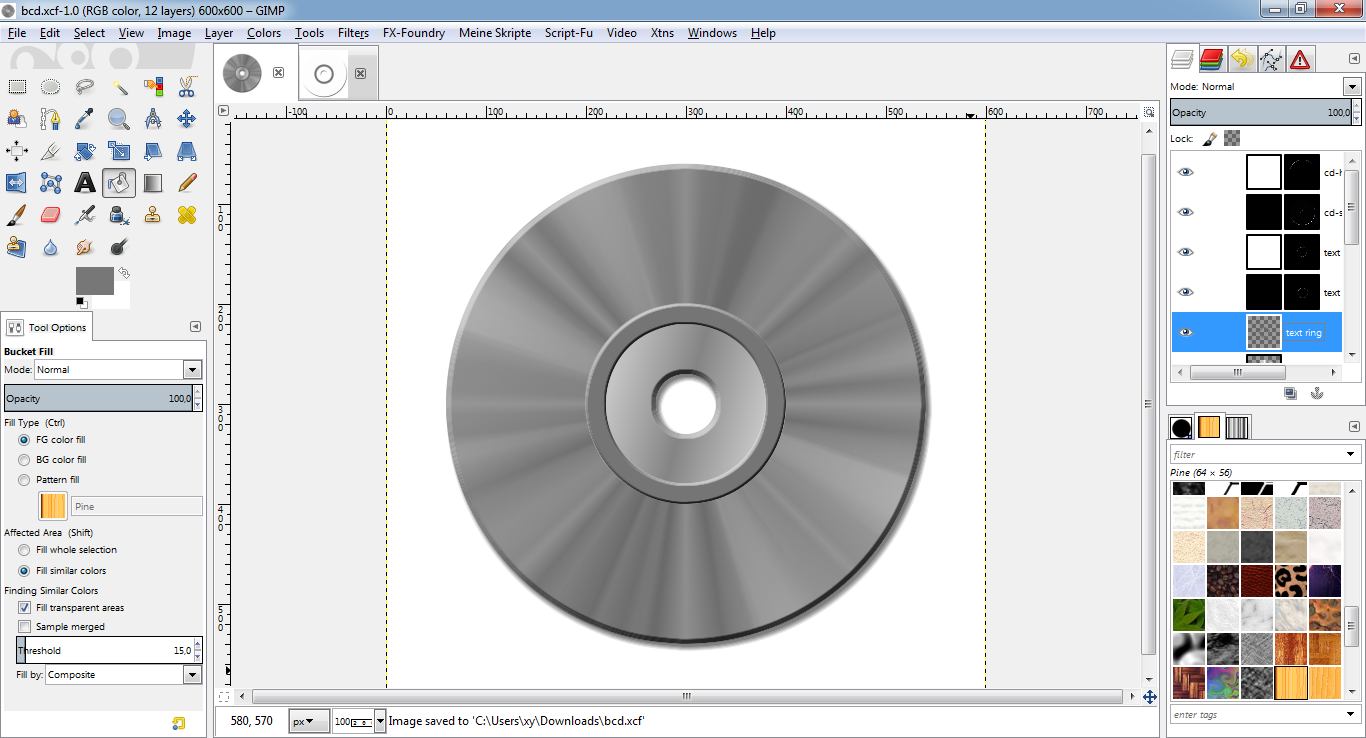
TEXT RING
* New layer "text ring" above the "gradient 2 copy" layer.
* Click in the center of your image (here: at 300:300) and drag a circular
selection with the ellipse select tool ("expand from center", "fixed
aspect ratio 1:1". My selection is 160x160.
* Select -> To path "text ring".
* Path window: "inner circle" -> Path to selection, "text ring" -> Subtract
from selection.
* Fill selection with grey (#777777).
* Script-Fu -> Layer effects -> Bevel and emboss, "Inner bevel", "Up", depth
2, size 2, rest stays default.
* Select -> None.
* This is what it should look like:
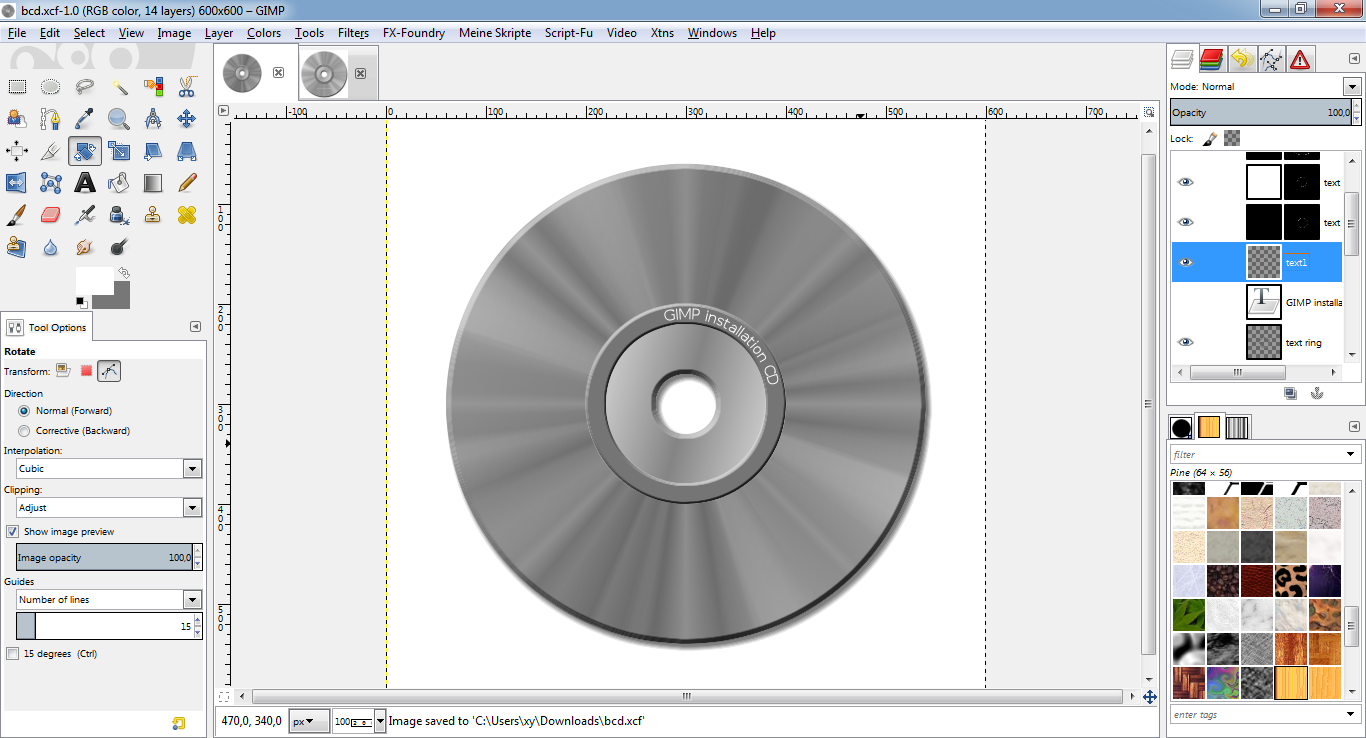
* Write first text label on the layer (I wrote "GIMP installation CD"), font
Sans, color white, size 15.
* Align this layer center of target (horizontally).
* Path window: "inner circle" -> Path to selection.
* Select -> Shrink, 10px.
* Select -> To path "text".
* With the "text" path still active, select the text tool and right click on
your text -> "Text along path".
* Use the rotate tool to rotate the path to about -15.
* Set white (#ffffff) as foreground color.
* New layer "text1" above text layer.
* Path window: Path to selection.
* Edit -> Fill with FG color.
* Hide the original text layer and hide the path.
* This is what it should look like:
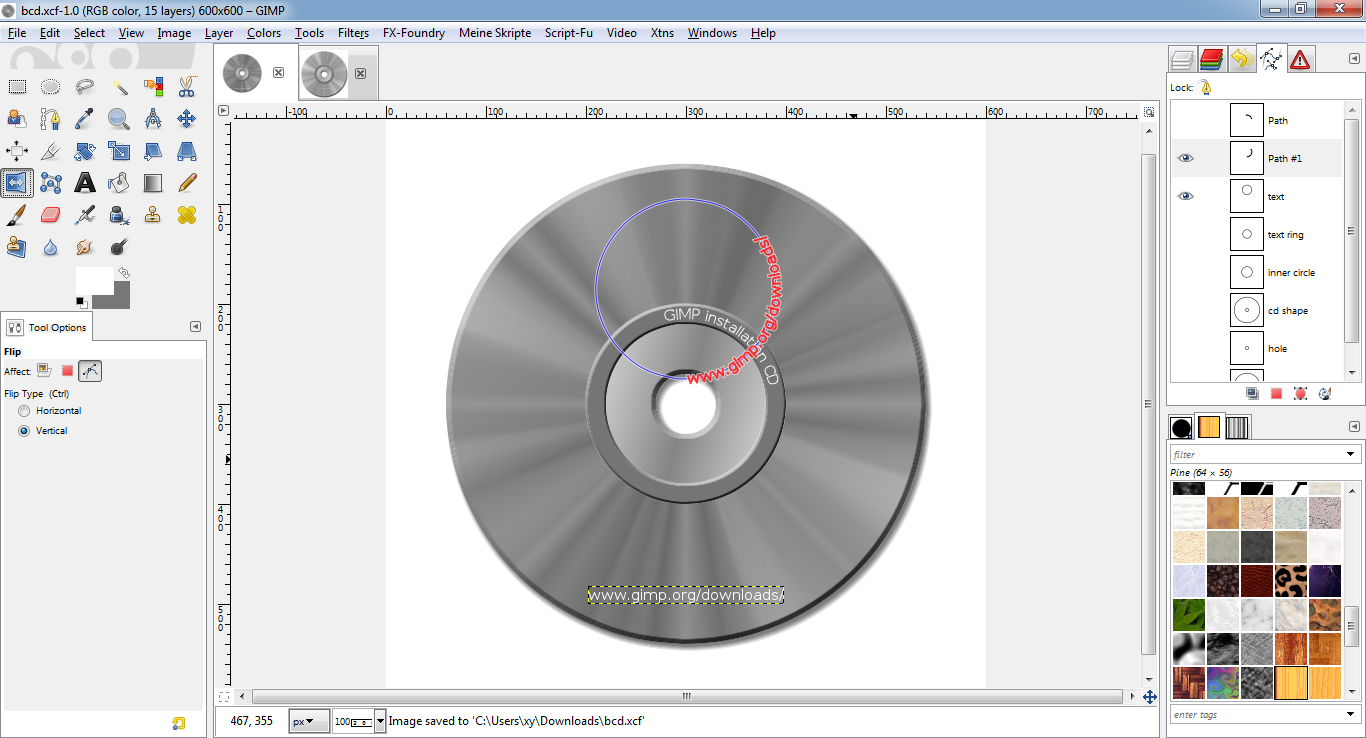
* Write second text label on the layer (I wrote "www.gimp.org/downloads/"),
font Sans, color white, size 15.
* Align this layer center of target (horizontally).
* Use your flip tool, vertical, on path, click on path to flip it.
* Select the text tool and right click on your text -> "Text along path".
* This is what it should look like:
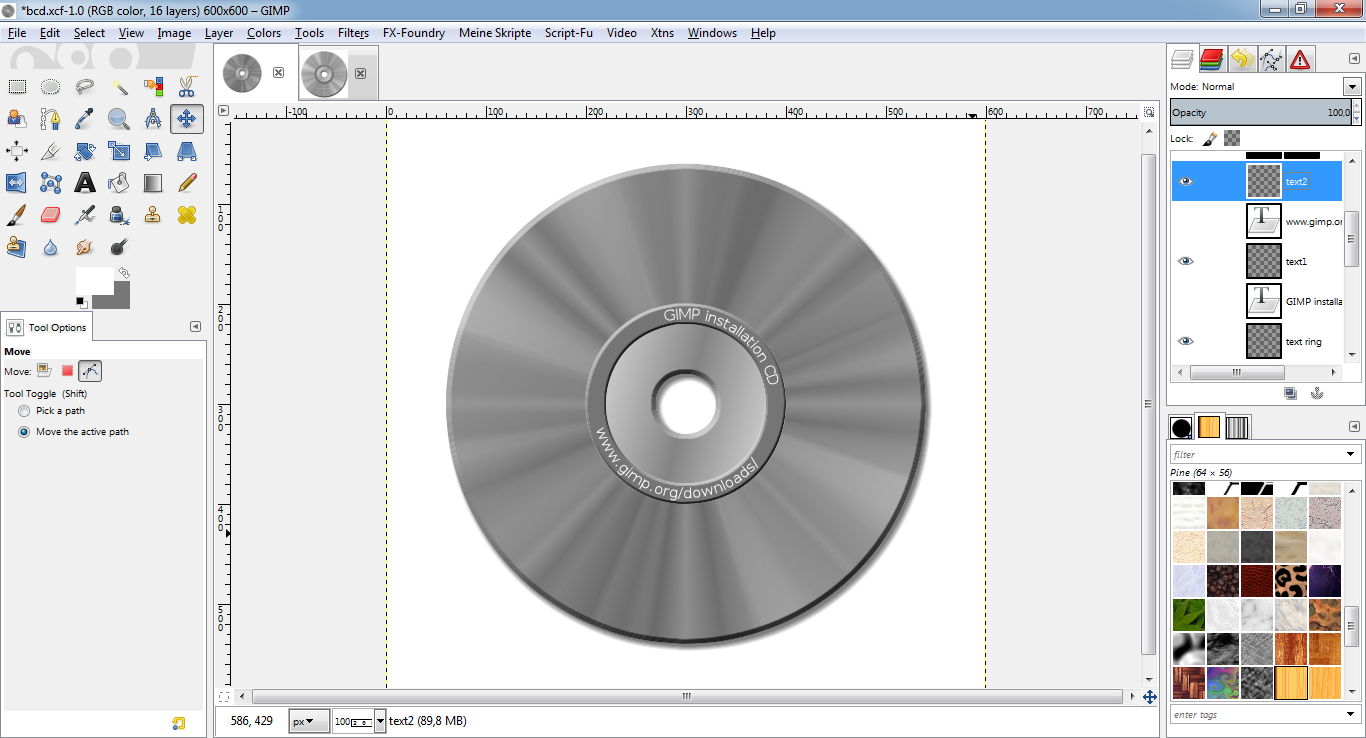
* Use the rotate tool to rotate the path to about 75.
* Use the move tool to move the path into the right position on your image.
* New layer "text2" above text layer.
* Path window: Path to selection.
* Edit -> Fill with FG color.
* Hide the original text layer and hide all the paths.
* This is what it should look like:
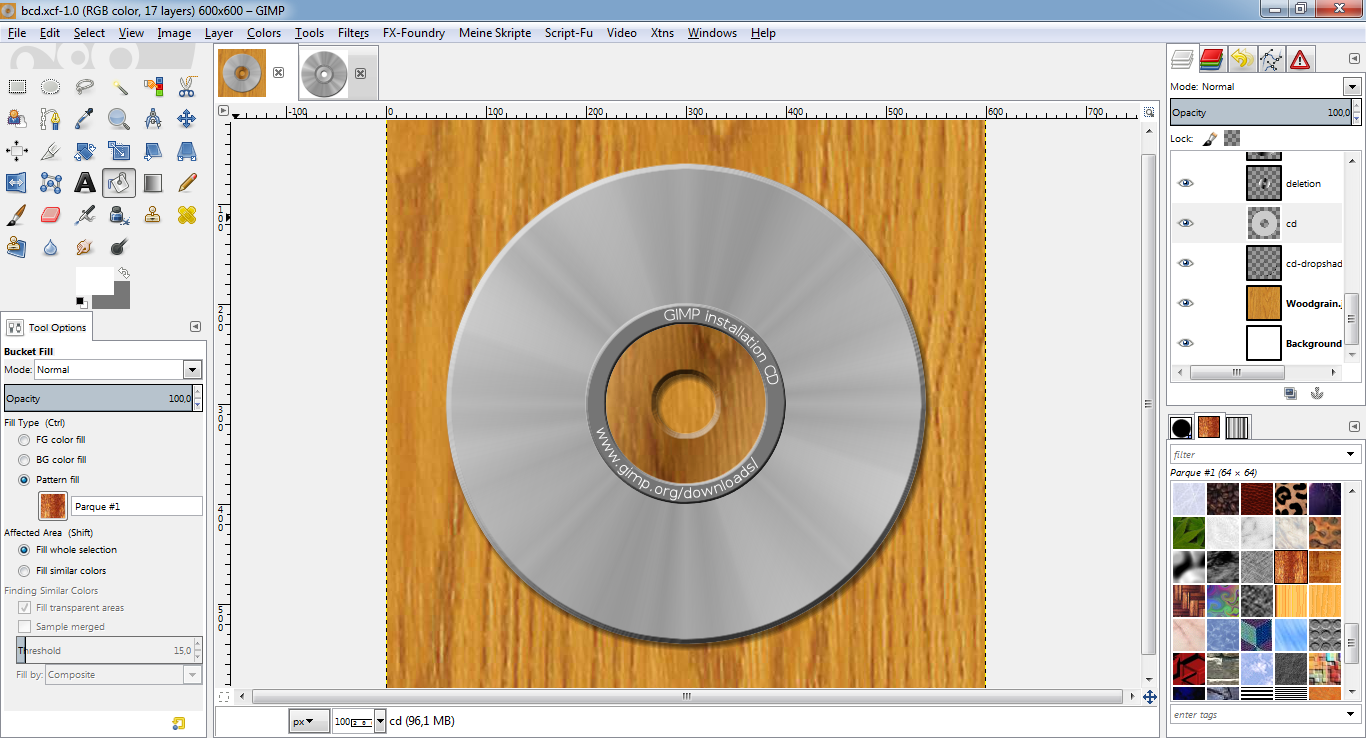
If you want the inner part of the CD semi-transparent, do the following:
* Select the "cd" layer.
* Path window: "text ring" -> Path to selection, "hole" -> subtract from
selection.
* Hit "Del" to delete the selection from the layer.
* To clarify, I created a wood texture on the bottom of the image.
* This is what it should look like:
DONE!
Congratulations, you have successfully completed the tutorial! Now it would
be a wise decision to save your work under a new name for later changes or
whatever.
If you find any errors or something I could improve, feel free to comment!
dietmar