LOADING BAR
a GIMP tutorial by dietmar
This will create a nice "loading bar" suitable for your UI projects like
software, Webdesign or other.
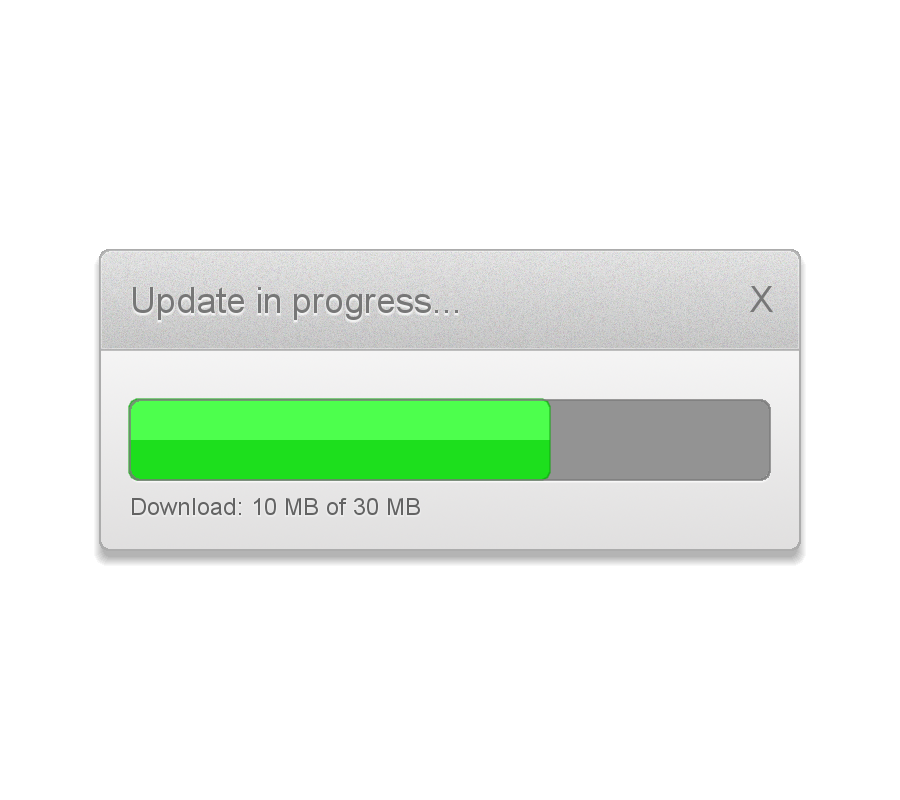
This is the final result:
Please notice:
I also recommend activating "View -> Snap to grid" for better selection
management.
I used GIMP 2.8.14 on Win7 64Bit for this, so I am not sure whether it will
work on older versions of GIMP.
And remember: Save often, perhaps with different filenames for the different
steps, to make reproducing or changing afterwards easier!
Here we go...
* Create a new image, 900x800, with a white background.
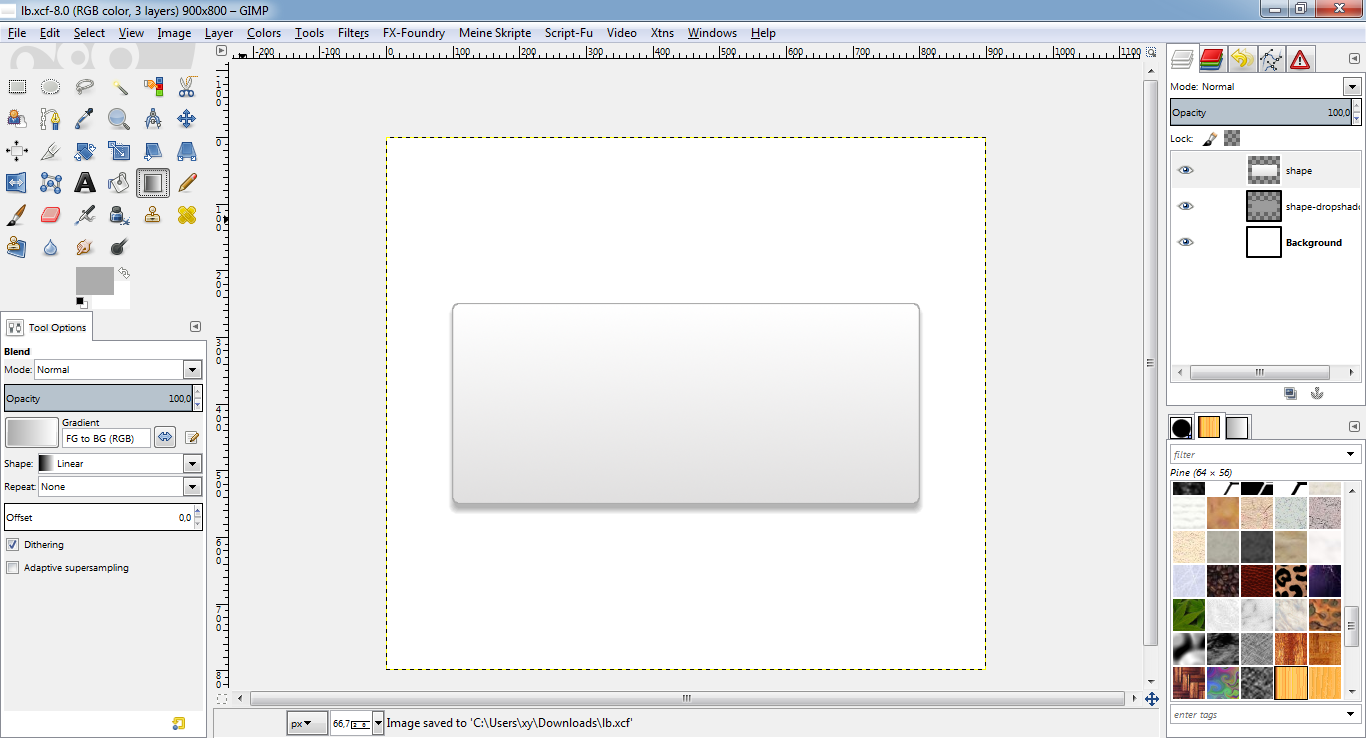
* New layer "shape".
* Rectangular selection in the middle of the canvas with rounded corners
(radius 10). Mine was 700x300px.
* To path "shape".
* Linear gradient from botton to top, VG #e0dfdf to BG #ffffff.
* Stroke selection with 2px #acacac.
* Script-Fu: Apply a standard drop shadow with color #9c9c9c, angle 90, size
and distance 10.
* Select -> None.
* This is what it should look like:
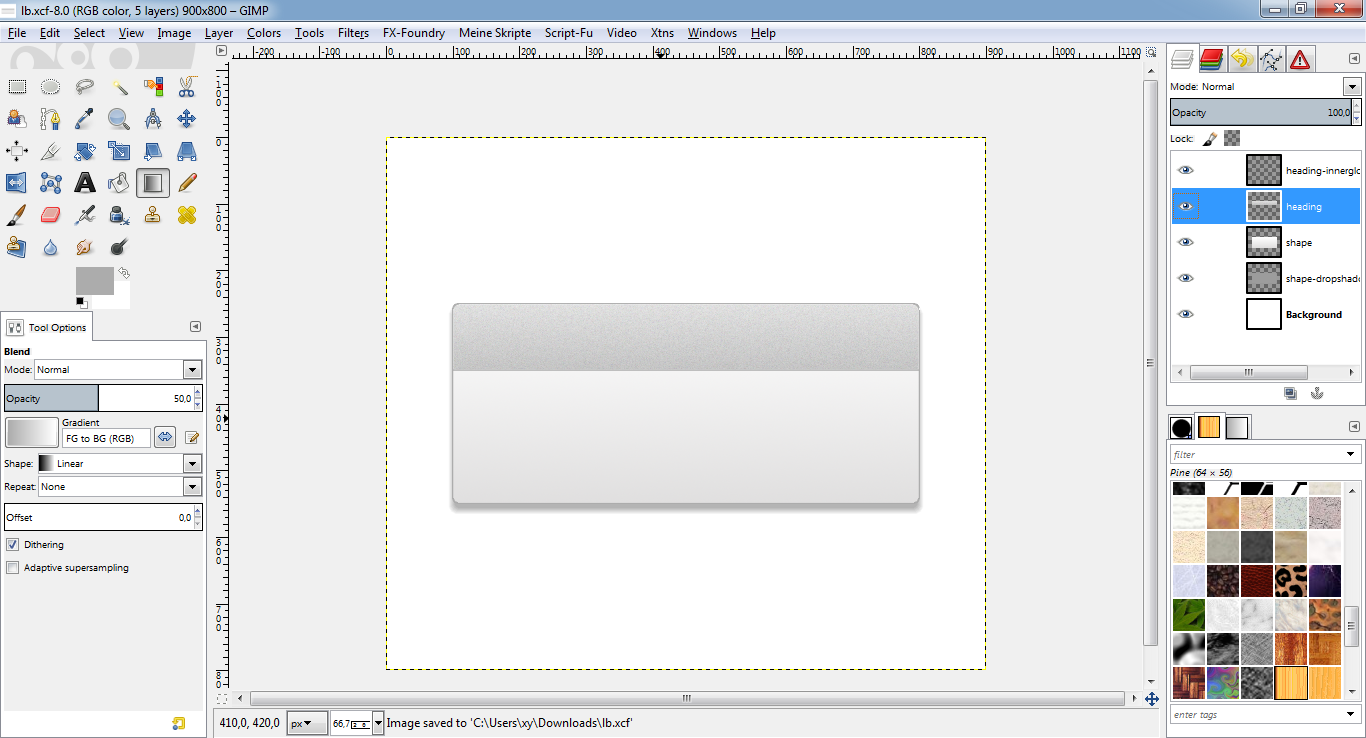
* New layer "heading".
* Path "shape" to selection.
* Using the rectangle select tool, subtract about 2/3 from bottom from the
selection to create the header selection. (But subtracting, you keep the
rounded edges on top while creating non-rounded edges on the bottom of
the header!)
* To path "heading".
* Fill selection with #c6c6c6.
* Linear gradient from bottom to top, VG #c6c6c6, BG #ffffff, opacity 50%.
* Script-Fu: Inner glow, color #ffffff, size 2, rest stays default.
* Stroke selection with 2px #acacac.
* Select "heading" layer again.
* Filters -> Noise -> HSV Noise, values 1/180/20/10.
* Select -> None.
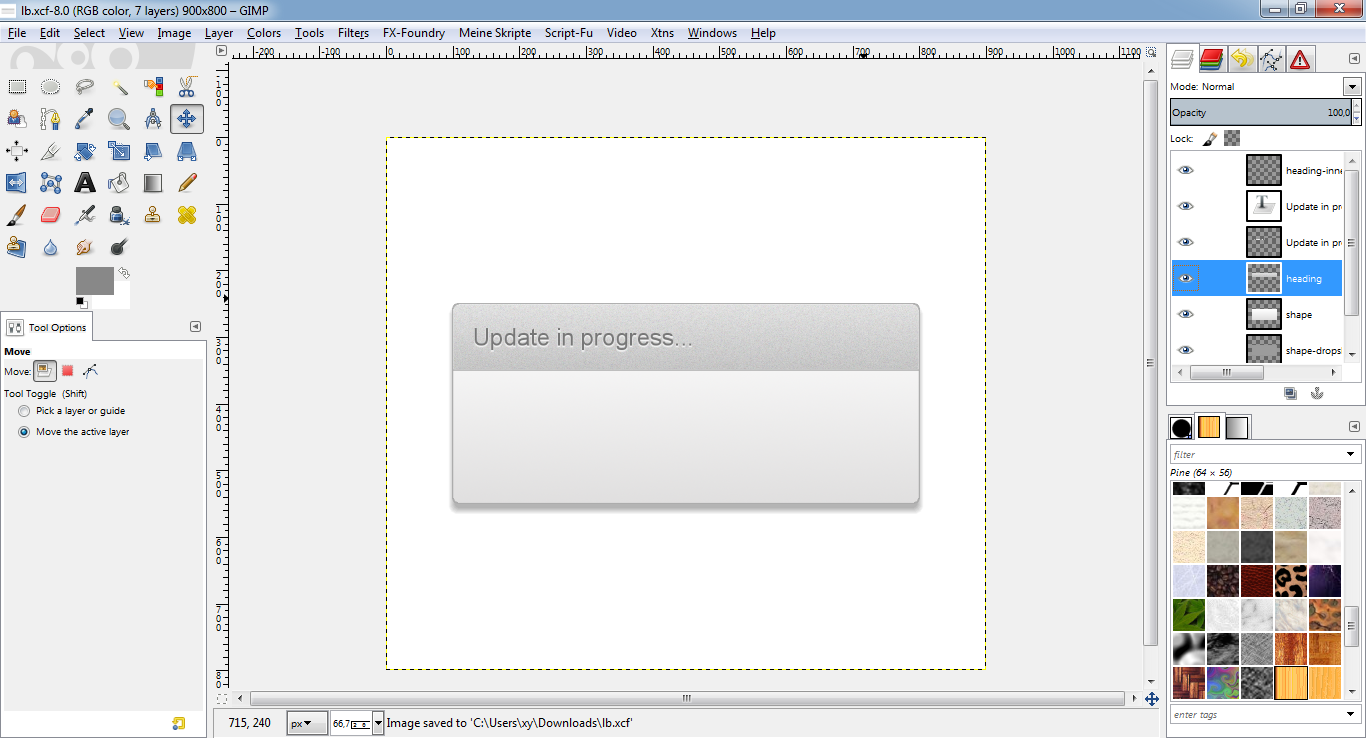
* This is what it should look like:
* Add text to your header. I used Arial font with color #777777.
* Script-Fu: Apply a standard drop shadow with color #ffffff, angle 90, size
and distance 2 to the text.
* This is what it should look like:
* New layer "loading" above the "shape" layer.
* Rectangular selection for the loading bar with rounded corners (radius 10).
Mine was 640x80px.
* To path "loading".
* Fill selection with #939393.
* Script-Fu: Apply a standard drop shadow with color #ffffff, angle 90, size
and distance 2 to the text.
* Select "heading" layer again.
* Script-Fu: Inner glow, color #ffffff, size 1, rest stays default.
* Stroke selection with 2px #7c7c7c.
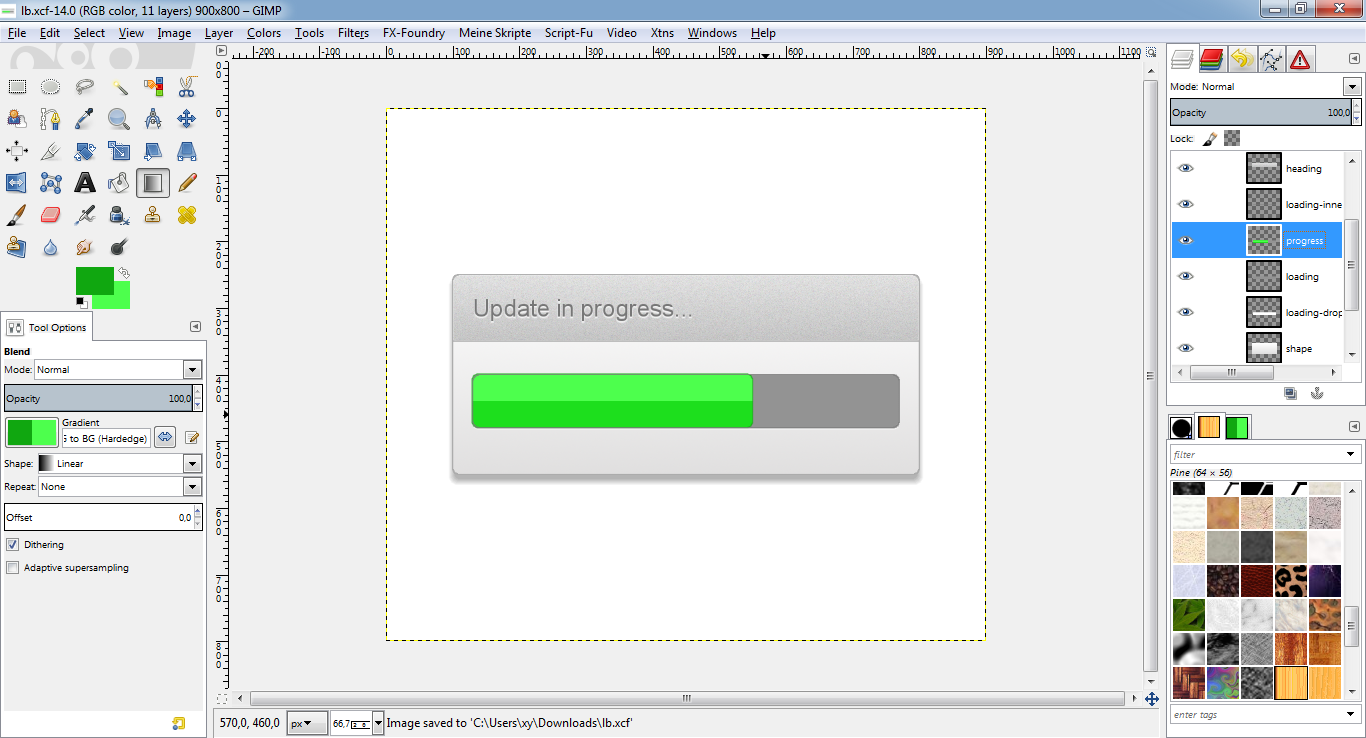
* This is what it should look like:

* Duplicate the "loading" layer and name it to "progress".
* Path "loading" to selection.
* Using the rectangle select tool, shrink your selection from right to left
to the amount your progress bar should point at.
* Fill the selection with a linear gradient from bottom to top, VG #1ddf1d,
BG #4dff4d, important: Type "hardedge", opacity 100%.
* Stroke selection with 1px #10a710.
* Select -> None.
* This is what it should look like:
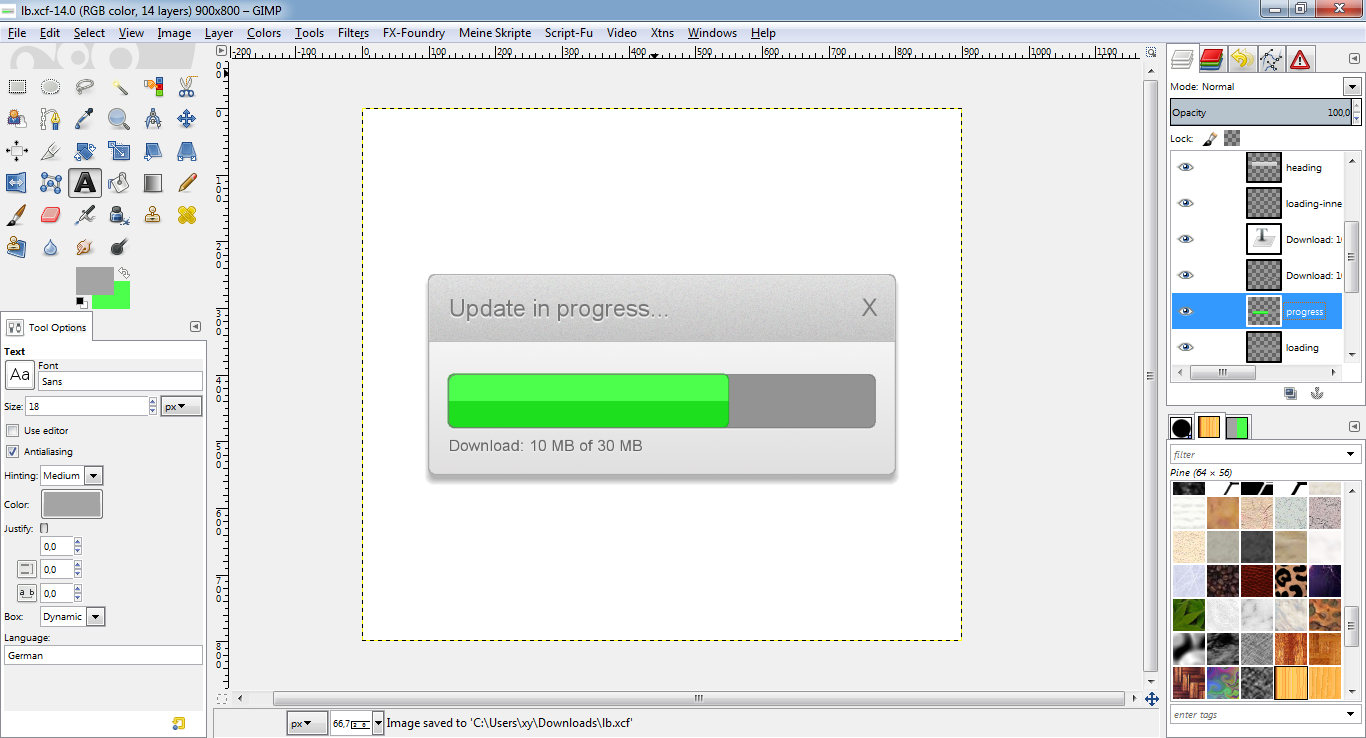
* Add text below your loading bar. I used Arial with color #636363.
* Script-Fu: Apply a standard drop shadow with color #eeeeee, angle 90, size
and distance 1 to the text.
* Finally, add an "X" as close button to the "heading" layer. I used Arial
with color #a4a4a4.
* This is what it should look like:
DONE!
Congratulations, you have successfully completed the tutorial! Now it would
be a wise decision to save your work under a new name for later changes or
whatever.
If you find any errors or something I could improve, feel free to comment!
dietmar