The original tutorial was created with a Pre-2.4 version of GIMP. While most of the steps should be the same, many of the screenshots might not reflect the newest GUI. I will update the tutorial with new screenshots if it's too confusing. Please note you need a basic understanding of using the paths tool to complete the tutorial. ArtAlright, let's begin our tutorial:
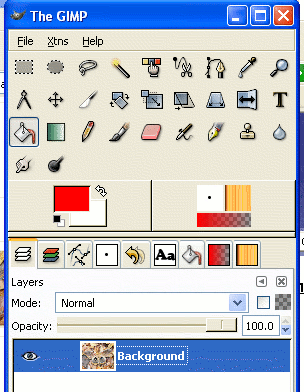
[*] Open up the image you wish to cut away from the background. If you plan on using an image that has no transparency to it or you'll be working on the background layer, you need to add and "Alpha Channel" to it. Here's how you do it: Right-click on the layer and select "Add Alpha Channel".
Now that you've gotten that out of the way, you need to create your path around the object you wish to cut out. Again, I'm not walking you through those steps. But I will give you a couple of suggestions that I've found work best for me:
[*] Zoom in on the object as far as you can. Don't worry about not being able to see your entire image. You'll be able to pan around the screen while creating the path. But for the best results, you need to be up close and personal with the object.
[*] Because the edge is not always well defined, I would err on the side of caution by placing your anchor points closer to the object where you are sure the edge is. You may lose a little bit of detail, but blending, blurring, etc. can help correct that.
[*] Don't go overboard placing anchor points. I've found that adding too many makes the render have a jagged or blocky appearance. What I generally do is create an anchor at every location where there's a major direction change. Later, I go back and use the "handles" to create curved line segments to more approximate the render edge. If additional anchors are needed, I'll add them at that time. Sometimes a render has to have a lot of anchors, that's ok, just use your best judgment, there are no rules.
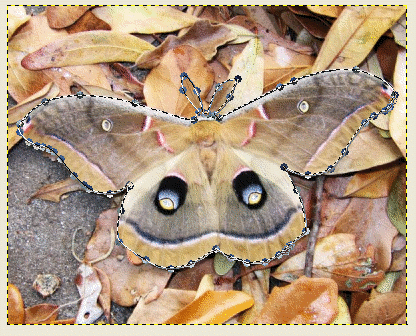
Here's my example of a image I'm working on. The red line is there only to show what the path looks like. Yours won't look like this.

As you will note, I've adjusted most of the path on the moth to fit the outline. I left some of the path as originally drawn to show that my first path wasn't made to fit the object too closely. Also, remember to close your path when you get done. (Ctrl-click on first path anchor) Even if the path doesn't look the way you want it to and corrections are needed, close it. If you don't, and you convert it to a selection before closing it, GIMP will automatically do it for you, and depending on the distance between your first and last anchor, you may not like the results. The nice thing is, paths are always saved and can be edited later.
This next graphic shows me adjusting the path on the bottom portion of the moth. Here, I'm adjusting curves with the handles and moving & adding anchors as needed.

This next screenshot shows me:
[*]Converting the path to a selection. After you close the path (Ctrl+click with the path tool), hit the enter key to create a selection.
[*]Inverting the selection (Ctrl+i) Notice that everything outside of the selected section, including the outline along the image edge, has the marching ants. They weren't like that when we just had the image selected.
[*]Deleting the background. Use the Delete key.
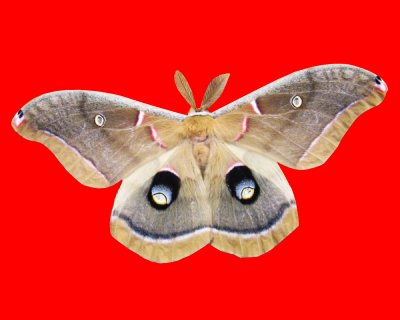
Here's a final screenshot with a new background. Looks pretty good doesn't it!?
Well, I hope you learned something and will be able to put this in your arsenal of tricks. If you have any questions or need clarification, please don't hesitate to ask.
Happy GIMPing!
Art