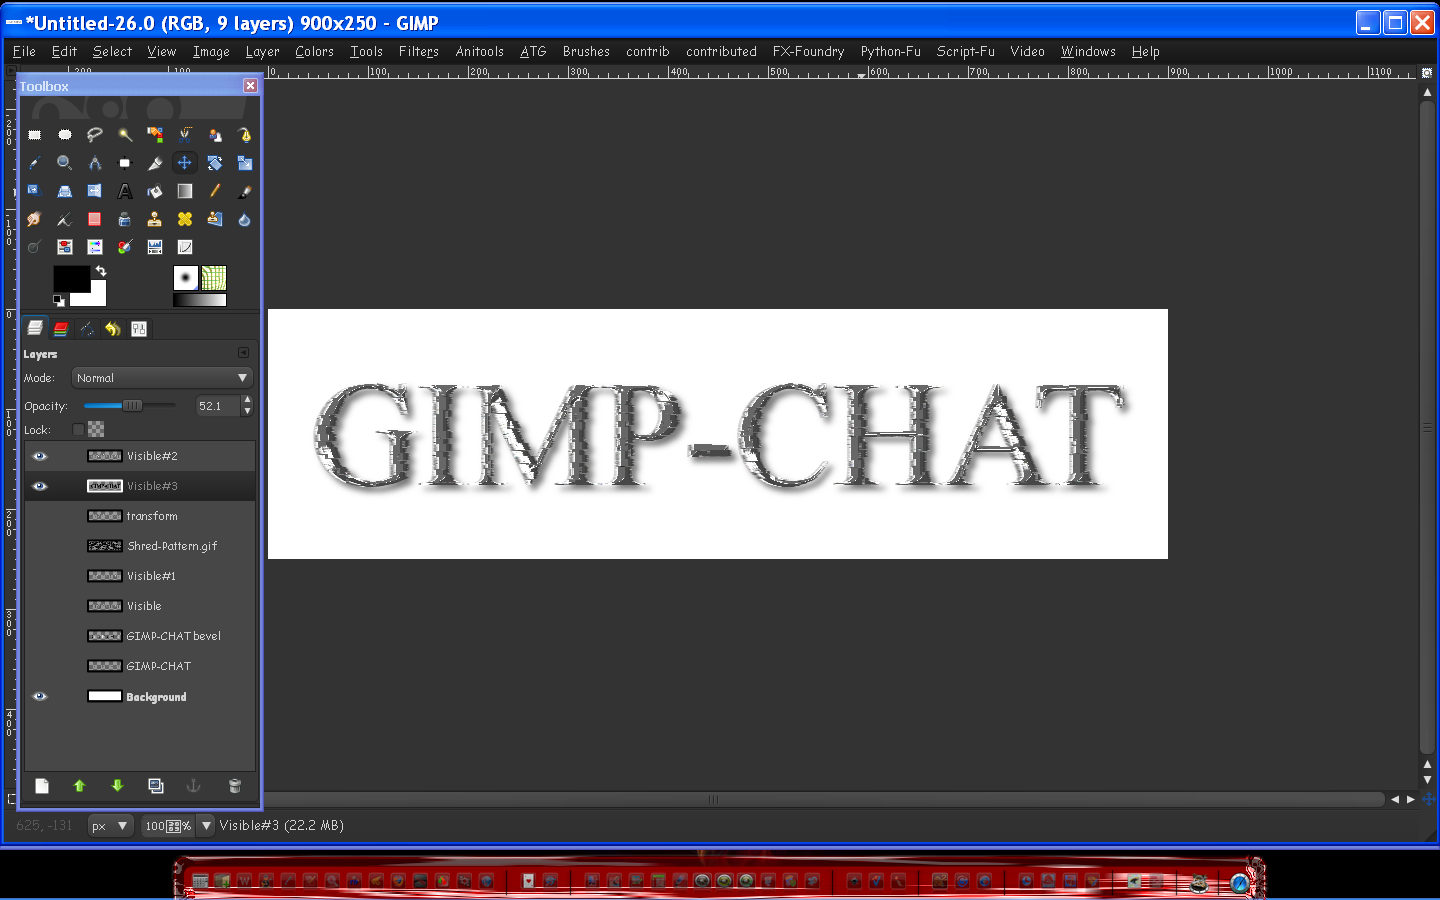
Creating Shredded Steel Text in Gimp - 2.6.11
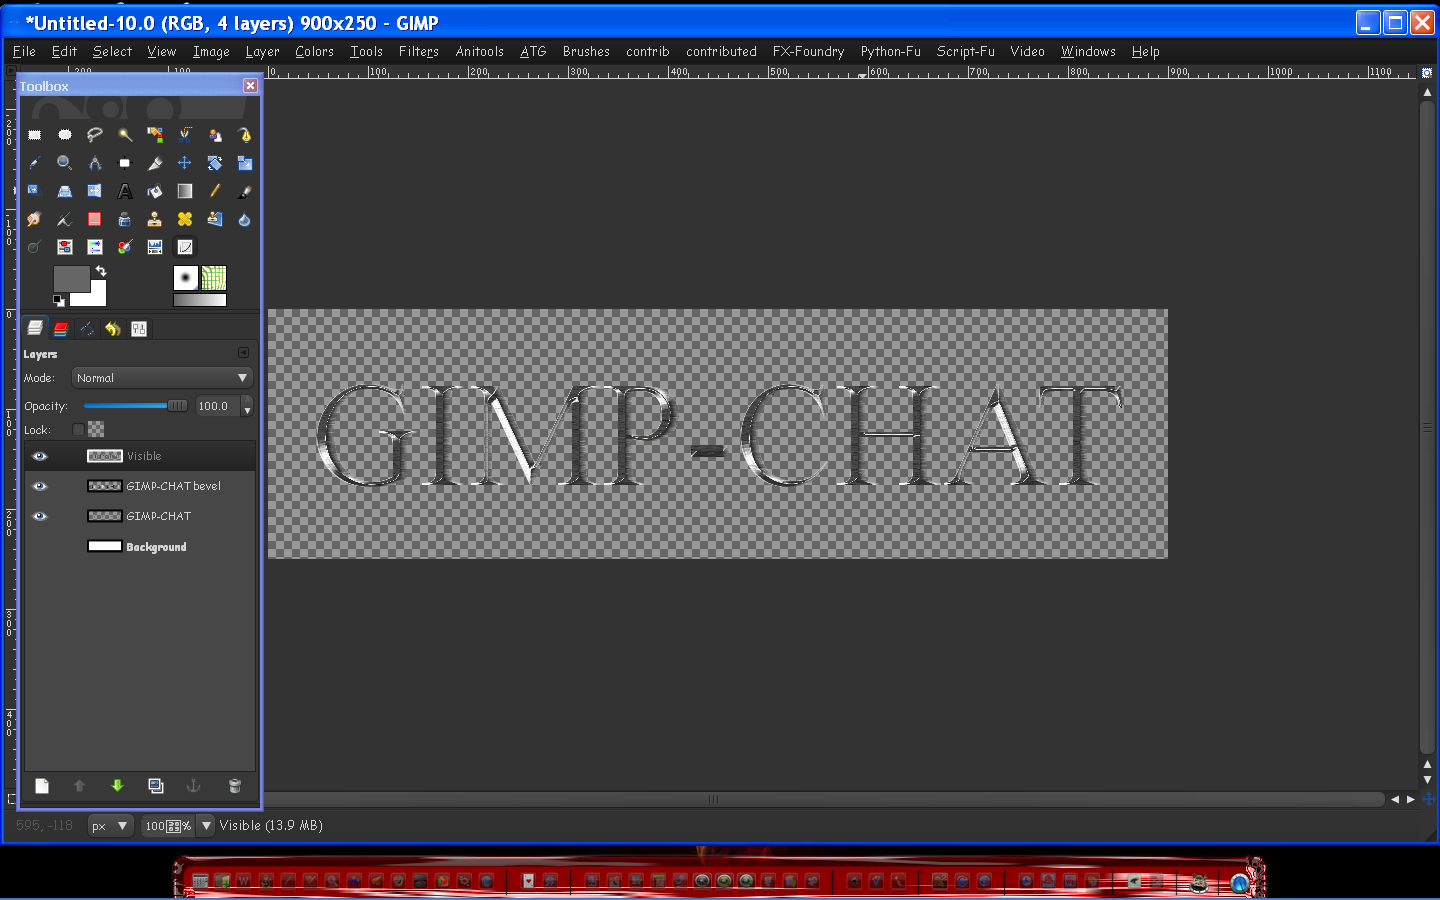
What we will be creating -


You will need -Chisel.scm for this tutorial get it here
http://registry.gimp.org/node/24217***************************************************
Let's begin-
Create a new document 900x250 pixels white background
Times Roman font - nice older midevil looking font works - antialias - size 150-230 - color: 666666 (mine is 150 because of text length)
Type your text - center it - (mine is gimp - chat)
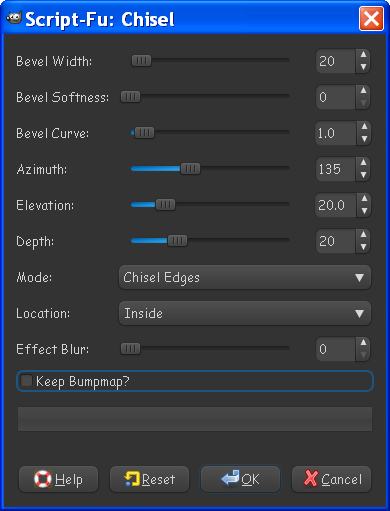
Go to Filters/Decor/Chisel - Put in these values
Make the top layer invisible (the bevel-layer)
Select the text layer
Go to Filters/Noise/HSV noise put in these values

Right click the text layer select alpha to selection
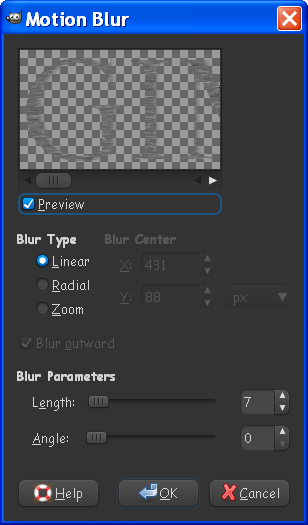
Go to Filters/blur/motion blur put in these values
select/none
Make sure the bevel layer is visible.
Right click any layer and select - new from visible
Make all layers invisible except the top one
Select the top layer
Go to colors/curves put in this line
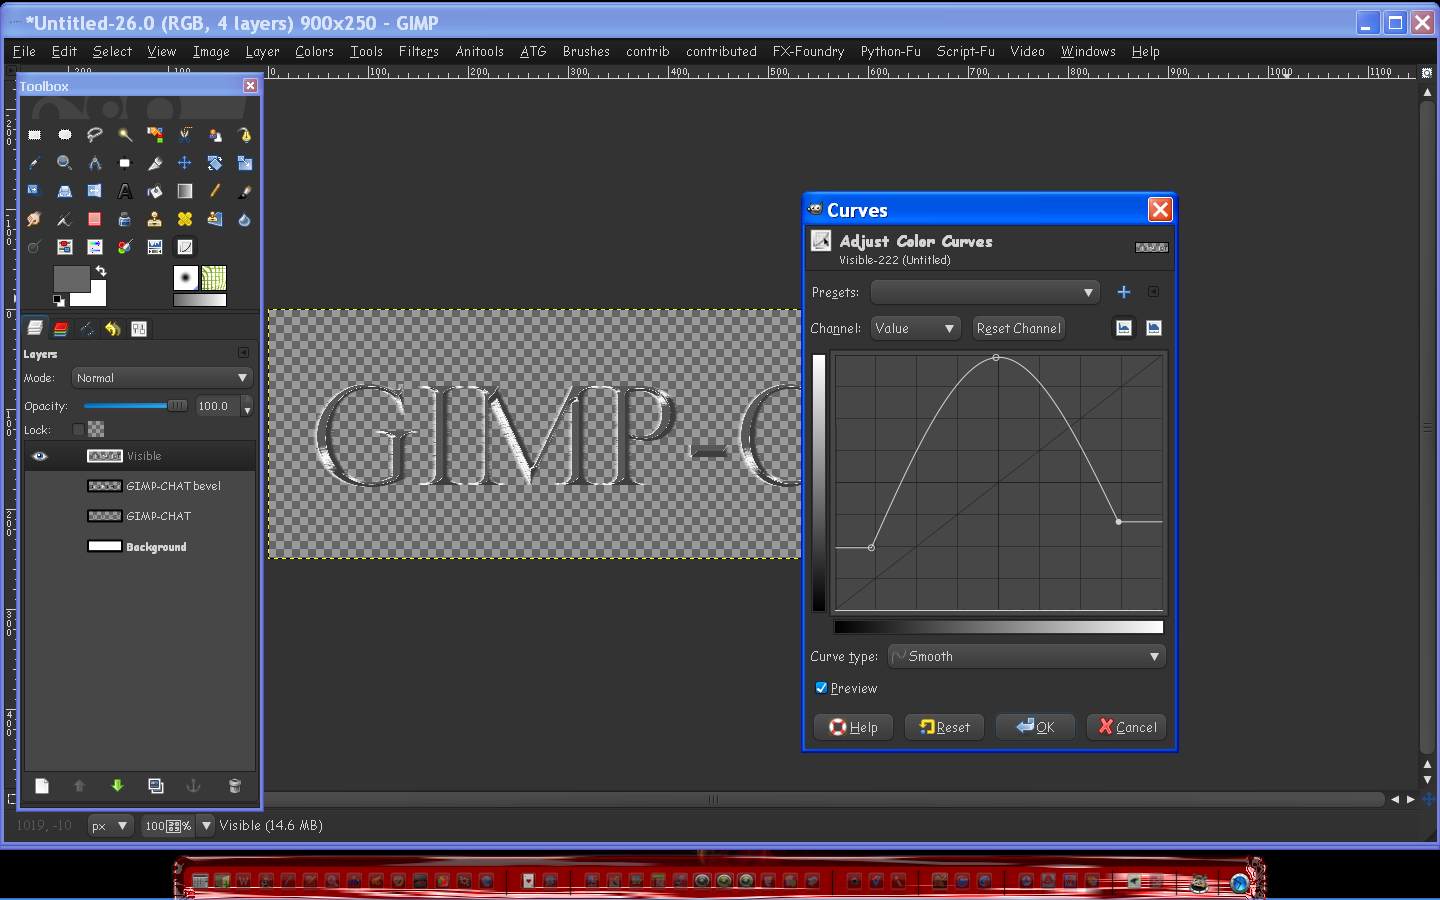
Your text should now be a nice chrome looking color like this. (this is kind of like the cone setting in photo-shop)
Now make all the other layers EXCEPT the white background layer visible again.
Right click the top layer and select - new from visible again
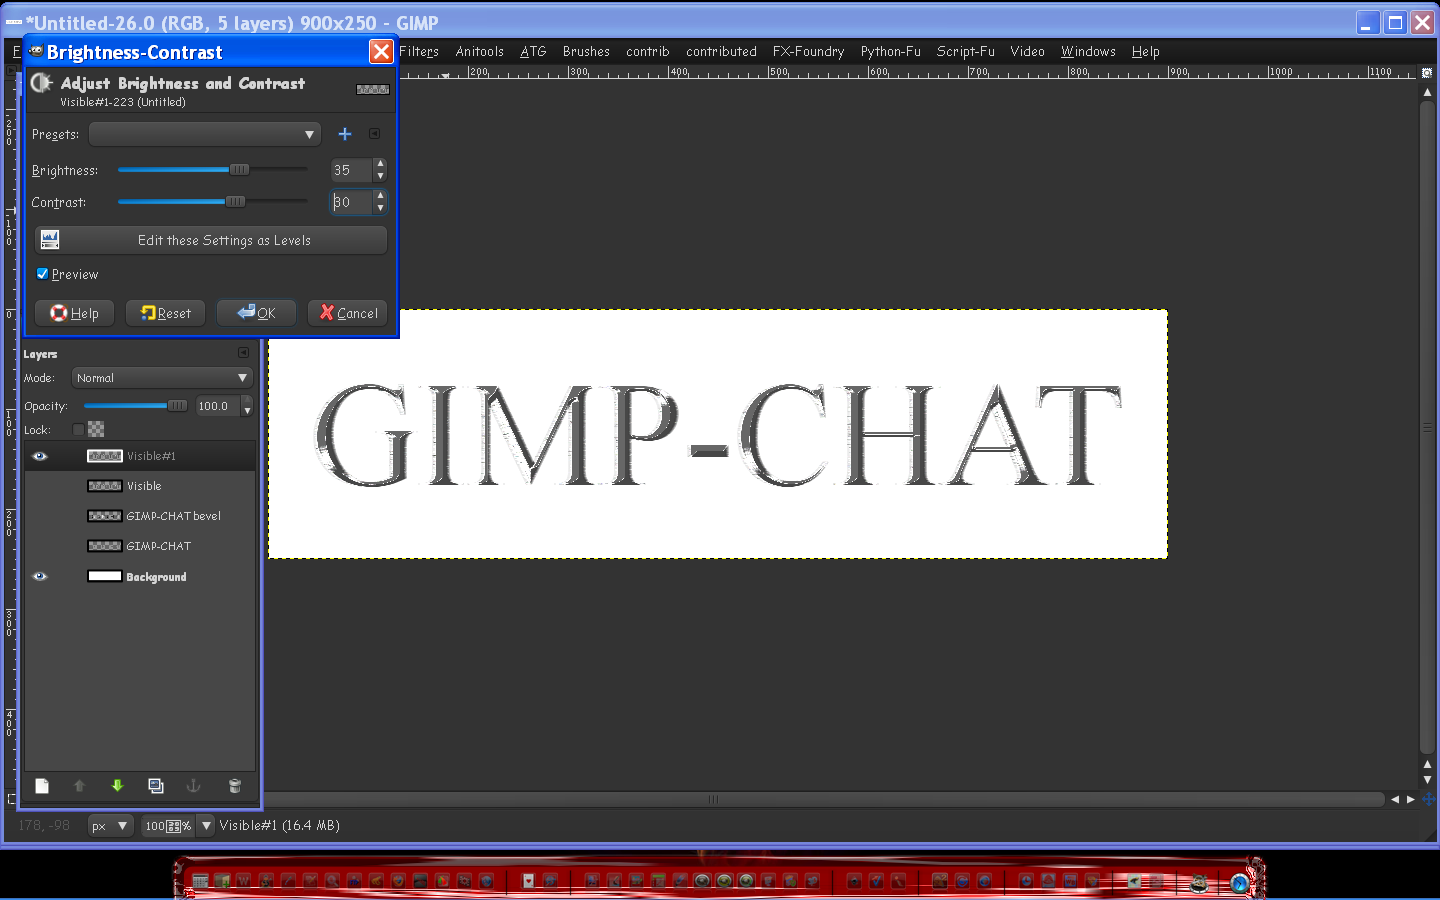
Select the top layer and go to Colors/Brightness and contrast put in these values
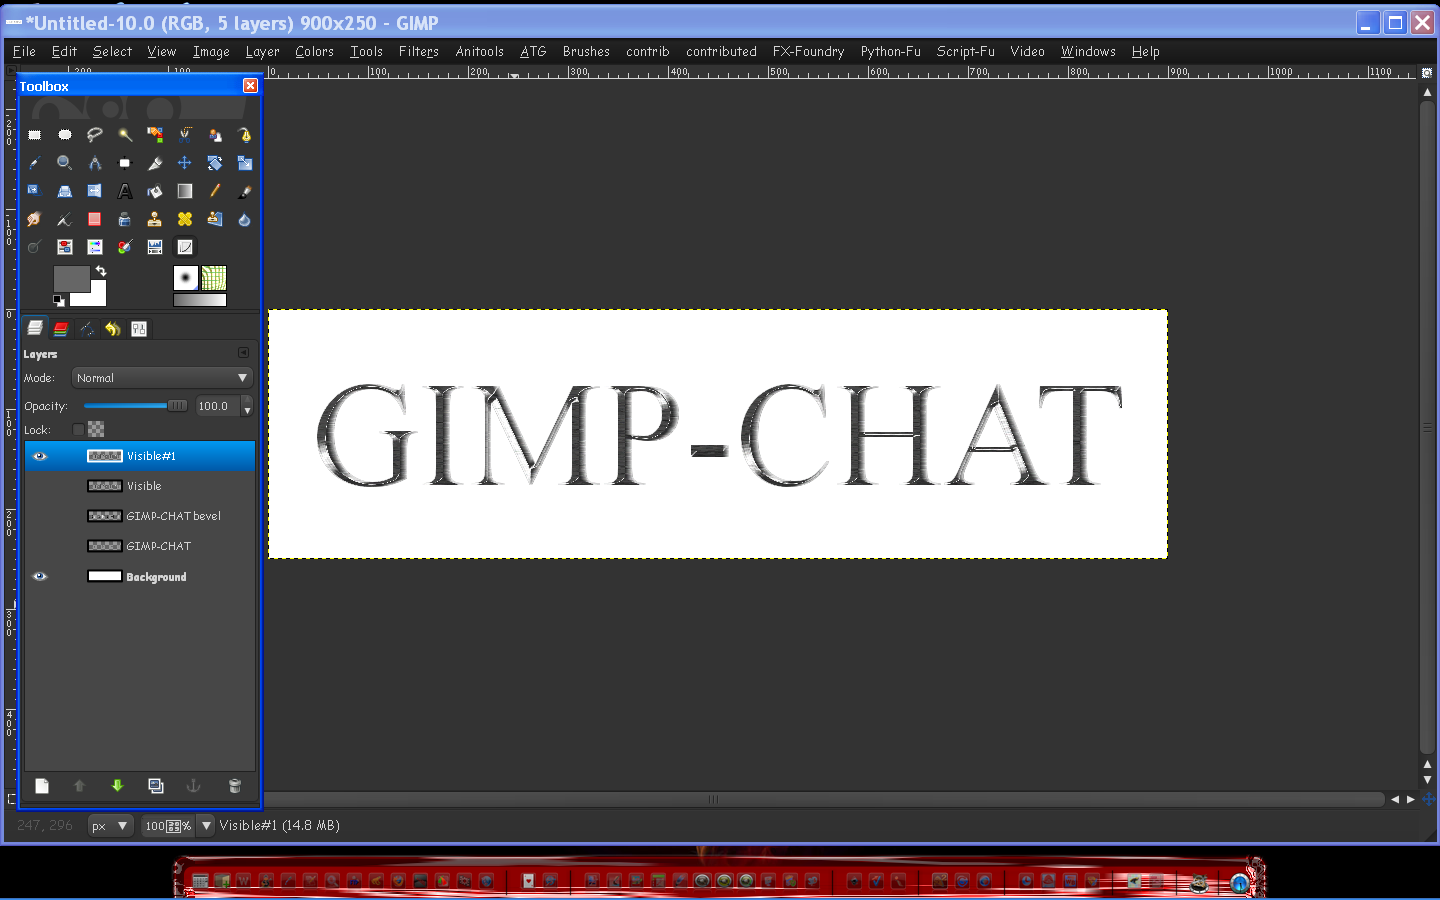
Make all layers invisible except the top one and the white background layer.
Now download this pattern and open as layers - shredpattern.gif
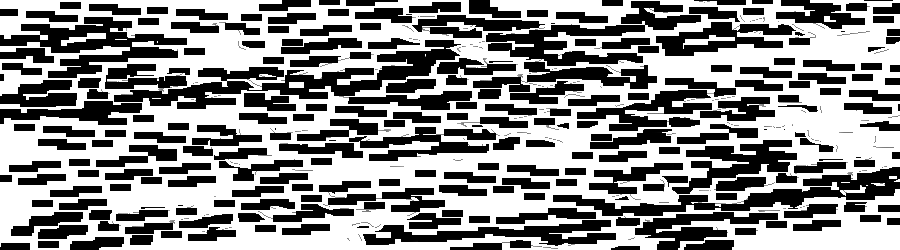
Right click the new opened layer and select alpha to selection all the black squares should be selected at once.
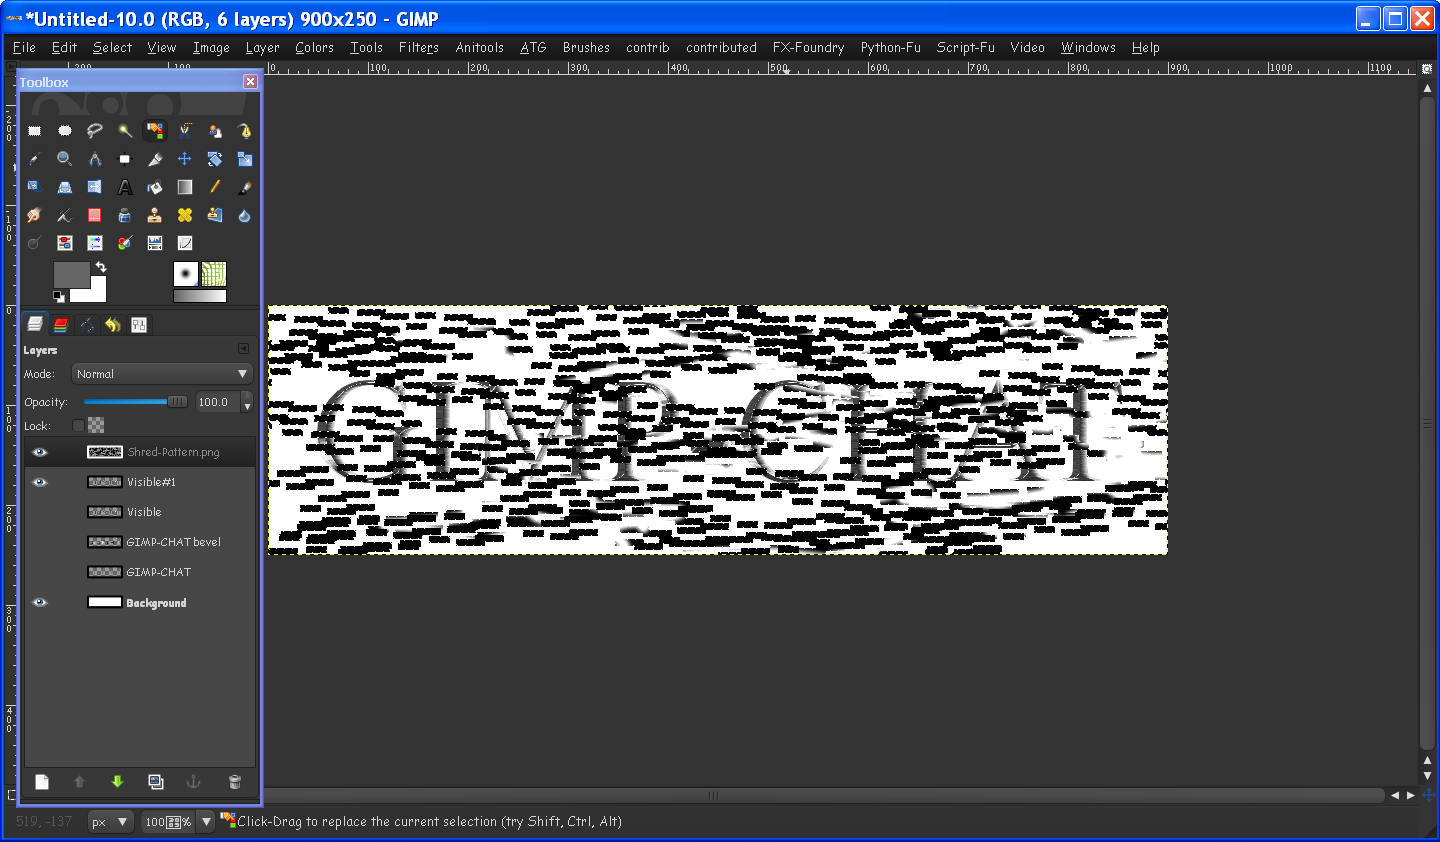
Make the shredpattern.gif layer invisible.
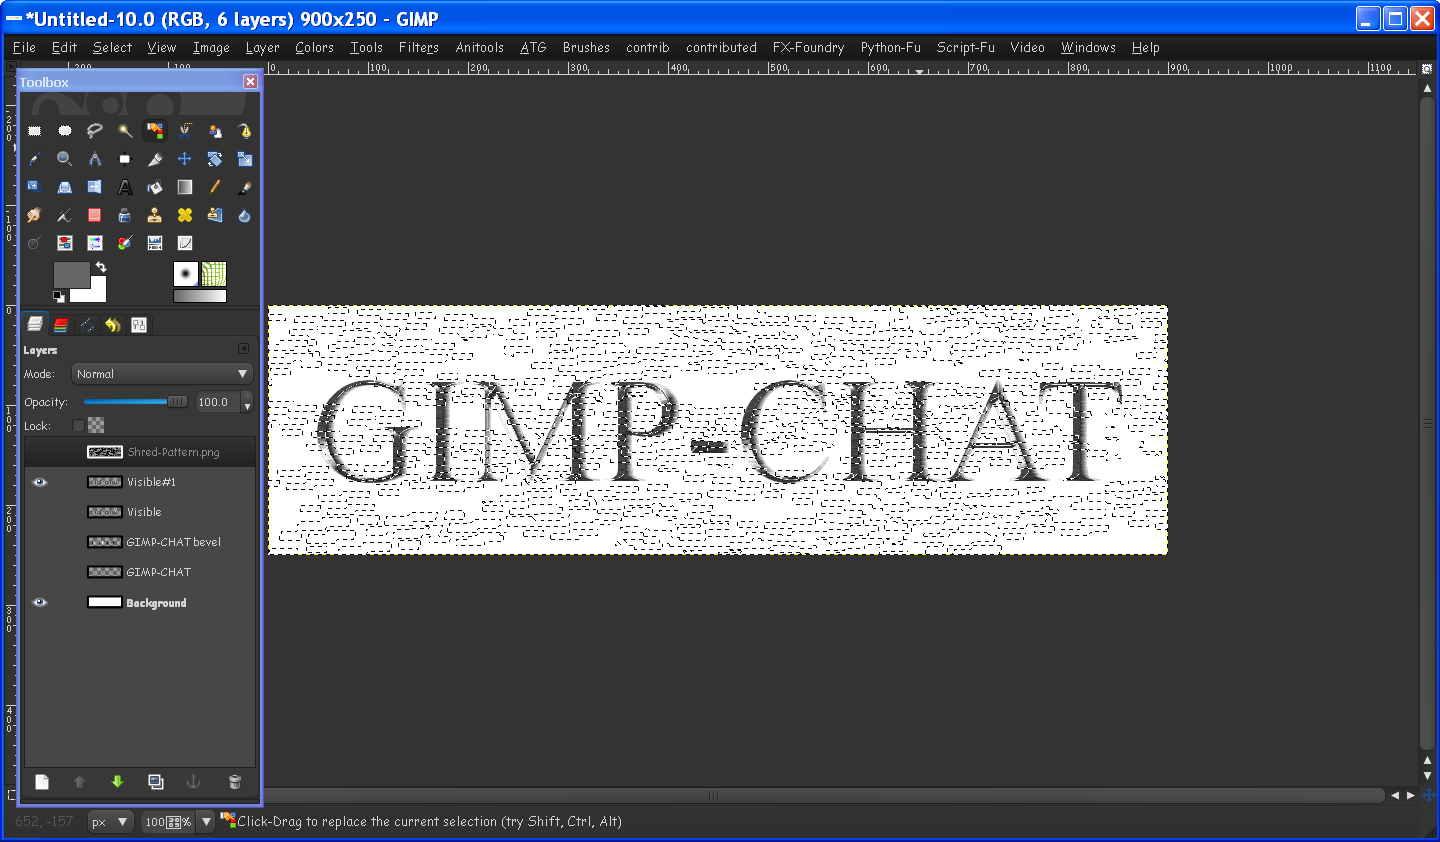
Select the layer directly under shredpattern.gif layer
Go to edit/cut and then edit paste
Make the new floating selection a layer (select new layer)
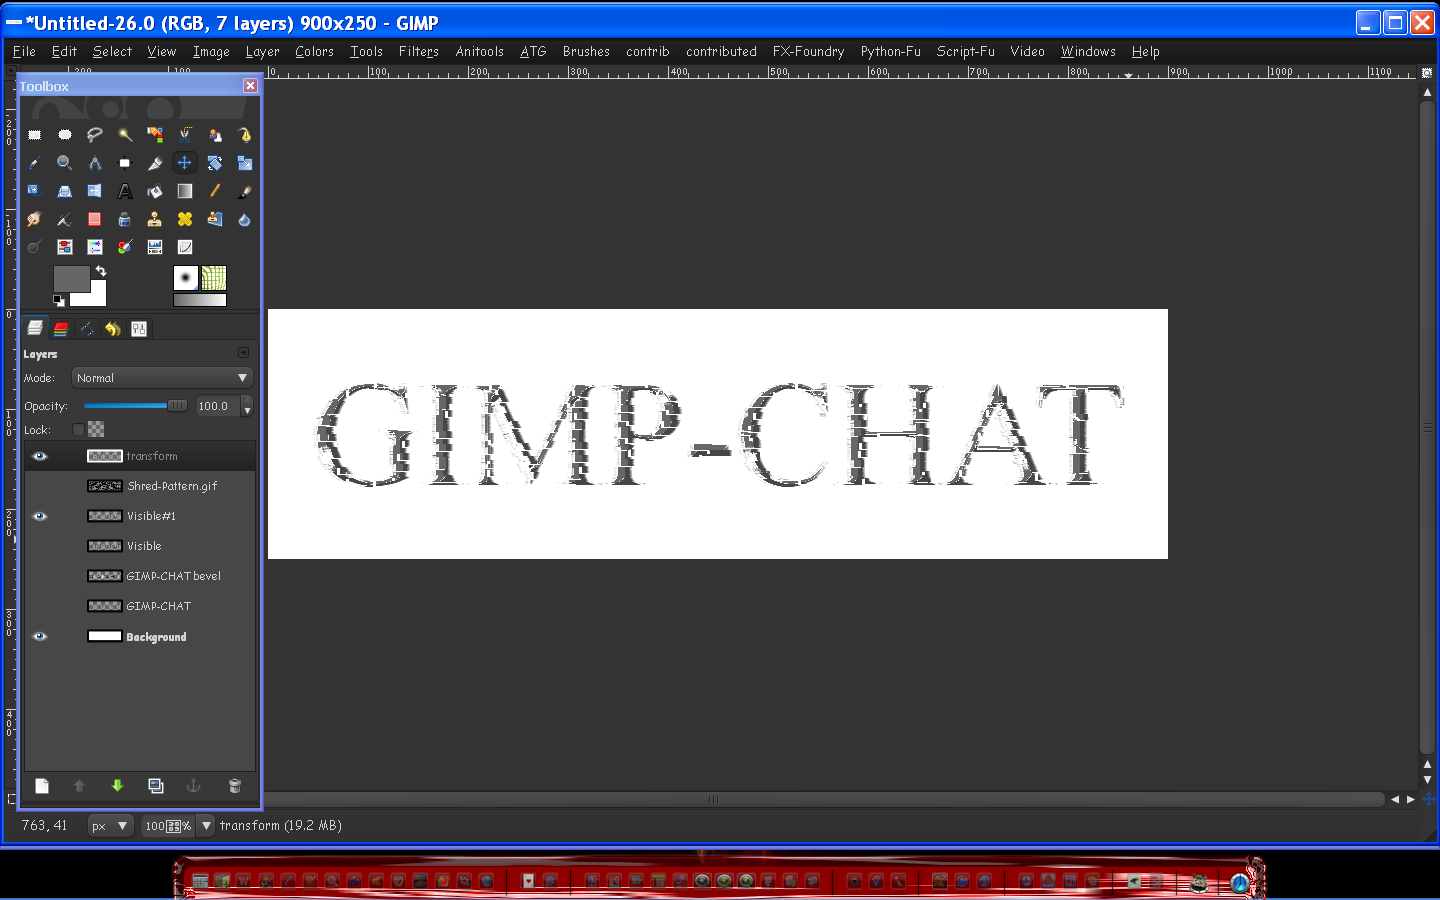
Rename this layer transformation.
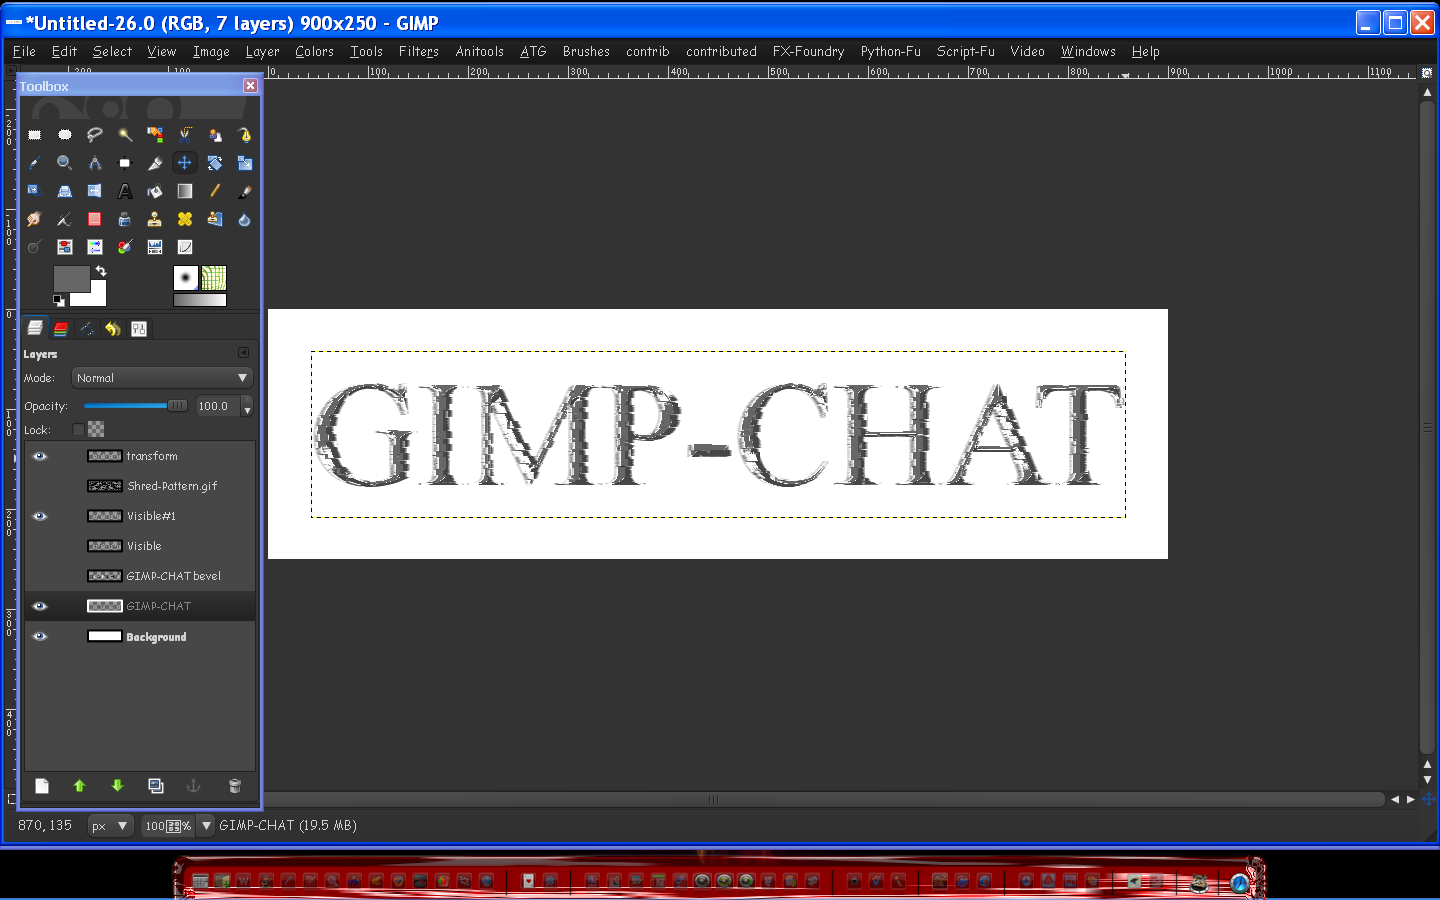
Select the transformation layer and the move tool, move it around to your liking.
This effect looks best with a dark layer behind it so lets make the original layer of text visible.
For a shadow duplicate the top layer and fill it with black and lower it underneath the original blur by 11 and that look creates your shadow.You can move it ( the shadow layer) around to your liking.
well there you have it - another pretty cool way to use the select tool.
This was originally a Photo-Shop tutorial

Thanks for checking it out.