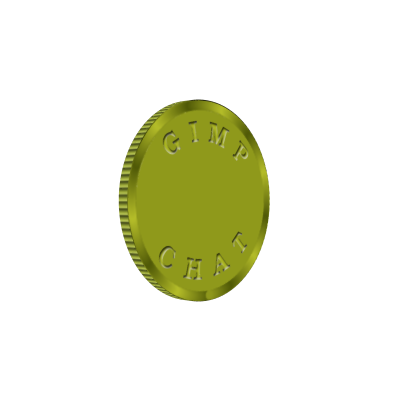
I was pondering making coin objects with Gimp using the
Cylinder setting of
Map Object. First I made a couple of perspective view still coins:

Using
GAP combined with both
Move Path and
Apply Filter On Layer(s) under the
Frames Modify function, I was able to make this:
 How This Was Accomplished
I began with a 400x400 square image. Getting a proper round rod shaped cylinder in Map Object requires beginning with a square image (I think

).
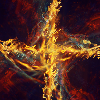
I wanted my coin to have a ridge on the side rather than be smooth. So I made this background for developing the side of the cylinder (coin):
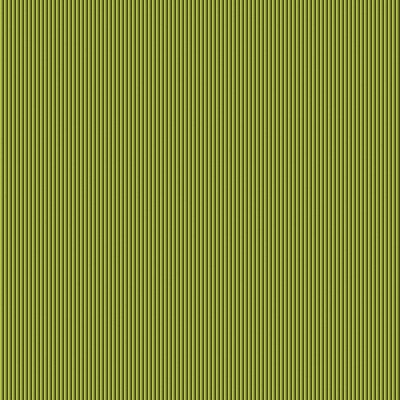
I made it by placing a
vertical guide at both 0 and 4 (I also had a
horizontal guide at position 200). Then using
d5e328 as my foreground color and
a0ab1e as my background color, I used the
Blend Tool set for a
Linear Shape and a
Sawtooth Wave Repeat. I then positioned my cursor at point 0,200 (intersection of the vertical guide at 0 and horizontal guide at 200) and holding down my left mouse button dragged the cursor to point 4,200. Releasing my mouse button, it created a striped background. However, that background was more blended. In order to make it a sharper more defined color separation, I adjusted the
Brightness and Contrast of the background and then used a
Colorize final step. There are other ways to do this.
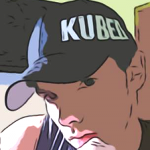
I found a public domain image of Wilber over at
Wikipedia. It was shaded. Since I am making an animated GIF, which allows only 256 colors, I simplified it down to a few basic colors:

I then used the
Fuzzy Select Tool along with the
Free Select Tool to select various parts of Wilber to make this:

I also used FX-Foundry's
Bevel and Emboss script to make
Inner Bevels for the various parts to give them a sort of 3 dimensional appearance.
I then developed my coin base:
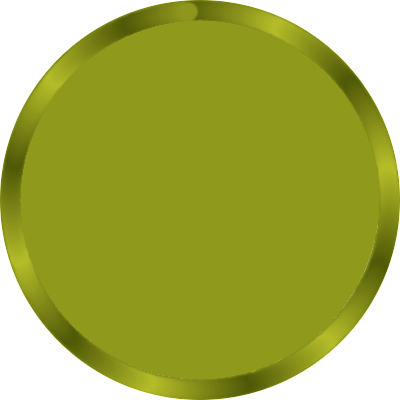
I filled a 400x400 circular selection with color 8f991b. I then shrank the selection by 10 pixels and using a 21x21 hard round brush, I created a new layer, reset my foreground and background colors to the default black and white and set my
Paintbrush Tool up to
Use Color From Gradient, and set the
Length to 100 and the
Repeat to Triangular Wave. I then
Stroked the Selection. When the
Stroke Dialog window opened, I selected to use the
Paintbrush Tool for creating the stroke.
I then set that "stroked" layer to
Overlay Mode and merged it down on the 400x400 circular selection layer.
I added "golden Wilber" on top of that to make the front of my coin:

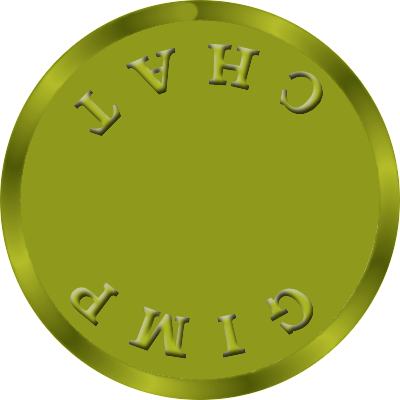
For the back side of the coin, I made another 400x400 circular selection, then
Shrunk it by 20 pixels and
saved that as a Path. I then made the text "GIMP" and "CHAT". I widened the space between each letter by adjusting the
letter spacing value in the
Text Tool Options Dialog. I applied GIMP to the circular Path as it was. I then copied the Path and then using the
Flip Tool, I flipped it vertically and applied the CHAT text to the flipped circular Path. I had to rotate each of the resulting word Paths by 45 degrees to get them into the desired position.
After filling each path, I again used the
FX-Foundry Bevel and Emboss script set to
Inner Bevel to give them a 3-d appearance. I had to adjust their final positions using the
Move Tool. Finally, I flipped the backside of the coin using the
Flip Tool first
Vertically, ,and then
Horizontally:
 Putting It Together With GAP
With GAP, I created a separate 400x400 background. Created
60 frames from it (59 duplicates). I then used
Move Path to add the ridged background image above into frames 1 through 60.
I then used
Frames Modify set to
Apply Filter on Layer(s) for
Layerstack 0 for
frames 1 through 30. I selected
Map Object using
Apply Varying and set the
Orientation Tab to
X-Rotation value of 90.00 (this value remains the same for all frames), and
Z-Rotation value of 0.00.
For all frames, I used
No Light under the
Lighting Tab. Under the
Options Tab, I had
Transparent Background selected.
Map To set to
Cylinder. Under the
Cylinder Tab, the
Top and
Bottom were selected from the images I posted above. The
Radius of the Cylinder was left at 0.25. The
Length of the Cylinder was set to a thin 0.03 to make it look like a coin.
After clicking OK (and then Continue in the little dialog box that opens afterwards), Map Object reopens and asks for the final value at frame 30. I wanted the coin to go 180 degrees over the first 30 frames (to spin from front to back). That makes six degrees per frame. However, since the first frame as at position 0 rather than 6, frame 30 will be a value of 174.0 degrees.
After processing those first 30 frames, I then again selected
Frames Modify with a selection of
Apply Filter on Layer(s), still using
Layerstack 0, but this time
Frames 31 through 60. Again,
Map Object is selected using
Apply Varying. The only settings needing changed are the
Z-Rotation values. The first setting will be -180.0 degrees (that is minus 180). After clicking OK, when the second rendition of Map Object opens, I set the final Z-Rotation value to -6.0 degrees.
After everything processed, using
Frames to Image, I made a multi-framed image setting each frames timing to 100ms. I added a plain black background to each frame using
saulgoode's combine background animation script. I then used the Optimize for GIF function under the Filters | Animation section to make an optimized file. Finally, I saved it as an animated GIF file.
Can This Be Done Without GAP?It could be done manually, but that would take a long time adjusting each layer manually.
If you have GAP installed, one of the options it installs is the
Filter All Layers option under the Filters heading in a Gimp Image Window. You could make
two 30 layer images with
all layers being copies of the base 400x400 background image I have posted above. In another image, you would have as layers the Front and Back side of the coin.
To the
first 30 layer image, you would run
Filter All Layers then select
Map Object and
Apply Varying. Set
Options to Transparent Background, Map To set to Cylinder,
Light Tab set to No Light,
Cylinder Tab, select the appropriate Front and Back images, leave the
Radius at 0.25 and the
Length is set to 0.03. In the
Orientation Tab, set the X-Rotation value to 90.0. Set the first Z-Rotation value to 0.0 degrees. Click
OK. Click the
Continue Button on the little dialog window that opens.
When Map Object opens again, change the
Z-Rotation value to 174.0 degrees. Click OK. You may have to click a second Continue button. After the process finishes, save the file as
rotation1.xcf. Close out the file.
Go to the second 30 layer file and again run
Filter All Layers, select Map Object and Apply Varying. The only thing you will need to change is the
Z-Rotation value. Set it to -180.0 degrees (that is minus 180.0). Click
OK. Then click on
Continue when the little Continue Dialog window opens.
After some processing again, Map Object will again open. This time set the
Z-Rotation value to -6.0 degrees. Click OK. Once it finishes processing, save the file as
rotation2.xcf. Close out this file.
Now,
open rotation1.xcf. Then select:
File | Open As LayersSelect
rotation2.xcfNow, you will have a 60 layer image file.
You can use
saulgoode's combine background animation script to add a background behind the coin in each frame.
You can also use
saulgoode's animation settings script to set the delay value for each layer rather than doing it manually.
Save the final result as an animated GIF file.
Thank you for checking this out.


 Seriously though, I agree with your observation. Any suggestions on a hex color number to use to give it a more golden appearance? Thank you.