I was in need of a zebra stripes pattern, of which there were a few brushes and patterns available but sadly only one GIMP tutorial that involved drawing out zebra stripes with the Path tool. Nope, too lazy for that. So I sought out a reasonable way to do it quickly without all the fuss.
Disclaimer: No animals were harmed in the making of this tutorial, but also...this isn't a PERFECT zebra stripes pattern, either. So if what you end up with doesn't resemble anything remotely close to zebra striped fur, you could always use an existing pattern or brush, or follow this video:
(This is not my video. It was submitted by billps34.)There are a few Photoshop tutorials, but the filters used for them are not similar to GIMP's. At least not in its entirety, to follow them completely.
The tutorial:1. Open any size drawing. (If you're wanting something to be seamless afterwards, this isn't something that will work out favorably for seamless tiles, just so you know.)
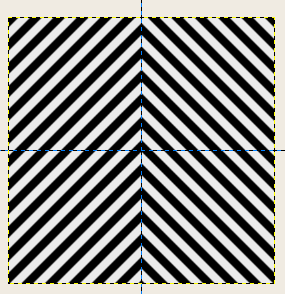
2. On the patterns dialog, select the "Warning!" pattern. (Yellow and black diagonal pattern). If you don't already have it, you'll need "Scale Pattern" by RobA, install it and refresh. The script can be found here:
http://registry.gimp.org/node/137073. Right click the pattern in the pattern dialog box and select "
Scale Pattern", and increase the slider to 300.
4. Using bucket fill with pattern selected, fill the image with the pattern. Go to
Colors - Desaturate, and check the Luminosity setting. The stripes should now be close to black and white (more of a dirty white, which is "OK").
5. If you have a centered guidelines option in Image - Guides, use it, or manually create centered guidelines for the image, both vertical and horizontal.
6. Duplicate the layer/image (should only be one layer to start with) Now there are two identical copies. Flip the top layer horizontally, using the flip tool. Add an Alpha Channel to the top layer.
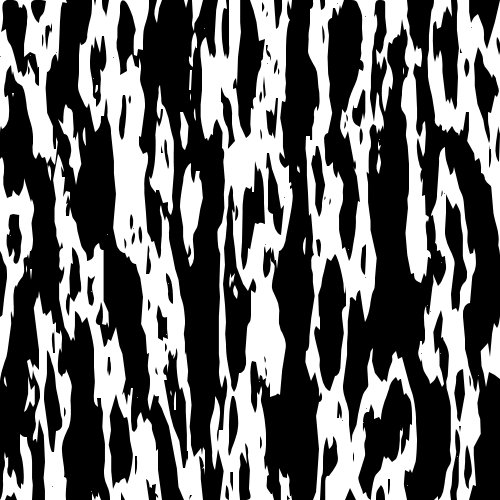
7. Using the centered guidelines to help you, with the Rectangle select tool, select the Left half of the top layer, and press "Delete". Merge the top layer down. You should now have an image that looks like this:
 8.
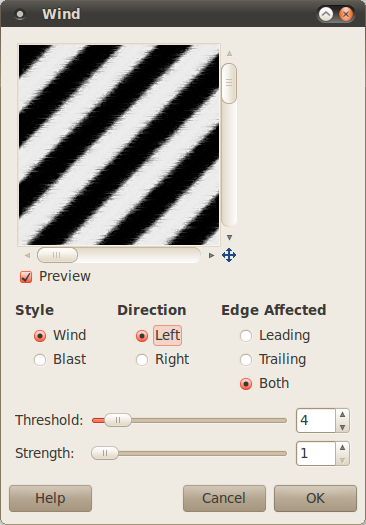
8. Go to Filters - Distorts - Wind, see settings below. You will run this twice, once for left direction, and again for right direction:
 9.
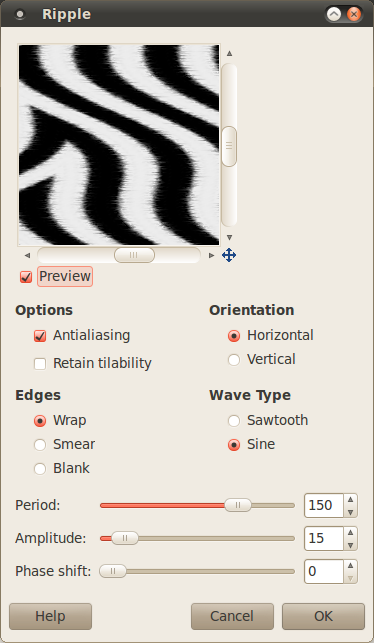
9. Go to Filters - Distorts - Ripple. I used the following settings. But depending on how wide or tall your own image is, you may want to adjust your settings to accommodate the image size.
 10.
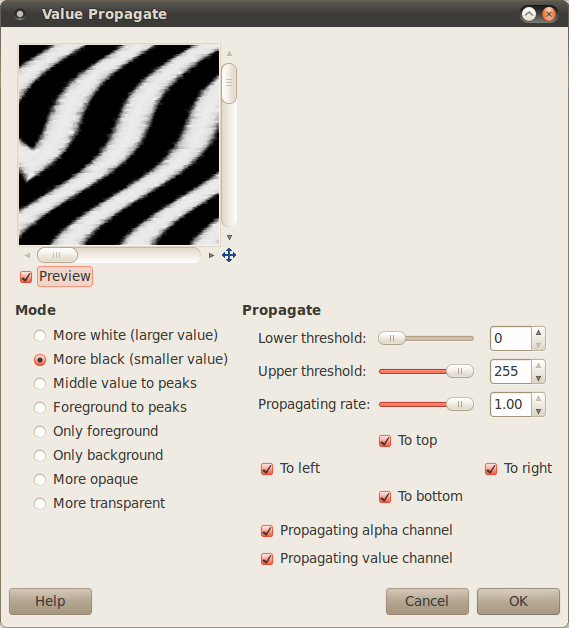
10. For me, the black stripes weren't thick enough, so I ran Filters - Distorts - Value Propogate and applied the following settings:
 11.
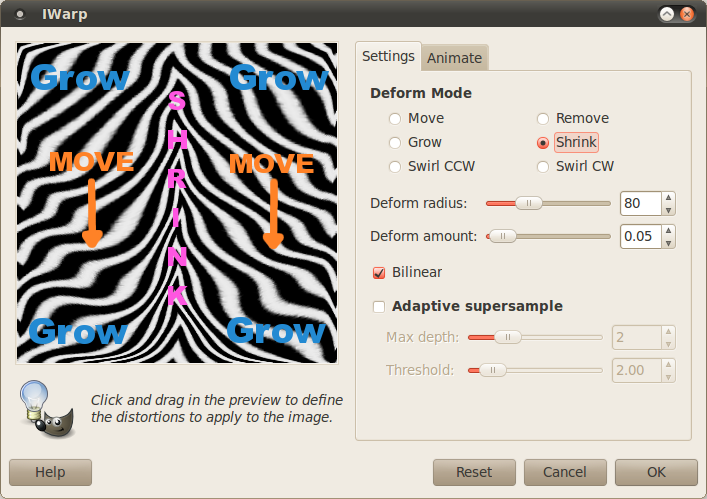
11. Now, to break up the symmetry flow from using Ripple, I tossed the image into IWarp (
Filters - Distorts - IWarp). And I used the following settings:
 12.
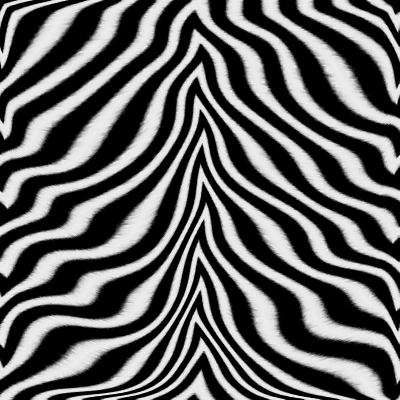
12. The final result was "ok" but I am still looking into how to better this technique, so the stripes are more random in nature. So, please, if you have a trick, please share it, so I can add it to my arsenal. I read online there was a zebra stripe user filter, but I can't seem to find it, and it's not in my guf folder.
_________________
"In order to attain the impossible, one must attempt the absurd."
~ Miguel de Cervantes


 Video from :


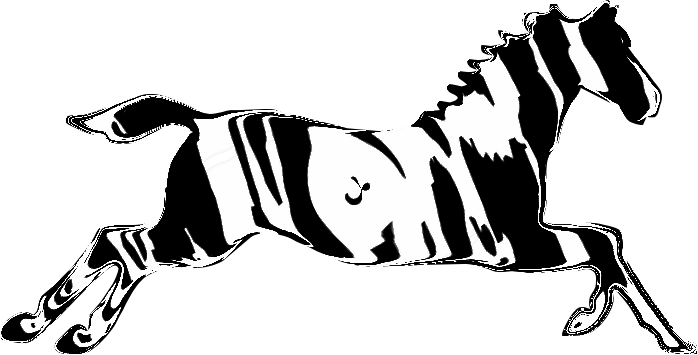
 I don't think my zebra is going to win any stripes contests.