"original" is a big word but as far i know it IS original and pass well also the most severe test for "artistic " filters that are human figure and portrait...is relatively simple create effect that works well with architecture and natural landscapes but faces are always more tricky
Here some examples of what you may get ,
please see at full viewWHAT YOU MAY GETLANDSCAPE
Full view
http://farm8.staticflickr.com/7008/6557 ... 6b5f_b.jpg digital painting with gmic
 by
PhotoComiX, on Flickr
ORIGINAL
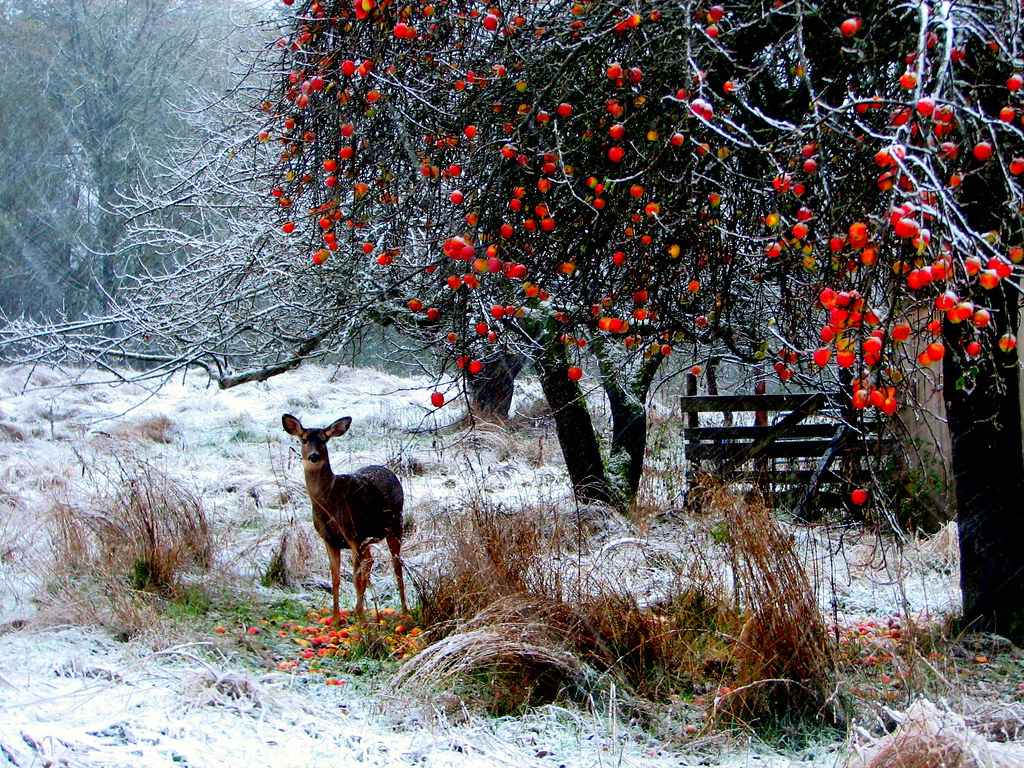 Winter Meal
 by
Jan Tik, on Flickr
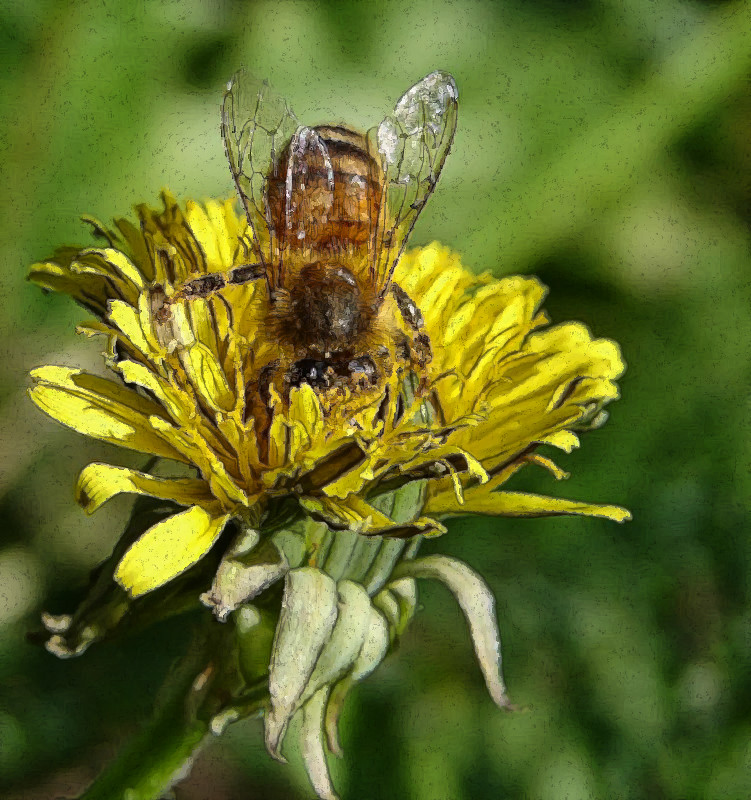
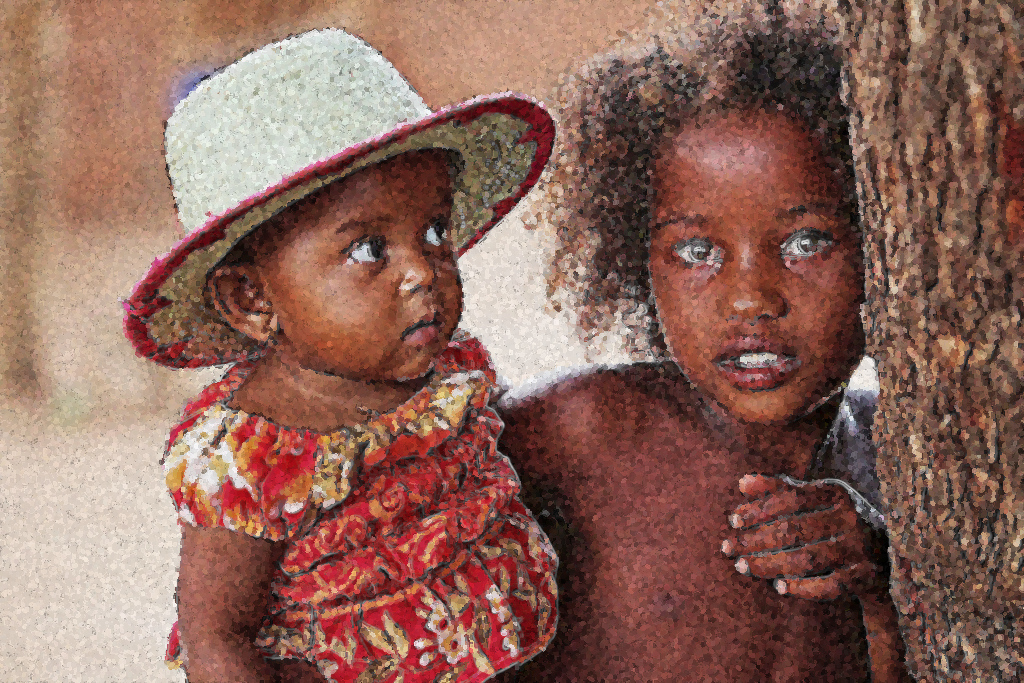
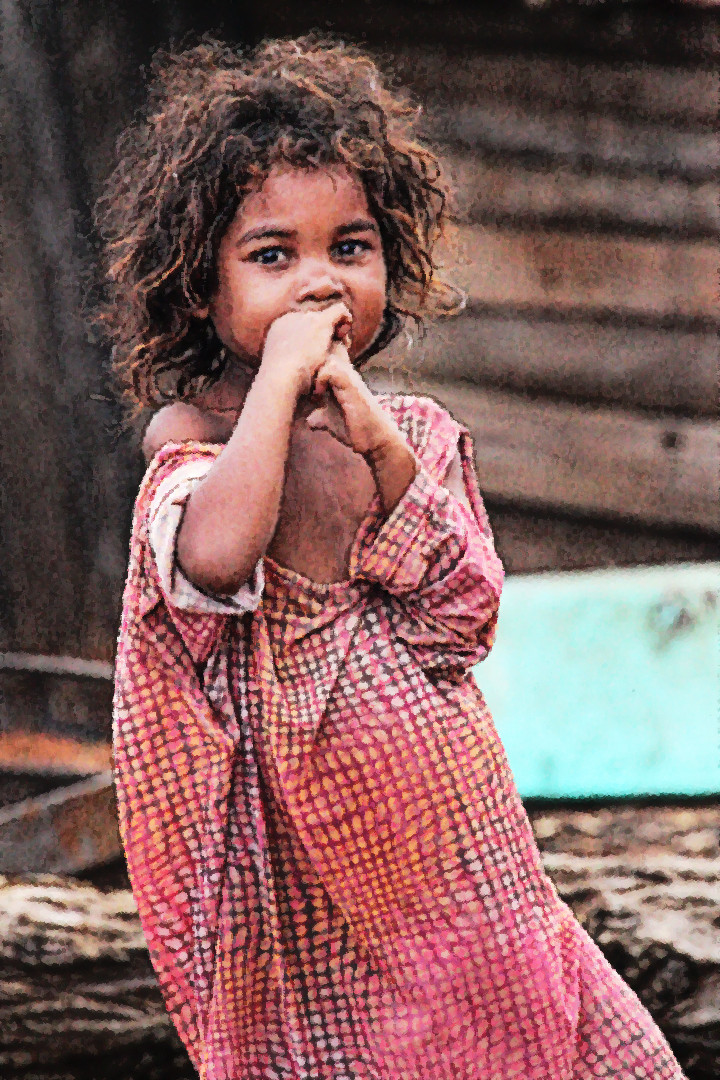
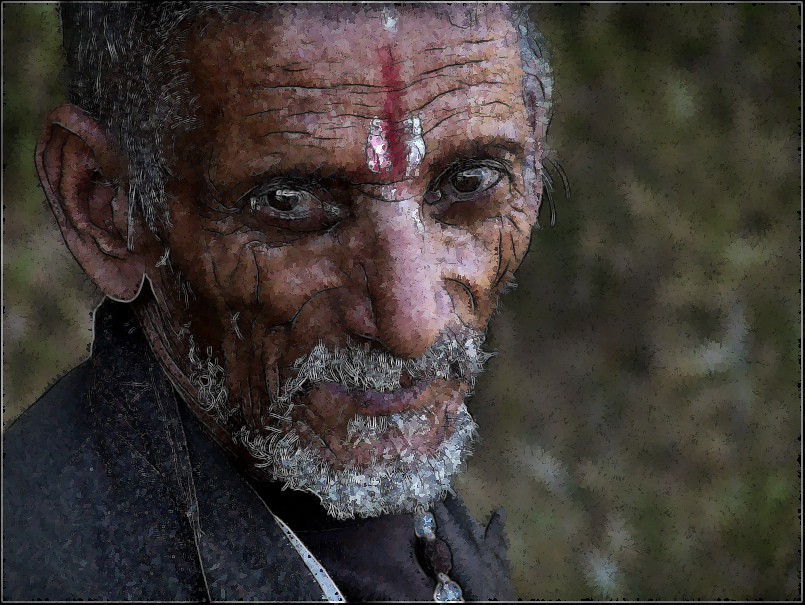
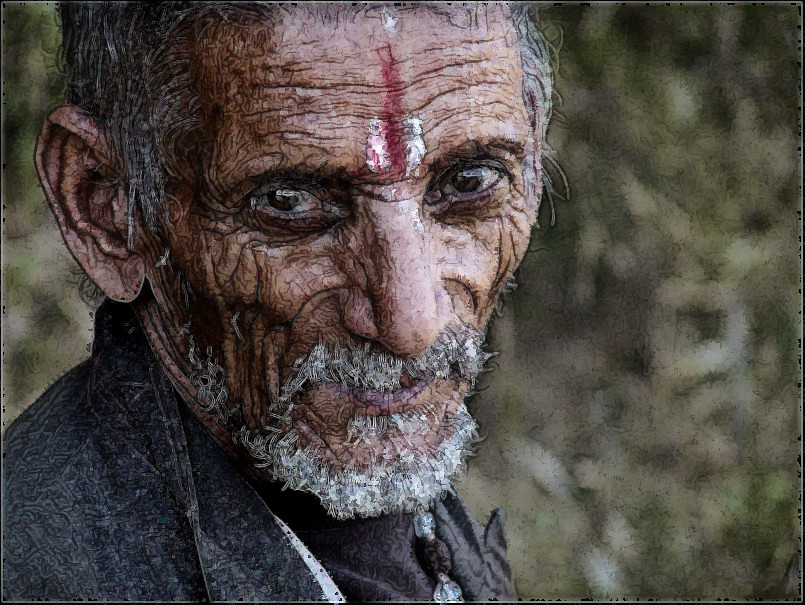
PORTRAIT
 digital painting with gmic
 by
PhotoComiX, on Flickr
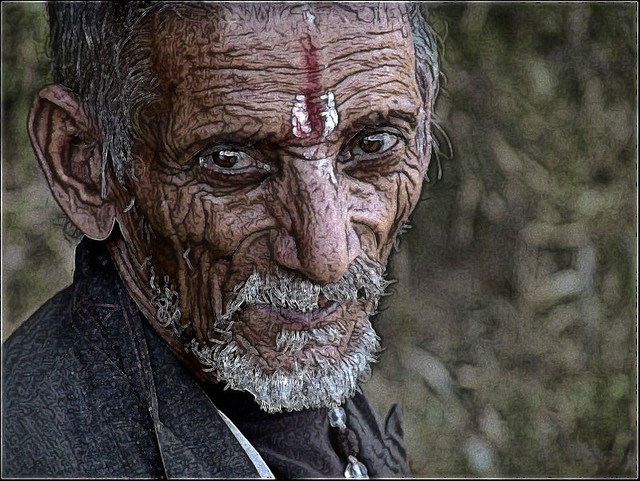
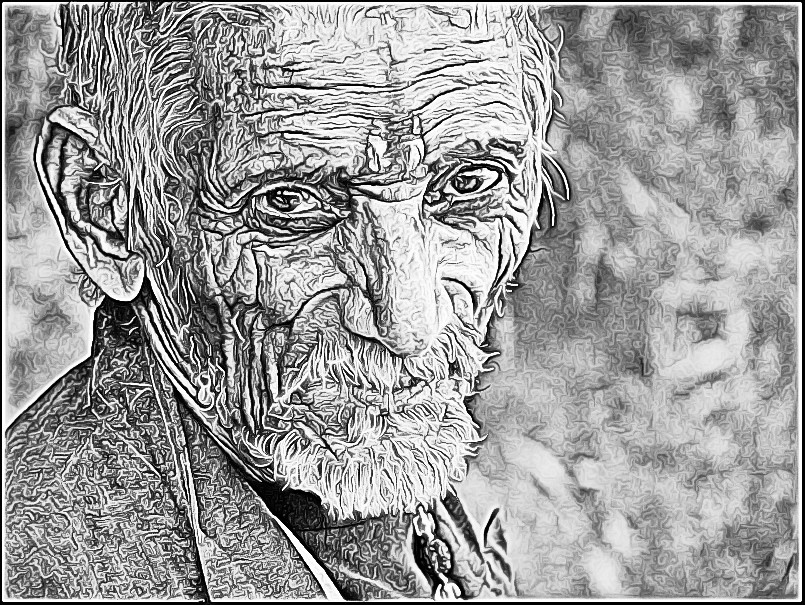
 Man from Dhulikhel
 by
Sukanto Debnath, on Flickr
TUTORIALOK chose a image, open in gimp, and start gmic
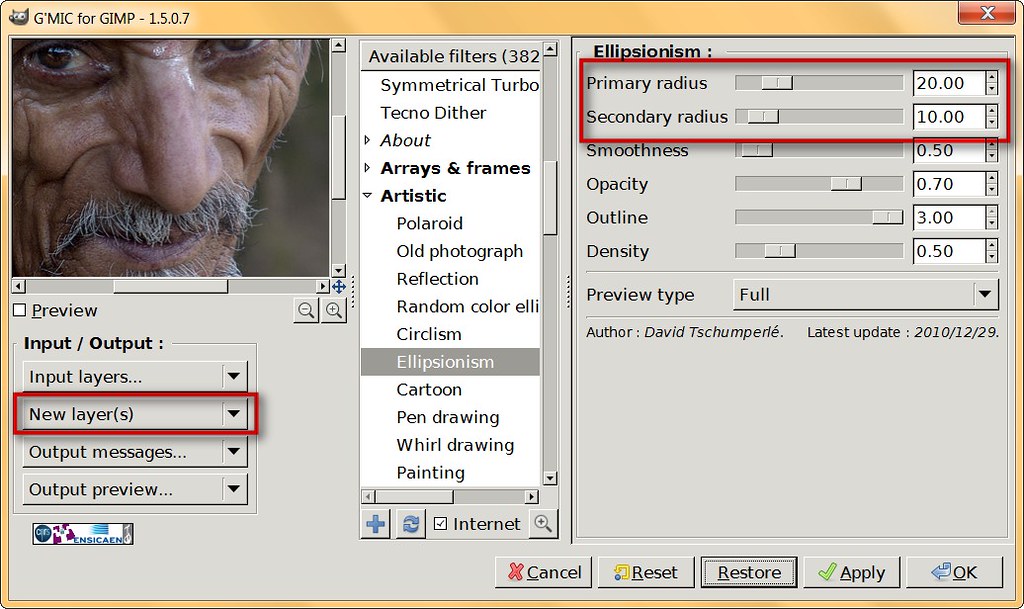
1) in gmic set Output (it is a option under the preview windows) to "New Layer(s)" take care, "New Layer(s)" NOT "new Active layer "2 ) Uncheck the preview display or will slow down a lot
go to Artistic /"Ellipsionism"
 Tutorial
 by
PhotoComiX, on Flickr
Don't be foolish by the default
The default effect would far too strong and abstract , but that may be adjusted reducing Radius and Outline values
,first i set the Primary radius to the MinimumThe Secondary Radius value should be different or the result will be boring (sort of circle ) the proportion between the 2 radius will determine the size of... something close to a brushstroke effect , A For secondary Radius the double of the primary (so 2) may be a good starting point
Also set the "Outline" to the minimumThis layer will be the base will contribute for texture and colors, try to find the best effect possible while maintaining the image still readable (later we will add details )
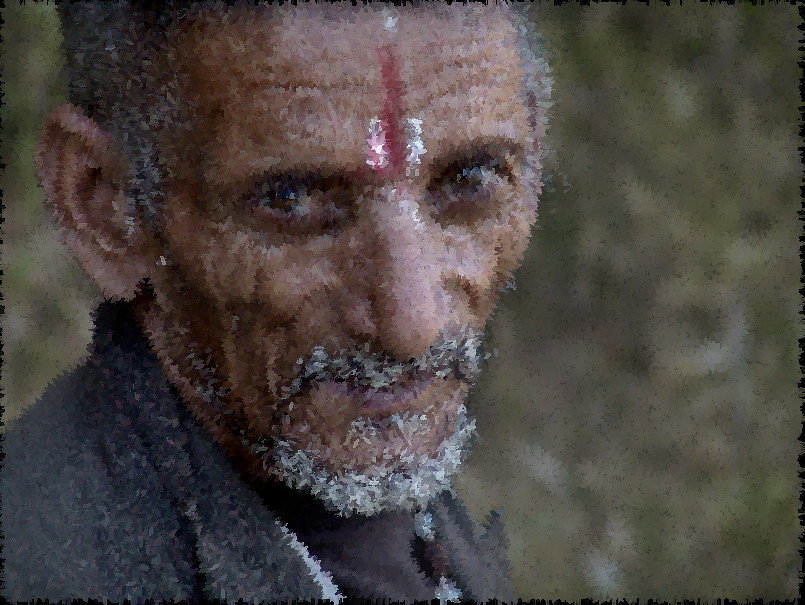
this seems good...notice that the eyes are still readable even if less clearly
(but they will regain readability later, by adding highlight and shadow)
 Tutorial
 by
PhotoComiX, on Flickr
click
Apply (no need to close gmic using OK, APPLY is fine) your new layer will look as
 Tutorial
 by
PhotoComiX, on Flickr
that is no bad at all but we want more ... first we want add dark outlines and details as with a thin sharp brush)
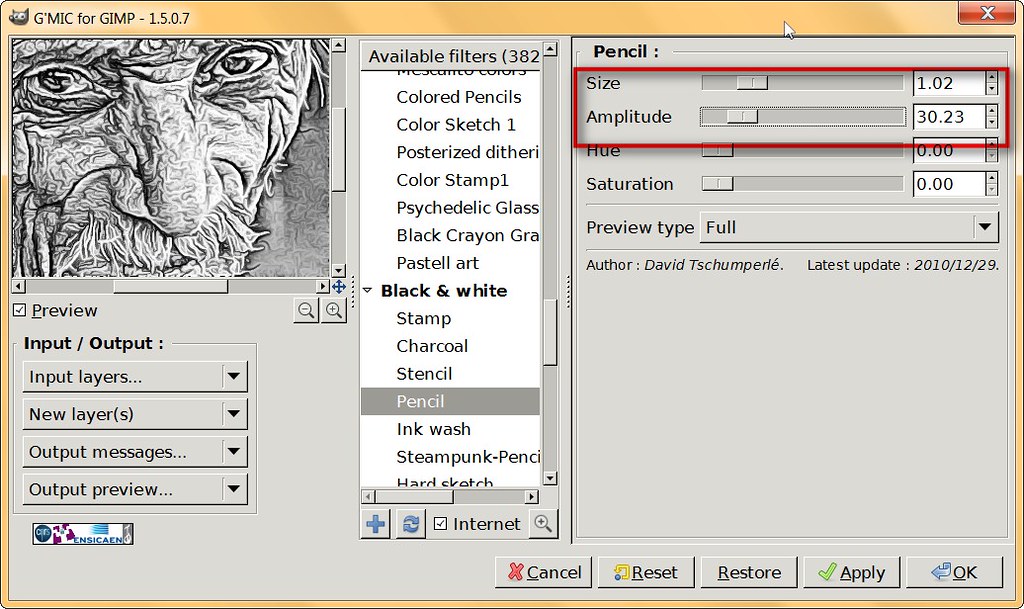
So now look inthe gmic menu for
BW/PencilLook to the screenshoot, we will use only the controls enclosed in red:
Size and Amplitudethe other Controls there (Hue and Saturation) are to give a color to the "pencil" but we only want BW so are not to be used
Note that again
the default is not what we wish,  Tutorial
 by
PhotoComiX, on Flickr
see the difference? raise Size and maybe lower Amplitude, focus on get nice clean black outlines
 Tutorial
 by
PhotoComiX, on Flickr
Again click apply and you should see a new top layer as
 Tutorial
 by
PhotoComiX, on Flickr
Now time for higthlight ....Again look in the gmic menu for
Contour/Gradient Normalizationagain
DON'T STICK TO THE DEFAULT, that in this case will look as
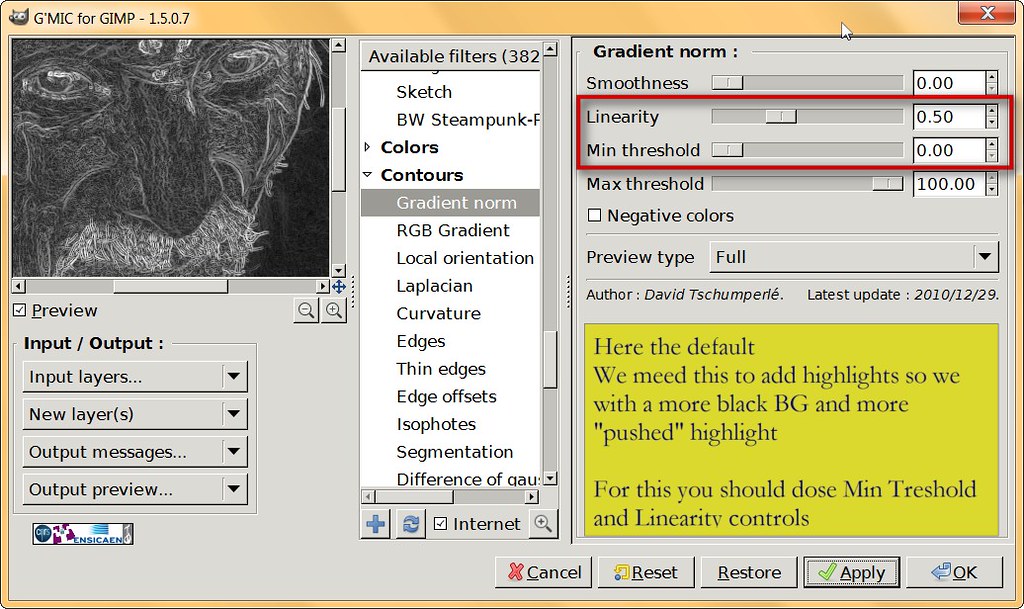 Tutorial
 by
PhotoComiX, on Flickr
The white outlines must be clean clearly visible while the dark BG must be close as possible to solid black as you may see here
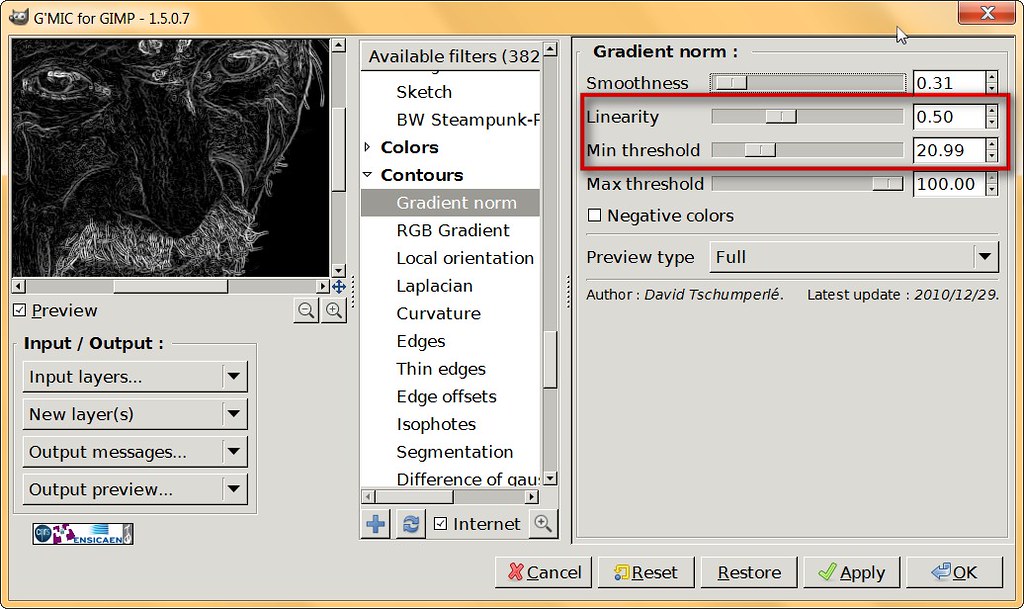 Tutorial
 by
PhotoComiX, on Flickr
So this time you may click OK, close GMIC and this should be what you see
 Tutorial
 by
PhotoComiX, on Flickr
NOW THE MAGIC1 )Open in the gimp the layer windows
toggle OFF the visibility of the top layer, now that would disturb
Click on the layer below ( that in BW with Pencil) in
DARKEN ONLY mode
Dose the opacity with the slider again
default 100% will be too strong, i chosen about 65% as you may better see here
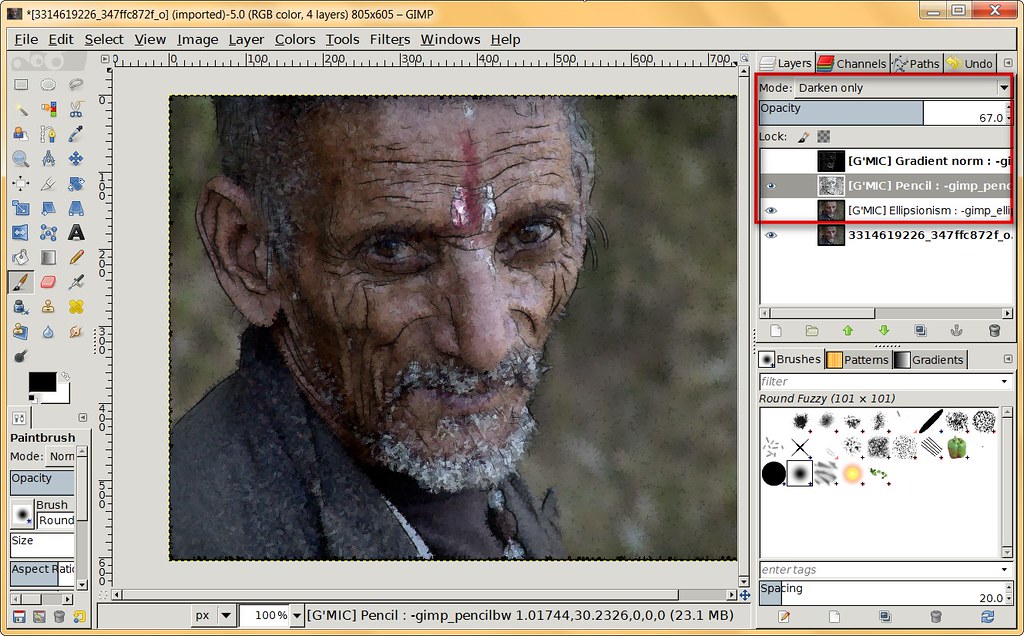 Tutorial
 by
PhotoComiX, on Flickr
time for highlight
Set the top layer to
LIGHTEN ONLY, make it visible again ...DONE
 Tutorial
 by
PhotoComiX, on Flickr
Now consider this a base once you get this base then will become obvious how to build upon or adapt to the images :
As example you may add a transparent layermask to any of this layer,
on the top layer to add modify the highlight
The same on the layer below to modify the darker outlines
And you you may Duplicate the "base" layer (were we used Ellipsionism") and set the dup on softligh or grain merge mode to obtain more dramatic colors
just as example i duplicated the Ellispionism layer, set over its copy in soft light mode and
 Tutororial
 by
PhotoComiX, on Flickr
Or you may wish copy the same base effect, put the dup on very top in normal mode with low opacity --
or
but whatever you may wish to do i believe this a good base