Been experimenting again so here goes....
Step 1. Open new image any size and go to Filters>Render>Clouds>Solid Noise and set the detail to 15 and the X and Y values to 5 as shown here.
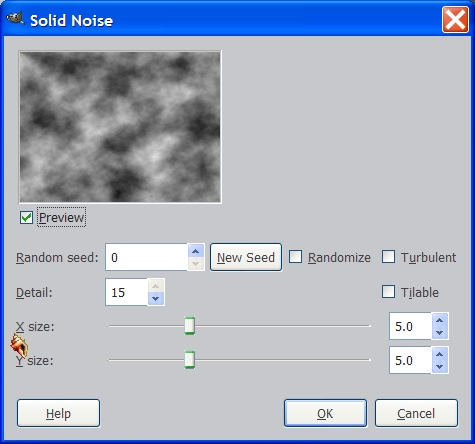
You should now have some clouds that look similar to this
 Step 2.
 Next, go to Filters>G’mic>Contours>Local Orientation and enter the settings as shown.
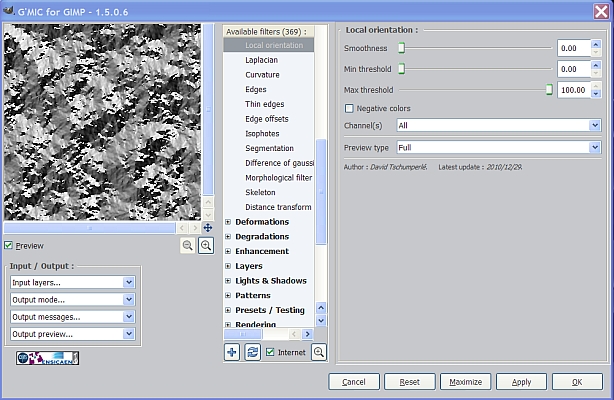
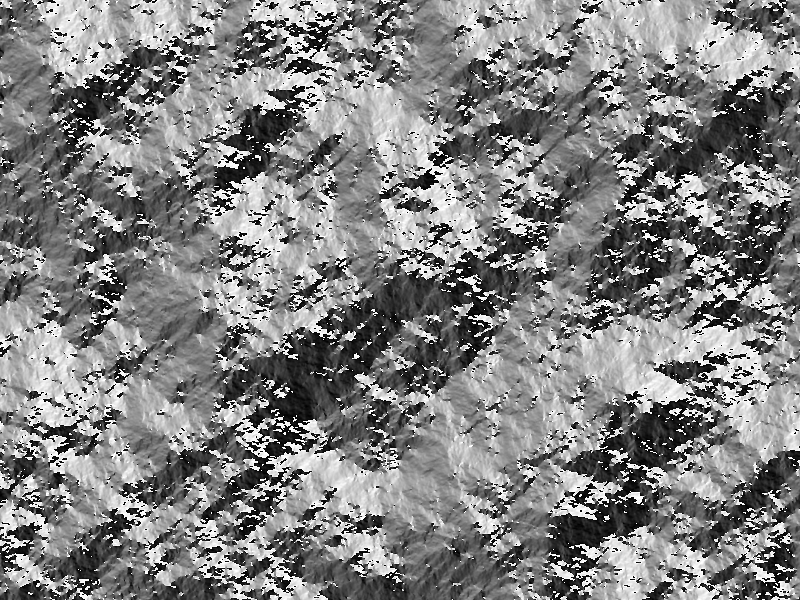
Your image will look similar to this.
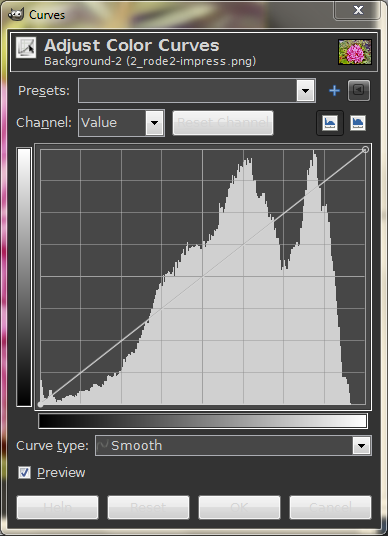
 Step 3.
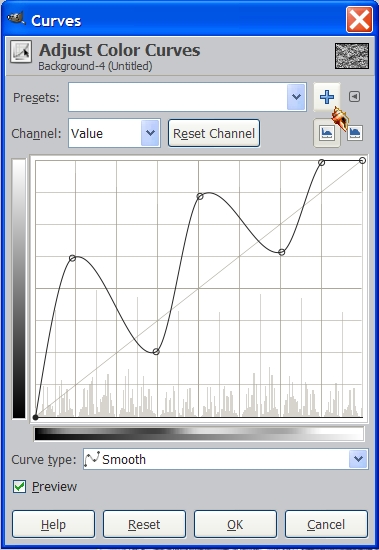
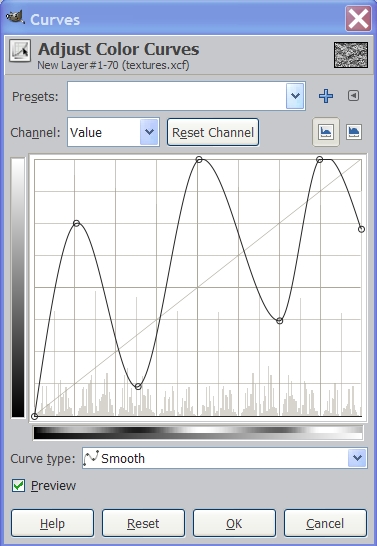
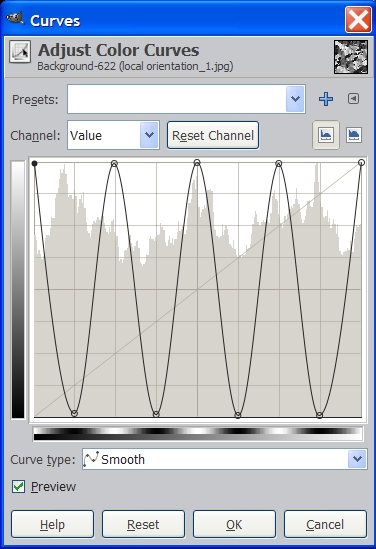
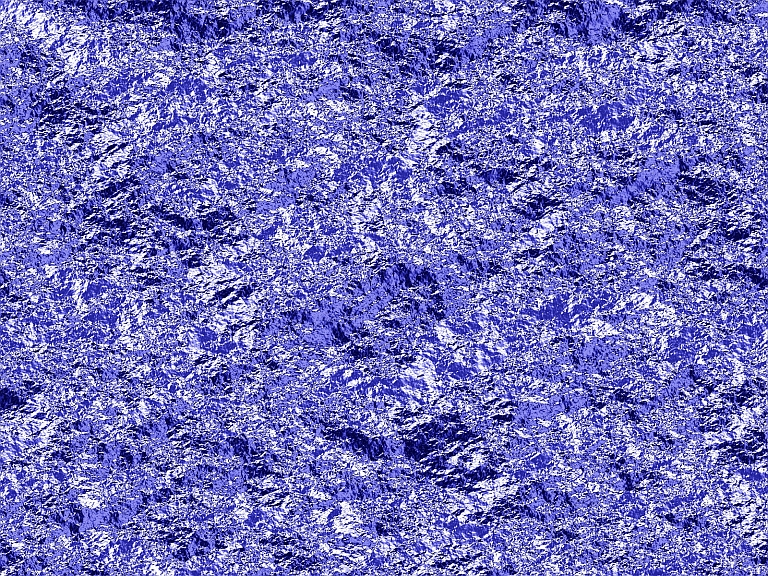
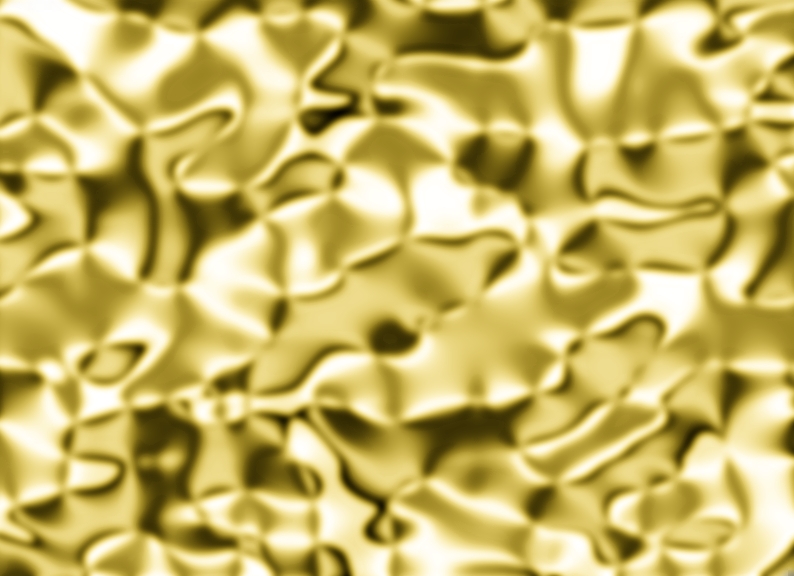
 Here’s where we make it look like crinkled tin foil. Go to Colors>Curves and use one of the chrome settings shown below. Save these settings by clicking on the little plus sign at the top of the Curves dialog and then enter the file names as shown. I will use three different settings I have saved as “Max Chrome”, “Medium Chrome” and “Soft Chrome” to demonstrate the different results and the amount of “crinkle”.
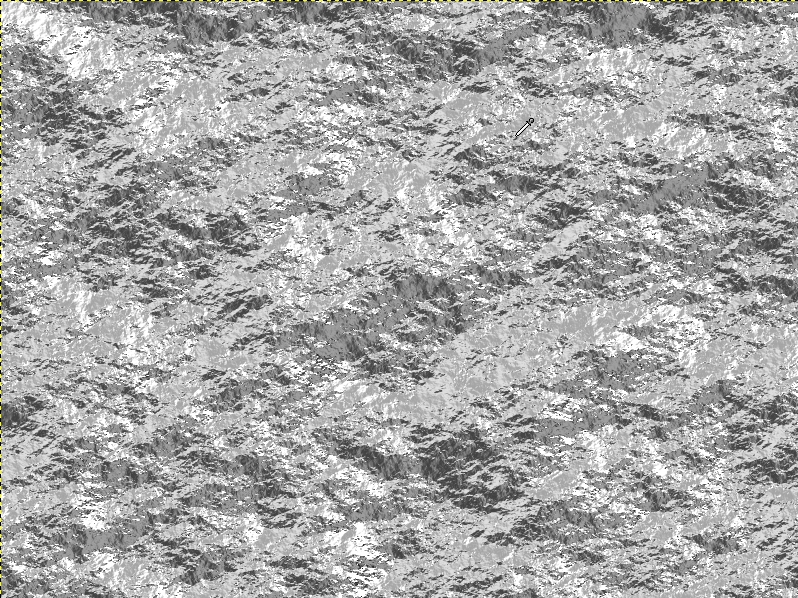
Soft Chrome settings
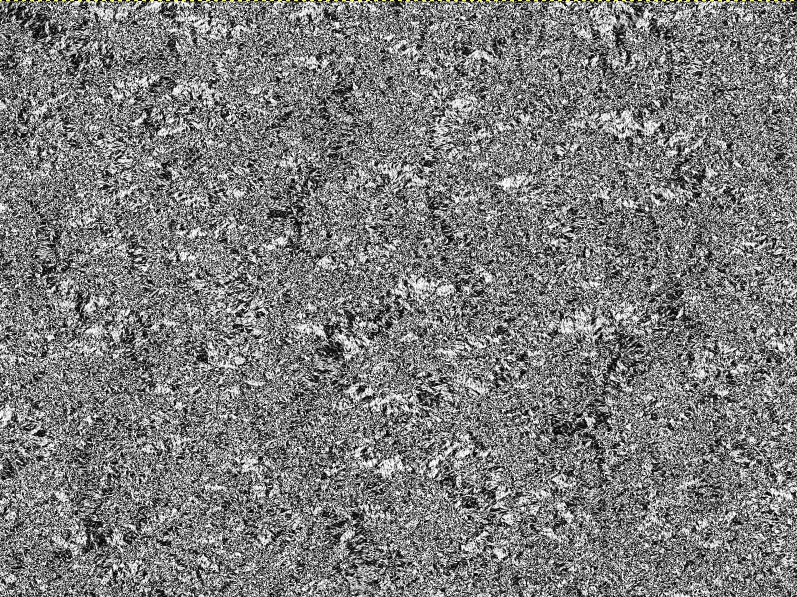
Soft Chrome results
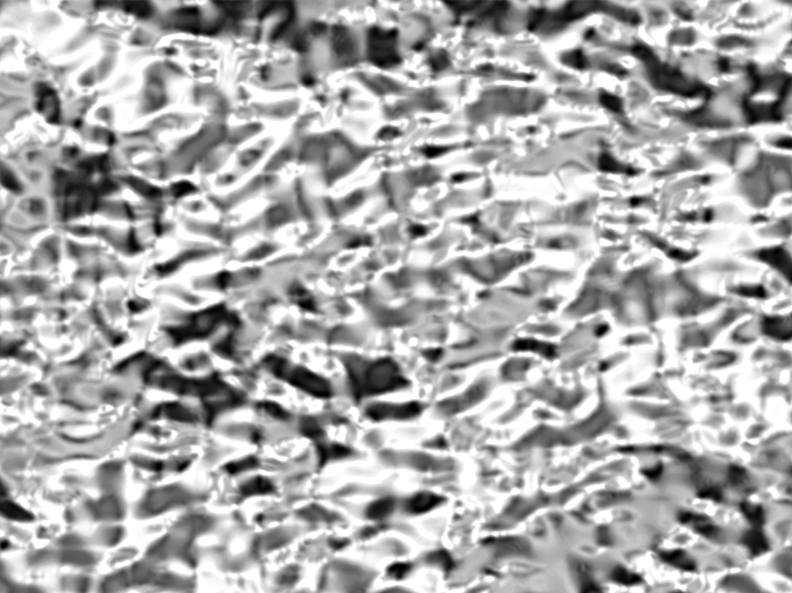
Medium Chrome settings
Medium Chrome results
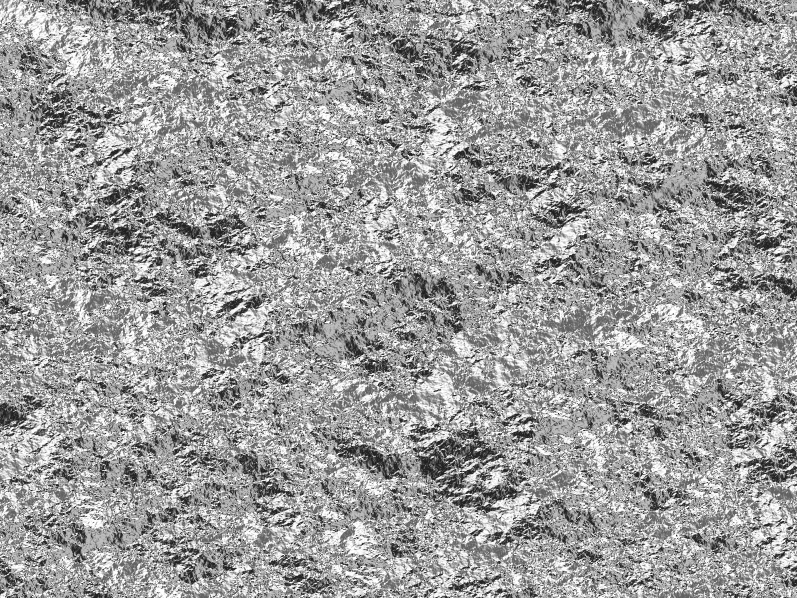
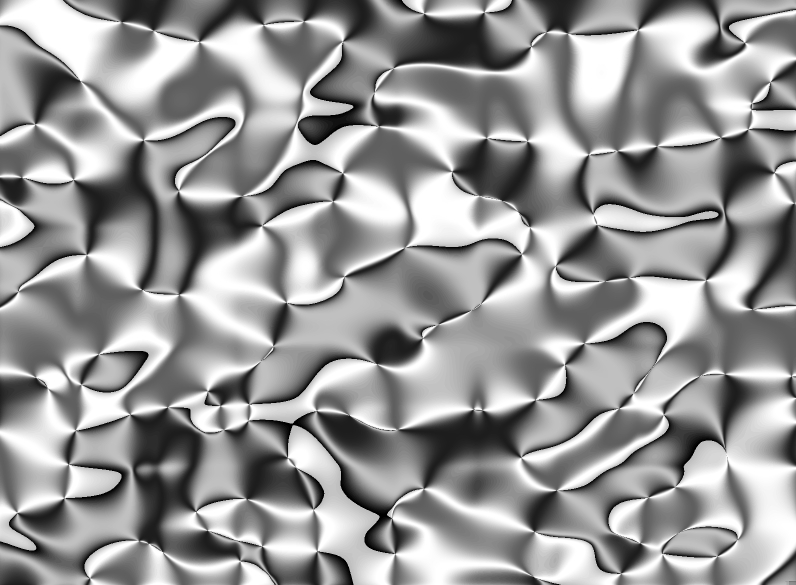
Max Chrome settings
Max Chrome results
As you can see, you can get dramatic results by simply adjusting the curves settings. I use these settings quite often when making metallic effects so saving these settings will keep you from having to recreate them over and over again.
If you want to get even more variations, try changing the settings on your Solid noise layer and then apply the same chrome setting variables with a few minor changes. Here are a few examples using different Noise settings and a couple of other filters:
Noise - Detail 1
X = 5
Y = 5
Noise - Detail 3
X = 3
Y = 3
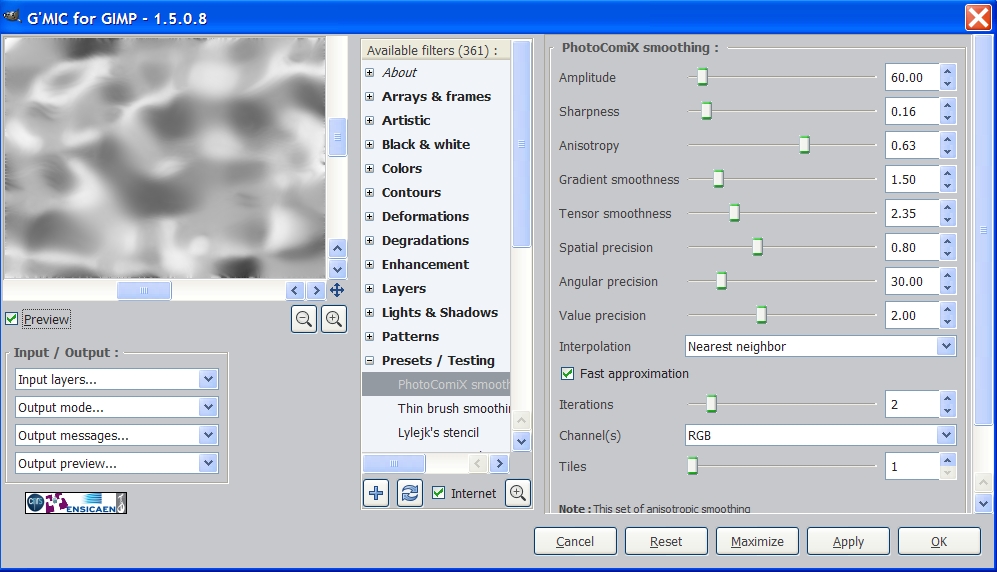
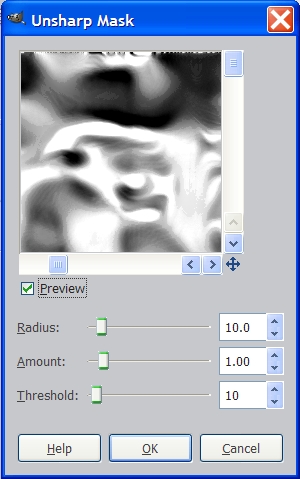
G’mic>Contours>Local Orientation. Set the Smoothness to .50 and use Medium Chrome for curves. Then go to G’mic>Presets & Testing>Photocomix Smoothing and Filters>Enhance>Unsharp Mask.
Here are the settings for the last two Smoothing & Unsharp Mask filters mentioned above.
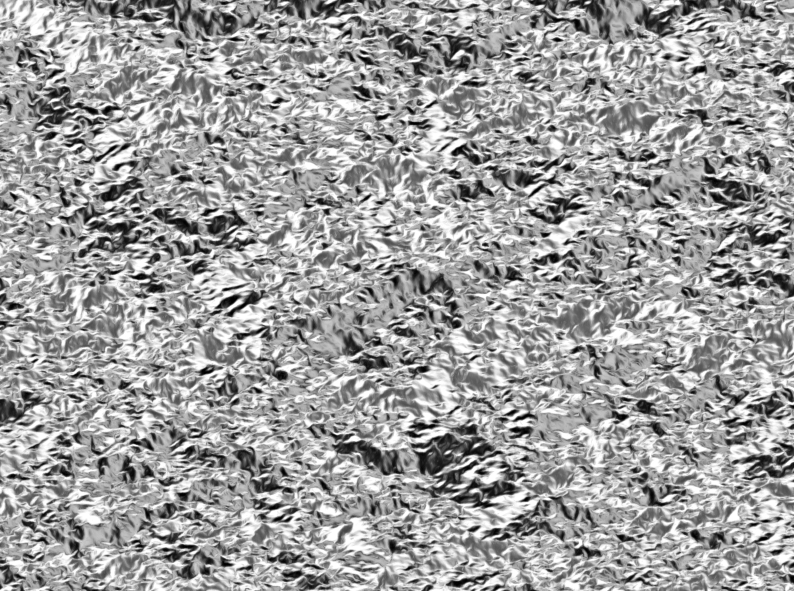
Here’s what the results look like now.
Next, make new Noise layers with the following settings.
Noise - Detail 5
X = 5
Y = 5
Noise - Detail 10
X = 3
Y = 3
Now use the same set of 4 filters as in the above examples with only small changes in the last two.
In the Smoothness filter dialog, change the Gradient Smoothness setting to 0 and in the Unsharp Mask dialog, change the Amount setting to .50 and here is what they look like.
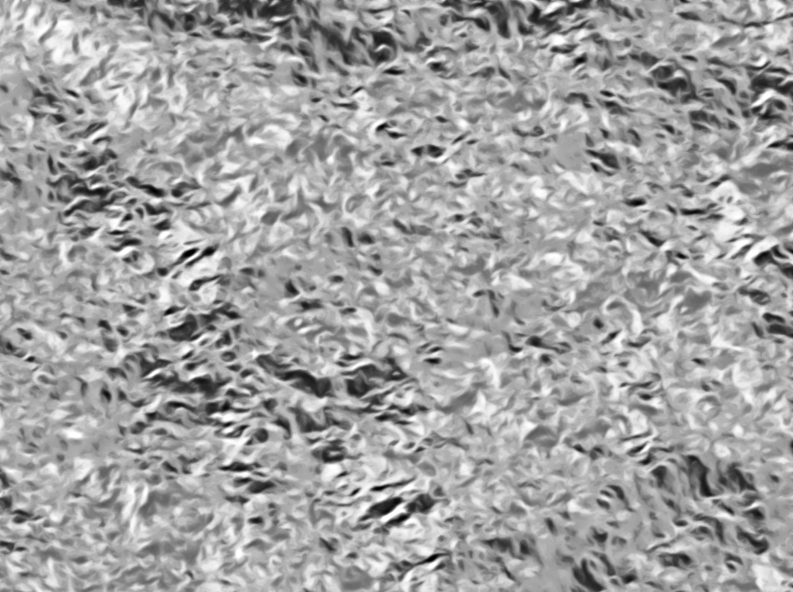
Not a lot of change in these but you be the judge of which settings and filters looks the best to you.
Add a transparent layer above your creation, fill it with any color and set the layer mode to “Overlay”.
I hope this wasn’t too long but you can see there are endless possibilities after the initial three steps
Have fun!