I DID NOT MAKE THIS I MERELY CONVERTED IT TO GIMP Today we will be creating an awesome grunge signature. In this Tutorial I will be teaching you how to use the simple tools of GIMP to your advantage and create a conspicuous signature for your forum profile. It also shows you just how similar both GIMP and photoshop can be as this is entirely based on a photoshop tutorial.
Files needed to complete this tutorial:
RadioactiveYellow pattern (uness using one in download lnik below)
RenderTemplateBlack metal rust (Unless using one in download link below)
Before we start unzip the contents of this folder to the GIMP pattern folder for windows 7 it will be C:\Users\<username>\.gimp-2.6\patterns
http://www.mediafire.com/?dfweg3d6hd3cs1jIf you don’t want to download these files then go and open both the black metal rust and yellow texture in GIMP and save them as a .pat then put them in the pattern folder.
If possible download this GIMP plugin following the instructions on the link
http://registry.gimp.org/node/186Part 1 Ok, open up GIMP with a new document of 640px x 128px (width-height).
Set the foreground color to black (000000), and then go to edit>fill with FG color.
You should now have this:
 Part 2
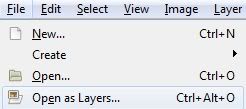
Open up the Template file in GIMP by going to file>open as new layer and select the template
It’s a bit too big to fit on the canvas, so we’re going to resize it. Use the scale object tool and drag from the corner until it fits.
Try resizing it to the way I did.

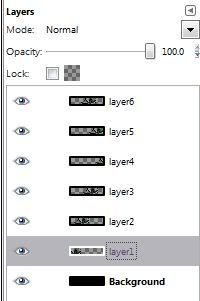
Now, this layer is going to make part of our background effect. But first we’re going to duplicate the “Layer 1” layer 5 times. So, right click on the layer and choose “Duplicate layer…” and keep doing that until you reach 6 layers in total (including the original layer)
 Part 3
 Now we’re going to disperse all the layers around the canvas. Just select each of the layers and the “Move tool” and move them around until you have something like this:

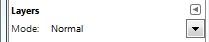
Now we’re going to add the “effect”. In the layers dialog where it says "normal" click that then select hard light. Do the same for all the layers (except “Layer 6” and “Background” layers) When you have done that, change the mode of “Layer 6” from normal to overlay.

To tidy it up a bit merge layers one to 5 by making the background layer and layer 6 hidden by clicking the eye in the layers dialog then right click on any layer in the layer dialog and select merge visible layer and click ok.
Now make all layers invisible.
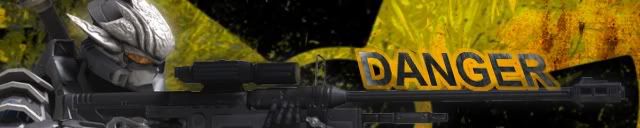
Part 4After select the text tool from the toolbox dialog and click on the canvas. Write whatever you want, in this case I chose “DANGER”. Make sure the colour of the text is white so you can see it clearly; if it isn’t click colour in the text tool options and change it to white.
The font I’ve used is Arial bold, which comes with GIMP. And pick any size you want I used 48.
Now again in the layers dialog right click on the text layer and select alpha to selection.
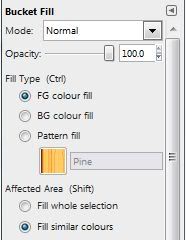
Using the bucket fill tool, make sure it is set to selection and pattern fill, select the black metal rust pattern.
Now click anywhere inside the selection and click to fill with the pattern. Then go to select>none.
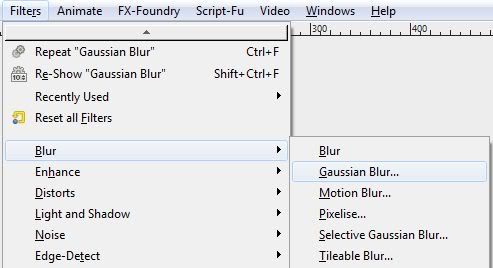
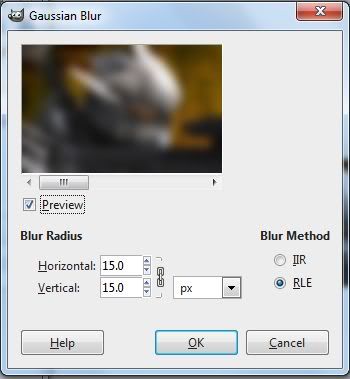
Ok, now duplicate this text layer and place it below the original one. Now we’re going to “blur” this duplicated layer. Go to Filter > Blur > Gaussian Blur and set it to 41 but you can change this depending on what looks good.
Now there is two ways to add the outer glow, the automatic way using the script linked above or the manual way.
Manual wayNow right click on the original text layer in the layers dialog and select alpha to selection. Create a new layer then go to select>grow and change the amount to 2.
Then go to select>feather>and select 5.
Now change the FG color to ffa800. Select the bucket fiil tool, this time FG color fill and selection fill in the options, and fill in this selection.
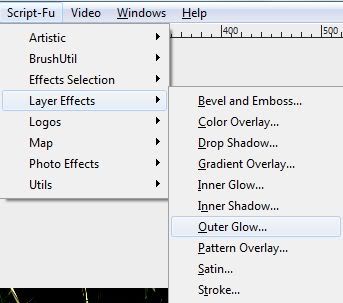
Automatic wayGo to script-fu along the top>layer effects>outer glow and change the color to ffa800 (this only works if you installed the link at the start right)
Should look like this:
 Part 5
 Ok, now we’re going to be concentrating on the template of the signature instead of the text, so to avoid the obscurity of the text click on the small eye next to all of the text layers to make them invisible just for now.
Make all of the other layers visible again.
Now open your Radioactive image and in the same way you opened the “Template” layer in Part 2. When you’ve done that paste the Radioactive file you’ve just copied into that layer. Try resizing it and position it the way I did.

Now drag the “Radioactive” layer above the “Background” layer and below the “Template” layers.

And lower the opacity of this layer to about 60%
After you’ve done that, click once on the “Template” layer (the one with the 5 renders merged) and set the opacity to 28%.

Now the signature seems to take form, but not quite.
Make a new layer by going to Layer > New > Layer and call it “Pattern”, once done drag this layer above the “Template” group.
Now using the bucket fill fill this layer with the yellow rust pattern.
Change the layer mode of this layer to darken.
 Part 6
 Now this is the exciting part of the tutorial! Ok, open up the Render by Hawk and open it like you did with the other files. rename this layer “Render” and move this layer above all the other layers. Now try to resize it and position it the way I did:

Now duplicate the “Render” file and place this duplicated layer under the original “Render” layer. Hide the original “Render” layer on top by clicking the eye symbol and then select the duplicated layer below. We are going to add another blur effect here so go to Filter >blur> Gaussian blur… > and set it to 15 (again mess about a bit with this) Should now look like this:
 Part 7
The last part!!
Make both text layers visible again by clicking the eye symbol. Now to have the text lay on the end of the sniper rifle select the upper text layer, right click on it in the layers dialogue and mergedown. Now with the merged layers still selected go select the rotate tool in the toolbox and then just rotate slightly to the left to imitate the rifle’s end. Select the “Move tool” and with the arrow keys move both text layers down a bit almost touching the end of the sniper rifle.


