Interwoven Metal Screens
Making screens requires a bit more skill at pattern making, so hang in there because this one is a bit long in order to explain everything completely. Once you have mastered these techniques, you will be equipped with the skills and understanding to create just about any kind of pattern you want. You may also want to review some of the principles of basic pattern making in one of my other tutorials. You can find it here…
viewtopic.php?f=23&t=3700Step 1.
Open a new image sized 260x 260 and the resolution should be pretty high to get a lot of definition in our pattern. I’m using 1200 ppi.
Step 2.
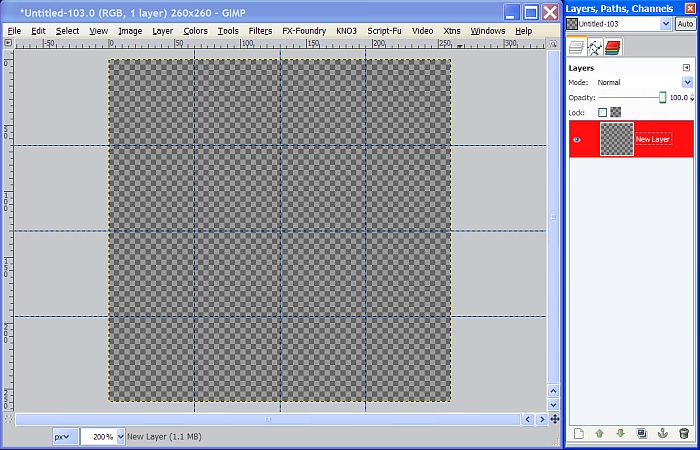
Create a new transparent layer above your background layer and name it Gradient. Tick the eye in front of the background layer so you only see the transparent layer.
Step 3.
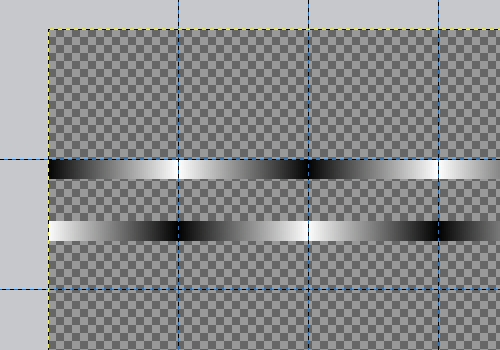
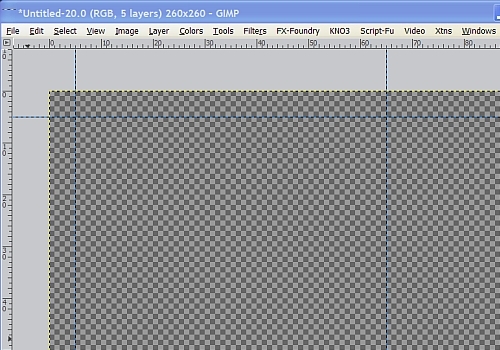
Increase your view settings to about 400% and place a guide in the exact center vertically and horizontally using the rulers at the top and the left. Since our image is 260 pixels the center will be at 130 pixels. Add more guides at 65 pixels and 195 pixels in both directions. This will essentially divide our image into 16 equal quadrants. Once you have all your guides in place, return your view setting to about 200%
Step 4.
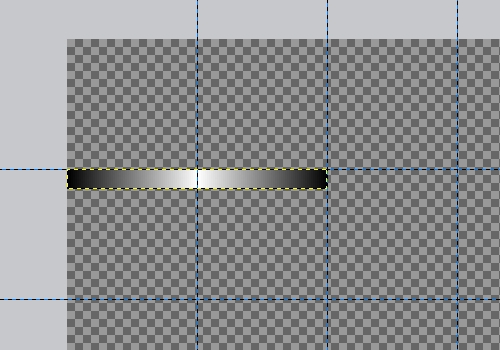
Select the Rectangle Select tool and start at the left corner of the first horizontal guide and create a selection 130 pixels by 10 pixels under the guide. You can watch the boxes at the bottom of the tool dialog as you make your selection to get it just right. Once you have your selection, click on the Gradient tool and select Foreground to Background for the gradient and set the shape to Bi-Linear. Tick the box to the right of the gradient or click on the little arrows to reverse the gradient. Using the guide we made, click on the center of the selection at the first vertical guide and drag the gradient to the right hand side of the selection to the center guide to create your gradient. Now go to Select>None to turn off the selection.
Step 5.
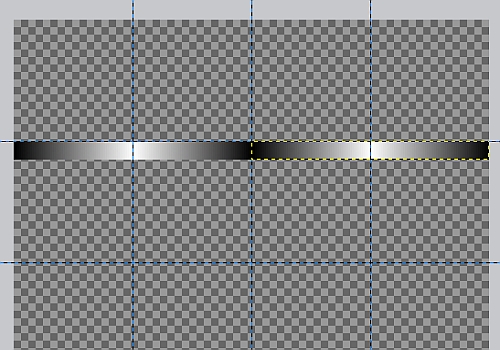
Duplicate this layer and using the Move tool, tick the little circle in the tool dialog that says Move the active layer, and move the layer to the right until they are end to end like so.
Right click on the duplicated layer in the layers dialog and select Layer to Image Size, then right click again and select Merge Down.
Step 6.
Duplicate this layer and go to Colors>Invert. Use the Move tool to move this layer down a bit so you can see both layers. It does not matter where as long as the layer remains aligned left and right. Right click on the duplicated layer and select Layer to Image Size.
Rename the layer “Inverted” just so we can differentiate between layers. Now that we have that completed, we need to “shape” our wire or bar.
Step 7.
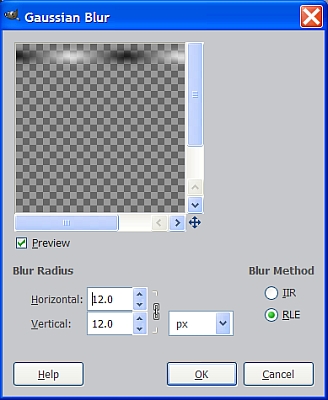
Select the Gradient layer to make it the active layer. Duplicate it and rename it “blur”. Go to Filters>Blur>Gaussian Blur and set both values to 15 and click OK. Tick the eye in front of the layer in the layers dialog to turn off the visibility of the Blur layer.
Step 8.
Select the Gradient layer to make it active again, and go to Filters>Map>Bump Map and enter the settings shown below. Make sure the Blur layer is selected as the bump map.
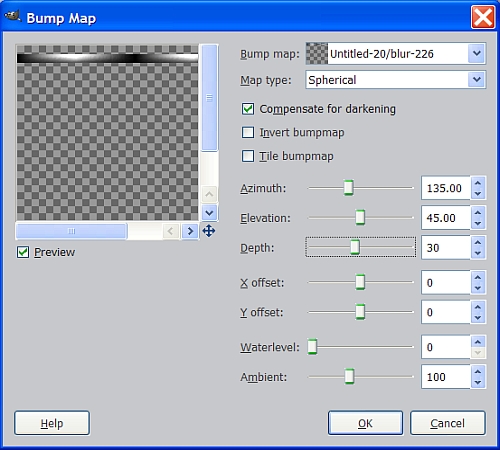
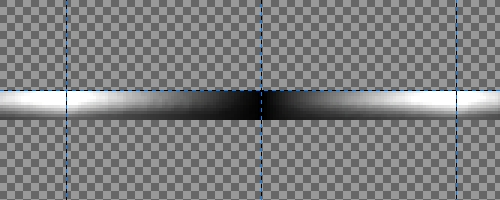
Now our little wire or bar appears to have a rounded shape with subtle shadows and a bit more definition.
Step 9.
Delete the Blur layer as we will not need it anymore. Repeat steps 7 and 8 working on the inverted layer to give it the same type shape.
Step 10.
Increase your view to about 800% again and move your scroll bars/arrows until you can see the top left corner of your image close up and the area just outside your image canvas. Since our bar is 10 pixels high, we need to place two new guides at exactly 5 pixels both vertically and horizontally like so.
Change your view setting back to 200% and use the Move tool to move the Gradient layer up to where the bottom edge our bar shape is aligned with the new horizontal guide at the very top. Rename this layer H1, duplicate it and move the duplicate down to and centered on what is now the third horizontal guide. Rename the duplicated layer to H3.
Right click on the H1 layer in the layers dialog and select Layer to Image Size.
To help us get the H3 layer lined up just right, let’s make it a bit more manageable. First, make absolutely sure the H3 layer is centered left to right, by checking the edge of your image to make sure it is not hanging over on one side or the other. Right click on the H3 layer in the layers dialog and select Alpha to Selection. Now go to Layer>Crop to Selection, then Select>None to turn off the selection. Now we have a smaller layer to work with and when we need to move it, we will be able to see the little crosshairs in the center of the layer to help us align it to our guides. (I use this technique quite often to make things easier.)
Step 11.
Rename the Inverted layer to H2, duplicate it and rename the duplicate to H4. Crop these two layers just like we did above with the H3 Layer to make them easier to work with.
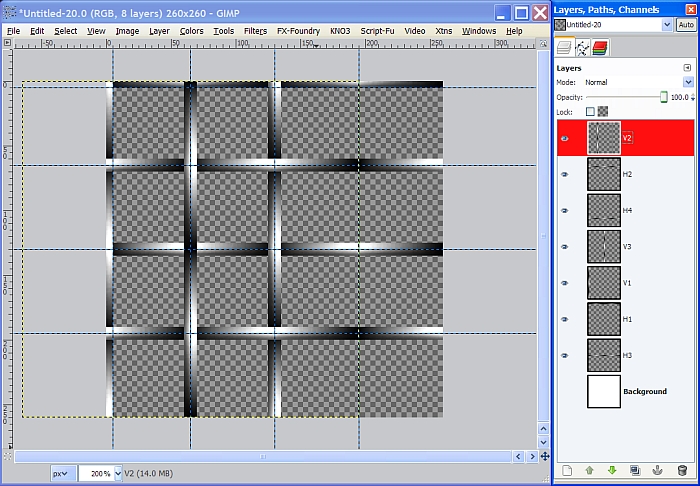
Use the move tool and reposition H2 to be centered on the second horizontal guide and move H4 to be centered on the fourth horizontal guide. Confused yet? This is where a picture really is worth a thousand words. Your image and layers should look like this.
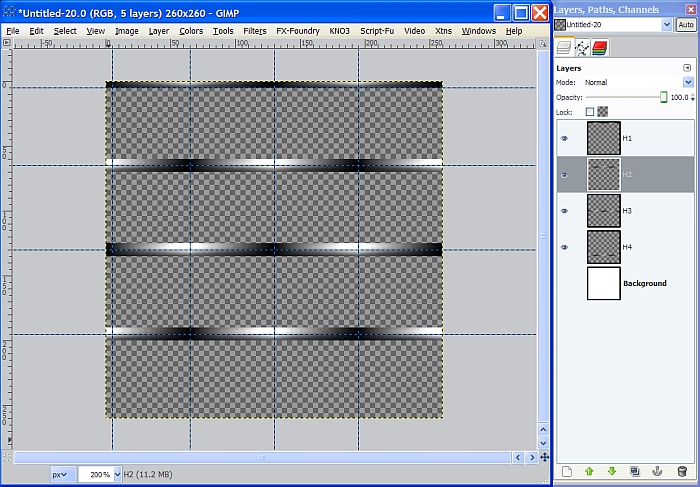
Make sure everything is aligned left and right and the layers are centered on the guides exactly.
Step 12.
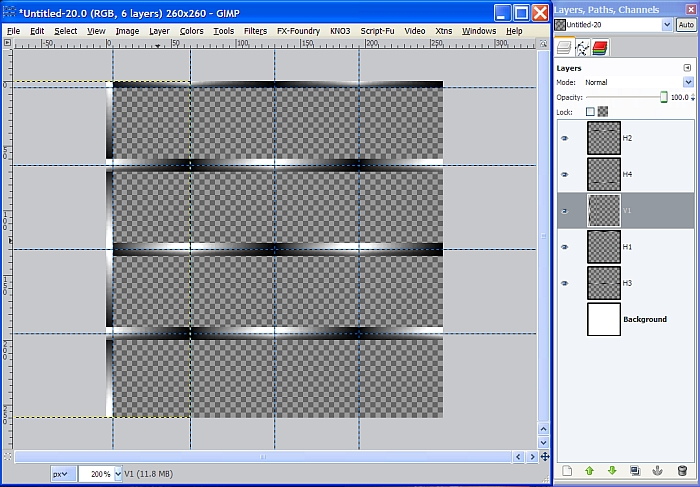
Duplicate the H2 layer and go to Layer>Transform>Rotate 90 degrees counter clockwise. Rename the layer V1 and using the move tool, reposition it all the way to the left side of our image so that the right edge of our bar is aligned with the first vertical guide. In the layers dialog, move the V1 layer all the way to the top in the layer stack so it appears to overlap the other layers in your image. Move the H4 layer above the V1 layer and the H2 layer above the H4 layer like so….
Step 13.
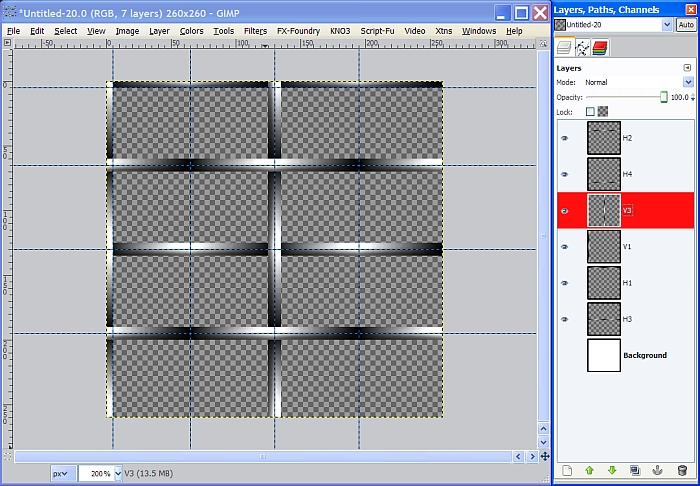
Select the V1 layer and duplicate it one time and move it into position centered on the third vertical guide making sure you keep the top and bottom edged lined up with your whole image. Right click on this layer in the layers dialog and select Layer to Image Size. Rename this layer V3. Now, right click on the V1 layer and select Layer to Image Size.
Step 14.
Duplicate the H3 layer and Go to Layer>Transform>Rotate 90 degrees counter clockwise. The rotated layer will appear behind the V3 layer so we need to use the Move tool to reposition it to be centered on the second vertical guide. Right click on this layer and select Layer to Image Size. Rename this layer V2 and move it to the top of the layer stack.
Step 15.
Duplicate the V2 layer one time and move it into position centered on the fourth vertical guide. Right click and select layer to Image Size. Rename this layer V4. Go back and right click on the V2 layer and select Layer to Image Size.
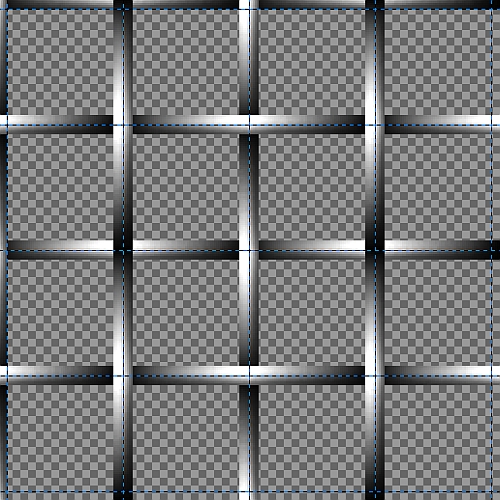
Our interwoven metal screen pattern should now look something like this.
Step 16.
Add two more guides at 5 pixels from the edge in the lower right hand corner of your image. Duplicate the H3 layer and move the duplicate down to the very bottom so that the edge of the layer is below the bottom horizontal guide similar to what we did at the top in Step 10. Rename the duplicated layer H5. Next, duplicate the V3 layer and move it to the far right side and name it V5. Right click on each layer in turn and select Layer to Image Size.
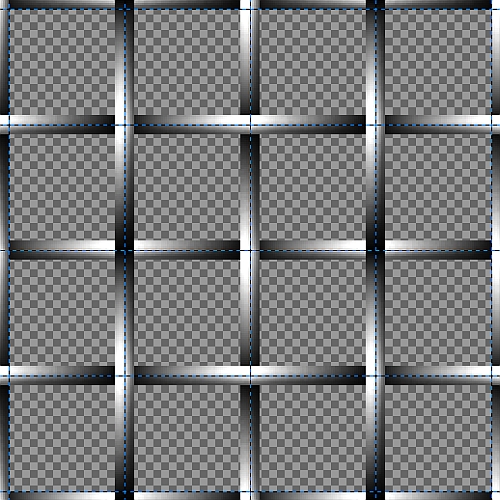
Just in case you didn’t already notice, some of the weave doesn’t cross over and under as it should, particularly V2 and V4 at the top, center, and bottom. We could spend all day trying to rearrange the order of the layers but it won’t matter because some will always be in the wrong position. To fix this we must carefully delete sections of the ones that are covering up parts that should appear to be on top.
Step 17.
Right click on the H1 layer and select Alpha to Selection. Click on the V2 layer in the layers dialog and hit the delete key. Now with the selection still active, right click on the V4 layer and hit the delete key again. Go to Select>none to turn off the selection. We pretty much do the same with Alpha to Selection on the H5 layer and using the delete key on layers V2 and V4 in a similar fashion, then Select>None. Now, do the Alpha to Selection on the H3 layer and use the delete key on the V2 and V4 layers again, then Select>None. Go to Image>Guides>Remove all Guides, then right click in the layers dialog and select Merge Visible Layers. You can now scale your image to 256 pixels and save it as a new .pat file
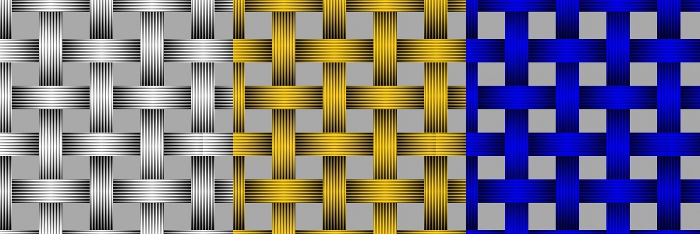
Whew! Our pattern is finally finished. Apply a rust or chrome finish or colorize it and you’re on your way to becoming a pattern warrior! Here’s what you should have.
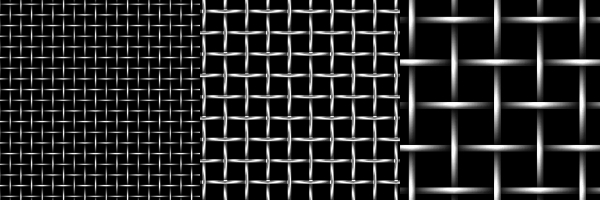
The first one is at 25%, second at 50% with a chrome finish and the last one is the full size pattern at 256 pixels. You can make your pattern a little fatter, without the blurring and bump mapping, or you can make it really wide and make it look like flat metal weave. Here are a few examples using a Four Bars gradient overlay on top of the original gradient used in this tutorial. The one on the left is plain with just the gradient overlay. The center one uses a gold layer above it set to multiply and the one on the right has a yellow layer in place of the gold layer, set to subtract.
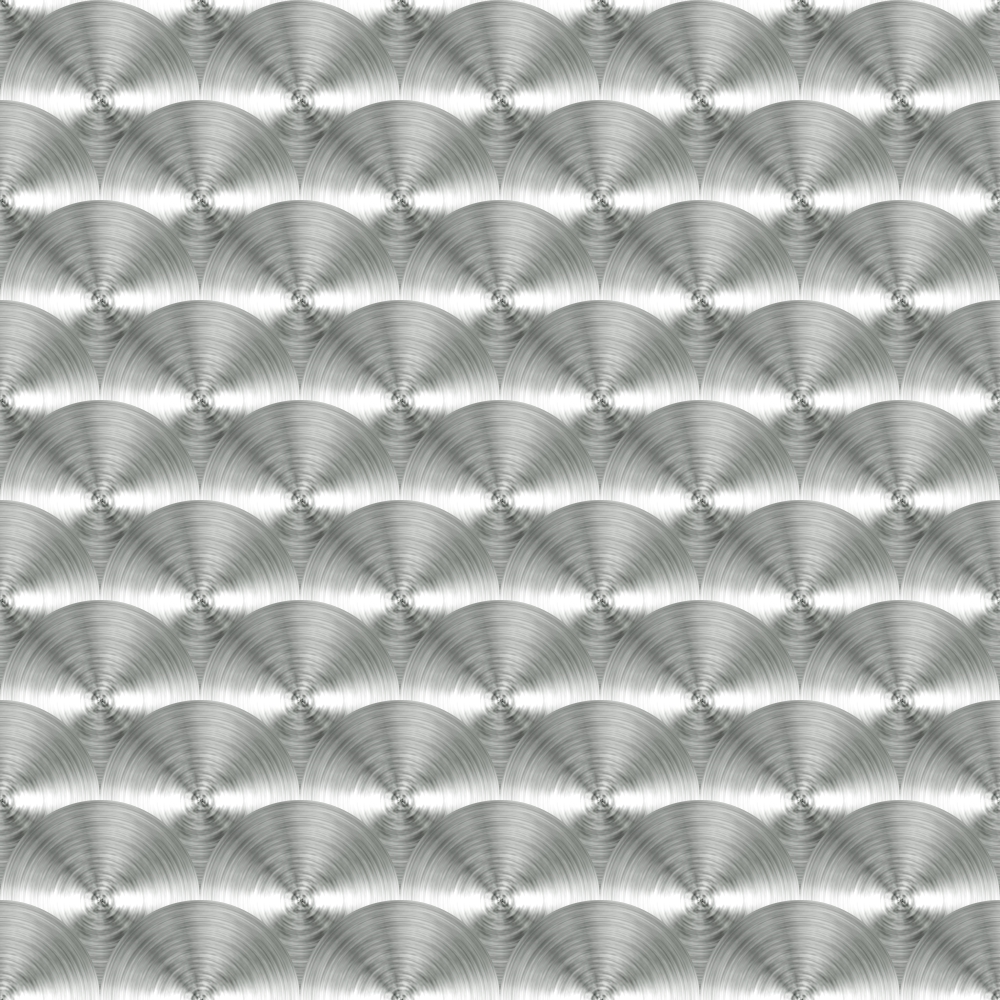
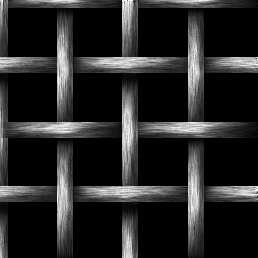
Instead of using a gradient overlay, maybe add some noise and wind to make it look like a brushed metal weave pattern like this….
The possibilities are endless, as you can see, so go have some fun! I hope you enjoyed this tutorial.
Metal Wurx - Part VI will look at how to make another kind of really awesome swirled brushed metal pattern like the one below, and look at how to get those lighting effects.