It's a little long, but I think you'll like it.
Greg
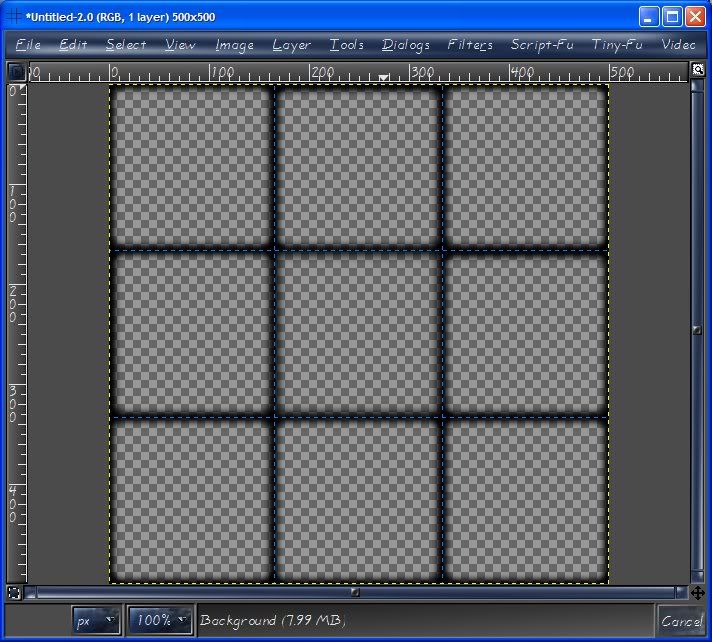
01) Create a square image. (500x500 in my example)
02) Layer > Transparency > Add Alpha Channel.
03) Select > Select All (Ctrl+A)
04) Fill the selection with black using paint bucket (Shift+B)
05) Select > None (Shift+Ctrl+A)
06) Run the Rule of Thirds Script if you have it and skip to step 11.
(Script is available here
http://gimpchat.com/viewtopic.php?f=9&t=427 or
http://registry.gimp.org/ where you can get all of my scripts)
07) Image > Guides > New Guide by Percent > Horizontal 33%
08) Image > Guides > New Guide by Percent > Horizontal 67%
09) Image > Guides > New Guide by Percent > Vertical 33%
10) Image > Guides > New Guide by Percent > Vertical 67%
11) Using rectangular Selection Tool (or press R key) and select the first square (1 of 9).
12) Select > Shrink > 5 pixels
13) Select > Rounded Rectangle > 10%
14) Select > Feather > 10
15) Cut out the selection (Ctrl+X)
16) Repeat steps 11 - 14 for the remaining 8 squares.
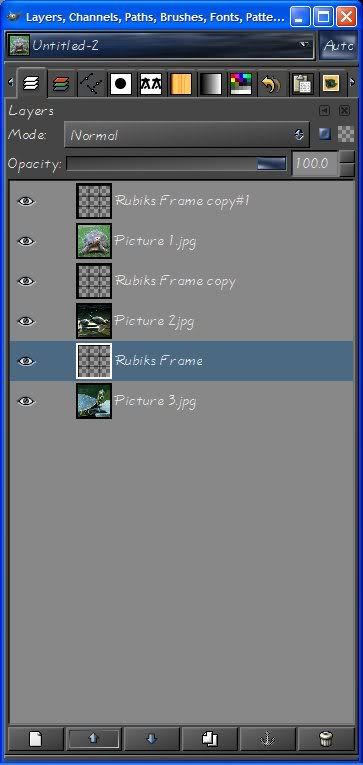
17) Rename the layer as "Rubiks Frame" and duplicate layer twice. (Total of 3 layers)
18) Load the three selected images as layers. (Ctrl+Alt+O)
19) Resize each and crop to 500x500.
20) Alternate the layers as Rubiks Frame, Picture 1, Rubiks Frame copy, Picture 2, Rubiks Frame copy #2, Picture 3
21) Merge Layers 1 & 2 together, 3 & 4 together, and 5 & 6 together.
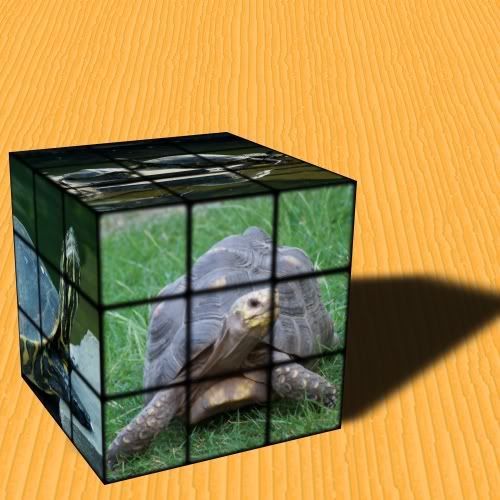
22) Right click on "Picture 1" layer and select "New Layer", name layer "Cube" and click on ok. (Pictures don’t show correct name.)

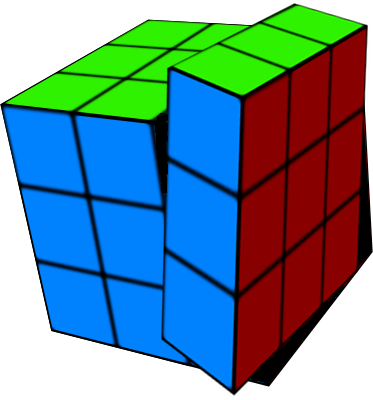
23) Filters > Map > Map object.
24) Map to: Box
25) Click Transparent Background button. (you should only see the checkerboard pattern in preview window)
26) Click Box Tab
27) Set Front and Back to Picture 1
28) Set Top and Bottom to Picture 2
29) Set Right and Left to Picture 3
30) Click Light Tab
31) Set Light to directional
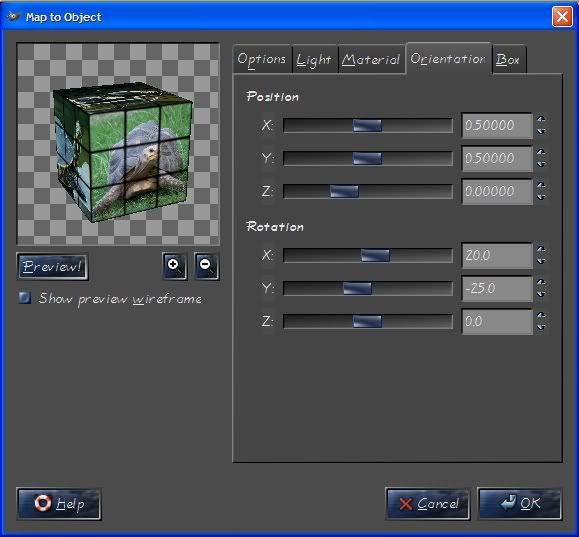
32) Click Orientation Tab
33) Under Rotation Set X= 20
34) Under Rotation Set Y= -25
35) Under Rotation Set Z= 0
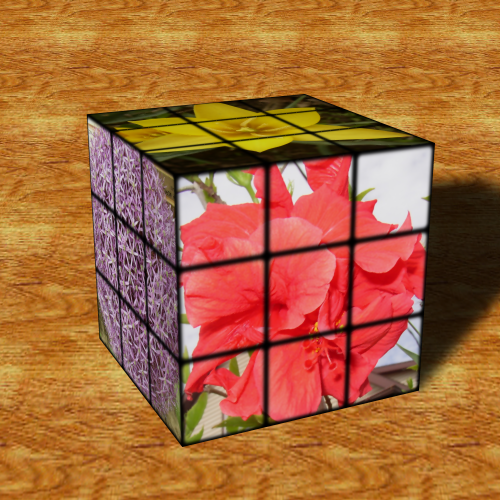
36) Click Preview (Now you should see your current cube design)
37) Experiment with the X, Y and Z rotations. (Preview after each change)
38) Click "ok" when you are happy with the preview result. (Can take a minute or two)
39) Turn off the 3 "picture" layers
40) Turn off the grid lines (Shift+Ctrl+T).
41) Right click on "Picture 1" layer and select "New Layer", name layer "Back" and click on ok.
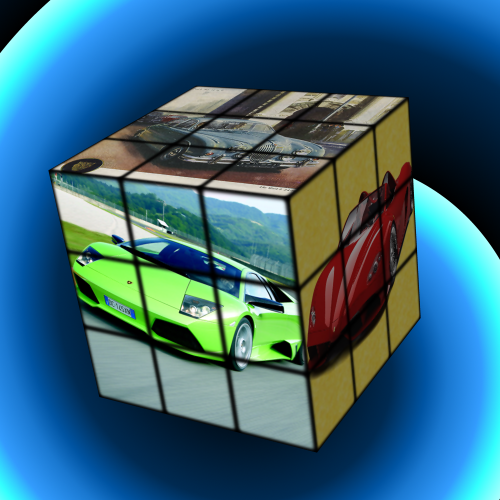
42) Fill layer with background color (or pattern) of choice. (Shift+B)
Note: If using pattern you might want to use the perspective tool (Shift+P) to give dimension to background.
43) Click on "Cube" layer.
44)with GIMP
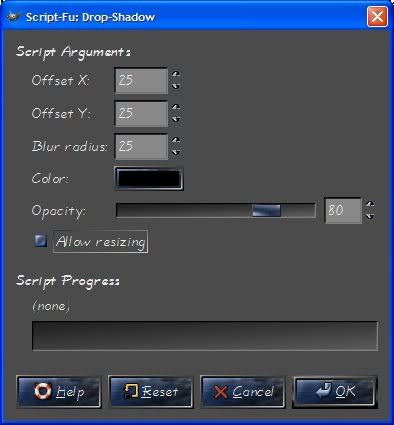
2.2 Script-Fu > Shadow > Drop Shadow >
but
with GIMP 2.4 Filter/Light and shadow/Drop Shadow
Offset X = 25
Offset Y = 25
Blur Radius = 25
Color = Black (Default)
Opacity = 80% (Default)
Turn off "Allow Resizing"
45) Click Drop-Shadow layer.
46) Click shear icon (Shift+S)
X= -250
47) Click scale Icon (Shift+T)
Width = 649
Height = 200
48) Click on move tool (or press M key) Position shadow where you would like it.
49) You can also vary opacity of "Drop-Shadow" layer if you'd like
50) Click links on "Cube" and "Drop-Shadow" layers (Next to eye)
51) Still using the move tool, drag cube and shadow to place it where you'd like.
Like I said, a little long but worth it... I think.
Greg
PS - I'm thinking of writing a script!