How to Make Metal Hull Plating
This segment will show you how to use metal textures to make hull plating designs. Incidentally, if you want to make your own metal from scratch instead of using an image, one of the best tutorials I’ve seen for creating realistic metal textures from scratch can be found at this website…
http://cg.tutsplus.com/tutorials/photos ... -textures/Another excellent tutorial for surface texturing can be found here…
http://forums.cgsociety.org/showthread.php?t=373024Although these are both Photoshop tutorials, they show the basic steps which can easily be accomplished with GIMP. I got the idea for making the hull plating from another PS tutorial I found here:
http://www.psionic3d.co.uk/tutorials/shiphull.html.
I thought this would make an excellent segment for the Metal Wurx series, so I decided to incorporate some of the steps into this tutorial. You can make your own custom metal using the tutorials referenced above or just use a few images like I’m going to do here. If you’re going to use images, you will need a scratched metal image like this one that you can download from the link below it.
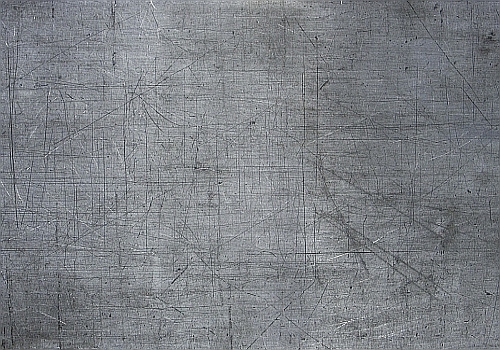 http://s401.photobucket.com/albums/pp96 ... g&newest=1
 You will also need a really dirty, grungy looking metal image like the one below which you can get here:
http://www.cgtextures.com/texview.php?i ... 01f7r46ra3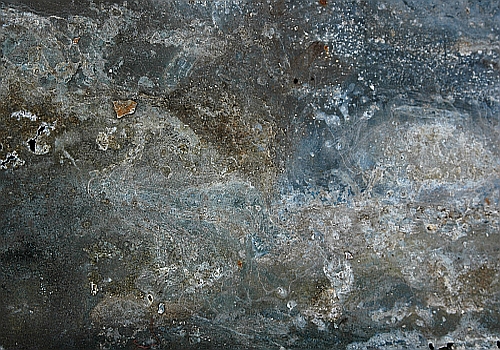
Step 1.
Open a new image 512 x 512 and use 1200 ppi for resolution and fill it with a medium gray color. I used 8E8E8E. Right click on this layer in the Layers Dialog box and select Add Alpha Channel.
Step 2.
Now set the background to a lighter gray (AEAEAE), create a new transparent layer and let’s just call it Layer 2 to keep it simple. Use the Rectangle select tool to create a selection somewhere and fill it with the background color. Repeat this several times
creating different size and shape selections and filling them each with the BG color.
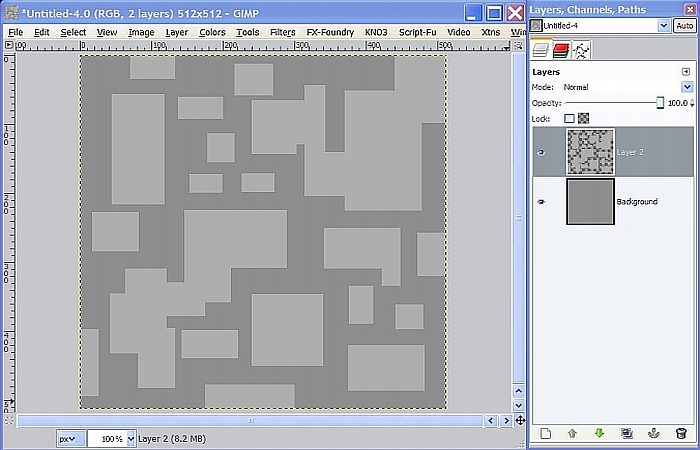
Step 3.
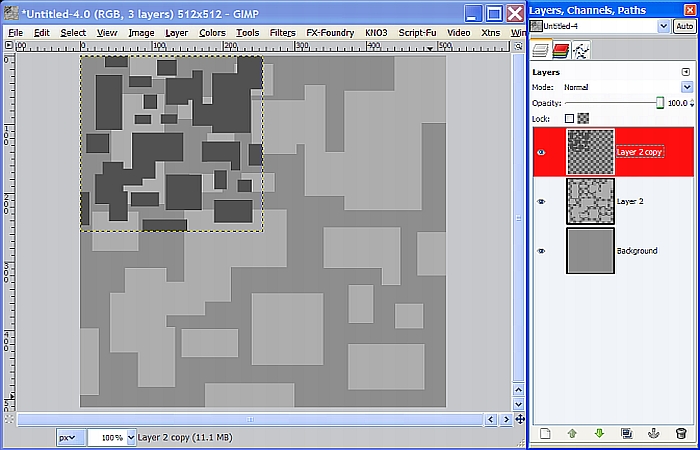
Duplicate this layer and go to Layer>Scale Layer and select “percent” and enter 50 for both values and click on the Scale button. Next go to Colors>Invert to change the color to a dark gray, then use the move tool to position it in the top left corner of the image.
You may want to zoom in to about 400% to get it exact then reset your view to 100%.
Step 4.
Duplicate this layer again, and use the Move tool again to position the second duplicate in the top right corner. Make sure it is exactly positioned. Once you have it positioned, go to Layer>Transform>Flip Horizontally, then Layer>Transform>Flip Vertically.
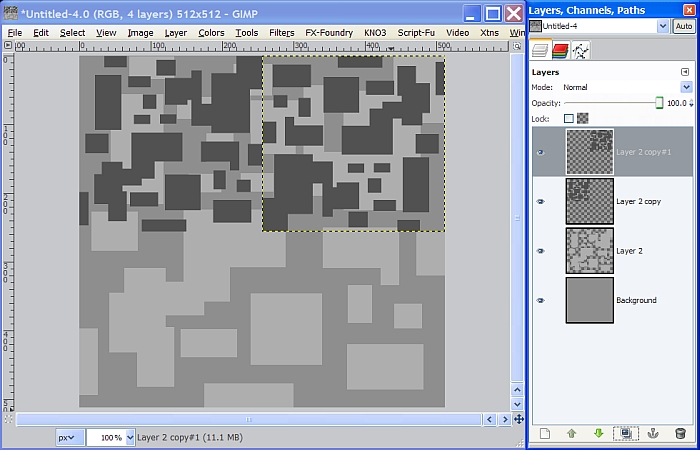
Step 5.
Right click on the Layer 2 copy #1 (the top layer) in the layers dialog and select Merge down. Right click on the duplicate layer and select Layer to Image size, and rename this layer to “Layer 3”. Duplicate Layer 3 and go to Layer> Transform>Flip Vertically, then Layer>Transform>Flip Horizontally. Now, Merge the Layer 3 copy down so that you have a single, dark gray.
You can make as many plating layers as you like but I’m just going to use 2, plus the background layer, for this tutorial.
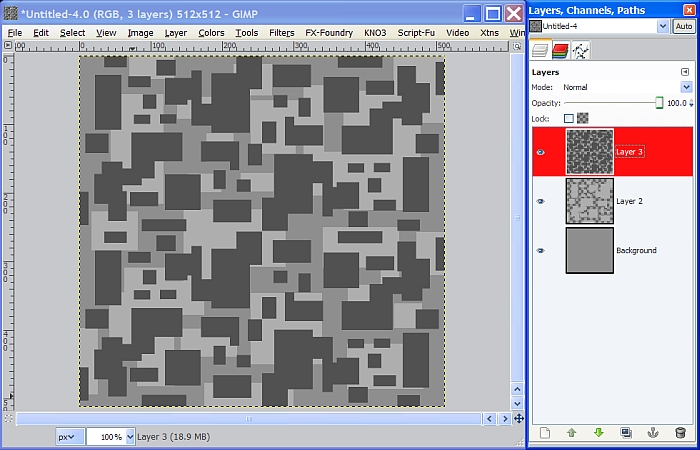
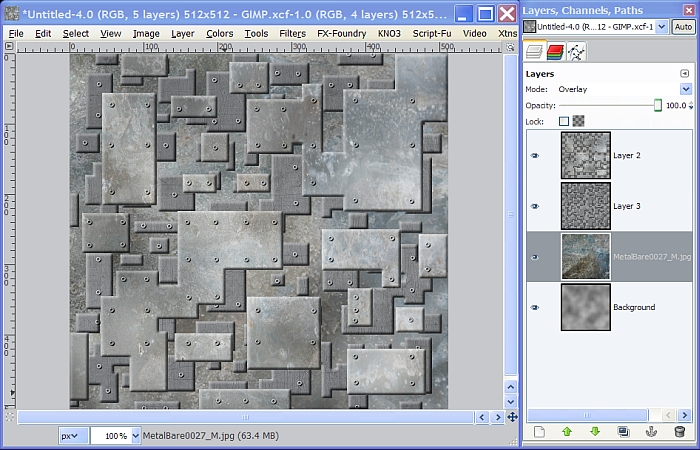
Step 6.
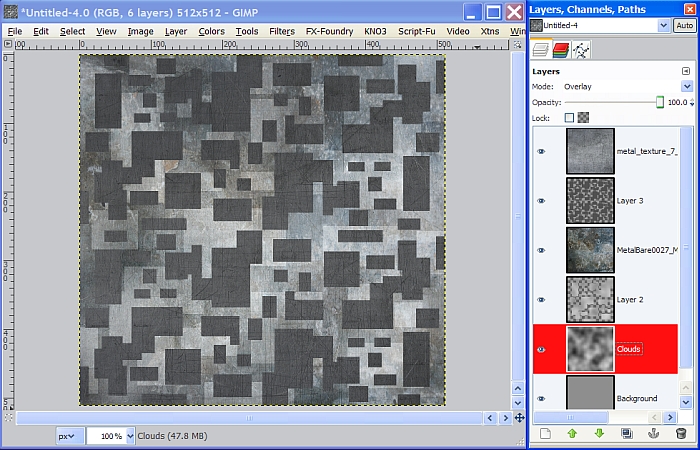
Open the two metal images and place the scratched metal image at the top of the layer stack, and the grungy metal image right underneath layer 3. On the scratched metal layer, go to Layer>Scale Layer and resize it to 512 x 512. Now resize the grungy metal layer in the same manner, then right click on each layer, in turn, and select and Add Alpha Channel. Set the layer Mode for both layers to Overlay, and your layers should now look like this.
Step 7.
Click on the Background layer in the layers dialog to make it active then create a new white layer above and name it Clouds. Go to Filters>Render>Clouds>Solid Noise and use 1 for the Detail and 4 for both the X and the Y settings and click OK.
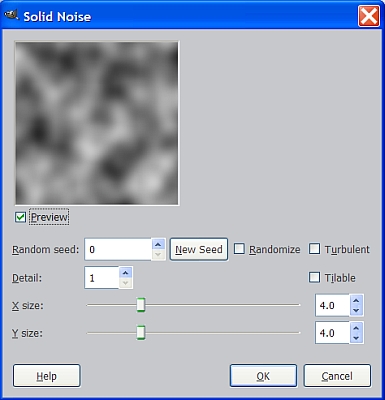
I think everyone knows what a cloud layer looks like and besides, you can see it in the settings dialog above, so no additional pic needed here. Set the layer Mode for the Clouds layer to overlay, then Merge it down with the Background layer. Here’s what your layers should look like before you Merge down.
It’s getting a little busy so we need to isolate the textures we made with the metal images for layers 2 and 3.
Step 8.
Select Layer 3 and right click to select Alpha to selection. Go to Select>Invert and click on the metal image layer above it and hit the delete key so that the portion of the metal image outside of our selection is deleted. Now deselect it (Select>None) and do the same with Layer 2 and the grungy metal layer. Now our Hull plating image is a little cleaner.
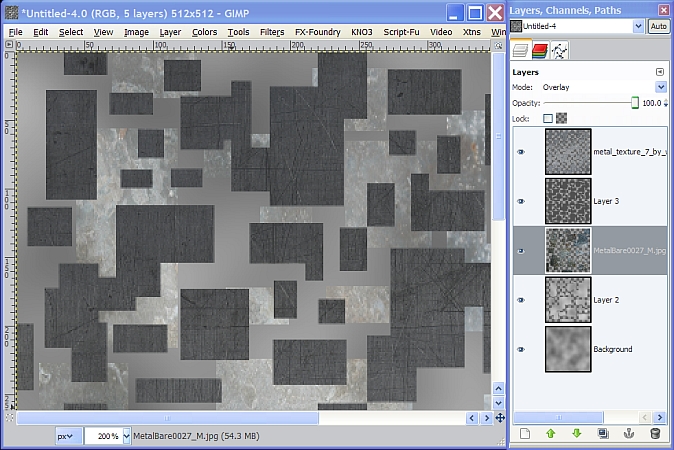
Now you only see the texture on the layer it is associated with.
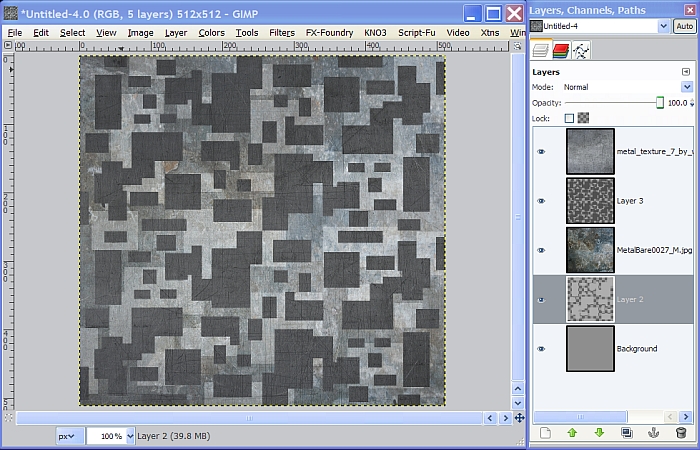
Step 9.
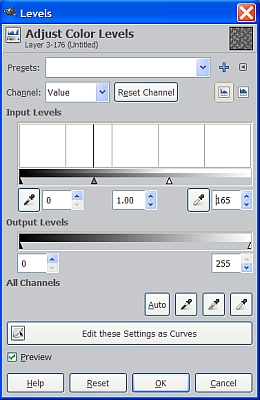
Let’s make one small tweak before we go any further. Click on Layer 3 in the layers dialog to make it active and go to Colors>Levels and change the Output level on the right to about 165 to lighten up our dark gray color so we can see the scratches a little better.
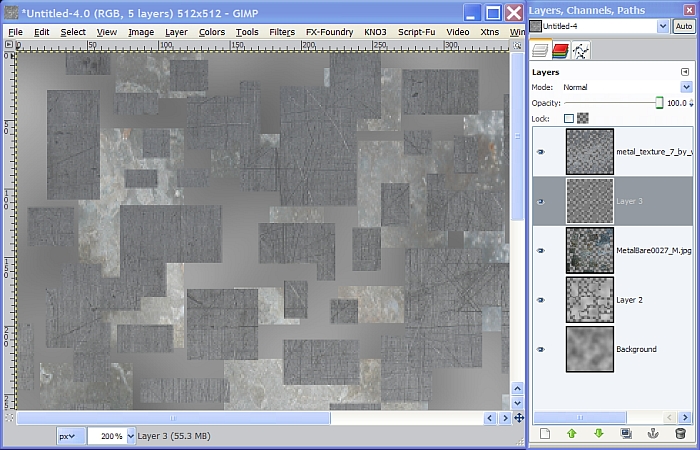
Now, that’s a little better.
Step 10.
Turn off the visibility to Layer 3 and the scratched metal image layer above it, to make this step easier. Next, increase your view to about 150% so you have a better view of what you are doing. Make sure your FG color is still set to 8E8E8E, and create a new transparent layer just above Layer 2 and call it Rivets. Select the Brush tool and then select the Pop Rivet Brush included with this tutorial, and place as many vertical and horizontal guides as you need in the largest areas of Layer 2. Carefully paint in the rivets where you want them using the guides to get them lined up.
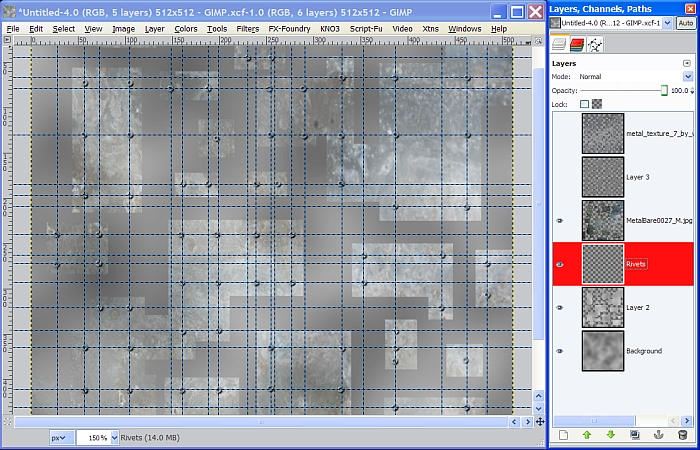
When you are satisfied, go to Image>Guides>Remove all Guides, then right click and select Merge down to merge the Rivet layer with Layer 2. Now merge the grungy Metal layer down with Layer 2. Since it is in Overlay mode, it will provide some matching texture for the rivets we just made.
Step 11.
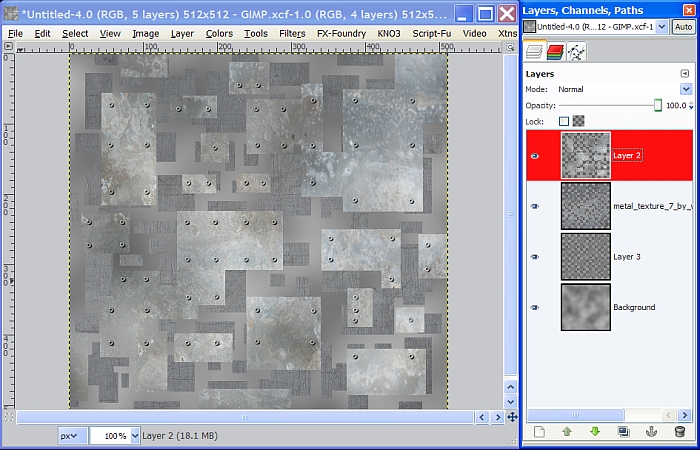
Turn the visibility back on for Layer 3 and the scratched metal layer above it, and you will see that some of the Rivets we just made are covered up now. Move these two layers down below Layer 2 so we can see the rivets again.
Step 12.
Repeat the process explained in Step 10 for Layer 3, except use the sampling tool to determine the dark gray color for your FG. This way you will paint in your rivets with the same dark gray color as the layer. You only need a few rivets for this layer since it is behind Layer 2 and we don’t want to over do it. When you are finished, Merge the rivet layer down with Layer 3, then Merge down the scratched metal image layer with Layer 3.

Step 13.
Now to add some depth, right click on Layer 2 in the layers dialog and select Alpha to Selection. Go to Filters>Distorts>Bevel (this is the Python Selection Bevel script included in the attached resources zip file) and use the settings below.
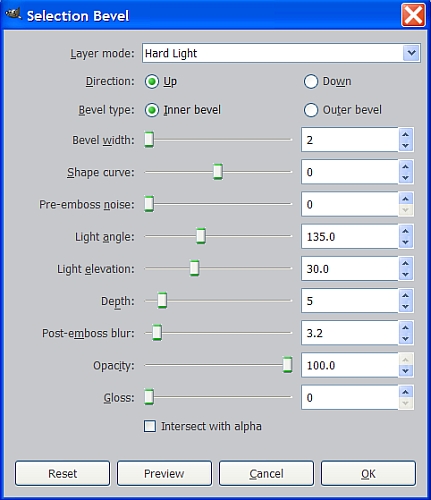
Now, deselect this layer and repeat the process for Layer 3 using the same Bevel settings.
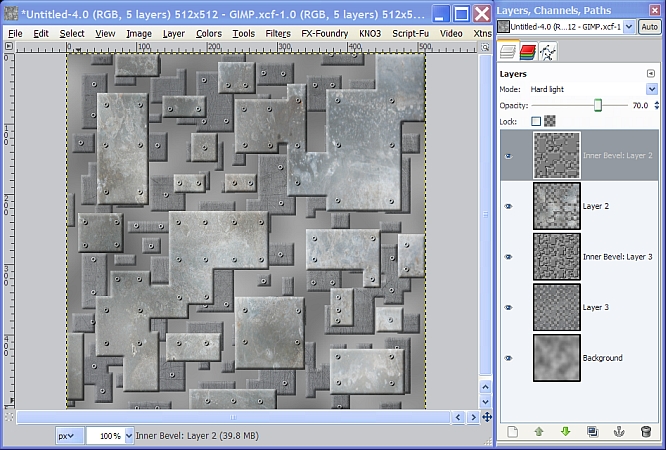
You should now have two new Bevel layers. Set the Opacity for Bevel Layer 2 to 70% and set Bevel Layer 3 to 50%. Merge down Bevel Layer 2 with Layer 2 and Merge Bevel Layer 3 down with Layer 3 so that you are back to three layers again.
Step 14.
Select the Background layer to make it active and go to File>Open as Layers and open that grungy metal image again as a new layer. Add an Alpha Channel and set the layer Mode to Overlay. Now go to Layer>Transform>Flip Vertically to even out the overall look, and all the different colored gray areas are more evenly distributed.
Right click and select Layer to Image Size and Merge the grungy metal layer down with the Background layer. Now we add a little more depth to our image by applying some shadowing effect.
Step 15.
Select Layer 2 and Go to Filters>Light and Shadow>Drop Shadow and use the default settings, except make the Opacity about 50% and make sure you uncheck Allow resizing.
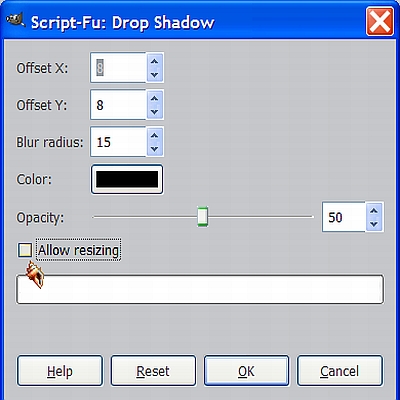
Now, using the same settings, apply the Drop Shadow to Layer 3 as well.

Step 16.
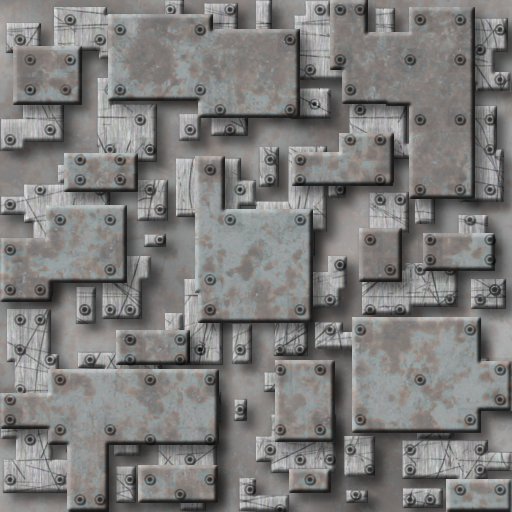
Now it’s starting to look like something, but we can’t use this for much as it is right now. Right click in the layers dialog and select Merge Visible Layers, then right click again and select Layer to Image Size.
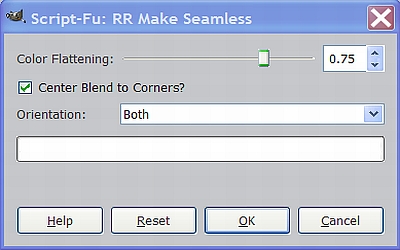
In order to convert this to a tileable pattern, we have to make it “seamless” so that all the sides match up and a larger image will look like one endless pattern without any descernable lines or mirroring effect. This is where it gets a little tricky because this type of pattern is more difficult to make seamless because of its complexity. There are several ways to make this type of pattern seamless. The one I will use here is Rob Antonishen’s “Script-fu-RR-Make-Seamless” filter. I have included it in the attached Resources zip file for convenience, and I will point you to an excellent tutorial that shows you another way.
Step 17.
Go to Filters>Map>RR Make Seamless, and just use the default settings.
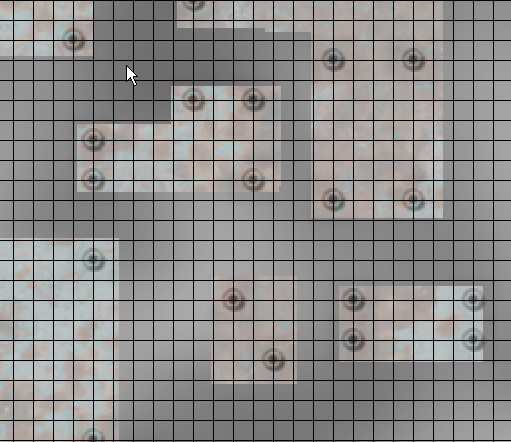
When the filter completes, the new image will come up in a different window. You will need to save this image as “seamless.jpg” to your desktop then close the window, and drag the new image over to your original window as a new layer. Right click on it in the layers dialog and select Add Alpha Channel. Your image should look something like this. The circles show some of the blurred, distorted areas and the rivets that look like ghosts or shadows.
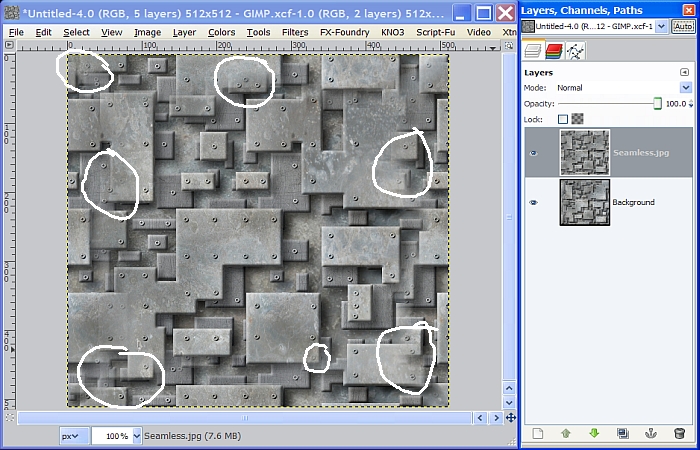
We need to clean this up, so first, increase your view to about 200% so you can see what you are doing better. Use the Smudge tool and a small sized circle brush to carefully smudge around on the rivet shadows, using very small strokes, to sort of blend them in and make them disappear. You can also use the Clone tool to repair some areas. The large blocky areas can be cleaned up by temporarily turning off the visibility of the Seamless layer, and doing a rectangle select of an individual shape on the original background layer. Go to Edit>Copy, and Edit>Paste as New Layer. Place the new layer above the “Seamless” layer, deselect it, and turn the visibility of the Seamless layer back on. Use the Move tool to position the pasted layer on top of the messed up area, and when you are satisfied, merge the pasted layer down with the Seamless layer to repair it.
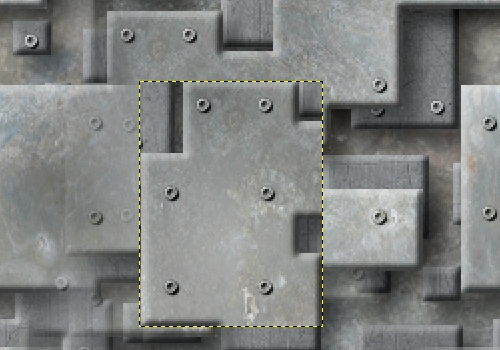
Whew! Sounds like a lot but it’s actually only a few clicks and some positioning. Here’s an area before it is repaired with the new, pasted layer almost in place.
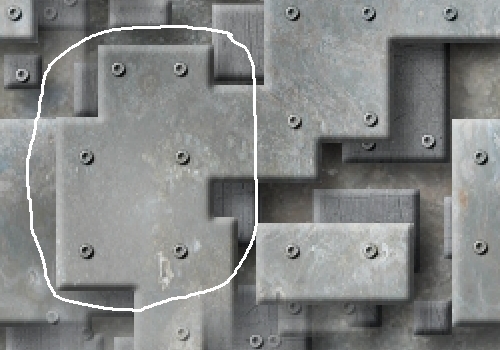
Here is what it looks like after it is merged down with the Seamless layer.
You can also use the Airbrush tool with a very low setting like 10, a fuzzy brush and the color sampling tool to shade in a few areas or blend them in if you really want to make the extra effort. You shouldn’t have to do this on more than 5 or 6 of the larger places to make it look decent. Notice I didn’t say like new or perfect. The idea is to just fix the major distortions and don’t worry about every little detail.
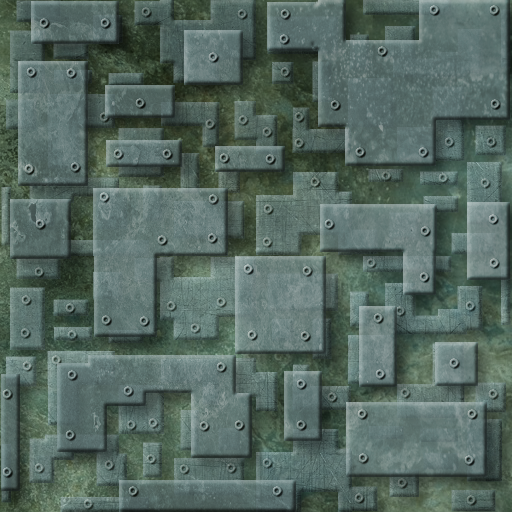
This whole process of cleaning up the image is subjective and entirely up to your own personal preference, and how much time you want to spend. Here’s what I came up with.
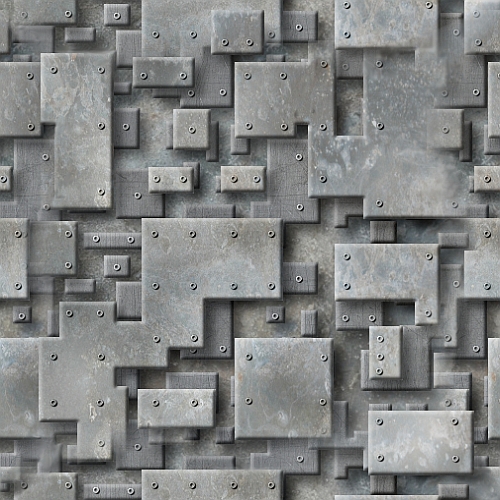
There are a few places where I could have taken a little more time on the clean up, but I’m sure you get the idea. This may seem like a lot of work, and it is kind of a pain sometimes, but it really only takes about 15 to 20 minutes or so to get it to look pretty good. The other tutorial I mentioned above that shows another way to make your pattern seamless can be seen here:
http://justpaste.it/resynth_seamless. You may prefer this method over the one I used but, either way you still have some clean up work to do and the results are worth the effort.
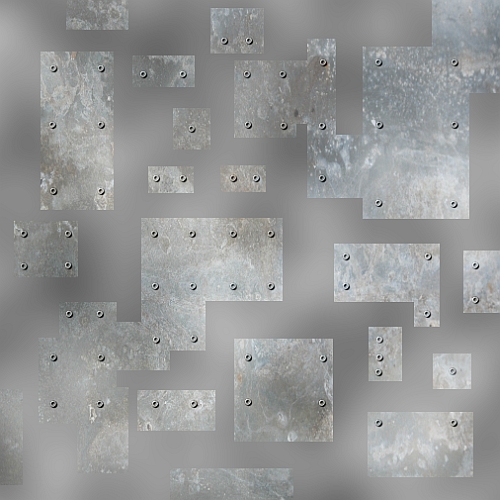
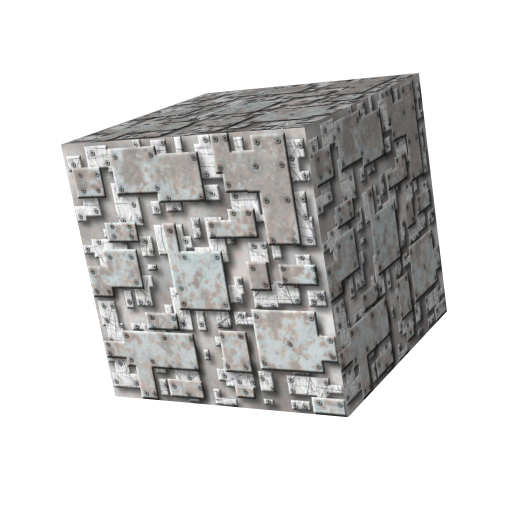
Since most Hull plating is usually grayish anyway, save the image as a JPG just in case you need it later for something else, then save it again as a Gimp .pat file and place it in your Gimp user patterns folder and refresh your patterns.
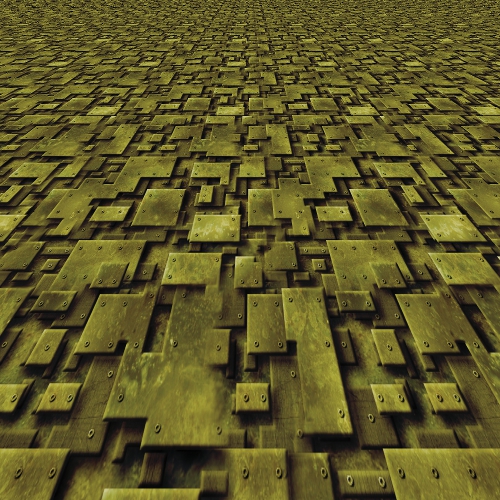
Here’s a sample of the pattern and a B5A642 (Brass) colored layer above it with the layer Mode set to Burn, and the Opacity set to 70%.

If you go to G’MIC>Deformation>Perspective, you get a really nice effect that looks like you’re flying over the surface of a ship or something.
You can always add rust or corrosion or maybe some additional bump mapping to apply more texture to your plates in some of the earlier steps. As always, the possibilities are endless.
I hope you enjoyed this tutorial.
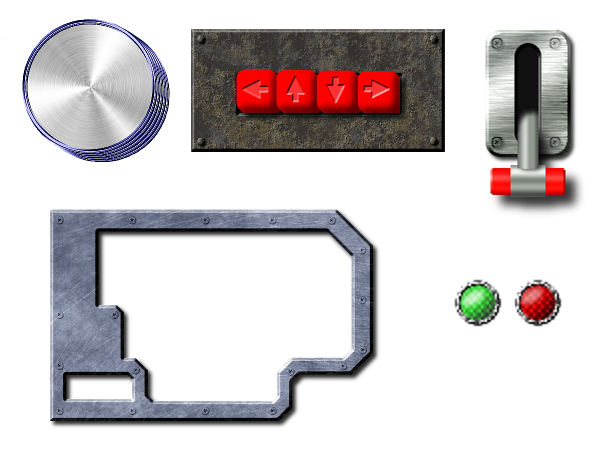
In the next several segments of the Metal Wurx series, I will show you how to make various pieces and parts that we will ultimately use in the last segment for constructing a very detailed interface module or control panel. Here’s just a few examples.


