Metal Wurx – Part XXI
How to Make a Radar Module
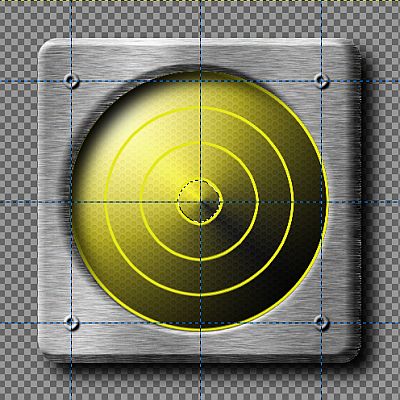
I was looking for a specific type of instrument on the internet and ran across an image of a radar screen that intrigued me. Having used Gimp for a while, I now “see in layers” when looking at various images and decided to try and make one myself. It proved to be a little more complex than I expected, but not really that difficult.
This is a rather long tutorial, however, with a lot of steps, but there are also a lot of screenshots to help you along the way.
I have provided one of the Shapes brushes I made and a Rivet Brush in the Resource zip file attached, as well as one of my dark hex patterns. You will also need to have Python installed which is available here:
http://www.python.org/ftp/python/2.6/python-2.6.msi as well as a few essential scripts.
Selection Bevel script -
http://gimpscripts.com/2011/10/selection-bevel/Copy-Rotate script -
http://registry.gimp.org/node/22254Pattern-Scale script -
http://registry.gimp.org/node/13707Step 1.
Open a new image 500 x 500 pixels and 600 ppi.
Step2.
Increase your view to 400% for accuracy and place a vertical and horizontal guide in the exact center at 250 pixels both directions.
Step 3.
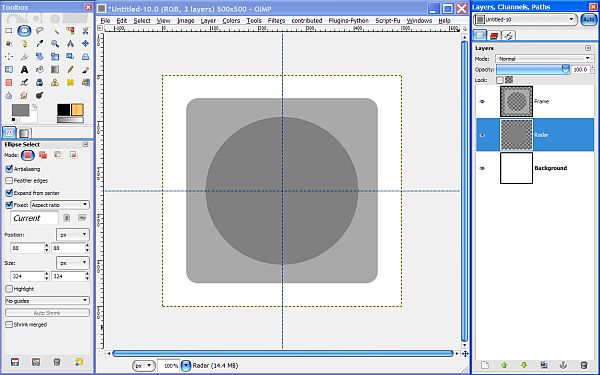
Create a new transparent layer and name it “Frame”. Click on the Rectangle select tool and check the boxes for Rounded Corners, Expand from center, and Fixed. Set the Radius for the rounded corners at 25. Place your mouse cursor in the exact center of the image at the intersection of the guides and drag out as far as you can. Change your view back to 100% and adjust your selection to 400 x 400 pixels then change your FG color to a medium gray like A9A9A9 and drag it over to the image window to fill the selection with the gray color.

Step 4.
Turn off the selection (Select>None) and click on the Ellipse Select tool and check the boxes for Expand from center and Fixed. You may want to increase your view again for accuracy and then make a selection from the center 320 x 320 pixels. Hit the delete key on your keyboard to remove the selected area of the Frame layer. Change your view back to 100%.
Step 5.
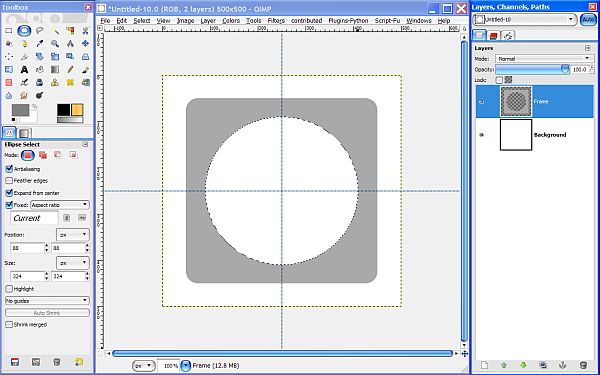
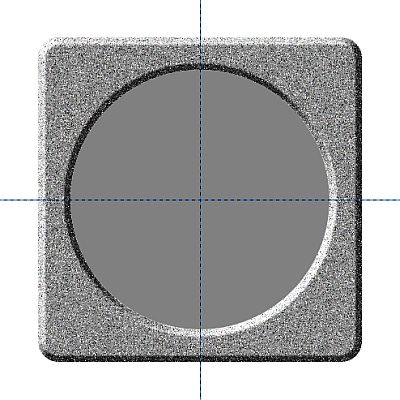
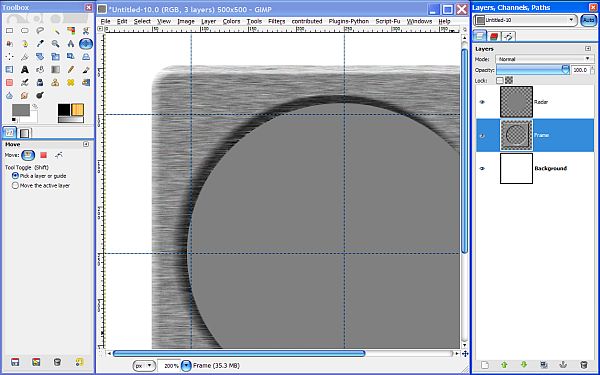
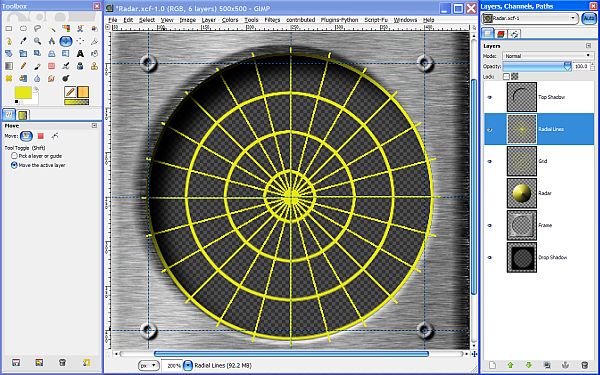
Create a new transparent layer and call it “Radar”. Adjust the selection to 324 x 324 pixels. Change your FG color to a darker gray like 808080 and drag the color over to the selection to fill the Radar layer. Turn off the selection (Select>None) and move the Radar layer down under the Frame layer so your image and layers look like the screenshot below.
Step 6.
Right click on the Frame layer and choose Alpha to Selection. Go to Filters>Distort>Bevel and apply these settings.
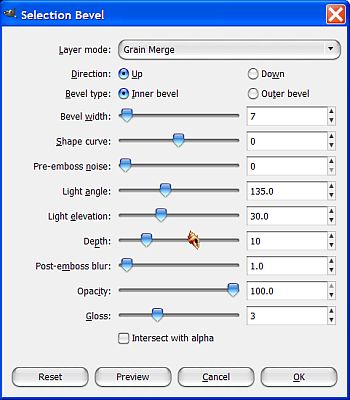
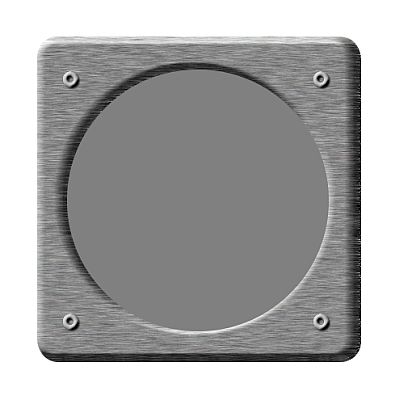
When the filter completes your image should look similar to this.
Step 7.
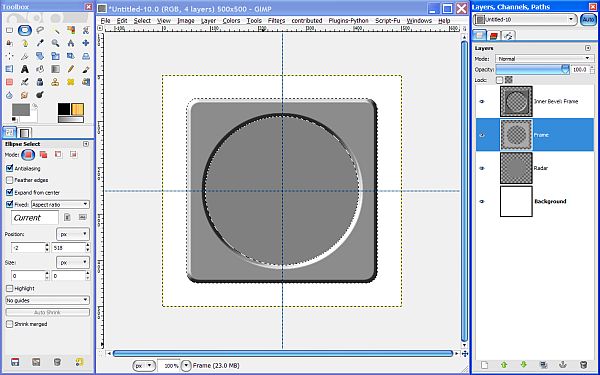
Turn off the selection and right click on the Inner Bevel: Frame layer the Bevel filter just created for you, and select Merge Down. Check the box at the top of the layers dialog to lock the alpha channel and go to Filters>Noise>HSV Noise and apply these settings.
Your image should be covered with a bunch of dots.
Step 8.
Go to Filters>Blur>Motion Blur and apply these settings.
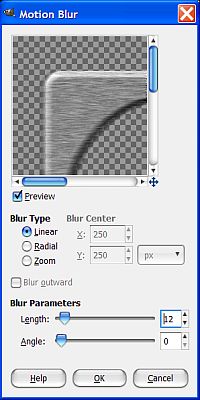
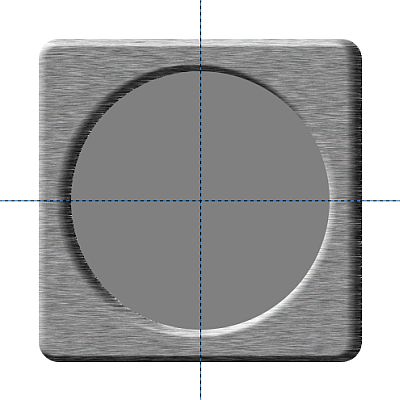
We now have a brushed metal finish for our Frame.
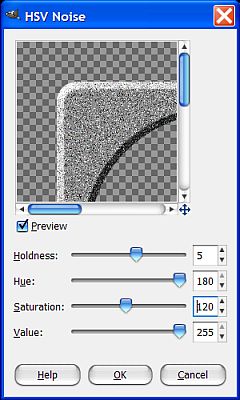
Step 9.The Motion Blur Filter still leaves a bit of distortion on the edges as you can see in this close-up image.
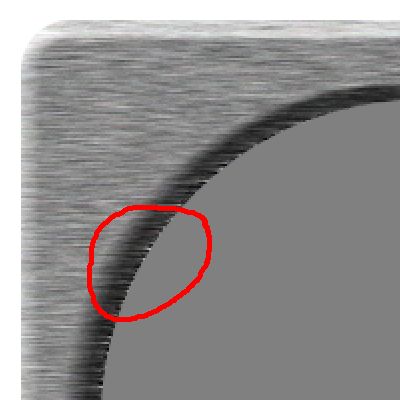
I’m going to cheat a little bit and show you an easy way to correct this but I also want to
explain why. The best way to avoid this distortion is to create the Noise on a new white layer, then apply the Motion Blur. This way the whole layer is effected instead of locking the alpha channel. Next alpha select the original Frame layer, go to Select>
Invert, reselect the duplicate Frame layer and then hit the delete button to remove the excess outside of the selection. All the distortions are on the outside edges of the whole layer which have now been trimmed away.
This is a very “clean” and actually preferred method and will yield much better results, but as you can see that’s a lot of steps and I’m feeling lazy today. Since we made the Radar layer just a little bit bigger than the selection we used to cut out the middle of the Frame layer, all we need to do is move our Radar layer back into position above the Frame layer in the layer stack. It will now cover most of the imperfections on the inside of the Frame. The others don’t show up so much because they are in shadow. The quality is not as good but it saves time if the image is going to be reduced and the imperfections are not going to be noticeable anyway.

Step 10.
Select the Frame layer to make sure it is the active layer, then increase your view to 200% (or maybe even 300% to make it easier) and place some additional guides at 100 and 400 pixels vertically and horizontally like so.
Create a new transparent layer above the Frame layer and name it “Rivets”. Select the Rivet brush provided in the attached Resources zip file and set your brush size to .40 and paint in a rivet at each corner where the new guides intersect. Reduce your view back to 100% and go to View>Show Guides and uncheck the box to turn off the visibility of the guides.
Step 11.
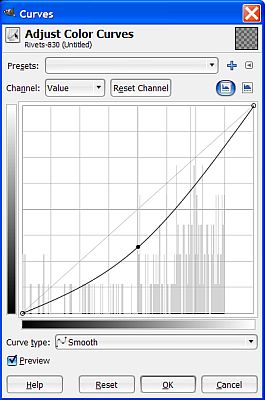
Our rivets are a little too bright so we need to tone them down a bit. Go to Colors>
Curves and pull the center of the curve down to about the middle of the second square.
Right click on the Rivets layer and select Merge Down.
Step 12.
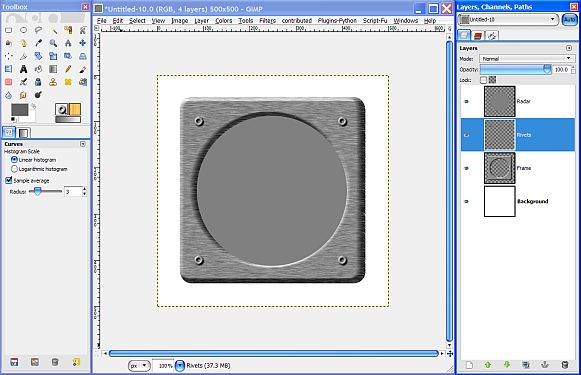
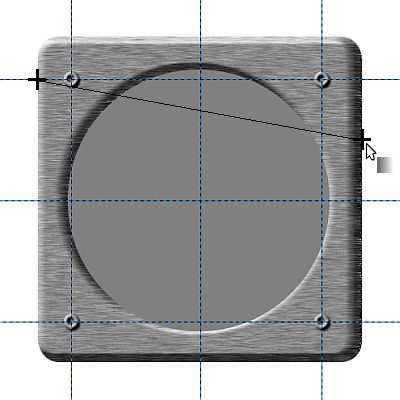
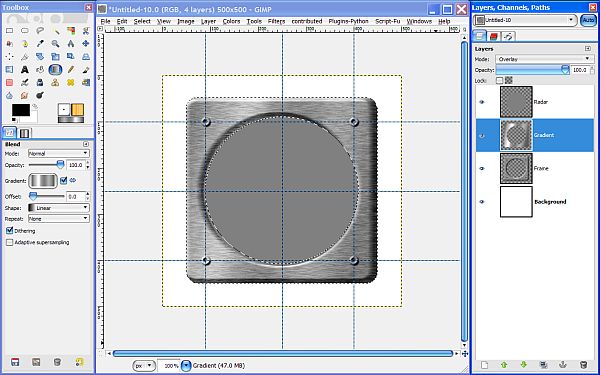
Go back to View>Show Guides and turn them back on by checking the box, then select the Blend tool. Set the gradient to Metallic 17 and check the little box next to the gradient to reverse it. Create a new transparent layer above the Frame layer and name it “Gradient”. Set the layer Mode to Overlay, then right click the Frame layer and choose Alpha to Selection. Reselect the Gradient layer and make a diagonal stroke from the top left side at the first horizontal guide to the right side halfway between the first and second horizontal guide to apply the gradient like so.
Your image and layers should now look like this.
Step 13.
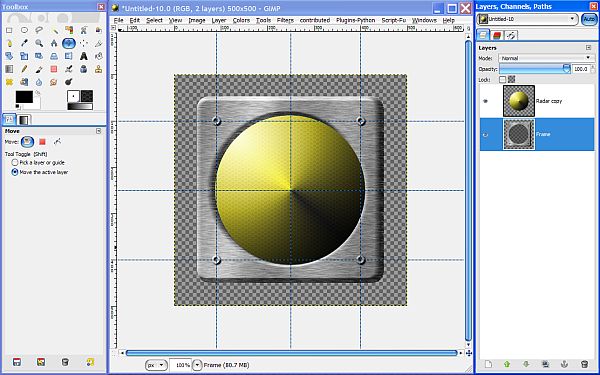
Turn off the selection (Select>None) and right click on the Gradient layer to select Merge Down. Now we turn our attention to the actual radar. Select the Radar layer and duplicate it. Rename the duplicate Radar layer “Gradient”. Set your FG color to yellow (FFF000) and the BG color to black (000000). Since the Blend tool is already selected go to the tool dialog set the Gradient to FG to BG (RGB) and set the Shape to Conical (sym). Lock the Alpha Channel on the Gradient layer and this time we drag from the center of the image diagonally upward to the rivet at the top left corner to apply the gradient.
Step 14.
Unlock the alpha channel on the Gradient layer and set the layer Mode to Grain Merge. Adjust the layer Opacity to about 85% then select the Radar layer to make it the active layer and lock the alpha channel. Select the Bucket Fill tool and tick Pattern fill and Fill whole selection. Click on the sample pattern and navigate to the “hex_pattern_dark” pattern and select it.
Click on the sample again and this time click on the little bucket in the bottom right corner of the dialog to open the pattern selection dialog. When this one pops up right click on your pattern and select Scale Pattern.

When the Scale Pattern dialog comes up set the scale to 50% and click OK. Now fill the Radar layer with the scaled pattern and set the layer Opacity to 50%.

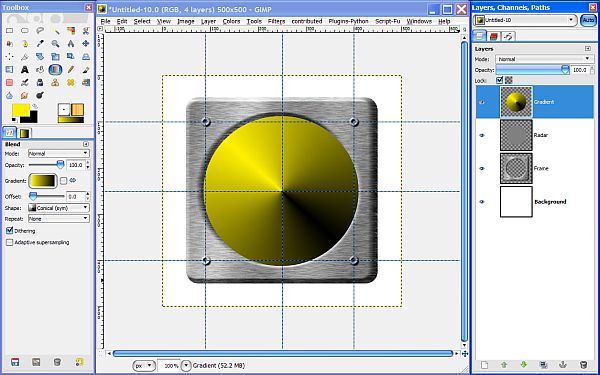
Since we lowered the Opacity, this layer is now dependant on the Background layer for its appearance. You can toggle the visibility of the Background layer off and on again to see what I mean. We will eventually delete the Background layer at some point so let’s duplicate the Radar layer again, adjust the layer Opacity on the duplicate to 100%, and drag your white background color over to the image window to fill the duplicate layer with white. Move this white layer down under the Radar layer.
Right click on the Radar layer and select Merge Down and rename the Radar copy layer to “Radar”. Now we’re set.
Step 15.
Right click on the Gradient layer and choose Alpha to Selection. Create a new
transparent layer above the Gradient layer and name it Gradient 2. Select the Blend tool and set the Gradient to FG to BG (RGB) and set the Shape to Radial. Reverse the Gradient and drag from top left to bottom right at about a 45
o angle making sure you pass through the exact center at the intersection of the two main guides to apply your gradient.
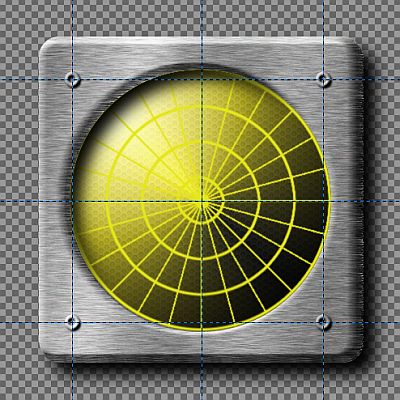
Set the layer Mode to Hard Light and set the Opacity at 85%. Turn off the visibility to the Frame layer and delete the Background layer. Right click anywhere in the layers dialog and select Merge Visible Layers. Turn the visibility for the Frame layer back on and here’s what we have so far.
Step 16.
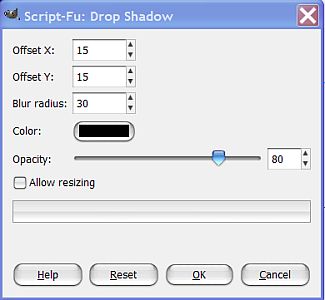
Make sure the Frame layer is selected and active then go to Filters>Light and Shadow>
Drop Shadow and enter the values below, then click OK.
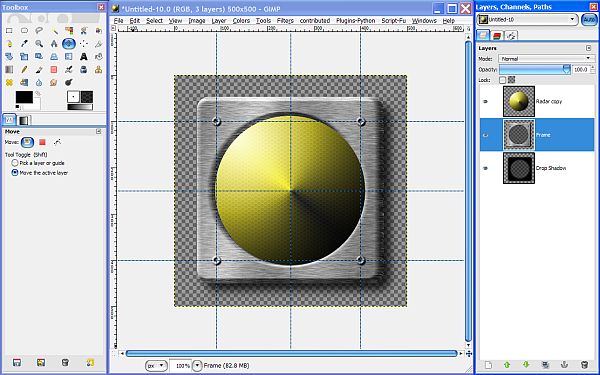
Step 17.
Let’s make a couple of minor tweaks. When we used Merge All Visible Layers in Step 15 above, it merged the layers down to the lowest visible layer in the stack which at that time was “Radar copy” and so it is named. Rename it back to “Radar” again just so we don’t get confused.
Right click on the Radar layer and choose Alpha to Selection. Select the Frame layer to make it active and then hit the delete key on your keyboard. This will reshape our Frame layer to the correct size for the next process. Right click on the Drop Shadow layer and select Layer to Image Size. Leave the selection active.
Step 18.
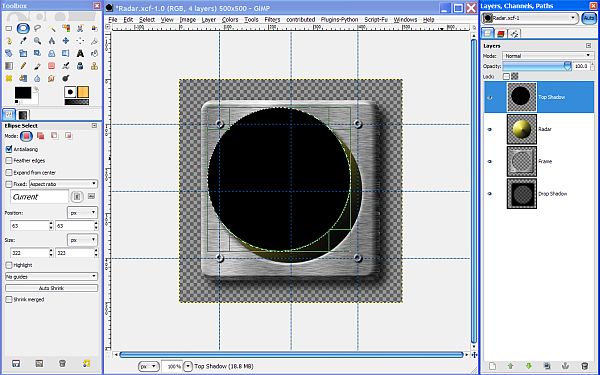
Create a new transparent layer above the Radar layer and name it “Top Shadow”.
Click on the Ellipse Select tool and click somewhere in the middle of the active selection to activate the tool. You will see four squares appear at the corners of the selection to indicate that the selection is now subject to alteration.
Using the keyboard arrows, we are going to move the selection up and to the left so hit the left arrow key 25 times and the up arrow key 25 times to reposition the selection. Make sure your FG color is set to Black (000000) and drag the color over to the selection to fill it. Your image and layers should now look something like this.
Step 19.
Turn off the selection (Select>None) and right click on the Radar layer to choose Alpha to Selection. Reselect the Top Shadow layer and hit your delete key to remove most of the black area leaving a black crescent shape at the top left of the instrument face.
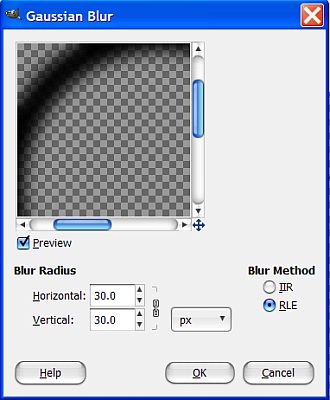
Turn off the selection and go to Filters>Blur>Gaussian Blur and use 30 for both amounts.
Step 20.
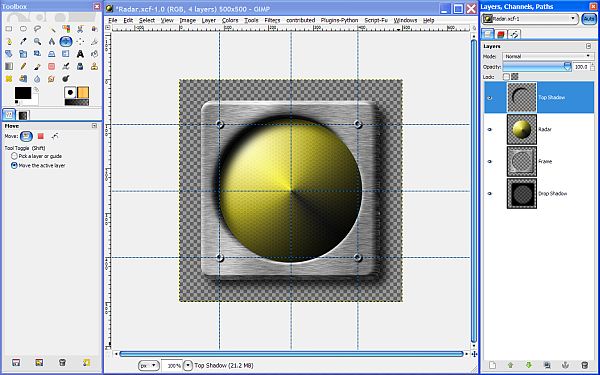
Select the Move tool and click somewhere in the middle of your image to activate the tool then use your keyboard arrows again to move the layer in the opposite direction as before. Hit your right arrow key 12 times, and your down arrow key 12 times to move the layer. Now right click on the Top Shadow layer and select Layer to Image Size.
Step 21.
Right click on the Radar layer again and choose Alpha to Selection. Go to Select>Invert then reselect the Top Shadow layer and hit the delete key to remove the excess shadow outside the selection. Turn off the selection (Select>None) and either adjust the Opacity of the Top Shadow layer to 80% or raise the Opacity of the Drop shadow to 100% so that they match. Whichever you think looks better. I think I like going with 100% shadows.
Step 22.
Create a new transparent layer above the Radar layer and name it “Grid”. Right click on the Radar layer and choose Alpha to Selection. Set your FG color to E5E71A and drag the color over to the selection to fill it. Go to Select>Shrink and enter 3 for the amount then click OK. Hit your delete key to remove the selected area.
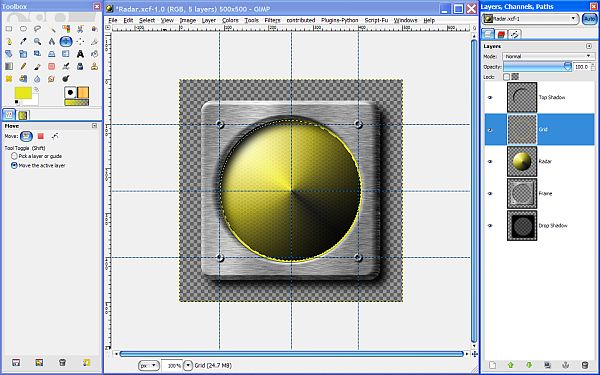
This give us a thin ring around the outside edge.
Step 23
Now we make three more, smaller ones in a similar manner. With the selection still active, go to Select>Shrink again but this time set the amount to 40 then click OK. Fill the selection with the same greenish yellow color, shrink the selection by 3, and hit delete.
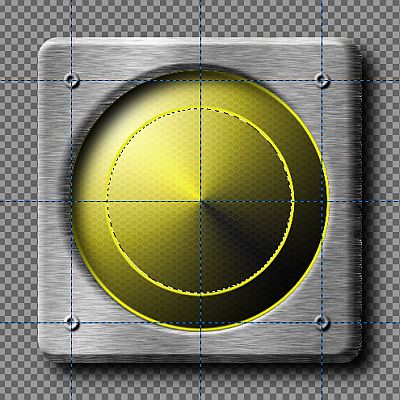
Repeat this step two more times, each time shrinking by 40, color fill, shrink by 3 and hit the Delete key. When you are finished you should have a total of four concentric rings.
Go to Select>None to turn off the selection.
Step 24.
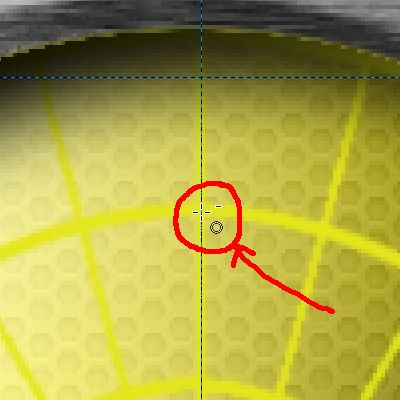
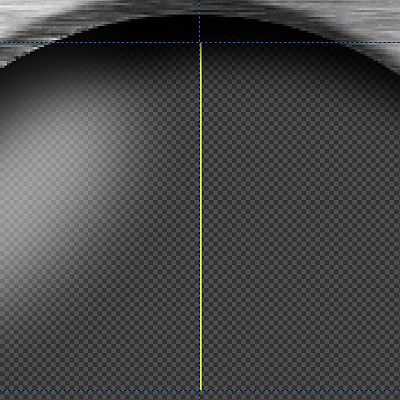
Create a new transparent layer above the Grid layer and name it “Radial Lines”. Turn off the visibility of the Radar layer to make it easier to see what you are doing. Select the Pencil tool and in the tool dialog select the smallest Circle (01) brush and set the Scale to 1.00. Increase your view to 800% so we can get this exactly right. We’re going to a vertical line from top to bottom in the exact center so as you move your cursor into position at the top of the center area, notice that you basically have a 1 pixel brush. We want to put this just to the right side of the vertical guide at the top to start our line.
Now click and drag down, using the Shift key to get it perfectly straight and draw the line all the way to the bottom just outside the outer ring like so.
Now duplicate the Radial line layer and use the Move tool and your left arrow key to move it 1 pixel to the left so that the line is basically doubled in width.
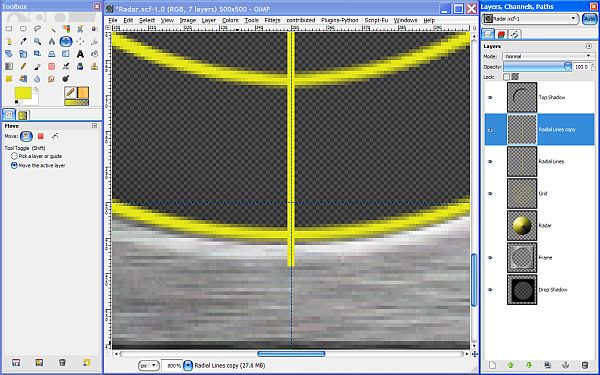
Right click on the Radial Lines copy and select Merge Down.
Step 25.
Reduce your view to about 200% and then right click on the Radial Lines layer and choose alpha to Selection. Go to Select>script-fu-copy-rotate and when the dialog pops up enter these values.

This nifty little script will create additional copies of the layer with our vertical line and rotate them in 15 degree increments to form the complete pattern of radial lines we are looking for.
Here’s what the results look like.
Step 26.
Our lines are extended outside the outer circle of the Grid layer so Right click on the Radar layer and choose Alpha to Selection and then go to Select>Invert. Reselect the Radial Lines layer to make it the active layer and then hit your delete key to remove the excess outside the selection.
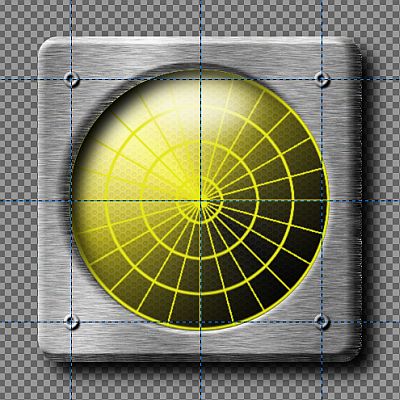
Turn off the selection and right click on the Radial Lines layer to select Merge down. Go to Filters>Blur>Gaussian Blur and apply a very slight blur of about 1 and no more than 2 to the Grid layer. Turn on the visibility of the Radar layer and our Radar is starting to take shape.
Step 27.
Create a new transparent layer above the Top Shadow layer and name it “Gloss”. Click on the Ellipse Select tool and tick the boxes for Feather edges and Expand from center. Set the Radius to 50. Place your cursor at the intersection of the vertical guide and the grid circle closest to the outside at the top like so.
Drag outward to create a selection 128 pixels x 64 pixels then drag your White (FFFFFF) background color over to the selection to fill it then go to Select>None. Set the layer Opacity to 50%.
Step 28.
Turn off the guides and select the Rotate tool. In the tool dialog, set the Clipping to “Crop to result” and click on your image to activate the tool. When the dialog comes up, set the angle to -45 and make sure the X and Y center is set to 250, then click on the Rotate button.
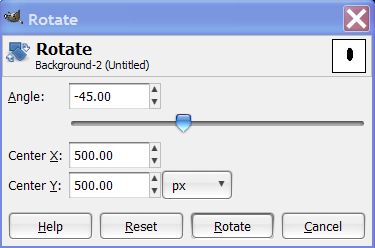
Our Gloss layer is now in the correct position relative to the lighting angle.
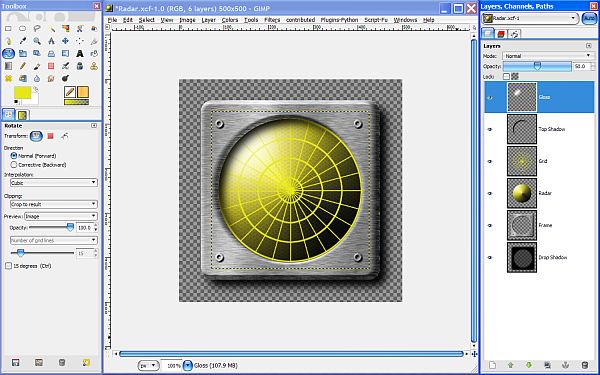
Right click on the Gloss layer and select Layer to Image Size.
Step 29.
Duplicate the Top Shadow layer and rename it “Glow”. Go to Colors>Invert to change it from black to white, then go to Layer>Transform>Flip Vertically. Now repeat the Layer>Transform step except use Flip Horizontally.
Set the layer Opacity to 70%, then Right click on the Radar layer and choose Alpha to Selection. Go to Select>Invert, reselect the Glow layer to make it active and hit your delete key to trim away the excess. The result gives us a little more depth to the image and provides a bit of a reflection effect from the light passing thru the dome shape.
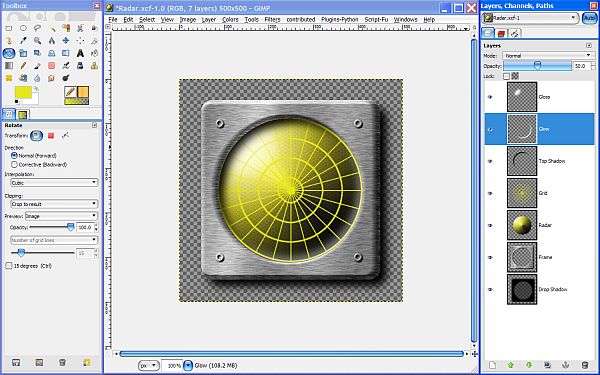
One final adjustment and we will be finished with this step. Select the Move tool and click on the image window to activate the tool. Now hit the Left arrow button 3 times and the Up arrow button 3 times to reposition the Glow layer. Go to Filters>Blur>Gaussian Blur and enter 15 for both values then click OK.
This gives us a slight edge between the Glow and the outer rim of the Grid layer making the “reflection” more believable. Right click and select Layer to Image Size.
Step 30.
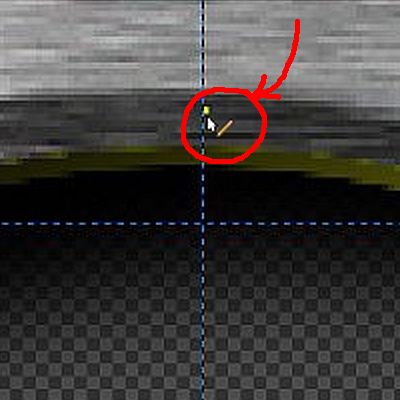
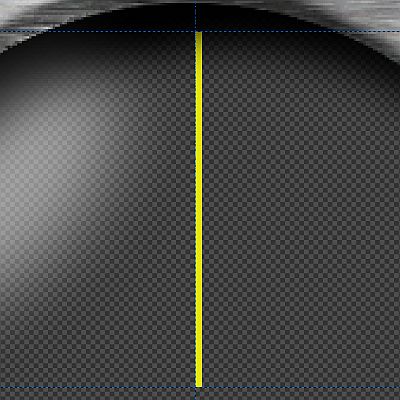
Create a new transparent layer above the Grid layer and name it “Sweeper”. Not really sure what you call this thing that moves around on a radar screen. Turn on the guides again and Turn off the visibility of the Radar and Grid layers. Select the Pencil tool with the same Circle (01) brush. Increase your view to 400% and draw a vertical line like we did before just to the right of the vertical guide but this time only go from the top horizontal guide to the center where the main guides intersect. Be careful not to go past the center horizontal guide but just to it.
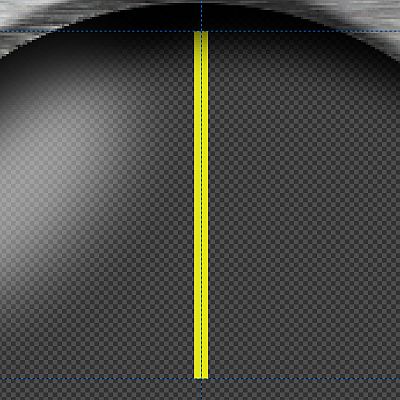
Now duplicate the Sweeper layer and use the move tool and your Right arrow button to move the copy one pixel to the right. Right click on the Sweeper copy layer and select Merge Down.
Step 31.
Duplicate the Sweeper layer again and reselect the Move tool. This time hit your Left arrow button 3 times to move the layer 3 pixels to the left. We now have a nice thick line for our “Sweeper”.
Select the Rotate tool again and in the tool dialog, make sure the Clipping is still set to “Crop to result”. Click on your image one time to activate the tool and when the dialog comes up enter 113 degrees then click the Rotate button. Go to Filters>Blur>Gaussian Blur apply a very slight blur of 1 to the Sweeper layer. Turn off the guides and turn on the visibility of the Grid and Radar layers.
Right click and select Layer to Image Size.
Step 32.
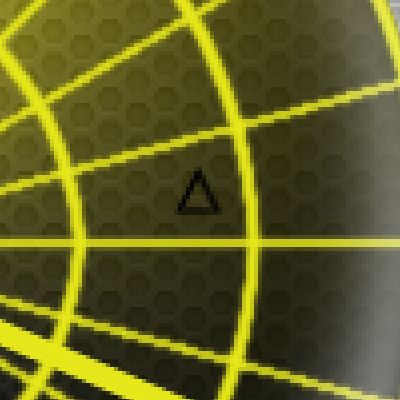
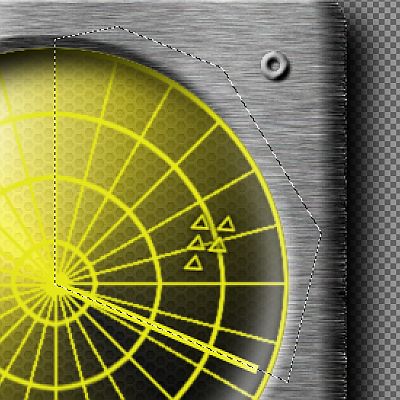
With your view still at 400%, create a new transparent layer above the grid layer and name it “Boggies”. Select the paintbrush tool then select the Shapes_3_triangle brush provided with this tutorial in the Resources zip file. Set the brush size to .25 and paint in a boggie on the right side close to the middle somewhere.
Right click and select Alpha to Selection then go to Select>Shrink and enter 1 pixel for the amount and click OK. Hit your Delete key then Turn off the selection.
Step 33.
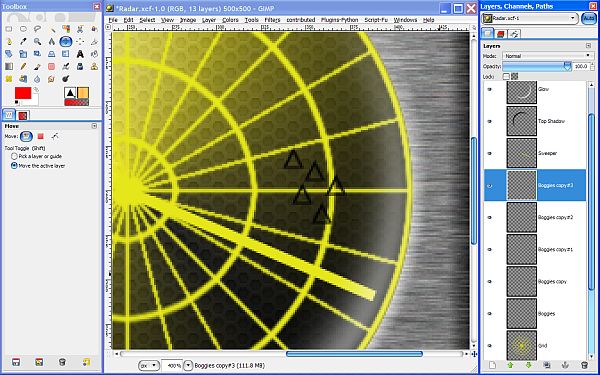
Duplicate the Boggie layer and use the move tool and your keyboard arrows to reposition the copy. What we want to do is create a “squadron of boggies so duplicate and move a few more until you have as many as you want. I made 5 for illustration.
Step 34.
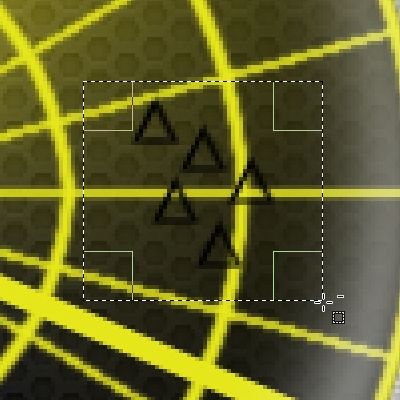
Next we need to merge our boggies into one layer. Starting with the topmost Boggie layer, right click and select Merge Down and repeat until they are all merged.
Click on the Rectangle select tool and make a small selection around the Boggies, then go to Layer>Crop to selection to reduce the size of the layer so it is more manageable for the next step. I use this technique quite often. Go to Select >None to turn off the selection.
Step 35.
Use the Move tool to move the Boggie layer wherever you want it, then select the Rotate tool again. Place your cursor on one of the layer corners and hold down the left button to “grab” it and move it around until the Boggies are pointed toward the center of the Radar.
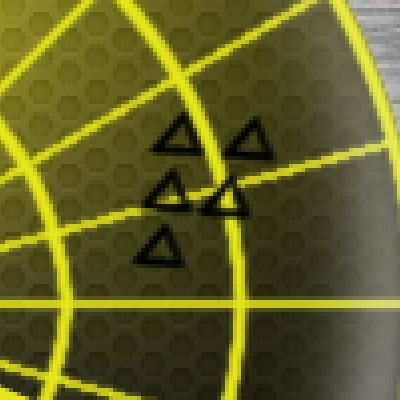
Once you have them positioned, right click and select layer to Image Size. Duplicate the Boggie layer and right click again to select Merge Down.
Step 36.
Reduce your view setting to 100% and duplicate the Boggie layer. Lock the alpha channel and set your FG color to E5E71A. Drag the color over to the image to change the color of the duplicate layer.
Unlock the alpha channel and Go to Filters>Blur>Gaussian Blur. Set the amount to 1 and click OK apply the slight blur. Reselect the Boggie layer to make it active again and apply a blur of about 7 to give us a little shadow effect and make them easier to see. Right click on the Boggie copy layer and select Merge Down.

Step 37.
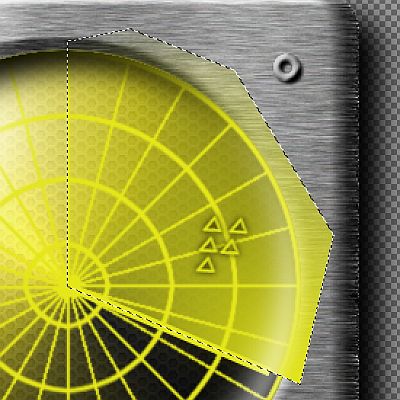
There is still one thing missing to add some realism to our Radar. Create a new transparent layer above the Grid layer and name it “Highlight”. Turn on the visibility of the guides and increase your view setting to 200%. Use the scroll bars to position your image in the image window so that you can see the entire upper right quadrant of the Radar Module and the whole Sweeper bar.
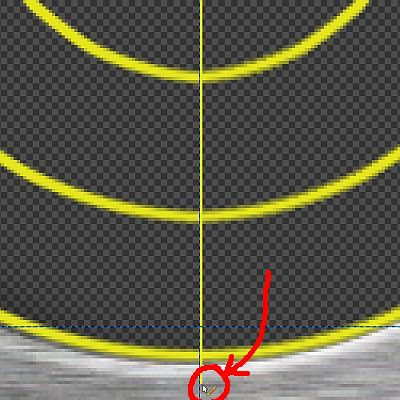
Click on the Free Select tool and make a selection where the left side of the selection is exactly on top of the center vertical guide and use the Shift key to get it perfectly vertical.
The bottom of the selection should also be exactly centered on the Sweeper bar. It’s a lot easier just to show you the selection than to explain it so here’s the screenshot.
Select the Gradient tool and set the gradient to FG to Transparent and make sure the “reversing” box next to it is unchecked. Now drag from the bottom right corner of the selection to the top left corner to apply the gradient.
Turn off the Selection (Select>None) and right click on the Radar layer. Choose Alpha to Selection then go to Select>Shrink and set the amount to 3 pixels then click OK.
Now go to Select>Invert then reselect the Highlight layer. Hit your Delete key one time to remove the excess outside the selection, then go to Select>None to turn off the selection.
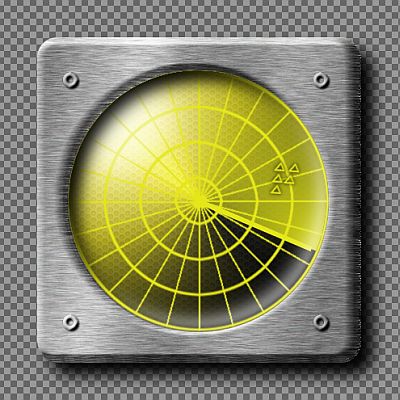
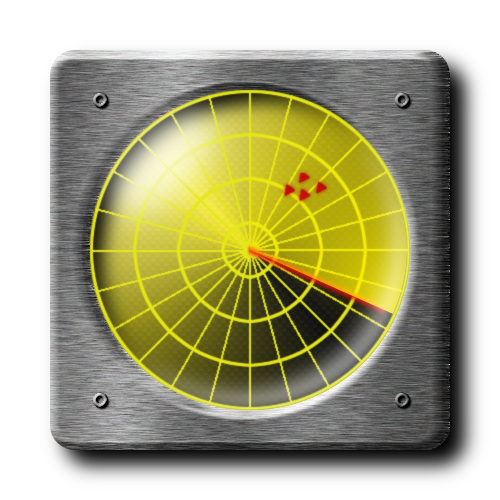
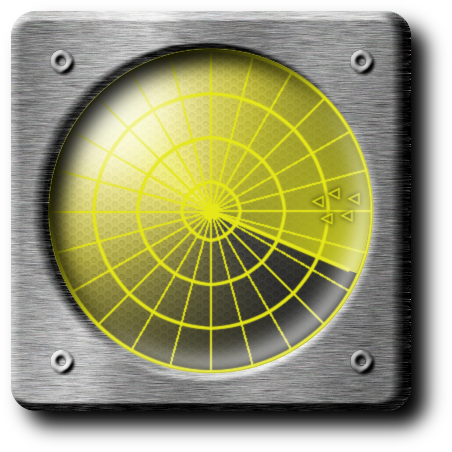
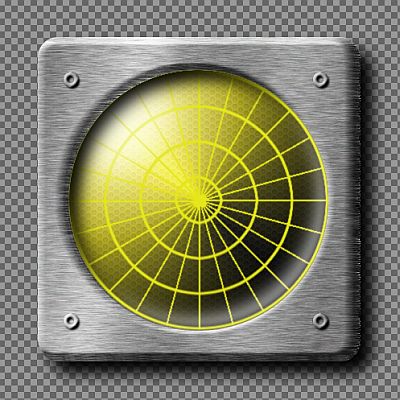
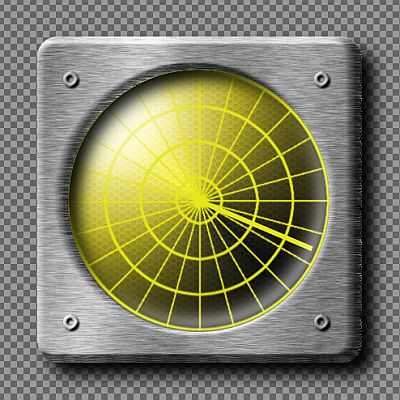
Delete the background layer, turn off the visibility of the guides, then right click anywhere in the layers dialog and select Merge Visible Layers and your Radar Module is completed!
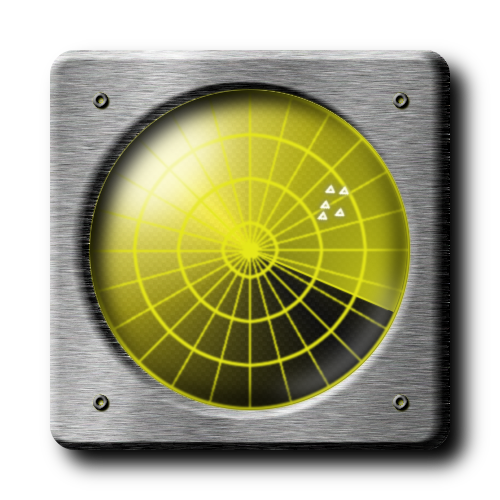
Rather than go back and change all my screenshots, I wanted to show you one variation that you can make now if you like. To make the Boggies look different, lock the alpha channel on the Boggie layer and drag the white background color over to fill it with white. You might also want to make them red. What ever you like best.
I hope you enjoyed this tutorial.
Next up in the
Metal Wurx series is how to make the flow meter I teased you with last time.