o previous knowledge is required , it is only required Mathmap already installed
WHAT YOU NEED TO KNOW BEFORE START
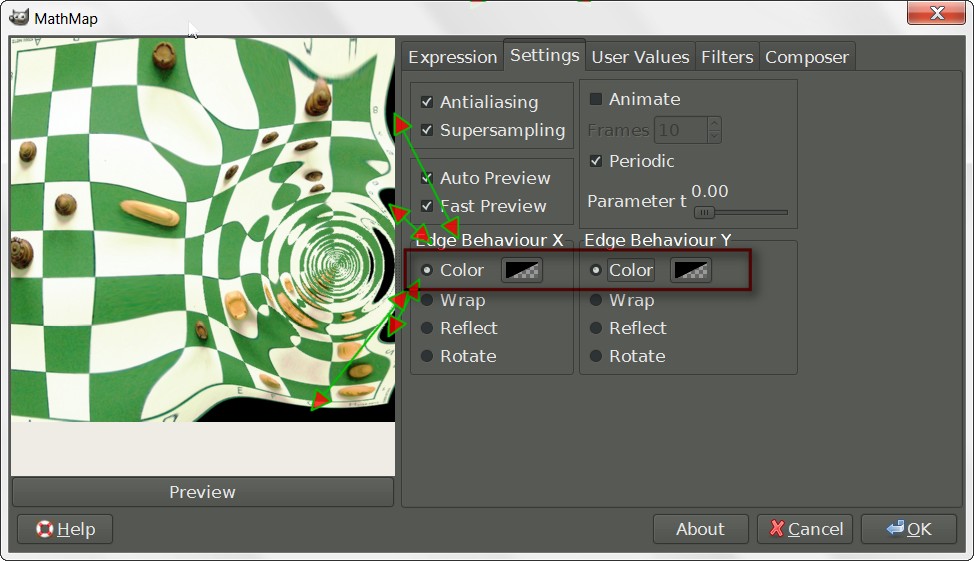
First : in mathmap not all the filter controls are accessible from the “User Value” tab , where are only those specific to each filter , there are others very important controls in the “Setting” tab
On top, to the right side the controls for animations :
a box to mark in case you want create a animation (if not will be no animation at all, even using animated filters), and other related control (how many frames, loop animation or not ,…)
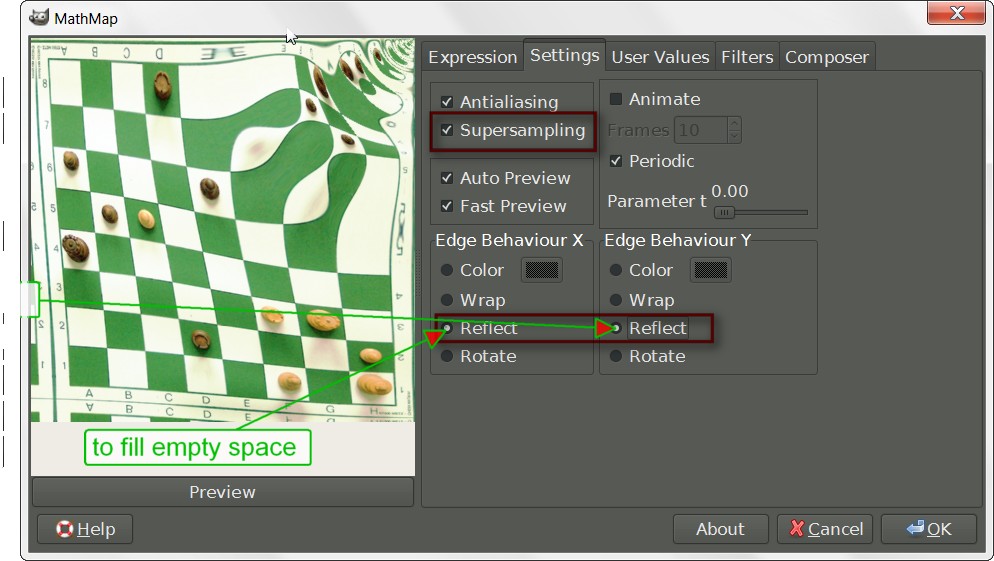
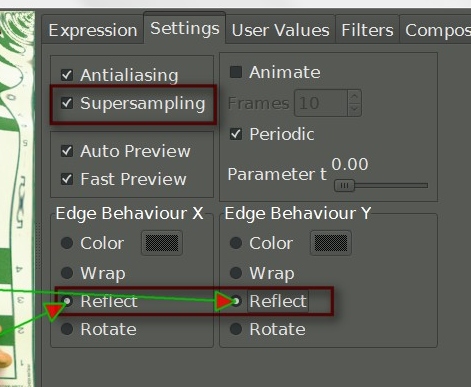
on the left side (framed in red in the illustration) the "supersampling option " OFTEN OVERLOOKED BUT PRECIOUS :
In simple words “supersampling” will give better , more smooth and neat results
without requiring much more resources , with no perceptible disadvantages
It would be nice if was enabled by default but, alas, as default is switched off so I suggest to switch it on at soon you open Mathmap
The other option framed in red “ Edges behaviors” are also very important for
what I want show , and again the default is not adapt:
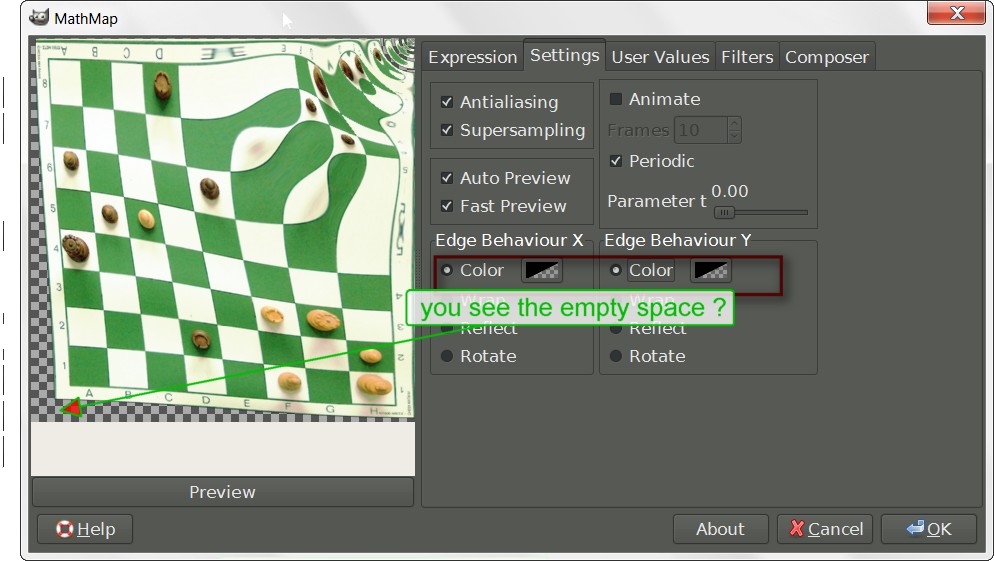
Most of “map” and “distort” filters may change shape and size of the image and so create “empty” spaces , “Edges behaviors” determine how this spaces should be filled , the default is the most obvious method “Color” that would fill the space with a solid color that may be even total transparency if the layer you are working on has a alpha channel
( In case you don't know what is a "alpha channel : just rename it "transparency channel" and magically its function will become clear

) … but here images explain better : “Color” option leave a empty space
the other option framed in red in the illustration , “Reflect” solve by filling the space as in a reflection
That for our use is a much better solution…
note that X and Y edges ( = Horizontal and Vertical edges ) have independent control you should set
both to "reflect"
OK , now we are ready to start !
Fun with the Composer
I will show how to use the Composer to make a more flexible and powerful version of a series of filter already included but first
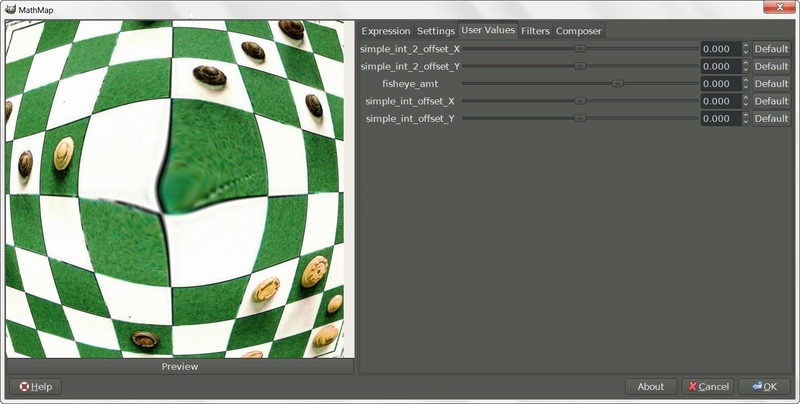
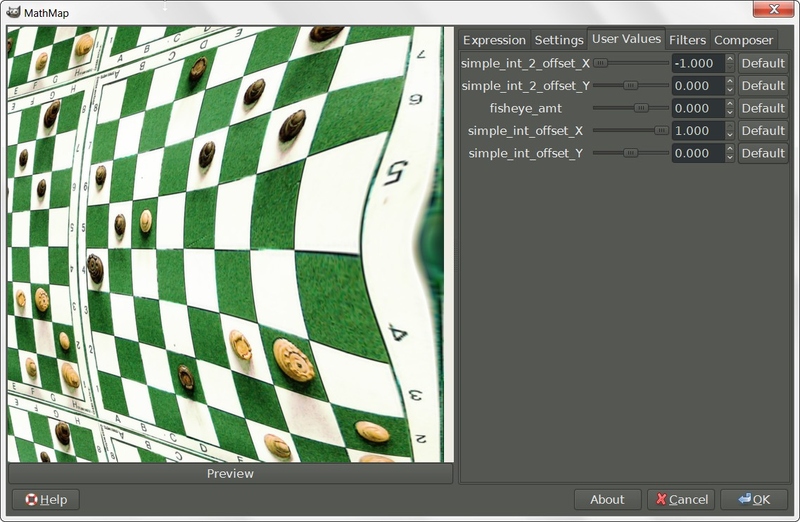
A good example is "Fisheye" that does exactly what expected : create a fisheye distortion
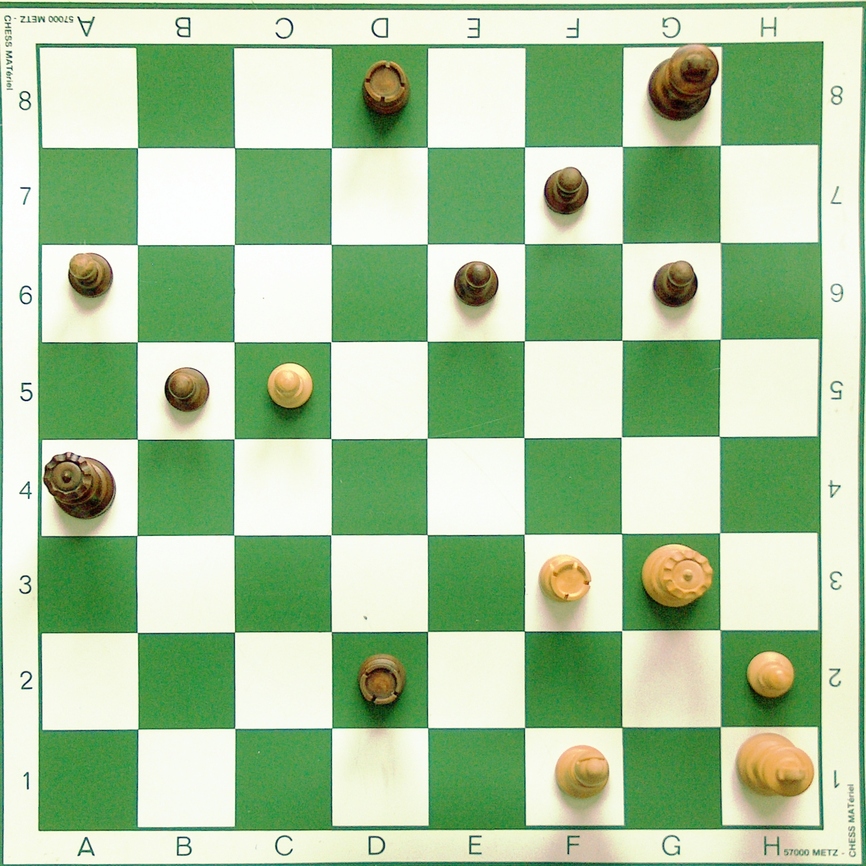
ORIGINAL
AFTERBut the effect is only centered in the very center of the image... most reasonable default but the problem is that is not the default, but the only option available:
And there are other cool mathmap filters with the same limitation as example Pond , Enhanced pond, Circular Slice , Square, rect2ellipsoid , just to quote a few
Now i want show you how to use the composer to create much more flexible version of all those filters :
create and save, any combination may be saved as new filter with just a couple of clicksExample same filter as before , "fisheye" but with the effect centered in the middle of the right vertical edge
another example with "Circular Slice " ; this the effect now
the modified filter will do as default the same but will allow to do also this

First is important to know
that for Mathmap the images are no limited by their edges or the edges of the canvas but have infinite extension
( Obviously that only for mathmap, once gimp will receive the image it will crop back to original layer size)
Then if we know how to code the solution would be trivial ,BUT we are supposed to know nothing about coding
And is even more quick and fun solve using Mathmap Composer
The last is the more simple case to solve
BUT remember this filter and the others that we will create should be used with this setting
( Again "supersampling" will allow a better quality and "reflect" option switched on here is very important )
------------------------------------------------------------------------------------------------
1) open a image, call mathmap, click the composer tab
2) in the center there is a filter list , click on Circular Slice to load the first component of the Composer
(if apparently nothing happens, pan in the lower left corner of the composer windows, the component may be there )
3) Now a filter to offset : here i goofed it was already one ready ( translate in "Geometry" ) but when i discover it i had already written another "Offset_XY" that does exactly the same
Anyway .. click on "Offset_XY "(or "Translate") to load in the Composer
now click on the little "out" circle of the Circular Slice and , without releasing move to the "in" circle of the Offset_XY and you will see a red line connecting the 2
TO MAKE THE USER CONTROL APPEAR YOU SHOULD CLICK "PREVIEW "
To save the new filter you may use the "Save as " button , under the composer tab
--------------------------------------------------------------------------------------
This simple solution works well with this filter but we may do better
Let s try with Distort/Enhanced Pond , again we want be able to offset the effect so we may still have this , the actual effect
But also this where i moved the center of the effect on the upper right corner
[align=center]
[/align]
To do this we need
1) offset the image before apply the "enhanced pond" filter , we may use the Offset_XY filter
2) apply the filter " Enhanced pond" on the offset image
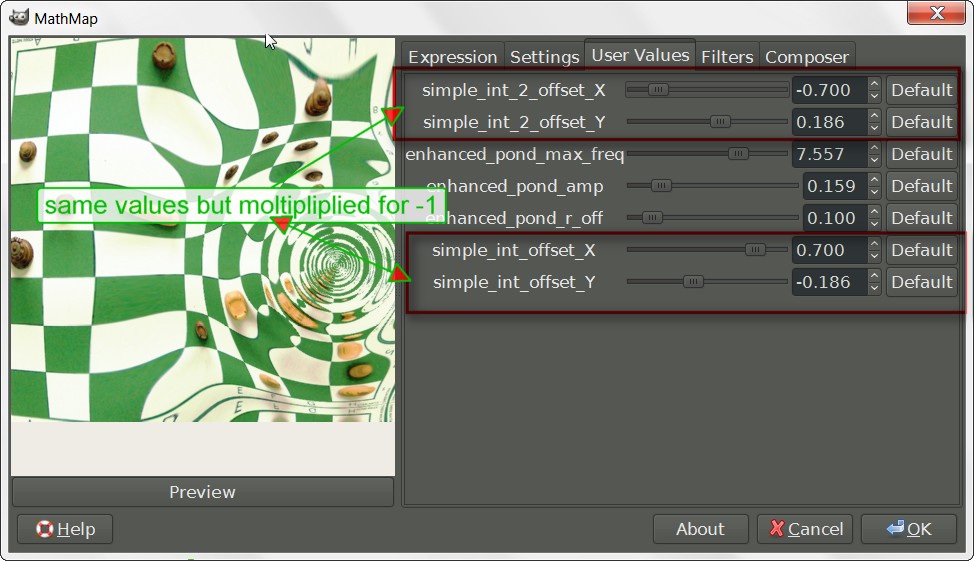
3) compensate the inizial offset so only the center of the effect has a offset not the image
A solution is use again the same Offset_XY filter with exactly the same values but multiplied for -1 .
so
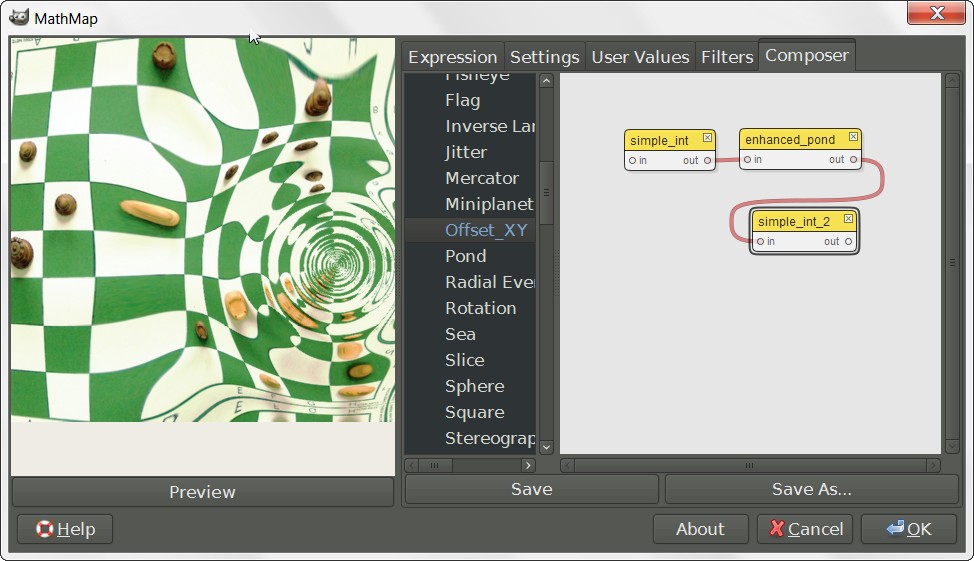
1) chose Offset_XY in the filter list and click to load in the Composer
2) same for "Enhanced Pound", collect
3) connect the "out" of the first with the "in" of the second
4) now chose and load another instance of Offset_XY, and connect it with the rest
(the "out" of Enhanced Pond to the "in" of OffsetXY-2
This is what you should see in the composer tab
5)
CLICK "PREVIEW" TO INITIALIZE THE NEW FILTER AND SO MAKE APPEAR ITS SLIDERS IN THE USER CONTROLS TAB
again do not forgetbecause if not you will get a lot of holes
Could be noted that is a pain use the sliders to set the last 2 values for X and Y offset, rhe slider may get jumpy or skip too much intermediate value
The best solution would be a snippet to code to just revert to the original position , but we are supposed to don't know how to code, and apparently there is not a similar component already coded and ready to be used in similar combinations
BUT there is a quicker method :
select and copy the values from the numeric boxes of the first 2 " Offset_XY "
paste in the last 2 , and then invert polarity (+ if was - and viceversa )
much quicker then with slider
--------------------------------------------------------------------------------------------------------------------------------
I hope you get the idea
the same idea may be used for many other filters :
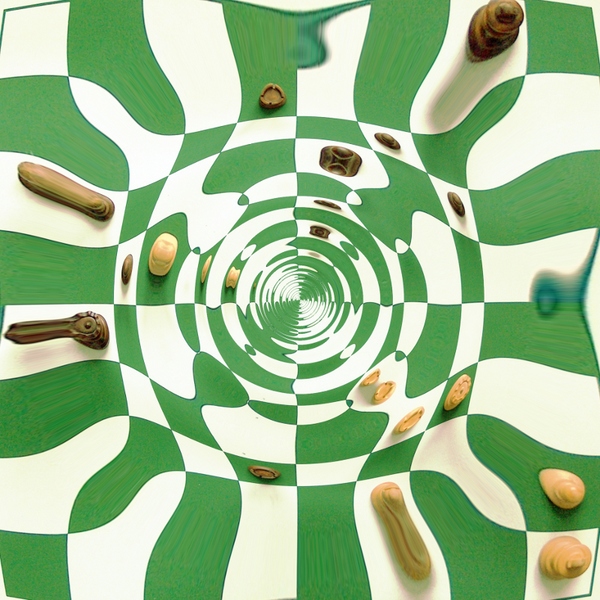
Zoom-blur with offset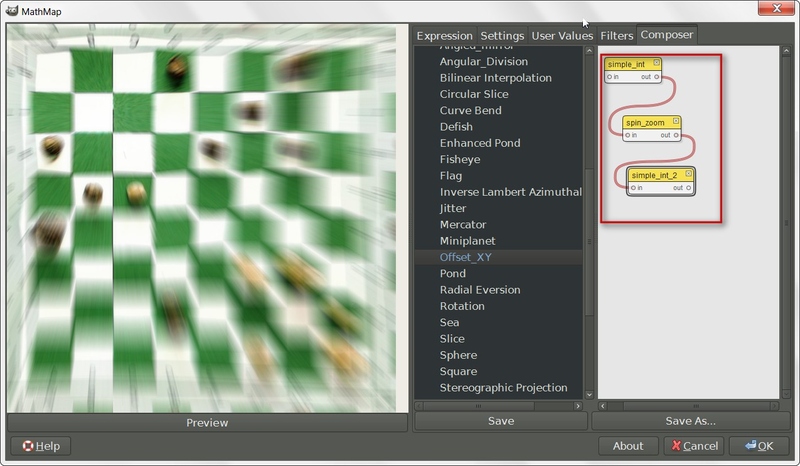
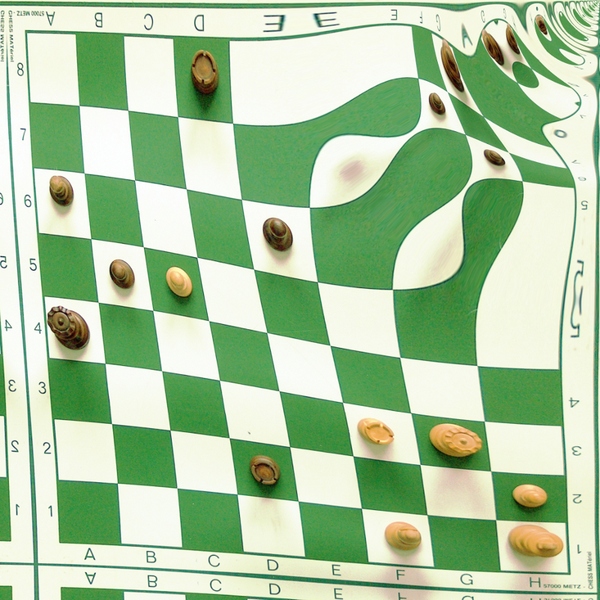
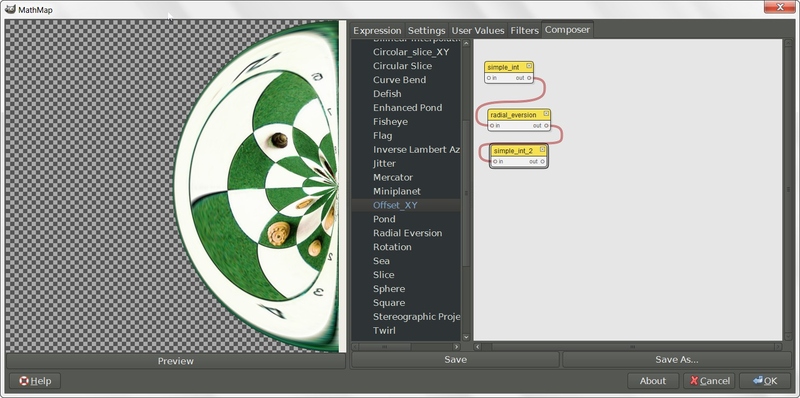
Radial Eversion with offset
Jitter with offset
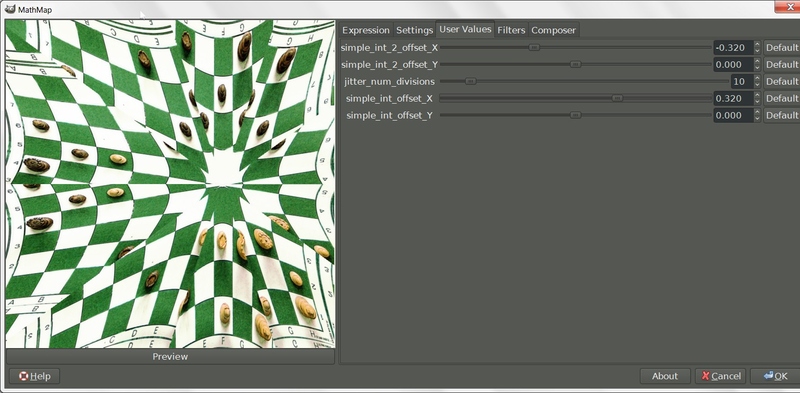
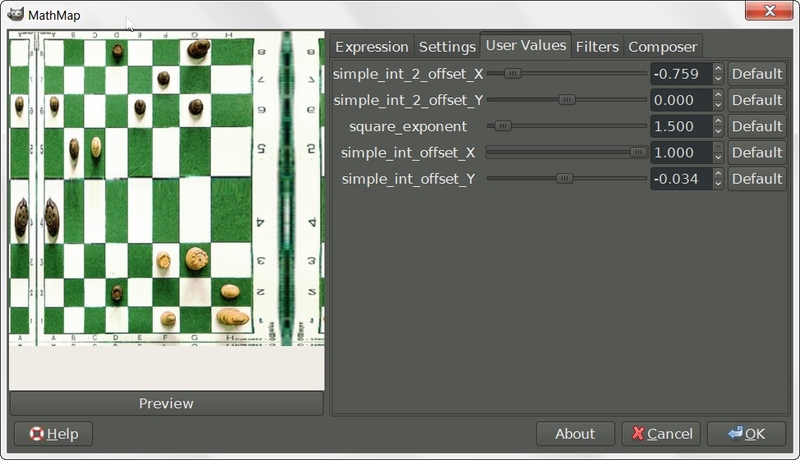
Square with offset (here i didn't use the second instance of offset_XY to compensate but to distort
)
Oh well you should have gotten the idea so something very different now
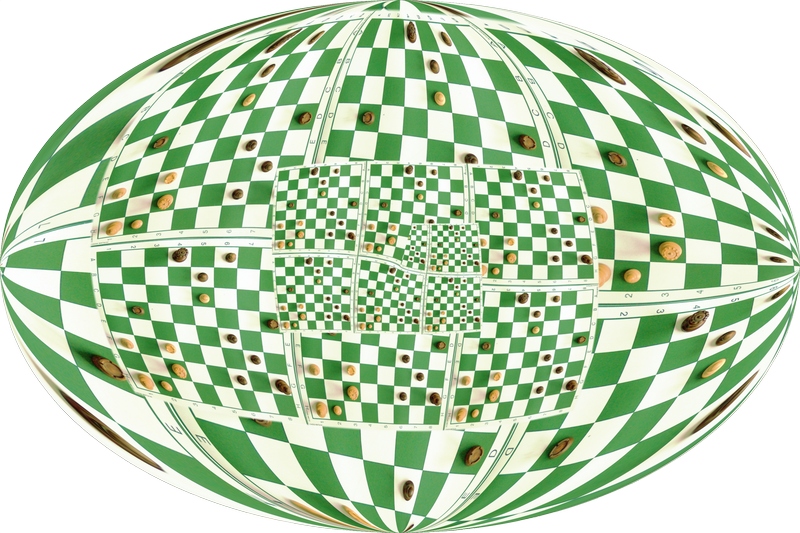
ESCHER'S GLOBE
if you have read till here
1) load in the composer Map/Droste
2) now Map/Sphere
3) connect "out" of Droste with the "in" of "sphere
4) CLICK PREVIEW TO INITIALIZE THE FILTER
result
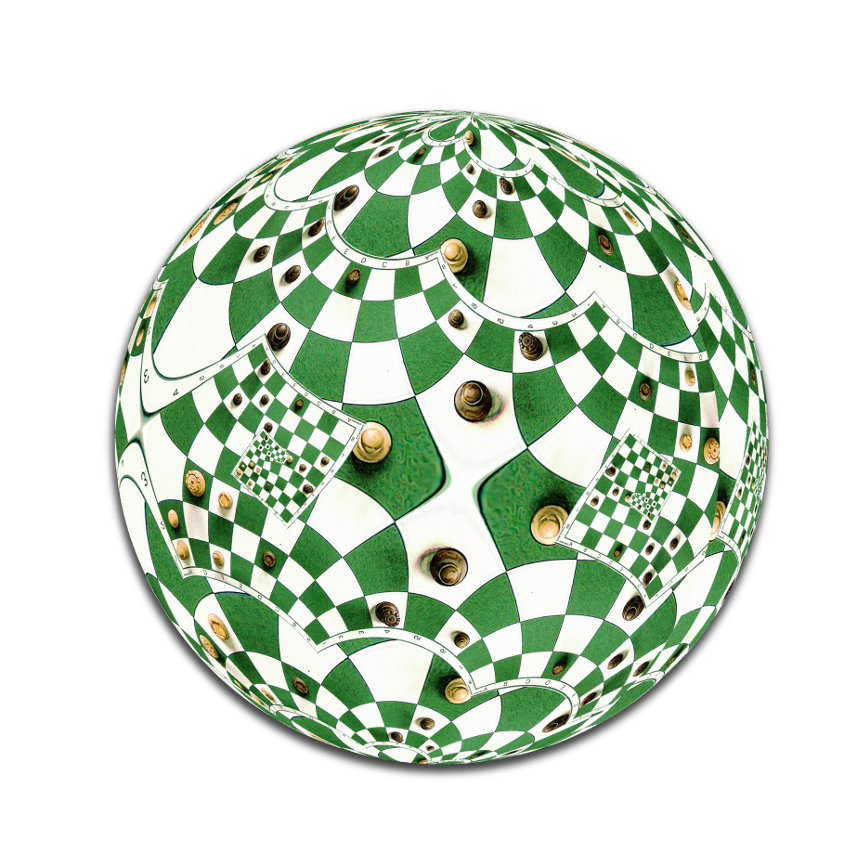
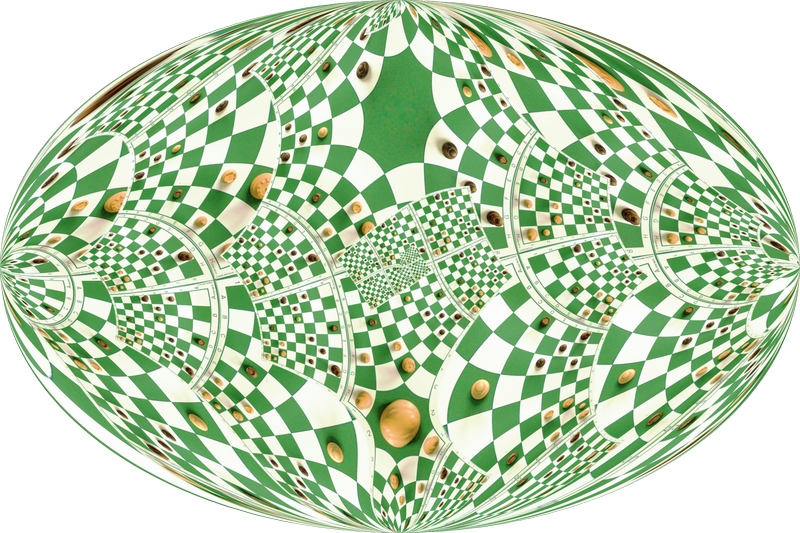
or even
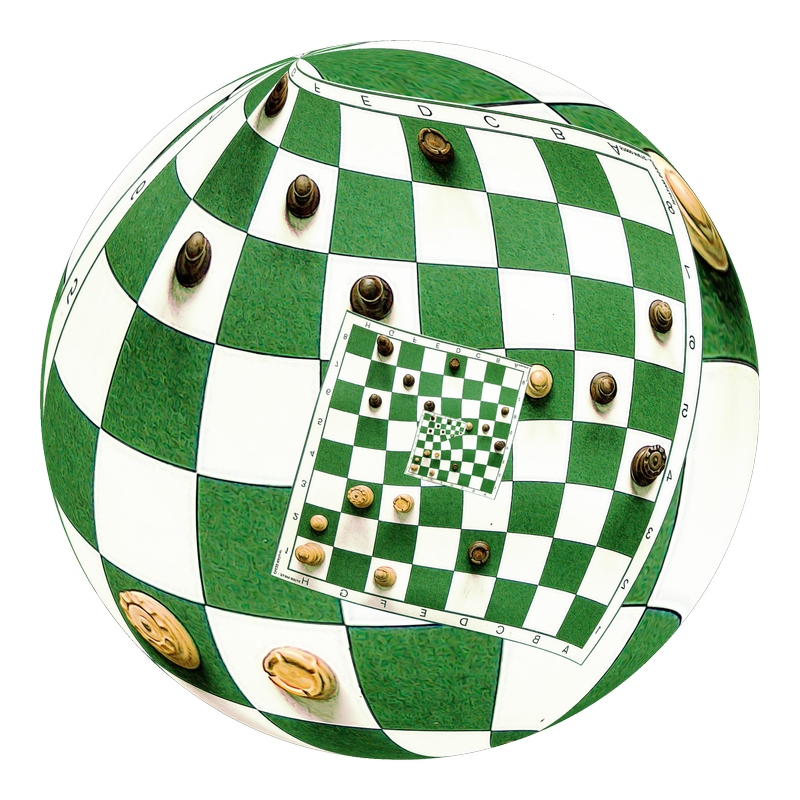
well...have fun and post the most interesting combination you have found
In the zip a copy of my Mathmap "expression" folder with a copy of Offset_XY and all the extra filters i collected till now
MORE INFO ON MATHMAP AND VIDEO ON THE COMPOSER http://www.complang.tuwien.ac.at/schani/mathmap/http://video.google.de/videoplay?docid= ... 8308861626