It is currently Thu Apr 25, 2024 4:07 am


All times are UTC - 5 hours [ DST ]


Post new topic Reply to topic  [ 64 posts ]  Go to page 1, 2, 3, 4  Next
Author Message
 Post subject: Flowing Text Tutorial
PostPosted: Sun Aug 12, 2012 5:28 pm  (#1) 
Offline
GimpChat Member
User avatar

Joined: Mar 23, 2012
Posts: 7309
Location: Göteborg at last!
Image

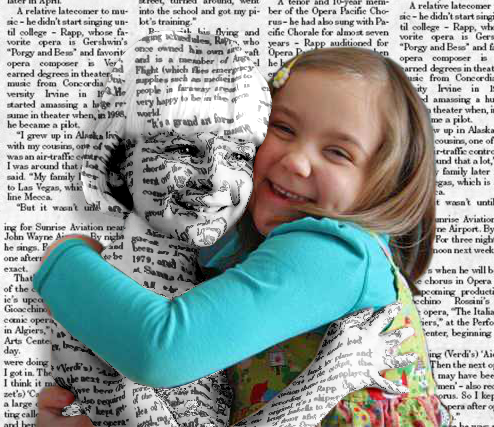
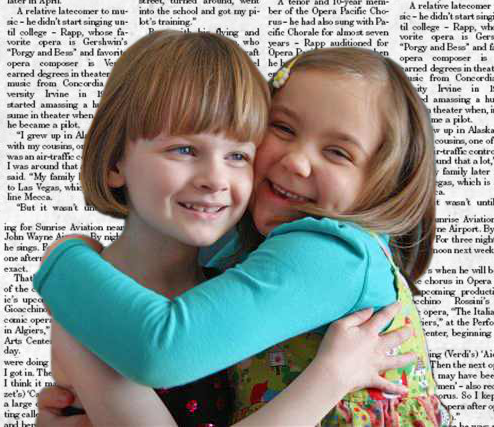
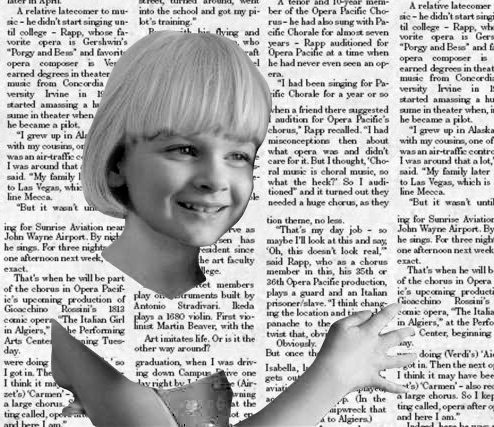
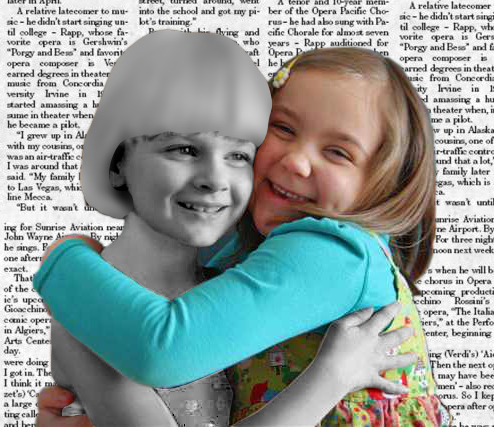
1. Open a newspaper image and open your hug image on top. Right-click your hug layer and add an alpha channel. Choose your free select tool and in tool options tick Feather Edges and set the slider to 3. This will antialias your cutout far better than antialiasing on its own will. Plot points around your subject, cutting away the background and saving as you go. It is better to plot the points
slightly inside the subject to ensure no background remains.

Image

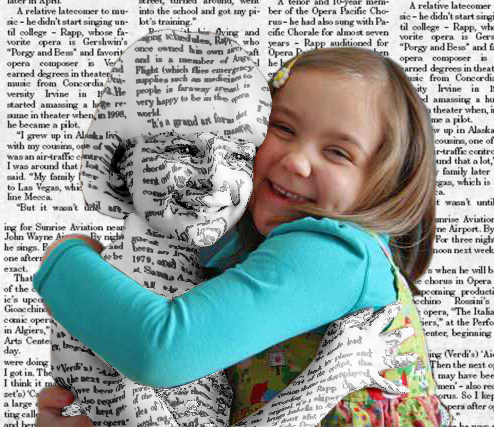
2. Duplicate your cutout layer and rename it "Map" Make your original hug layer invisible. Using the free select tool cut away from the map layer the person who is being hugged to leave only the person who will become the newspaper person.

Image

3. Open colours>desaturate and choose the mode that gives the best contrast then click OK. Use the dodge and burn tools if necessary to equalise the main values and to ensure good shadow contrast. Use a fuzzy brush for this.

Image

4. Right-click the layer and choose alpha to selection then select your free select tool. In tool options select "subtract from current selection" (the third mode icon at the top) then remove the selection from the body leaving it just around the hair. Use CTRL+c or edit>copy followed by edit>paste into. This will create a floating selection that we turn into a normal layer by clicking on the new layer icon. Rename this layer "Hair Map" and duplicate it. Rename your hair map copy layer "Hair" and make it
invisible. Remove your selection. (select>none)

5. Make all layers invisible apart from the hair map layer and with the hair map layer selected run filters>blur>gaussian blur at about 15 pixels on both x and y. Now keep duplicating the layer until the edges are solid then right-click the layers window and select merge visible layers. Right-click your hair layer and choose alpha to selection then reselect your hair map layer, select>invert and delete to remove the outside. Make all your layers visible again except for the hair layer and merge the hair map layer down with the map layer. Remove the selection.

Image

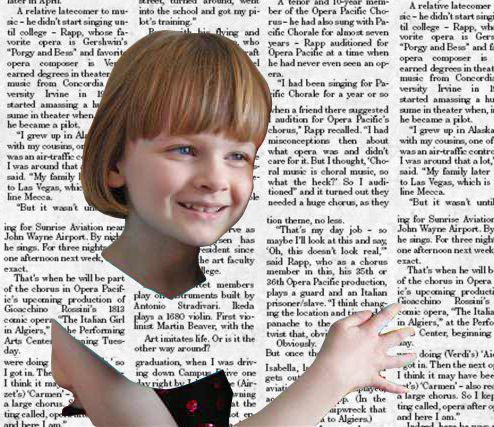
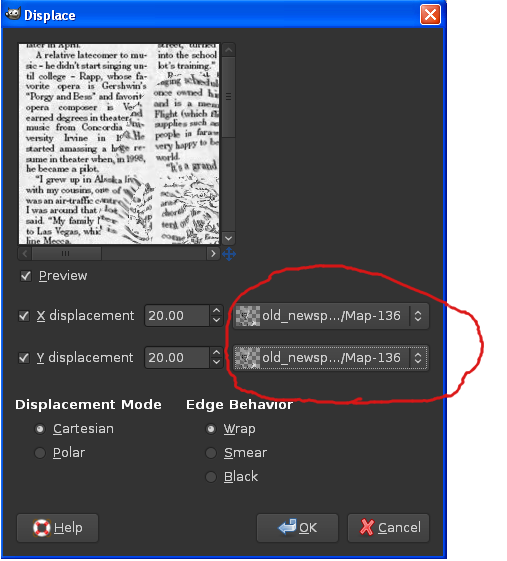
6. Duplicate your newspaper layer, move it up in the stack to just below the hair layer and right-click>add alpha channel. Ensure both this layer and the map layer are image size. (Layer>layer to image size) The displacement map we are about to use will only work with layers that are the same size. Open Filters>map>displace and set the map boxes to use the map layer then click on OK.

Image

Image

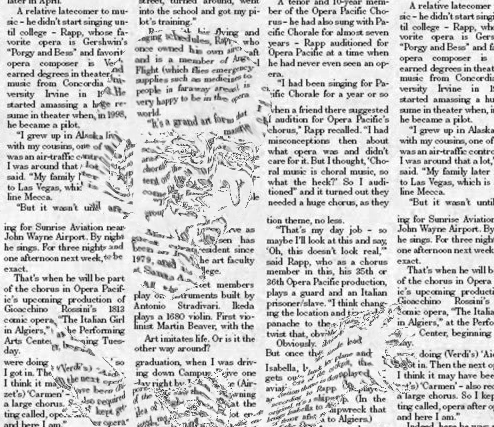
7. Right-click your map layer and choose alpha to selection then making sure your newspaper copy layer is selected choose select>invert followed by delete to remove the outside. Put the layer into overlay mode and use colours>levels to improve contrast. Remove the selection.

Image

8. On the map layer, adjust the levels to your liking then make the hair layer visible and put it into grain merge mode. Make your background layer invisible then right-click>merge visible layers. Make your background visible again. Select the people layer. Open filters>light and shadow>drop shadow and uncheck the allow resizing box then click OK. Select your drop shadow layer and move the shadow to a suitable position and adjust the opacity.

Image


Attachments:
Erisian-Flowing text-tutorial.pdf.7z [626.74 KiB]
Downloaded 771 times


Last edited by Erisian on Sun Aug 12, 2012 6:00 pm, edited 1 time in total.
Share on Facebook Share on Twitter Share on Orkut Share on Digg Share on MySpace Share on Delicious Share on Technorati
Top
 Post subject: Re: Flowing Text Tutorial
PostPosted: Sun Aug 12, 2012 5:51 pm  (#2) 
Offline
Global Moderator
User avatar

Joined: Apr 07, 2010
Posts: 14182
Very nice Eris, I will definitely try it.

_________________
Image


Top
 Post subject: Re: Flowing Text Tutorial
PostPosted: Sun Aug 12, 2012 5:54 pm  (#3) 
Offline
GimpChat Member
User avatar

Joined: Mar 23, 2012
Posts: 7309
Location: Göteborg at last!
Thank you Molly. I found this tute a bit difficult so I hope I haven't messed up anywhere. Let me know if you have any questions.


Top
 Post subject: Re: Flowing Text Tutorial
PostPosted: Sun Aug 12, 2012 6:14 pm  (#4) 
Offline
Global Moderator
User avatar

Joined: Nov 16, 2011
Posts: 5128
Location: Metro Vancouver, BC
That was quick, thanks Erisian :coolthup
I will give it a go for sure.

BTW, I enjoyed your Olympics.

_________________
Image
Gimp 2.8.18, Linux, median user
Gimp Chat Tutorials Index
Spirit Bear (Kermode)


Top
 Post subject: Re: Flowing Text Tutorial
PostPosted: Sun Aug 12, 2012 6:16 pm  (#5) 
Offline
GimpChat Member
User avatar

Joined: Mar 23, 2012
Posts: 7309
Location: Göteborg at last!
Odinbc wrote:
That was quick, thanks Erisian :coolthup
I will give it a go for sure.

BTW, I enjoyed your Olympics.


You're welcome. Glad you enjoyed the Olympics - I didn't. Not really a sporty sort. :)


Top
 Post subject: Re: Flowing Text Tutorial
PostPosted: Sun Aug 12, 2012 6:46 pm  (#6) 
Offline
Global Moderator
User avatar

Joined: Apr 07, 2010
Posts: 14182
I didn't care for the closing ceremony, the music and some of the performances were out there, way out there, I just thought it dragged on far too long.

_________________
Image


Top
 Post subject: Re: Flowing Text Tutorial
PostPosted: Sun Aug 12, 2012 6:50 pm  (#7) 
Offline
GimpChat Member
User avatar

Joined: Mar 23, 2012
Posts: 7309
Location: Göteborg at last!
There's too many bells and whistles surrounding these events IMO. It's not the be-all and end-all of life so why drag it out so much. These are times when I'm glad I don't watch TV.


Top
 Post subject: Re: Flowing Text Tutorial
PostPosted: Sun Aug 12, 2012 7:47 pm  (#8) 
Offline
GimpChat Member

Joined: Jun 04, 2011
Posts: 80
loved the Olympics! after Beijing's total spectacle some wondered how London would fare ... just splendidly TYVM!

loved every minute, from opening to closing. big thank you to the hosting Brits!


Top
 Post subject: Re: Flowing Text Tutorial
PostPosted: Sun Aug 12, 2012 9:29 pm  (#9) 
Offline
GimpChat Member
User avatar

Joined: Aug 24, 2011
Posts: 1785
Location: Dallas, TX
Great improvement Erisian. Good tut as well. I'll have to give this a try when I get the right pic.

_________________
Image


Top
 Post subject: Re: Flowing Text Tutorial
PostPosted: Mon Aug 13, 2012 5:56 am  (#10) 
Offline
GimpChat Member
User avatar

Joined: Mar 23, 2012
Posts: 7309
Location: Göteborg at last!
Draconian wrote:
Great improvement Erisian. Good tut as well. I'll have to give this a try when I get the right pic.


I'm looking forward to seeing your results Drac. :)


Top
 Post subject: Re: Flowing Text Tutorial
PostPosted: Mon Aug 13, 2012 7:53 am  (#11) 
Offline
Global Moderator
User avatar

Joined: Apr 07, 2010
Posts: 14182
Draconian wrote:
Great improvement Erisian. Good tut as well. I'll have to give this a try when I get the right pic.


Here ya go Drac...lots of hugging goin-on.
Hugging going on

_________________
Image


Top
 Post subject: Re: Flowing Text Tutorial
PostPosted: Mon Aug 13, 2012 9:11 am  (#12) 
Offline
GimpChat Member
User avatar

Joined: Aug 24, 2011
Posts: 1785
Location: Dallas, TX
Thanks Molly but I found one in my family photos I wanted to use cuz I'll probably frame it and use as a Christmas gift if it turns out well.

Erisian - I having problems understanding several steps. Some screenshots of the layers would help tremendously. At first I couldn't figure out which layer was named what and also I've never used the Dodge and Burn tool and don't have a clue what settings to use or what to apply it to.

I messed something up in step 4 cuz I ended up removing the hair instead of vice versa so I just did a regular selection and did the copy/paste as and made a new layer then deleted the selection from the original. I ended up at the same place you did.

I'm not sure what you are doing with step 5 so I just locked the alpha channel and applied the blur. That way I didn't have to do all the duplication process and the other part. If I understood it correctly you were just going for a blurred hair layer that does not overlap the boundries of the original hair layer.

In step 6 you duplicate the newspaper layer and add an alpha channel. It should already have an alpha channel because you already did that in step 1.

By virtue of the fact you are working on the newspaper layer when you duplicate it, it is the one selected when you open the Displacement map filter which doesn't work. Which layer should be selected and active when you open the filter?

What settings did you use in step seven for the levels? I never could get it to come out right.

Is the "people" layer you refer to in step 8 the same as the "Hug/Image" layer in steps 1 and 2?

I'm so confused I think I'm going to start over. :gaah Nuttin' like feeling dumb!

_________________
Image


Top
 Post subject: Re: Flowing Text Tutorial
PostPosted: Mon Aug 13, 2012 9:19 am  (#13) 
Offline
Global Moderator
User avatar

Joined: Apr 07, 2010
Posts: 14182
I haven't started it yet Drac. I was busy out at the garden. I have tomatoes coming out my ears.
Anyway, I think I found a picture that isn't full of water marks to use.

_________________
Image


Top
 Post subject: Re: Flowing Text Tutorial
PostPosted: Mon Aug 13, 2012 10:53 am  (#14) 
Offline
GimpChat Member
User avatar

Joined: Mar 23, 2012
Posts: 7309
Location: Göteborg at last!
The newspaper layer should not have an alpha channel because it is the background layer. In step 1, you add an alpha channel to the figures not the newspaper. I didn't name all the layers but I thought everything was clear. The idea of step 5 is to blur the hair without the coloured image showing at the edges. Dodge and burn, use the default settings. The levels are adjusted to your satisfaction so I can't give precise figures. Just play a bit and if you can do it better than me - fantastic. :)


Last edited by Erisian on Mon Aug 13, 2012 5:48 pm, edited 1 time in total.

Top
 Post subject: Re: Flowing Text Tutorial
PostPosted: Mon Aug 13, 2012 5:35 pm  (#15) 
Offline
GimpChat Member
User avatar

Joined: Mar 23, 2012
Posts: 7309
Location: Göteborg at last!
Displacement map. Both the map and the newspaper copy layers should be the same size. To make sure, do layer to image size on both layers. The newspaper copy layer should be selected when you open the filter. The people layer is the hug layer.

EDIT: With the displacement map, if the lettering is too badly distorted, try lowering the displacement figures with the sliders. I wouldn't go below about 10 for this.


Last edited by Erisian on Tue Aug 14, 2012 8:48 am, edited 1 time in total.

Top
 Post subject: Re: Flowing Text Tutorial
PostPosted: Mon Aug 13, 2012 9:23 pm  (#16) 
Offline
GimpChat Member
User avatar

Joined: Apr 08, 2010
Posts: 5420
Location: Northwest Ohio
I hope I can find a good photo to try this out...sometimes finding the right photo takes much longer than the tutorial itself.


Top
 Post subject: Re: Flowing Text Tutorial
PostPosted: Thu Aug 16, 2012 2:17 pm  (#17) 
Offline
New Member
User avatar

Joined: Aug 16, 2012
Posts: 2
Location: Poland
detailed description.
Maybe video Flowing Text Tutorial


Top
 Post subject: Re: Flowing Text Tutorial
PostPosted: Thu Aug 16, 2012 4:45 pm  (#18) 
Offline
GimpChat Member
User avatar

Joined: Mar 23, 2012
Posts: 7309
Location: Göteborg at last!
prozak64 wrote:
detailed description.
Maybe video Flowing Text Tutorial


This is as detailed as I know how to make it. My computer is too slow to make video screen captures. Sorry. :)


Top
 Post subject: Re: Flowing Text Tutorial
PostPosted: Fri Aug 17, 2012 10:22 am  (#19) 
Offline
New Member
User avatar

Joined: Aug 16, 2012
Posts: 2
Location: Poland
computer is too slow to make the video screen captures. OK
maybe Gimp screenshots step by step :yes


Top
 Post subject: Re: Flowing Text Tutorial
PostPosted: Sat Aug 18, 2012 10:06 am  (#20) 
Offline
GimpChat Member
User avatar

Joined: Aug 24, 2011
Posts: 1785
Location: Dallas, TX
In Step 7 you state "Put the layer into overlay mode and use colours>levels to improve contrast. Remove the selection."

This is the Newspaper copy layer correct?

_________________
Image


Top
Post new topic Reply to topic  [ 64 posts ]  Go to page 1, 2, 3, 4  Next

All times are UTC - 5 hours [ DST ]


   Similar Topics   Replies 
No new posts Attachment(s) Quick and Easy Text Tutorial

5

No new posts Attachment(s) Lurid text effect plugin from Conbagui's tutorial (Edited)

18

No new posts Change From Cross Hair To Pointer (Quick Tip Text Tutorial)

2

No new posts Attachment(s) GEGL Text Style Collection - plugin with many fancy text styles

14

No new posts Attachment(s) manipulate a portion of text inside a text layer using python-fu

2


* Login  


Powered by phpBB3 © phpBB Group