Ok the first thing you need to do is download my gradient and brush...
Download my brush here
http://www.mediafire.com/?0sta80ykok7pa80 (brush no longer available). You will need your own horse or other brush to complete this tutorial. Here are some nice ones by Maureenolder.
http://maureenolder.deviantart.com/art/ ... e-83172782Download the gradient file here
http://www.mediafire.com/?376a4okm63lz9i3place each file in their proper folders and restart Gimp.
Now that we have our brush and our gradient ready, lets begin -
Open Gimp... I will be using Gimp 2.6.10 for this tutorial.
Create a new document 640x400, fill it with black.Right click this layer choose add alpha channel.
Create a new white layer, name it clouds. - select black for foreground color, and white as background color.
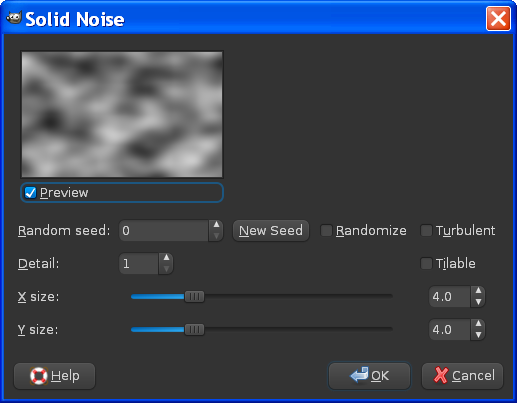
Go to filters/render/clouds/difference clouds - put in these settings.
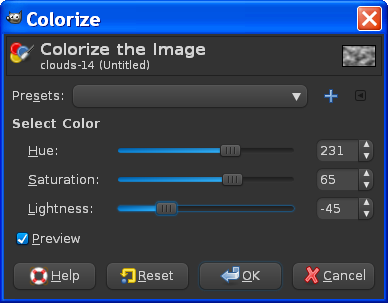
Select the clouds layer and go to colors/colorize and put in these settings -
Now select the clouds layer and using the free select tool select a area at the bottom of the layer like this..
Go to Edit/clear.
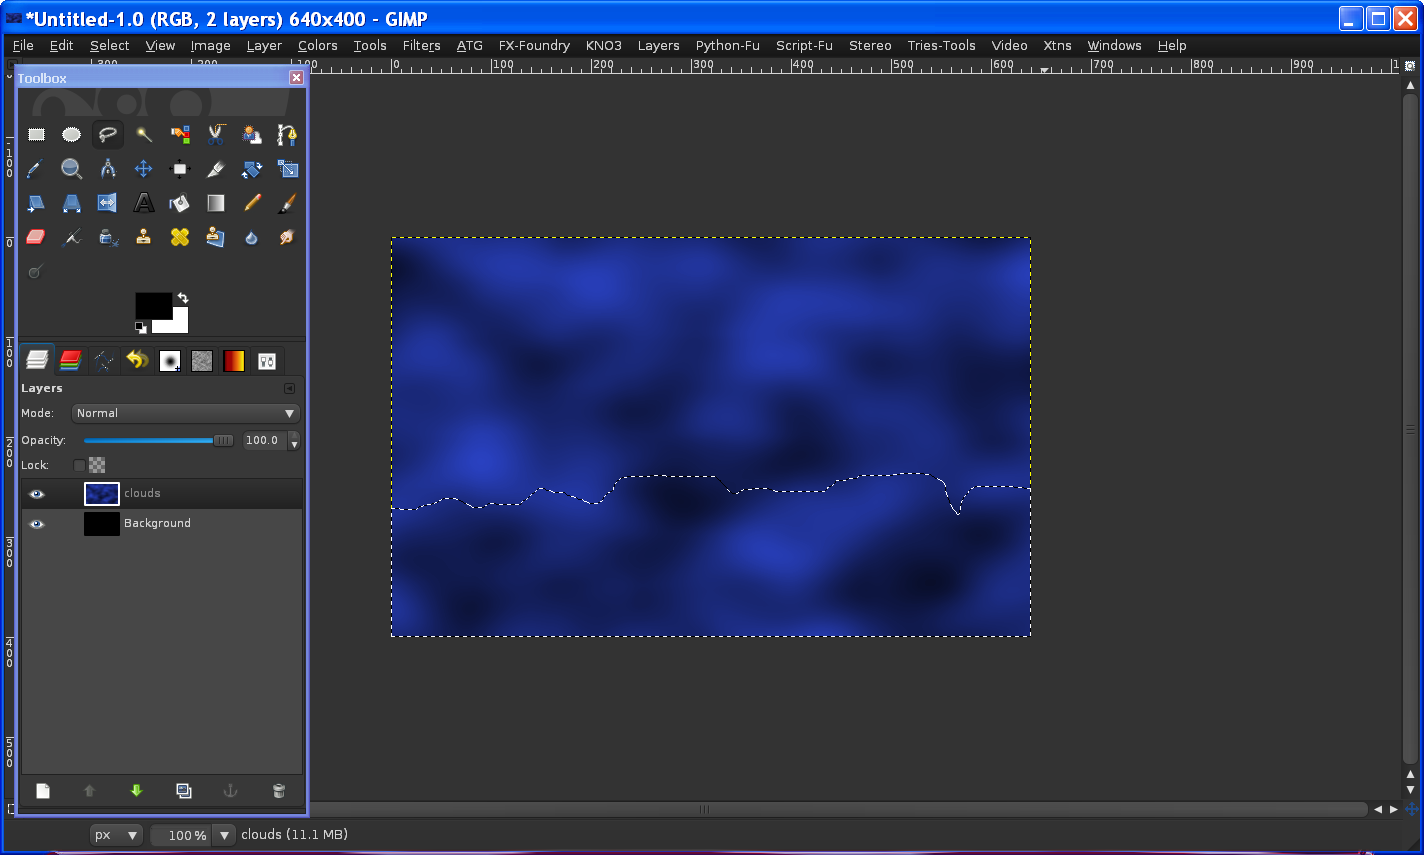
Your image should now look like this
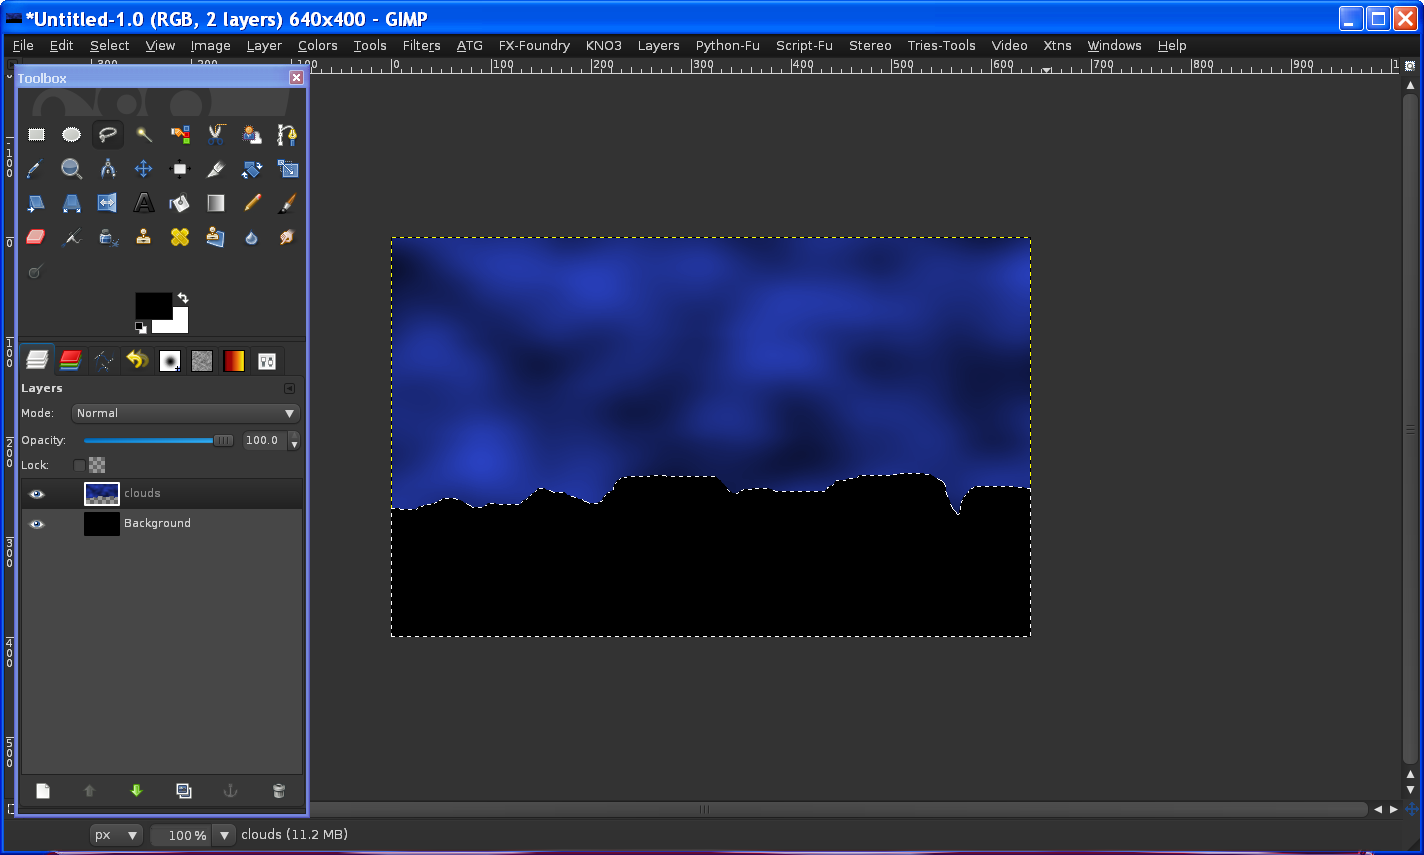
Select/none to deselect all.
Now here is where your own creative juices come into play.Using the eraser tool select the clouds layer and erase out your cliffs like this..
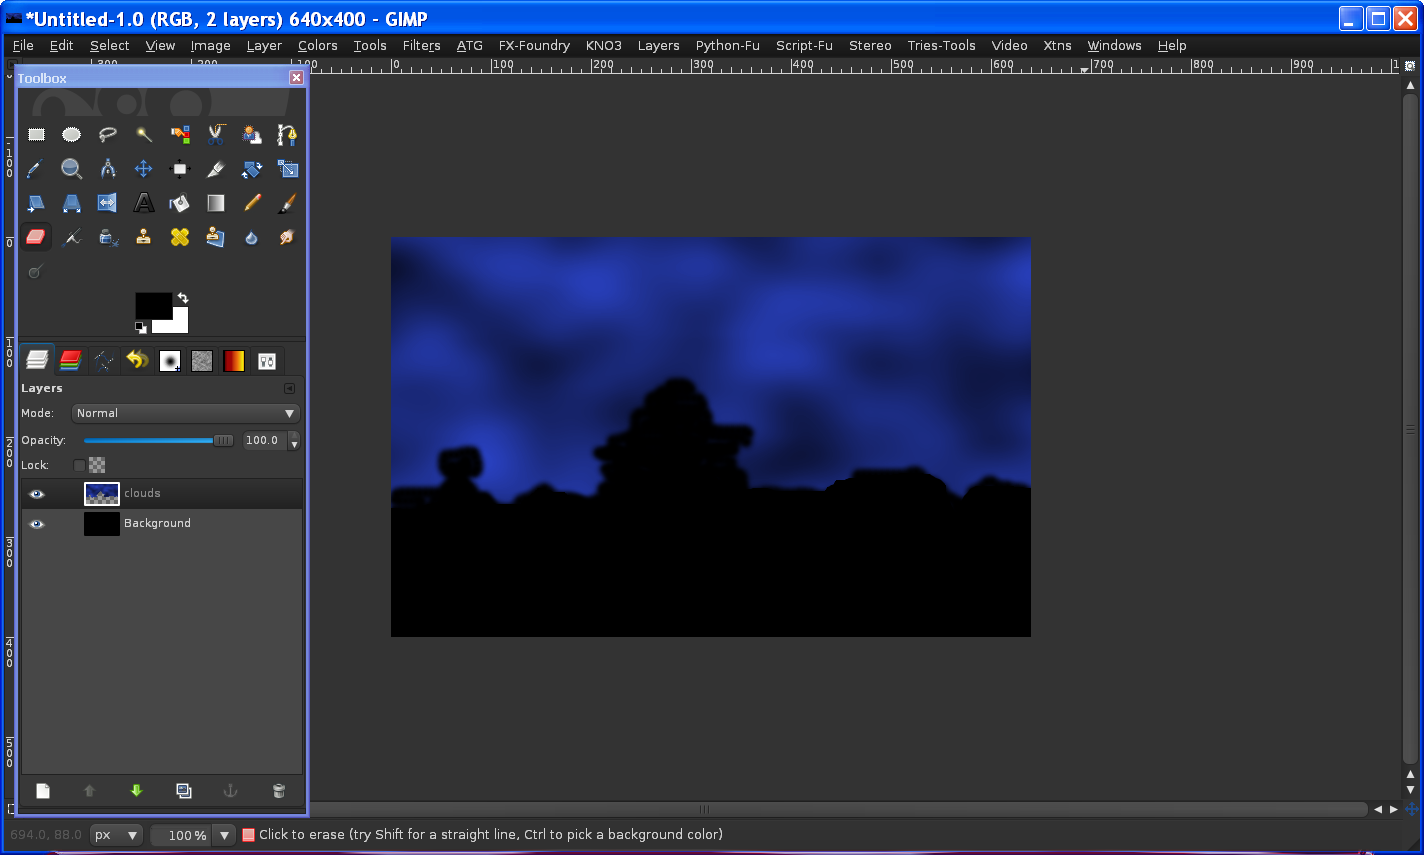
Use a size eraser about 1.25 for this..anything small enough to work with easily.
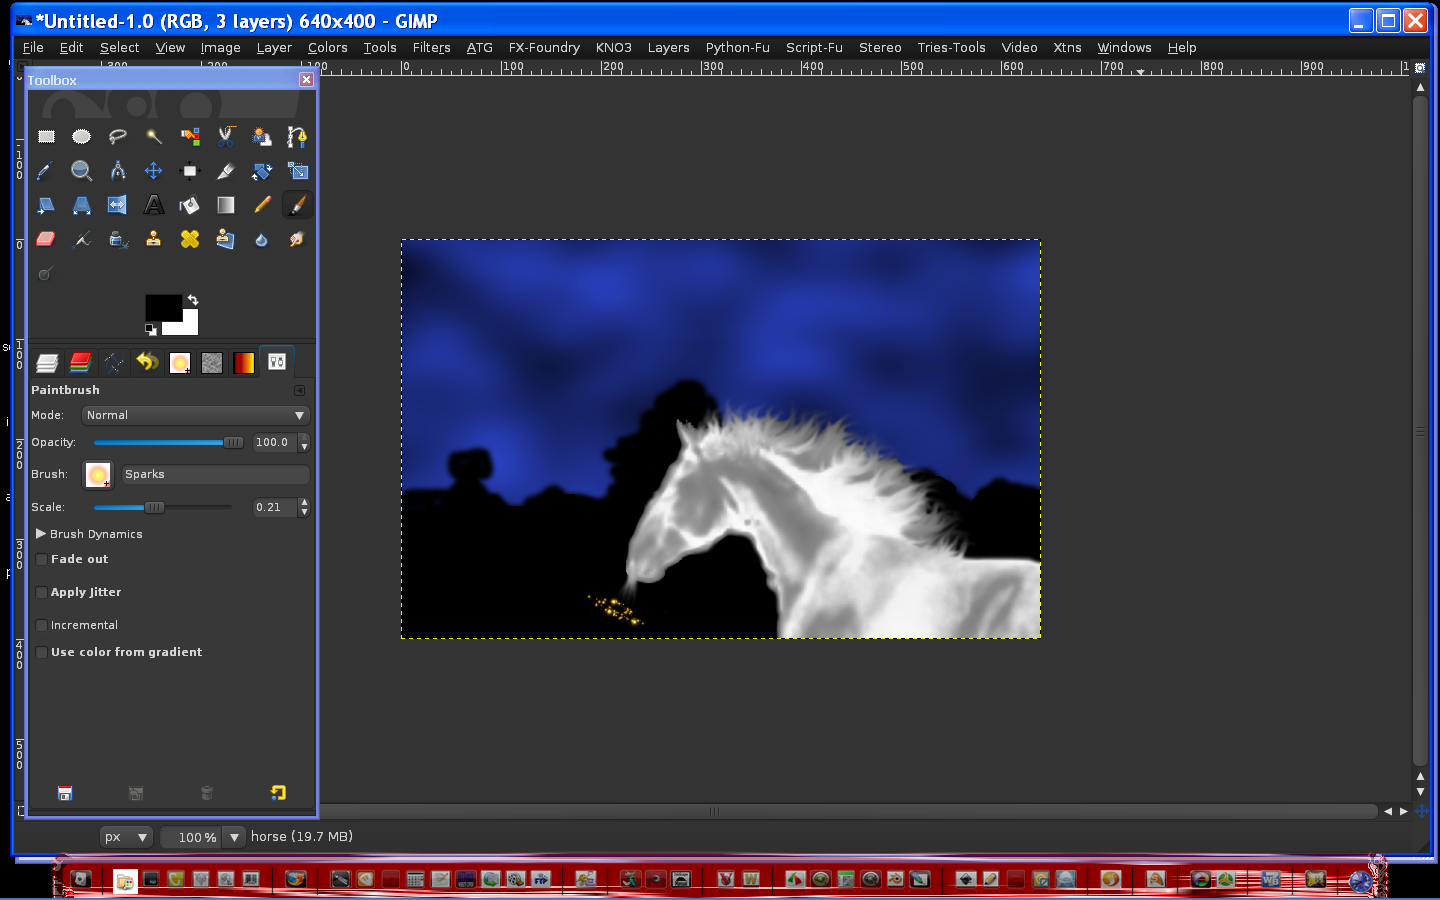
Now create a new transparent layer, name it horse - go into your brush folder and select the horse brush you downloaded.Use a nice big size.
Select the horse layer and decide where you want your horse to be in the image, and click on the image once to paste the brush like this.

Grab the eraser tool and erase very carefully the dark edges around the horse
Now we need to make the mane of the horse more flamed out looking so grab the smudge tool and select the horse layer.
Using the smudge tool at a size of 0.70, smudge from inside the horses body to outside of the mane.
HINT: wiggle the tool as you smudge - this is also how i make text on fire in Gimp. It looks nice and realistic this way. =)
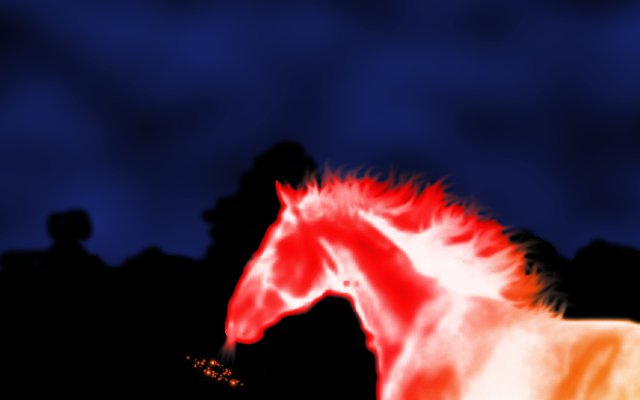
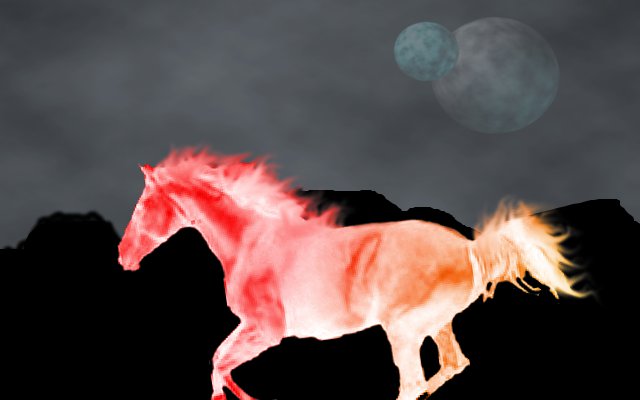
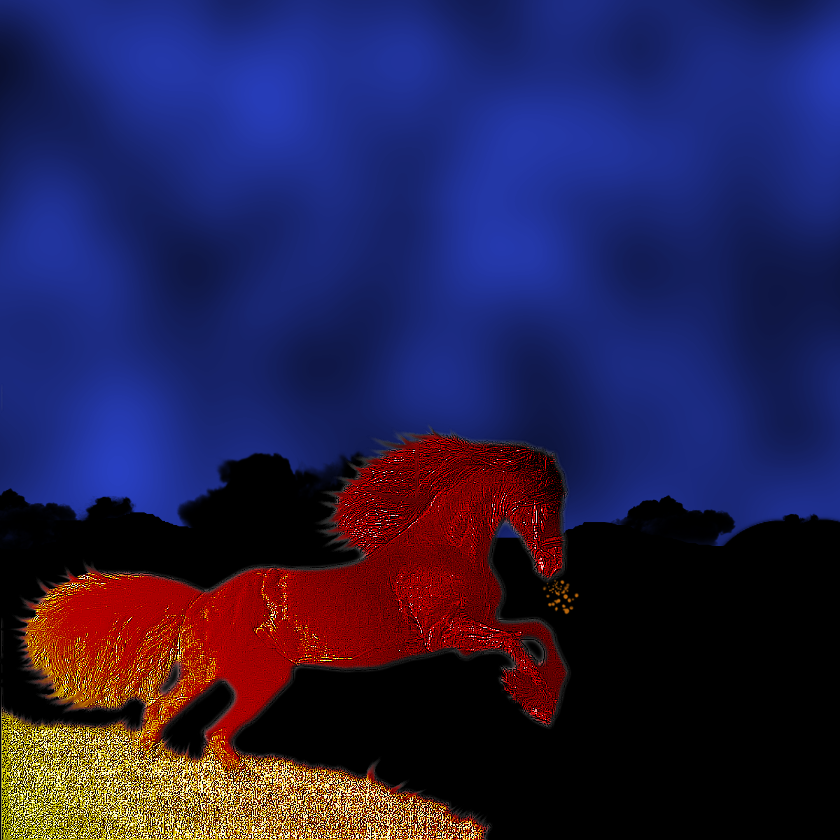
Using the sparks brush set it at 0.21 and create a cloud from the nostrils like he is breathing fire.Now your image
should look something like this.
Create a new transparent layer name it gradient - Open Gradients Dialog - open your new Fire Storm gradient set it to linear , 38.6 offset -- Select the gradient layer and create a gradient from top left to bottom right corners.
Set the opacity to the gradient layer at 80.0 so you can see the horse under it.
Select the scale tool. and move the gradient over the entire horse...mostly the red and orange.
like this..
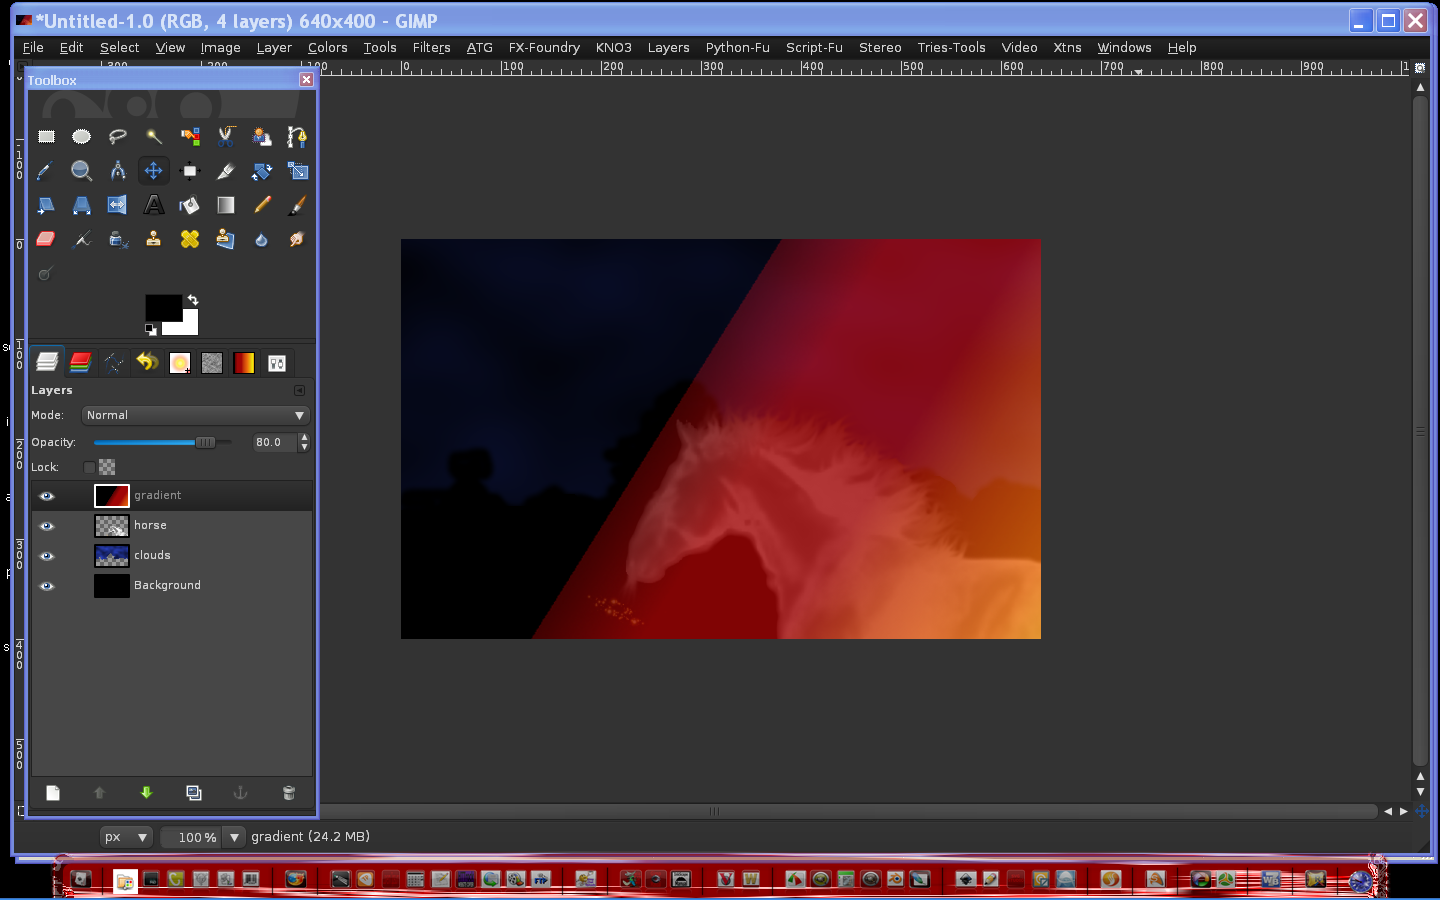
Set the opacity of the gradient layer back to 100.
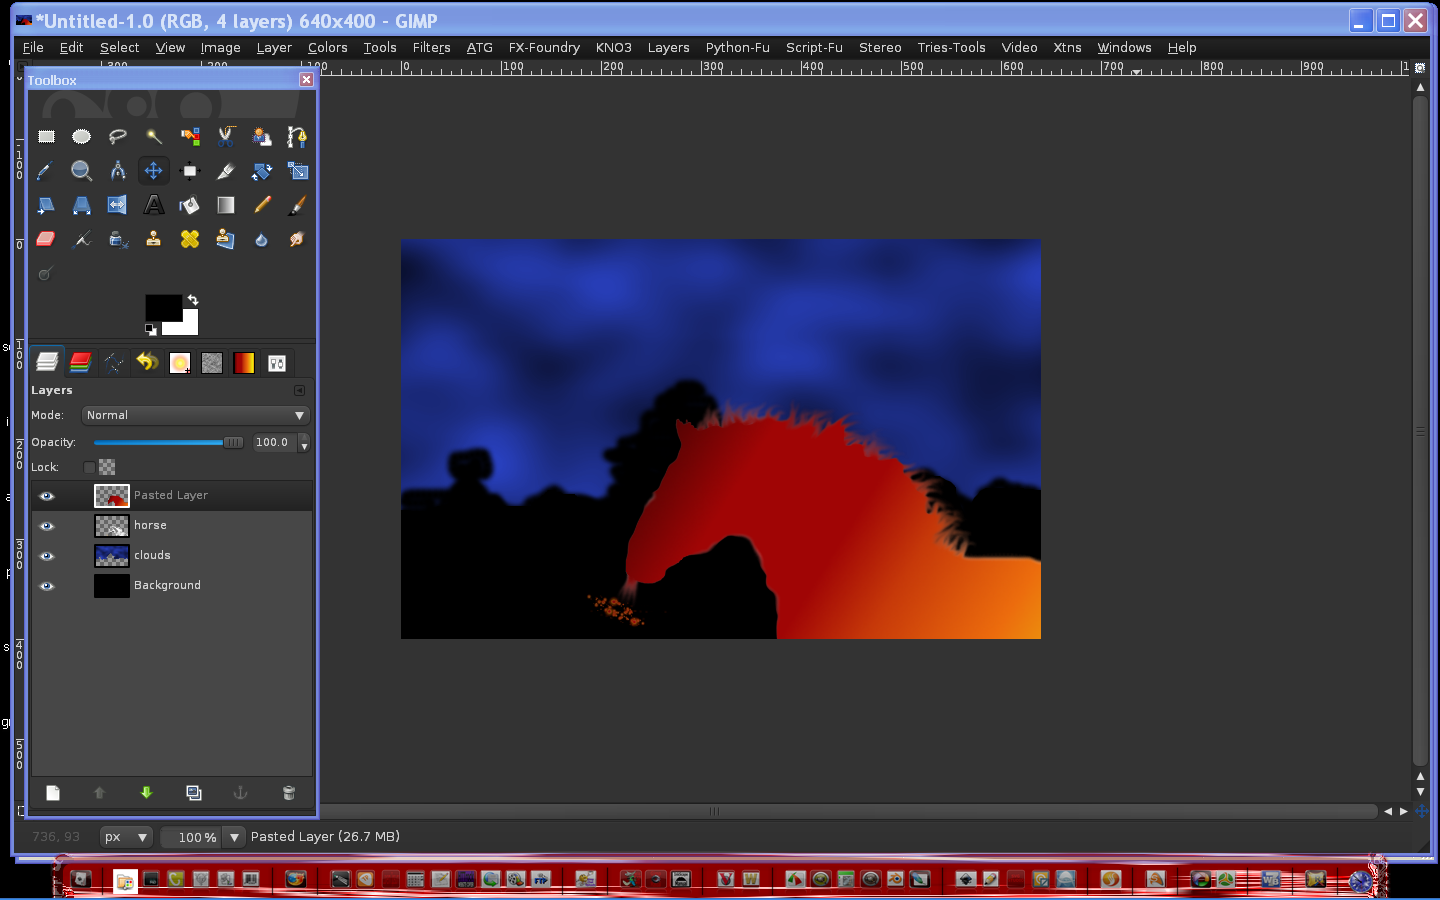
Right click the horse layer select alpha to selection...now select the gradient layer go to Edit/Copy
Select the horse layer again and go to
Edit/Paste into - select create new layer to make a new layer from the floating selection...
Select/none to deselect all...
Delete the gradient layer.Your image should now look like this with all the layers.
Rename the pasted layer gradient overlay
Select the gradient overlay layer and set the layer mode to color.
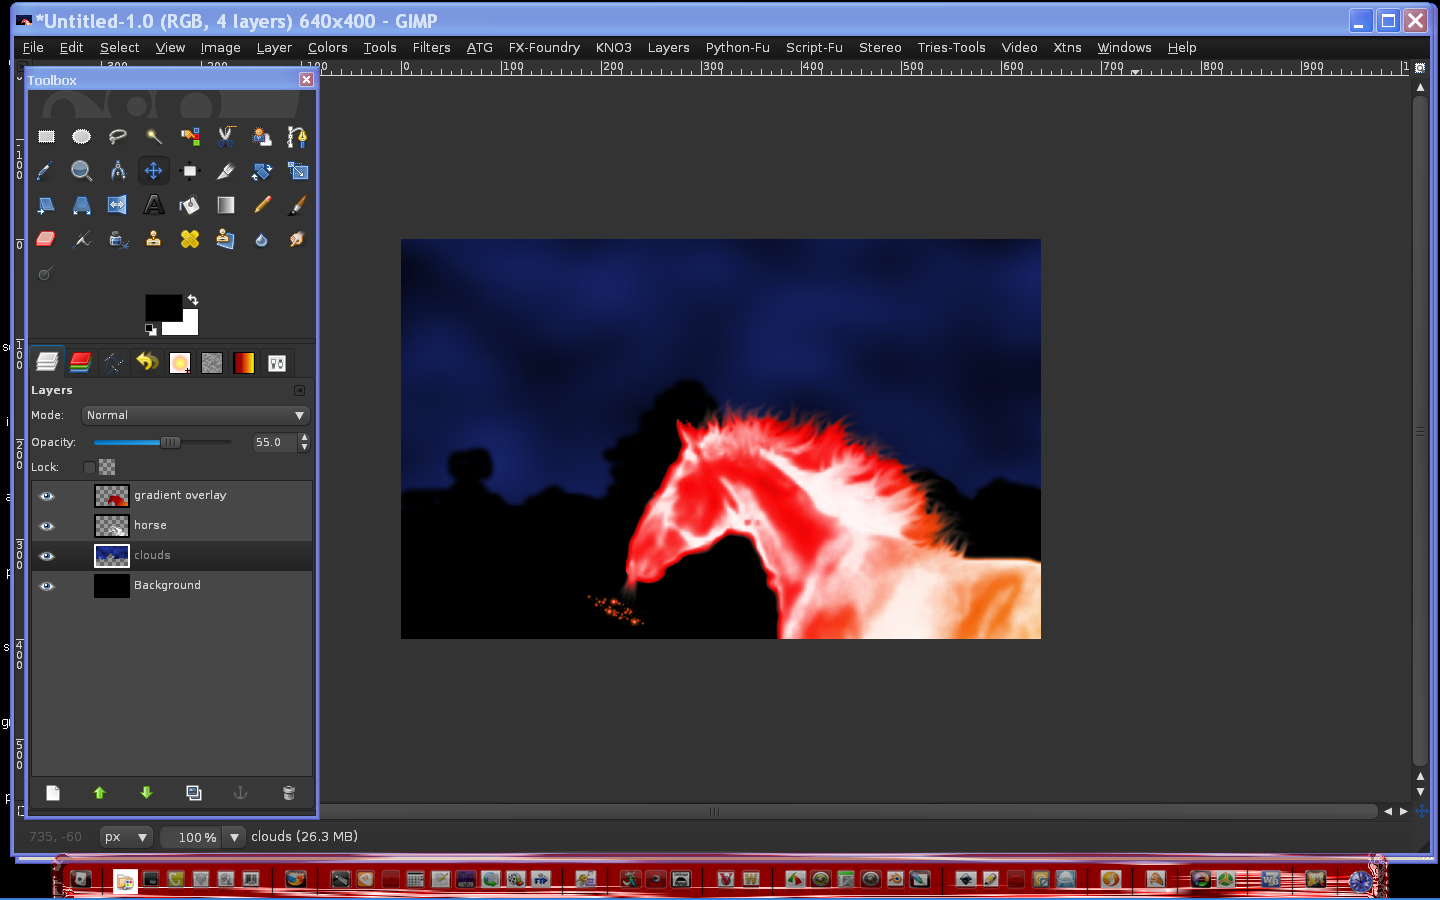
Set the clouds layer opacity to 55 so its nice and dark looking type of sky.
At this time you can also set the opacity of the horse and/or gradient overlay layers. =)
You could also have used Colors/Colorize after using the smudge tool, but what fun would that be?
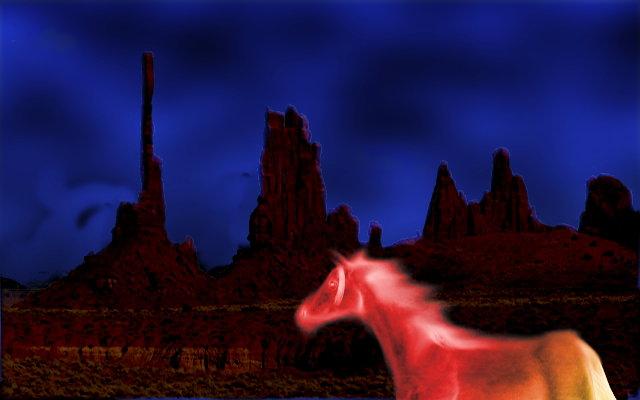
finished image
I know you guys will make it even better so have at it!
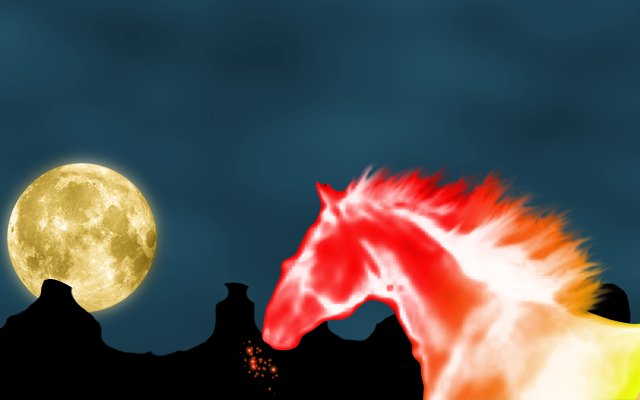
I suppose you could add some motion blur or possibly wind to it.Maybe a moon or a tree...
You could make some pretty cool Halloween stuff with this method!
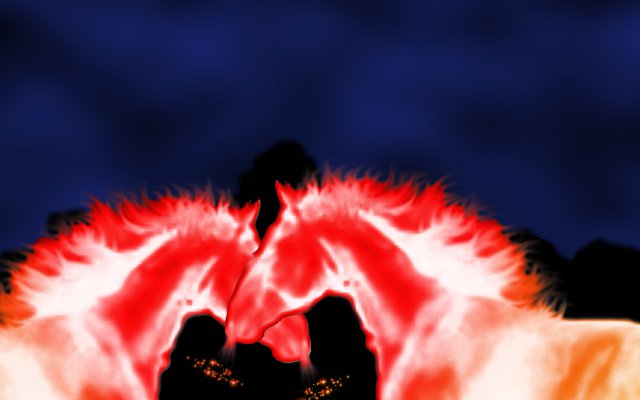
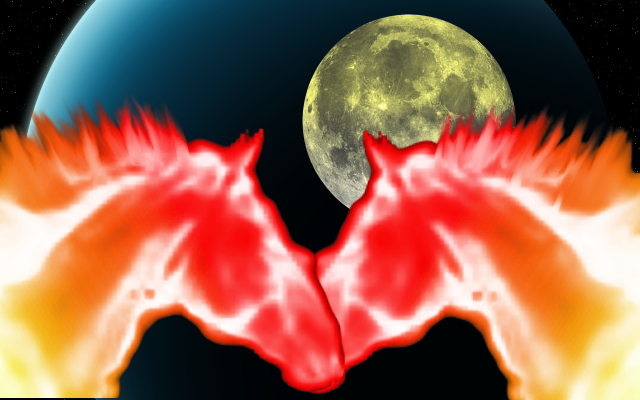
Oh and if you want more than one horse in the image just duplicate both the gradient overlay and horse layers...flip them or move them around, just make sure the gradient overlay layer is directly on top of the horse layer.
Two horses
Hope you enjoyed the tutorial.


