It is currently Thu Apr 25, 2024 9:57 am


All times are UTC - 5 hours [ DST ]


Post new topic Reply to topic  [ 24 posts ]  Go to page 1, 2  Next
Author Message
 Post subject: Simple Gears, Gimp 2.6 & 2.8
PostPosted: Sun Sep 16, 2012 7:02 am  (#1) 
Offline
GimpChat Member
User avatar

Joined: Aug 30, 2012
Posts: 2174
First off let me just state that this isn't a tutorial for making realistic looking gears, the purpose of this tutorial is to try and show you one way in which you can create your gear teeth and then make gears of various diameters that are then able to be meshed together.
So what you'll end up creating is a white gear on a black background, you can then use this as a layer mask or template for your gear.

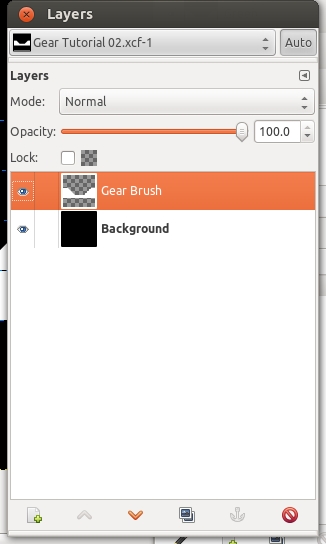
1. Open gimp and create a new image 1000px by 1000px, fill image with black, open new transparent layer and call it “Gear brush”, Make sure this layer is selected.
2. Go View and make sure “Show Guides”, “Snap to Guides” & “Snap to Canvas Edge” are all ticked.
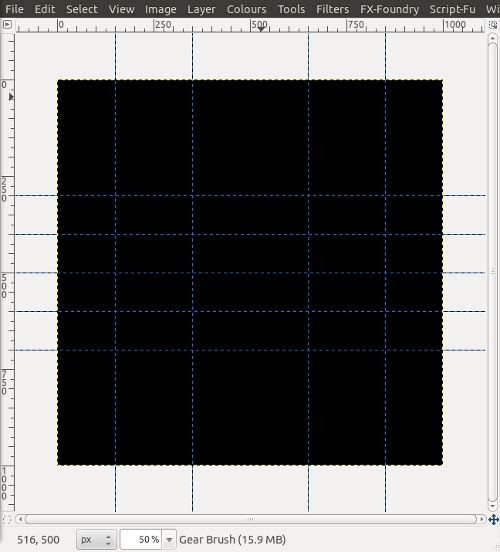
3. Go Image>Guides>New Guides and place horizontal guides at 300px,400px,500px,600px & 700px.
4. Now place vertical guides at 150px,350px,650px & 850px.
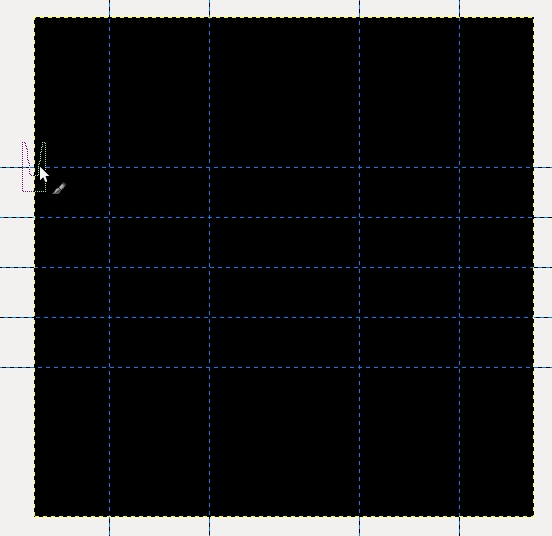
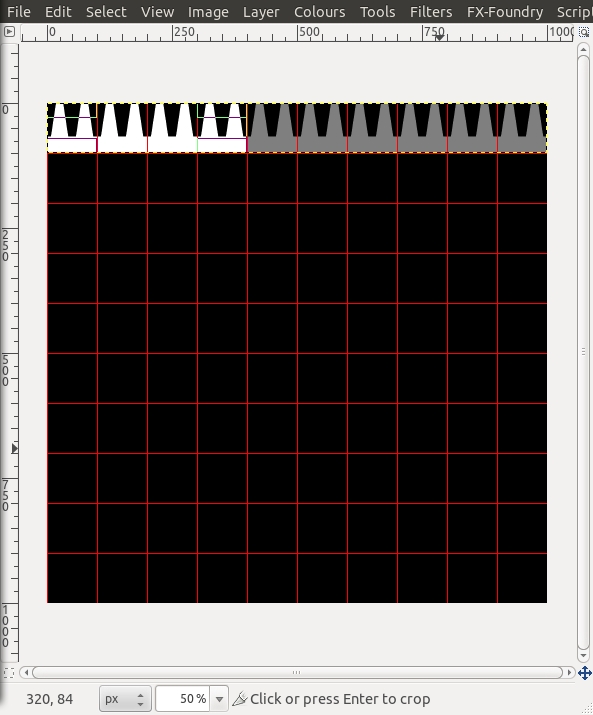
5. Your Image should look something like this.

Image

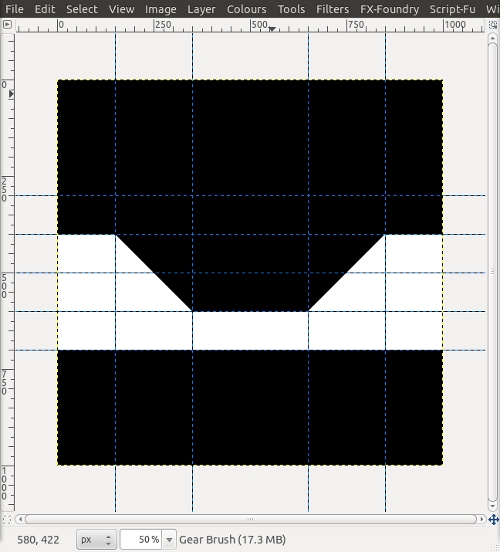
6. Using the Free Select Tool :freesel draw an image to the one shown and fill with white, Remove the selection.

ImageImage

7. Go Layer>Autocrop Layer, then Go Layer>Scale Layer and set Width to 50px and Height to 100px click Scale. Go edit>copy, turn off layer.
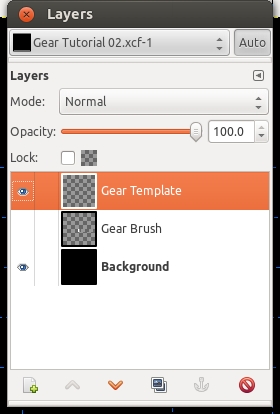
8. Create a new transparent layer and call it “Gear Template”. Select this Layer.
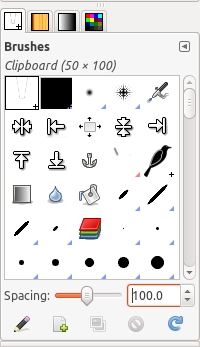
9. Open up the brush dialogue window and select the image just copied and set spacing to 100.
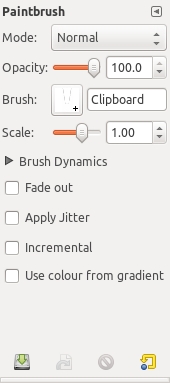
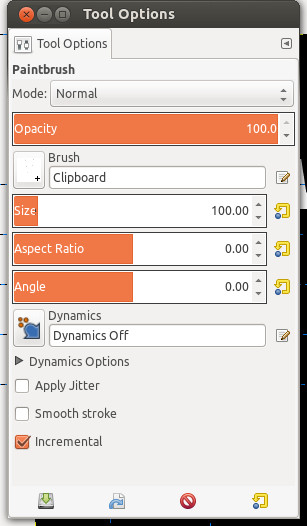
10. Select the paint brush tool, make sure settings are the same as image below right.

ImageImage

For Gimp 2.6
Image

For Gimp 2.8
Image

11. Move Cursor to left hand side of canvas and inline with one of the guides until brush snaps to this point.

Image

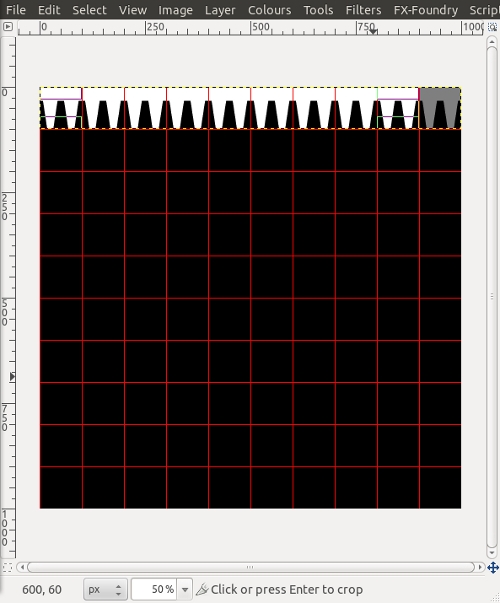
12. Left Click mouse to place brush, with brush still in the same position hold the “Shift Key” and drag brush along guide to right hand edge of canvas.

Image

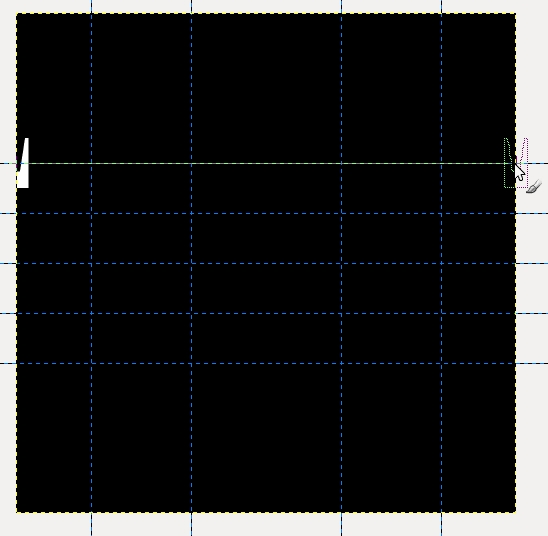
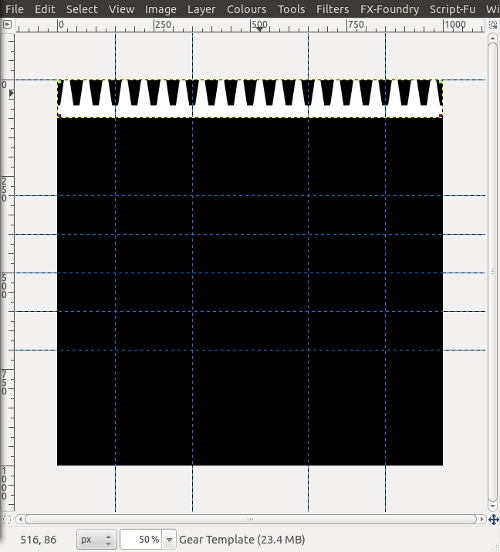
13. Left Click mouse button, you should now have a row of gear teeth across the page.
14. Go Layer>Autocrop, Then select the Align tool :alntool from toolbox and align layer centre/top.

Image

15. Go Image>Configure Grid, Set foreground colour to red and set spacing to 100px * 100px. Click OK.
16. Go View and deselect “Show Guides” & “Snap to Guides”, Select “Show Grid” & “Snap to Grid”.


Image

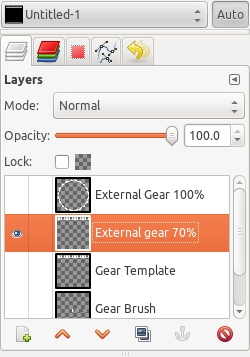
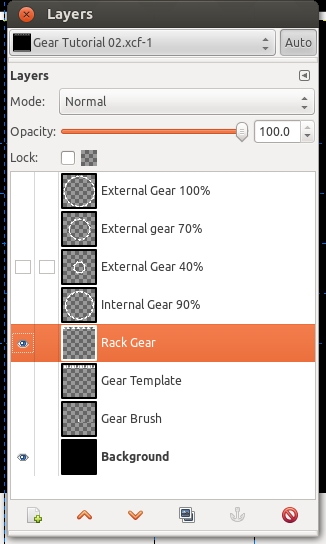
17. Duplicate layer “Gear Template” and rename Layer “External Gear 100%”, Turn off layer “Gear Template”, select Layer "External Gear 100%"
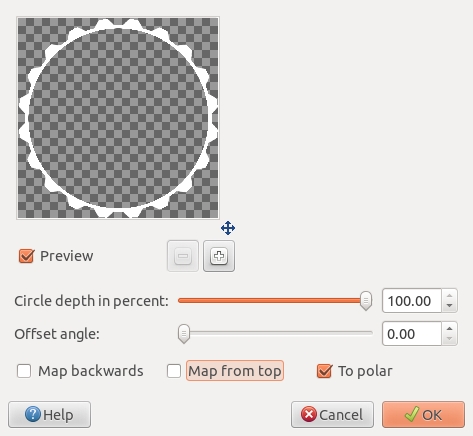
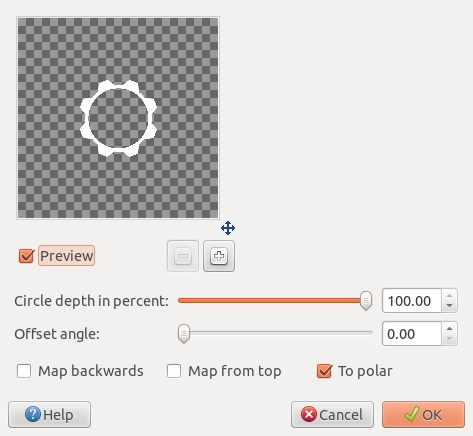
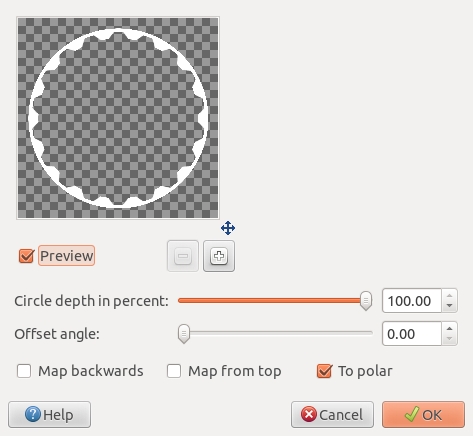
18. Go Layer>Layer to Image Size, Go Filters>Distort> Polar Coordinates check box “To Polar” then Click OK.
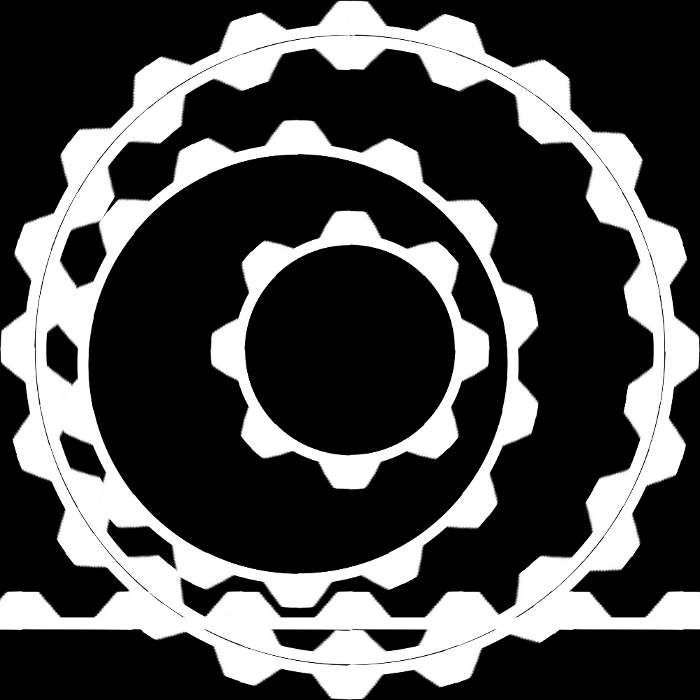
19. That’s it, the first gear completed. Now to make a gear of a smaller diameter.

Image

20. Turn off “External Gear 100%” Layer, select and duplicate Layer “Gear Template” and rename to “External Gear 70%” select this layer.

Image

21. Just to make things easier, from left to right of image, imagine the guides are placed at intervals of 10%, and from bottom to top are also at intervals of 10%.
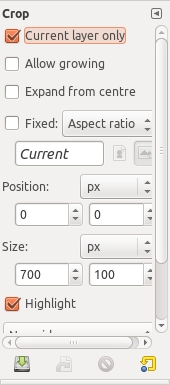
22. From tool Box select the crop tool :crop 
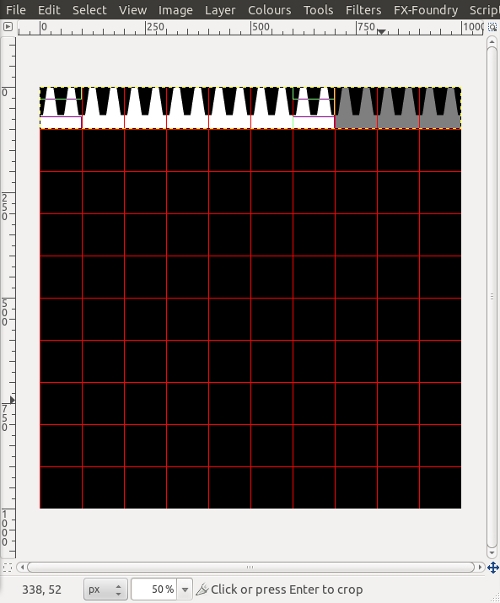
, Make sure “Current Layer Only” is checked. Then from top left hand corner drag a crop area of 700px * 100px.
23. Left click in crop selection to crop image.

ImageImage

24. Then Go>Layer>Scale Layer and set width to 1000px and Height to 100px .
25. Position Layer centre of image and with top of Gear on the 70% Guide. Go Layer>Layer to Image size.

Image

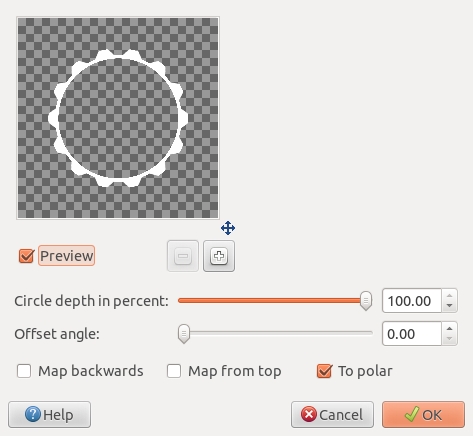
26. Go Filter>Distort>Polar Coordinates and using the same settings as before, click OK.
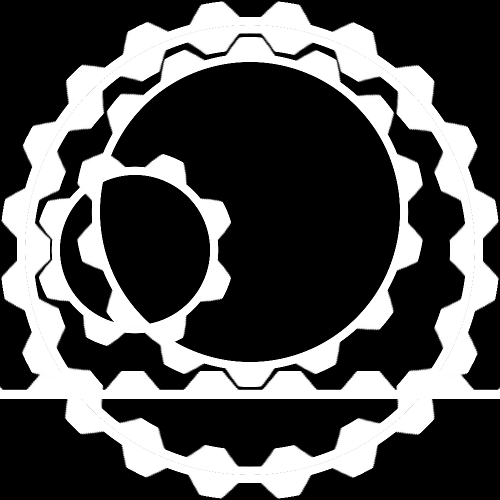
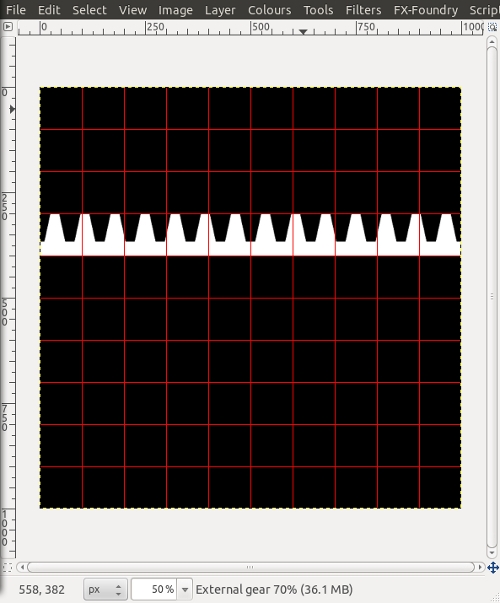
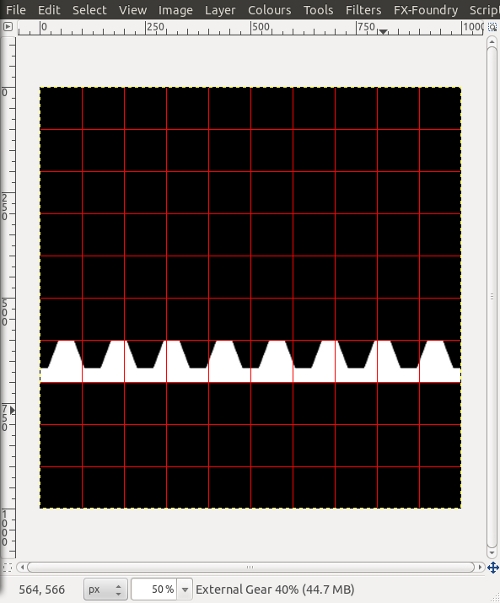
27. You should now have a Gear 70% the size of the original gear created. Now to have a go at making a smaller sized Gear.

Image

28. Turn off “External Gear 70%” Layer, select and duplicate Layer “Gear Template” and rename to “External Gear 40%” select this layer.
29. From tool Box select the crop tool, Make sure “Current Layer Only” is checked. Then from top left hand corner drag a crop area of 400px * 100px.
30. Left click in crop selection to crop image.

Image

31. Then Go>Layer>Scale Layer and set width to 1000px and Height to 100px.
32. Position Layer centre of image and with top of Gear on the 40% Guide. Go Layer>Layer to Image size.

Image

33. Go Filter>Distort>Polar Coordinates and using the same settings as before, click OK.
34. You should now have a Gear 40% the size of the original gear created.

Image

35. To create an Internal Gear simply duplicate the Layer “Gear Template” then flip vertically, rename layer to “Internal Gear 90%” select this Layer
36. From tool Box select the crop tool, Make sure “Current Layer Only” is checked. Then from top left hand corner drag a crop area of 900px * 100px.
37. Left click in crop selection to crop image.

Image

38. Then Go>Layer>Scale Layer and set width to 1000px and Height to 100px.
39. Position Layer centre of image and with top of Gear on the 90% Guide. Go Layer>Layer to Image size.

Image

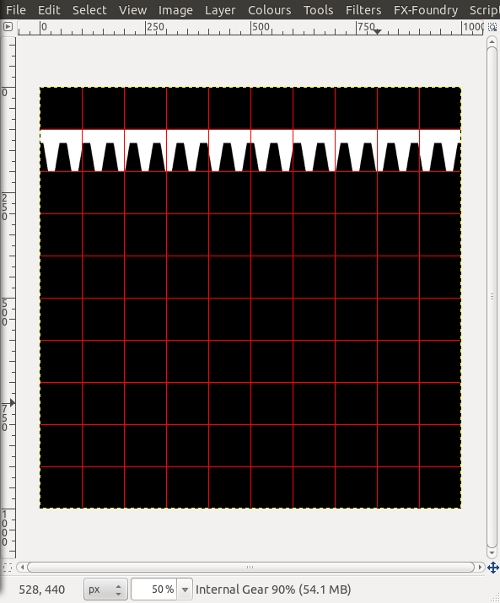
40. Go Filter>Distort>Polar Coordinates and using the same settings as before, click OK.
41. You should now have an Internal Gear 90% the size of the original gear created.

Image

42. To create a rack Gear simply Duplicate the Layer “Gear Template” rename the new Layer to “Rack Gear” select this Layer.
43. Then Go Layer>Scale Layer and set width to 3142px (This is current width * Pi) and Height to 56px (This is to bring the thickness of the rack inline with the thickness of the gears). Click Ok.

ImageImage

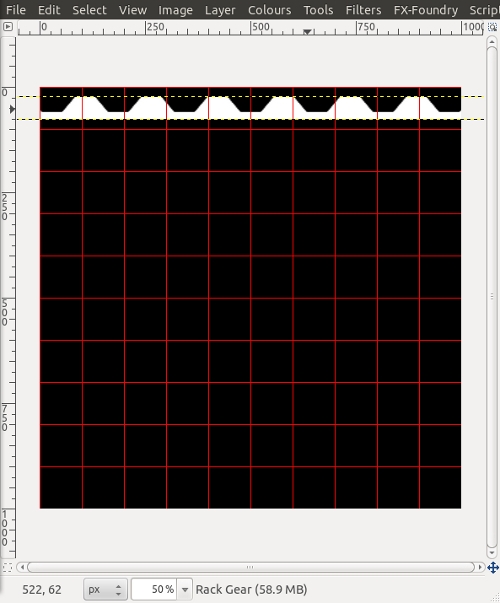
44. And that is it for the rack.
45. And that is it for the Gear Tutorial.


Now using the Move tool and the Rotate Tool have a play moving and positioning the Gears. If you want to scale the gears so they are smaller then make sure all Gear Layers are the same size as the Image then go Layer>Scale Layer, Change the scaling dimensions from pixels to percent and scale all layers to the same desired percentage.
The Brush width of each tooth is 50px or 5% of the image width so therefore you can create a gear at any diameter so long as it is a multiple of 50px or 5% I.E 250px/25% or 750px/75%. If you want to have more teeth on your gears then the brush could be scaled to 25px or 2.5% initially, this will give you more teeth and more size options as you can then create diameters of 775px/77.5%

Image

_________________
Image


Last edited by he4rty on Sun Apr 20, 2014 1:03 am, edited 4 times in total.

Share on Facebook Share on Twitter Share on Orkut Share on Digg Share on MySpace Share on Delicious Share on Technorati
Top
 Post subject: Re: Simple Gears
PostPosted: Sun Sep 16, 2012 7:19 am  (#2) 
Offline
Global Moderator
User avatar

Joined: Apr 07, 2010
Posts: 14182
Very nice job on this tutorial he4rty.

I will give this one a go later on today or tomorrow.

_________________
Image


Top
 Post subject: Re: Simple Gears
PostPosted: Sun Sep 16, 2012 7:53 am  (#3) 
Offline
GimpChat Member
User avatar

Joined: Mar 23, 2012
Posts: 7309
Location: Göteborg at last!
You're going to have me inventing again he4rty. This looks really interesting.


Top
 Post subject: Re: Simple Gears
PostPosted: Sun Sep 16, 2012 8:16 am  (#4) 
Offline
GimpChat Member
User avatar

Joined: Aug 16, 2012
Posts: 4271
Location: Göteborg, Sweden
he4rty: this too has to be tried! great tutorial.

_________________


Top
 Post subject: Re: Simple Gears
PostPosted: Sun Sep 16, 2012 2:23 pm  (#5) 
Offline
GimpChat Member
User avatar

Joined: Jul 17, 2012
Posts: 2770
i cant get this to work

what is the size of the brush at step 10 ?

your attached picture says 1,0 - but when i use 1, its tiny (like one pixel)
judging from the rulers it must be something like 150 but that seems to be wrong as well

EDIT: apparently its 100


Top
 Post subject: Re: Simple Gears
PostPosted: Sun Sep 16, 2012 3:35 pm  (#6) 
Offline
GimpChat Member
User avatar

Joined: Aug 30, 2012
Posts: 2174
Esper wrote:
i cant get this to work

what is the size of the brush at step 10 ?

your attached picture says 1,0 - but when i use 1, its tiny (like one pixel)
judging from the rulers it must be something like 150 but that seems to be wrong as well

EDIT: apparently its 100


Not overly sure I understand which bit your lost at, the brush should have been autocroped and then scaled to Width 50px & Height 100px, the brush size doesn't change after that.

The only other value to change is the spacing of the brush which you set to 100, spacing can be found at the bottom of the brush dialogue window.

The scale of the brush should be 1.0

Hope that helps.

Curious as I have used gimp 2.6.11 for this tut so wondered if its possible because of a different version.

Been thinking about this some more and just checking that you created your brush on a transparent layer.

_________________
Image


Top
 Post subject: Re: Simple Gears
PostPosted: Mon Sep 17, 2012 10:28 am  (#7) 
Offline
GimpChat Member
User avatar

Joined: Aug 30, 2012
Posts: 2174
Just added some screen shots of the layers dialogue at certain steps, hopefully this will make things clearer.

_________________
Image


Top
 Post subject: Re: Simple Gears
PostPosted: Mon Sep 17, 2012 10:41 am  (#8) 
Offline
GimpChat Member
User avatar

Joined: Jul 17, 2012
Posts: 2770
i was to tired to go on yesterday, but will try some more later

as i said, setting the brush scale to 1 made my gear tiny, so that cant be right


Top
 Post subject: Re: Simple Gears
PostPosted: Mon Sep 17, 2012 10:44 am  (#9) 
Offline
GimpChat Member
User avatar

Joined: Aug 30, 2012
Posts: 2174
I can only think that you haven't autocropped the brush before scaling to 50px * 100px.

_________________
Image


Top
 Post subject: Re: Simple Gears
PostPosted: Mon Sep 17, 2012 12:22 pm  (#10) 
Offline
GimpChat Member
User avatar

Joined: Mar 23, 2012
Posts: 7309
Location: Göteborg at last!
Esper - are you using the right brush? Click the top left of your brushes dialogue. It looks like nothing is there but that is your clipboard brush. Don't set the size - keep the default - just change the spacing to 100.

Nice easy to follow tutorial he4rty.

Image


Top
 Post subject: Re: Simple Gears
PostPosted: Mon Sep 17, 2012 2:28 pm  (#11) 
Offline
GimpChat Member
User avatar

Joined: Aug 30, 2012
Posts: 2174
Thanks Erisian, glad you managed to follow it ok.

_________________
Image


Top
 Post subject: Re: Simple Gears, Gimp 2.6 & 2.8
PostPosted: Sun Apr 20, 2014 1:12 am  (#12) 
Offline
GimpChat Member
User avatar

Joined: Aug 30, 2012
Posts: 2174
Updated the brush part of the tutorial to included the different settings between 2.6 & 2.8

_________________
Image


Top
 Post subject: Re: Simple Gears, Gimp 2.6 & 2.8
PostPosted: Sun Apr 20, 2014 4:16 am  (#13) 
Offline
GimpChat Member
User avatar

Joined: Dec 08, 2013
Posts: 1088
Thankyou he4rty, i will definately try this.

_________________
Image


Top
 Post subject: Re: Simple Gears, Gimp 2.6 & 2.8
PostPosted: Mon Apr 21, 2014 6:51 am  (#14) 
Offline
GimpChat Member
User avatar

Joined: Jan 20, 2013
Posts: 591
Thanks, he4rty.

_________________
Image


Top
 Post subject: Re: Simple Gears, Gimp 2.6 & 2.8
PostPosted: Mon Apr 21, 2014 12:19 pm  (#15) 
Offline
Script Coder
User avatar

Joined: Nov 06, 2012
Posts: 239
Location: Italy
Thanks he4rty, another nice tutorial on your part.
If one day I have the opportunity to create a tutorial of my own to share on this site, I will surely draw inspiration from yours for how well they are written and illustrated.

_________________
Gino D's GIMP scripts: https://sites.google.com/site/ginodonig/gimp-scripts


Top
 Post subject: Re: Simple Gears, Gimp 2.6 & 2.8
PostPosted: Mon Apr 21, 2014 12:45 pm  (#16) 
Offline
GimpChat Member
User avatar

Joined: Aug 30, 2012
Posts: 2174
Thanks for the Lovely comments.

_________________
Image


Top
 Post subject: Re: Simple Gears, Gimp 2.6 & 2.8
PostPosted: Mon May 05, 2014 7:58 am  (#17) 
Offline
GimpChat Member
User avatar

Joined: Jan 20, 2013
Posts: 591
Thanks, he4rty.


Attachments:
Charlie gears movie.gif
Charlie gears movie.gif [ 672.18 KiB | Viewed 1716 times ]

_________________
Image
Top
 Post subject: Re: Simple Gears, Gimp 2.6 & 2.8
PostPosted: Mon May 05, 2014 8:47 am  (#18) 
Offline
Global Moderator
User avatar

Joined: Apr 07, 2010
Posts: 14182
Very nice animation Carlos

_________________
Image


Top
 Post subject: Re: Simple Gears, Gimp 2.6 & 2.8
PostPosted: Mon May 05, 2014 9:31 am  (#19) 
Offline
GimpChat Member
User avatar

Joined: Jan 20, 2013
Posts: 591
Thanks, Molly.

_________________
Image


Top
 Post subject: Re: Simple Gears, Gimp 2.6 & 2.8
PostPosted: Mon May 05, 2014 2:36 pm  (#20) 
Offline
GimpChat Member

Joined: May 05, 2014
Posts: 5
Excellent tutorial! I will have to have a shot at this too.


Top
Post new topic Reply to topic  [ 24 posts ]  Go to page 1, 2  Next

All times are UTC - 5 hours [ DST ]


   Similar Topics   Replies 
No new posts Where is the simple pointer

9

No new posts Attachment(s) Simple pastimes...

5

No new posts Attachment(s) Photo to simple Pencil drawn

34

No new posts Attachment(s) How to create and simple Easter egg using GIMP and G'MIC

17

No new posts Attachment(s) gegl makes a simple starburst

10


* Login  


Powered by phpBB3 © phpBB Group