Software: GIMP 2.6-2.8
Proficiency level: Intermediate to Advanced
Estimated time: 30-40 minutes
Plugins required: MathMap, Interleave Layers, Mirror Layers
I'll be referring to my previous
Still Photo 3D effect animationTutorial on several occasions (further, Tutorial 1).
The basics of working with layers, select tools, maps, paths and transparency WILL NOT be covered here.
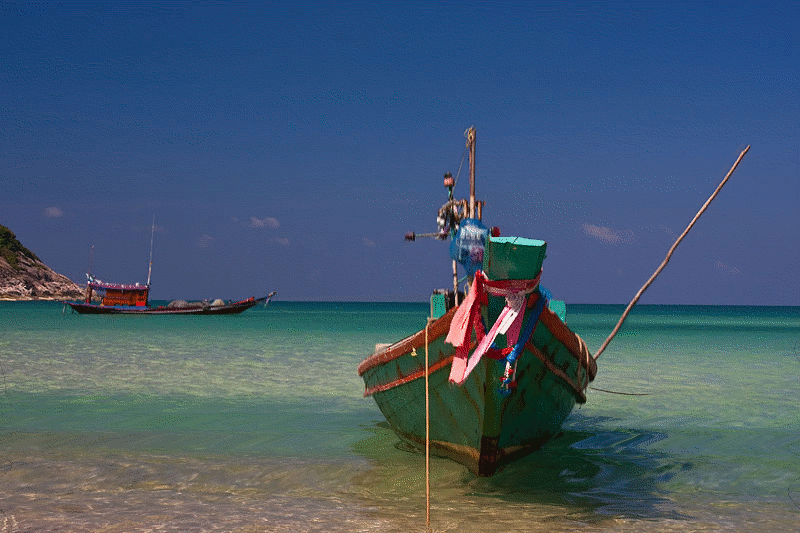
In this image there are two objects and water surface we are going to animate. If you've chosen your own image with different object(s) and surface, there could be some things you'll have to figure out on your own.
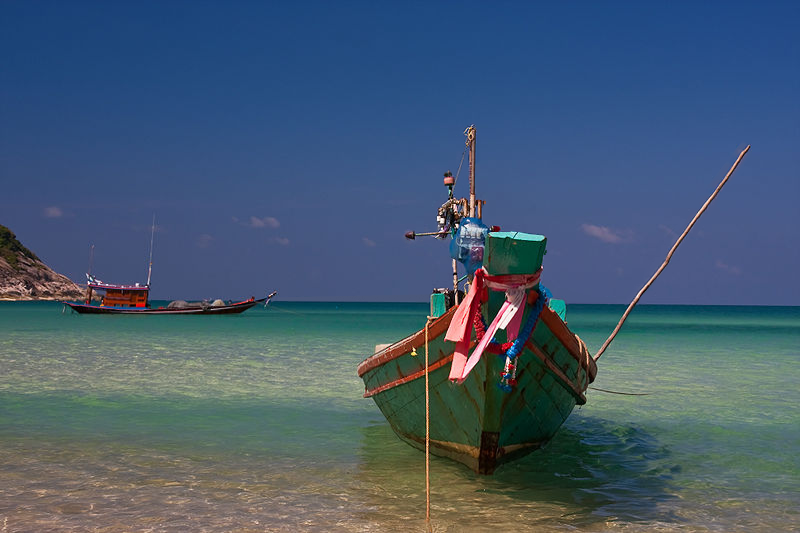
Unlike Tutorial 1 animation, this time we're going to leave background absolutely motionless.
Stage 1.
Selecting objects and making Displacement Maps1.Open image, change layer name to Original
2.Add alpha channel
3.Duplicate Original layer, name it Map Boat 1
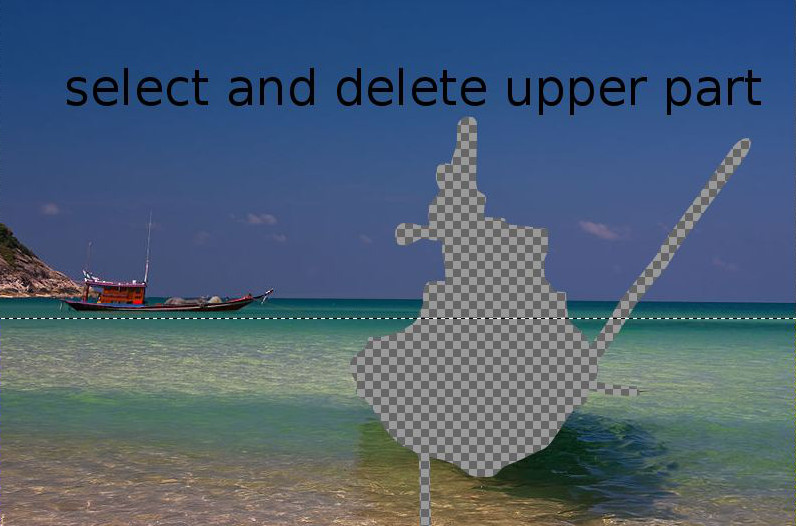
4.Select the boat in front using free select, scissors select of foreground selection tool (accuracy matters here)
5.Go to Menu>Select>to Path, name this path Boat 1
6.Deselect all (Shift-Ctrl-A)
7.Duplicate Map Boat 1 layer, rename it Map Boat 2
8.Repeat steps 4-6 for the small boat, name new path Boat 2
9.Go to Map Boat 1 layer
10. Choose Boat 1 path, right-click, Path to Selection
11. Grow the selection by 1 pixels
12. Paint your map as shown in Tutorial 1 (only this time you have to be more precise and paint the boat as close as possible to the one shown below).
13. Ctrl-I to invert the selection, Delete key to delete everything around the Boat.
14. Shift-Ctrl-A to deselect all.
15. Go to Map Boat 2 layer and repeat steps 10-13 using Boat 2 path this time.
16. Deselect all.
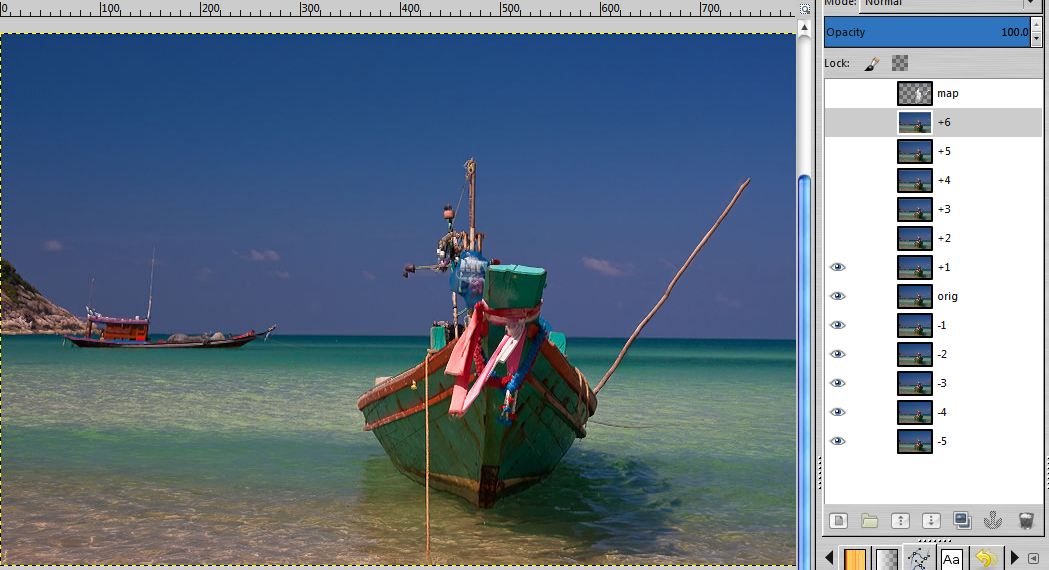
Now you have 2 displacement maps and 2 paths ready. And total of 3 layers (See picture below)
 Stage 2. Displacing Layers and making frames
Steps are pretty much the same as in Tutorial 1. (Important note: unlike in Tutorial 1 animation, your're going to displace Original image in Y-coordinates to move the objects up and down rather than side to side).
1. Drag Original layer over the Toolbox area or Edit>Copy, Edit>Paste as New Image
2. Add Map Boat 1 layer to the new image ( Edit>Copy, Edit>Paste as New Layer).
3. Copy Boat 1 path and paste it in New image.
(Important note: Blurring Map layer is optional in this case. If you feel that the precision level of your map is high, don't blur it, otherwise, apply Gaussian Blur with value 3 to 5)
4. Duplicate Original and go to Filters>Map>Displace
5. Uncheck X-displace and set Y-displace to 1.00
6. Create 6 displaced layers as shown in Tutorial 1.
7.Duplicate Original again and create 5 displaced layers with Y -1 (negative 1) value in Map>Displace.
8. Delete map layer.
You must have 12 layers now. Run Playback in Filters>Animation. If you're not satisfied with the results, make selection from path and adjust you map – re-paint over regions where the boat edges came out too blurry.
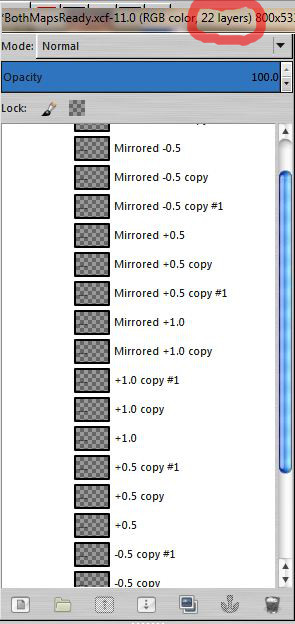
9. Run Mirror Layers Script.
Total layers count is now 22.

10.Now go to you first image again, drag and drop Original layer over Toolbox area to create 3rd image.
11.Copy and paste here Map 2 and Boat 2 path like you did for your second image
12. Select Original , right-click on path, path to Selection.
13. Ctrl-I to invert selection and press Delete key to delete everything around boat 2.
14. Duplicate Original, name it +0.5
15. Map>Displace Y at +0.5.
16. Duplicate displaced layer, Ctrl-F and name it +1.0
17. Go to Original and displace it at -0.5. Name it -0.5
18. Duplicate -0.5 layer and Ctrl-F, name it -1.0.
19. Delete Map layer
Now you have 4 layers.
20. Make 2 more copies of each layer to a total of 12. (See picture below)

22.Run Mirror Layers script
Now you have 22 layers.
As you will see later all the troubles of making each boat displacement layers separately are going to pay off.
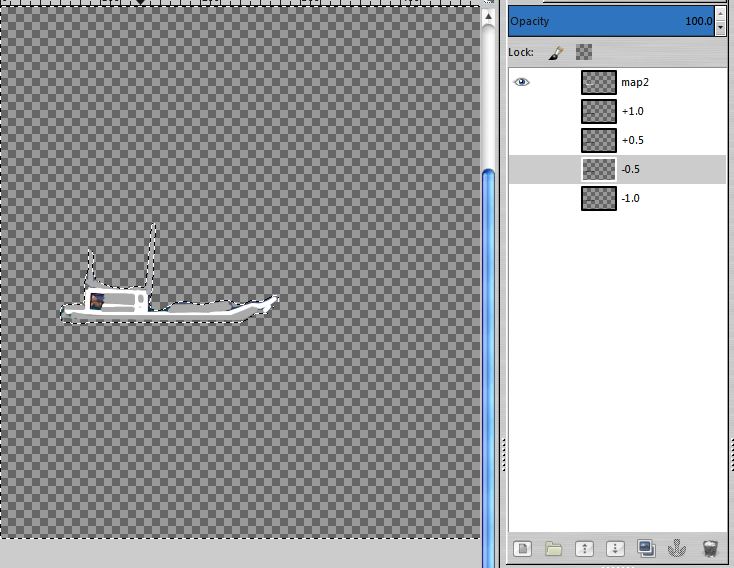
Each boat will rock in its own pace!!!Stage 3 Waves animation1.Drag and drop Orig from the first image over Toolbox area to create fourth image
2. Copy Boat 1 path and paste it here
3. Path to Selection
4. Grow the selection by 3 pixels and press Delete key
5. Deselect all
6. With Free Select tool draw a line just below the bottom of the small boat and select everything above that line and press Delete key
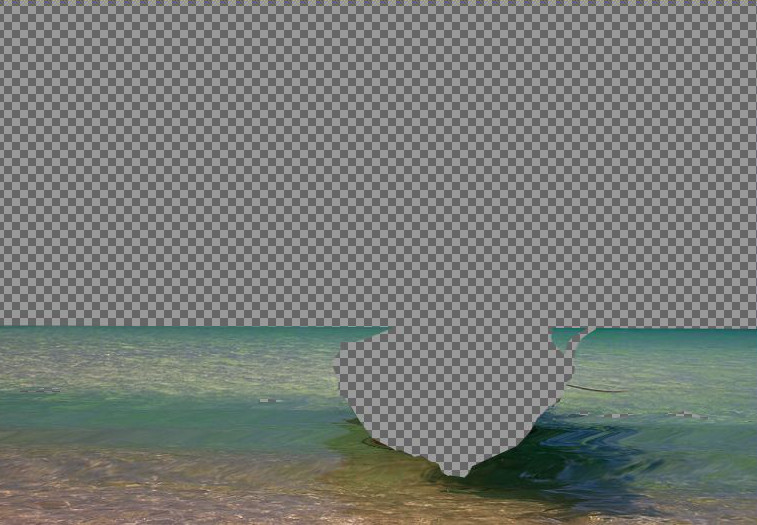
7. Duplicate layer, now name layers Waves 1 and Waves 2
8. In Waves 1 select lower part of the waves with free select tool
9. Invert selection (Ctrl-I)and delete again
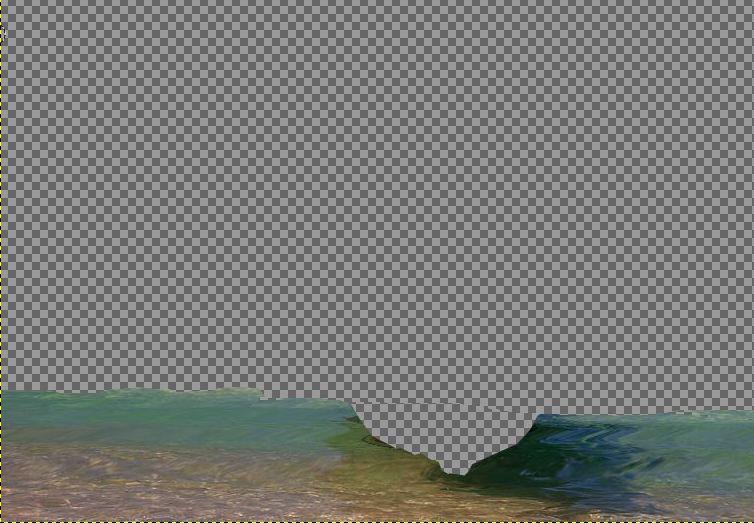
10. Click on Wave 2 layer, Invert selection
11. Press Delete key
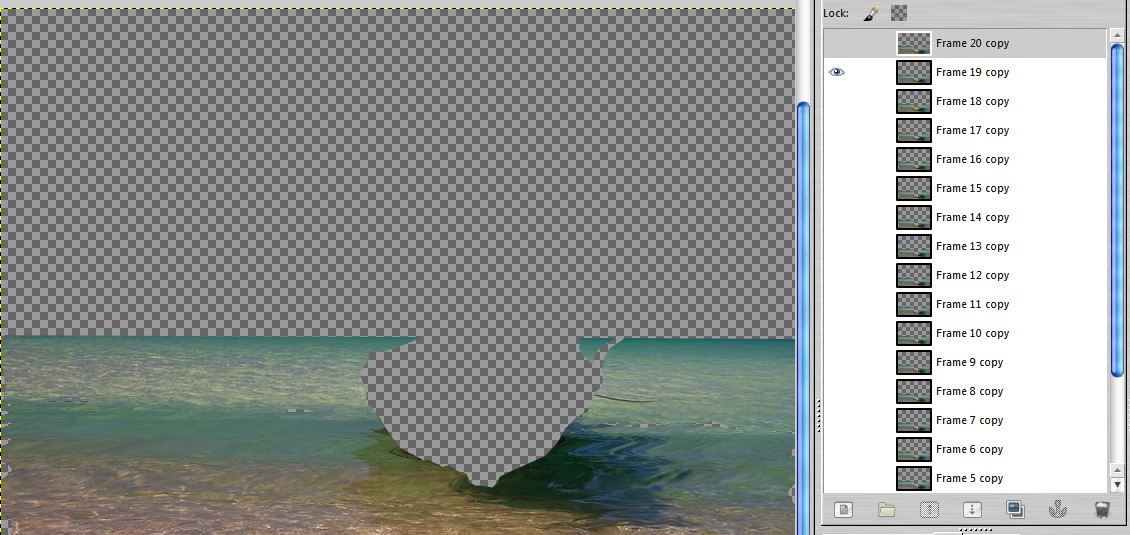
12. Drag and drop Waves 2 to create a new image
13. Delete Waves 2
Now you have two images Waves 1 and Waves 2 with 1 layer each.
14. In Waves 1 go to Filters>Generic>MathMap>Distorts>Sea, check animation option and set number of frames to 22. Run plugin with default User Values
15. Go two Waves 2 image and run Mathmap again, only this time set User Values to approximately half of its values
16. Delete bottom layers in both Waves images to keep the overall number of layers exactly 22.
Now Playback all your animations and make adjustments if necessary before you get to the next stage.
Stage 4 Combining animations This is a very quick stage if you use Interleave Layers scripts and keep the right order of combining images. (Important note: the script will not run if the number of layers in two stacks do not match. Also, it won't run if some of the layers have visability tured off)
1. Choose your Wave 1 image and go to Image>Interleave Layers>Interleave Stacks of Layers. Make sure Waves 2 is your source layer and run the script. Yes to Merge. New Image is created – combined waves. Run Playback to see if there no gaps between the lower and upper parts of the waves.
2. Save and close Waves 1 and 2 images
3. Go to your second image – Boat 1 with displaced layers and run Interleave Layers choosing Boat 2 as source layers. Yes to merge and run it. New image is created – two animated boats with static waves
4. Save and close Boat 1 and 2 images
5. Now you have two images left. Choose combined boats image and run Interleave Layers again. Combined waves should be your source layers.
Your animation is ready!!!
 Stage 5 Saving your animation
At the end of Tutorial 1 I've already covered animation options. If you decided to make GIF animation I would recommend to convert your image to Indexed in Image>Mode. Use Optimum palette and Floyd-Steinberg (normal) color dithering method. Now Optimize (Difference) and export as GIF. Check Loop Forever box and set frame delays to 150 ms. You're done. Congratulations!
Thanks for reading!
P.S. This Tutorial can be used as the basis for making animation within animation. On that I am going to make another (much shorter) tutorial


 Before got started with this tut, I was tempted to write down just the general ideas on how to make such animations. Then figured, it might not be enough for someone who'd never done Tutorial 1 kind of thing. Later on came realization that rare person would even get half way through that wall of text.


 WOW! Shockingly incredible K1TesseraEna!
  Too advanced for me I won't even try it. But I am in awe.


