Target audience: GIMP beginners
The main purpose of this tutorial is to help the beginners learn a few things about basics of
working with selections, blur filters, layer modes and paths in GIMP.
1. Open image in GIMP and add alpha channel
2. Duplicate layer
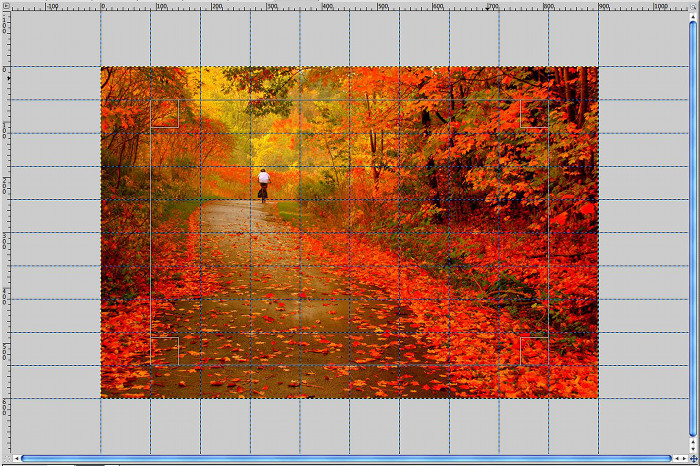
3. With Rectangle select tool make border selection at about 10% of image size as shown in this image below
(I use 10% guides script for setting guides) After you're done with selection remove guides in Image>Guides if you have any.
4. Go to Edit and click Clear (or just press the Delete key). Now you have a layer that is going to be our glass frame.
5. Invert the selection (Ctrl+I) and in Filters>Blur>Motion blur choose Zoom and set the Length to 8.0
Make sure Blur Center is set to half of the image's width for X and half of the height for Y (it is necessary to make the
center of image a blur center). Click OK
6. Create new transparent layer
7. In Foreground/Background box (under the Toolbox) click on Foregroung box (usually black by default) and set FG
color to 3b3b3b (simply type it in HTML nomination line). Then go to Edit>Stroke selection, select Solid color, set Line
width to 2.0 and select Round in Join style, then click Stroke. Save your selection to path in Select>To Path.
8. Go to Select>Border and set selection to 3. Lock selection to image size. Click OK
9. In Filters>Blur>Gaussian blur set blur radius to 3 and click OK. Deselect all (Shift+Ctrl+A)
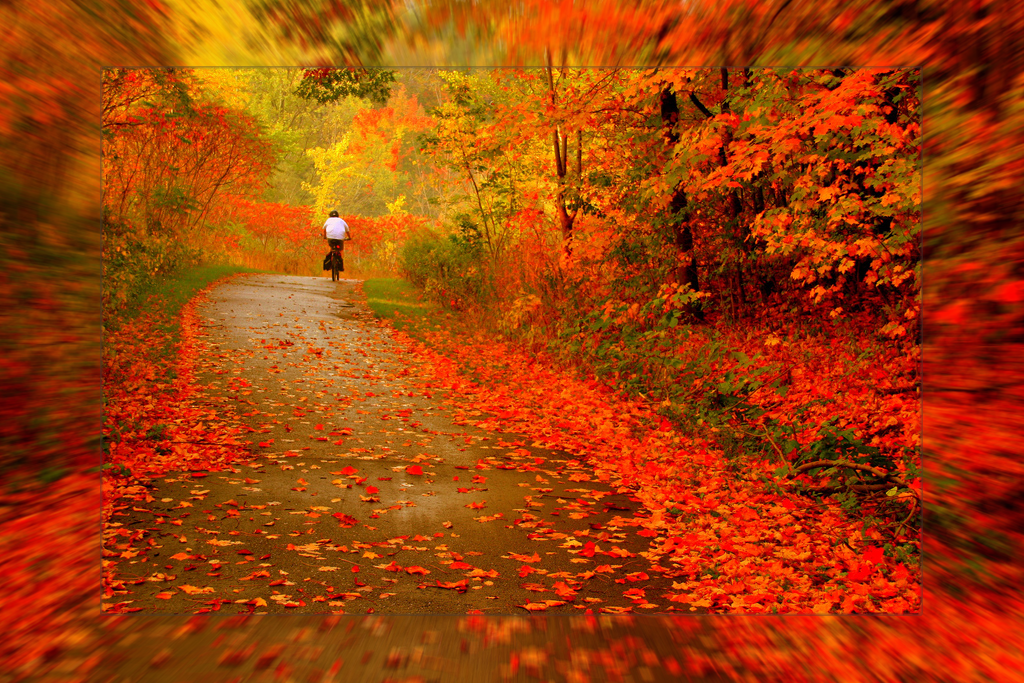
Your glass frame is ready.
To add matte glass effect follow next steps.

10. Duplicate Frame layer.
11. Right-click on path and make a selection from Path to Selection
12. In Select>Grow increase the selection by 2 pixels
13. Press X key to swap FG/BG colors. Choose Bucket fill tool and fill the selection with white
14. Go to Filter>Noise and select RGB noise. Uncheck Independent noise, check Correlated and set the values
to 25-30. Clikc OK.
15. Go to Filters>Blur>Motion Blur again and choose Linear Blur with 7 for Lenght and 0 for Angle. Click OK. Deselect all.
16. Set white frame layer mode to Screen and opacity to 30%. You can try other layer modes and opacity settings
to your taste, e.g. Grain merge with 70% opacity
Your matte glass frame is ready.
Thanks for reading.
References:
Image source: Flickr, photo by
Ming chaiAll right reserved. Please read info for more details.


 Thanks