In this tutorial i will show you how to change the dimensions of text by scaling a path created from your text, and then how to achieve an interesting pattern effect by applying a texture made of a processed picture.Attachment:
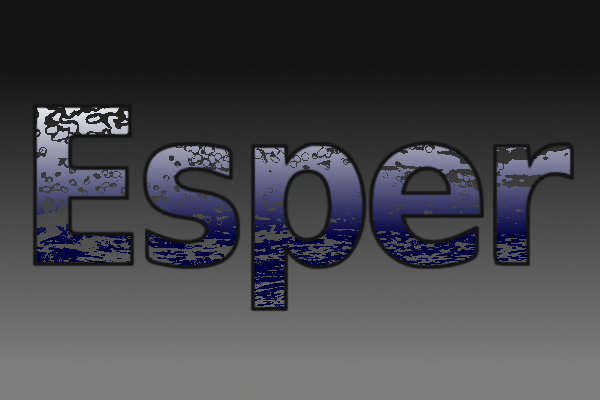
 Final_Variation.png [ 175.83 KiB | Viewed 17021 times ]
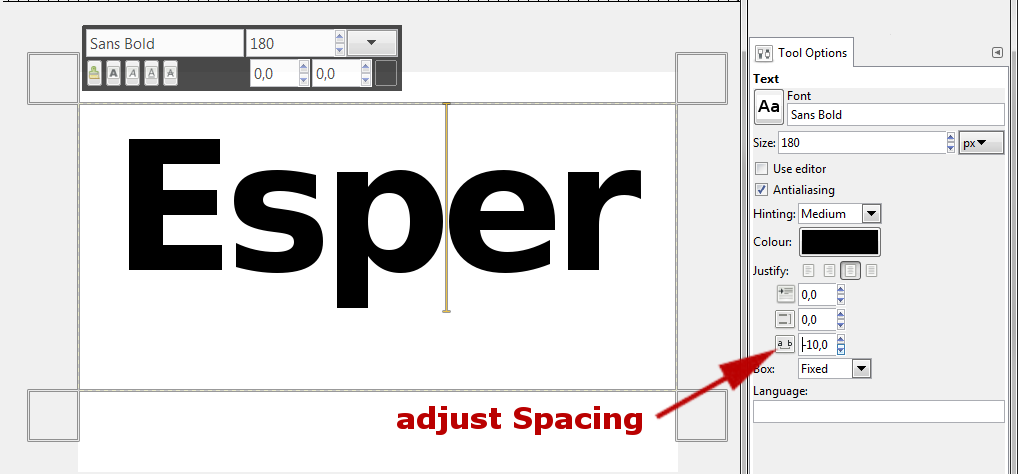
1.Start by writing your text on a canvas 600x400 - i used Sans Bold 180px and adjust the spacing by -10 to customise the look to what i think looks good
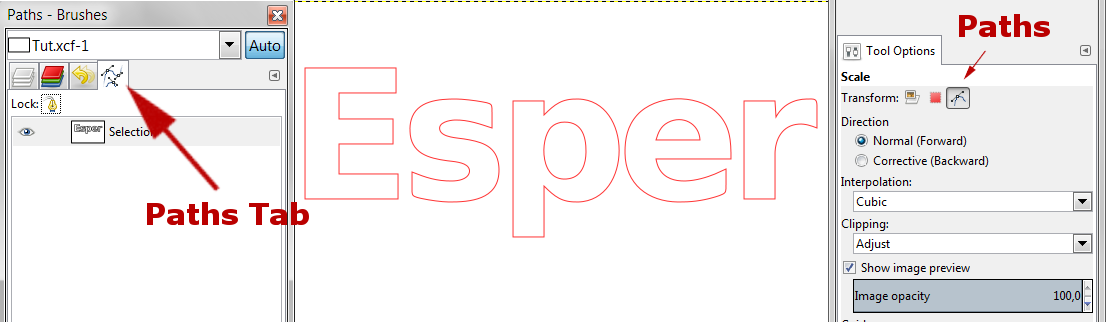
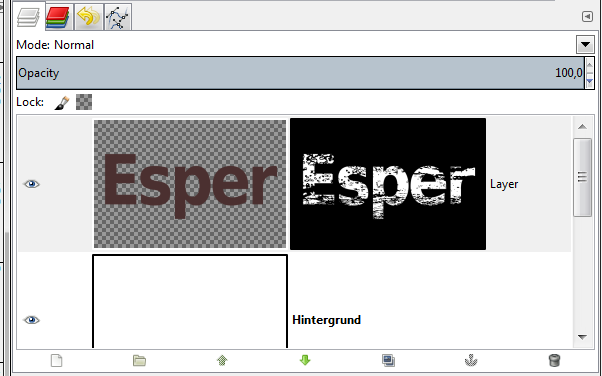
2. click on your text layer and alpha select your text
3. then go to: Select → To Path, this will create a path from your letter
4. make the text layer invisible and Select → None
5. now go to your 'Paths Tab' and make the path visible by clicking on the eye symbol - it will apear on your canvas in red
6. choose your Scale Tool – this will normally be set to 'Layer', and you need to change it to 'Path'
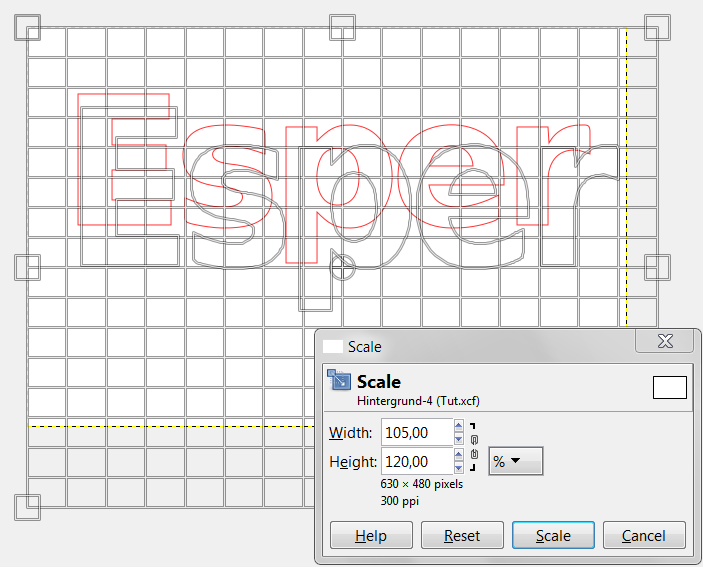
7. click on your canvas and a grid will appear – Width and Height are usually shown in pixels (px) and i like to change that to percent, because i can visualize changes in percentage better than pixels, but thats just my preference
8. change the dimensions of your text path to something you think looks good:
i choose 105% for Width and 120% for Height
9. Take your 'Move Tool', change the mode to 'Path' as you did with the Scale Tool and center your text path
10. in your 'Paths Tab', click 'Path To Selection', make your path invisible, go to your 'Layers Tab' and create a new transparent layer
11. fill the marching ants with a color of your choice, then deselect
12.
Now for the texture effect: find a picture via an image search engine that looks like it could work
i googled: „ocean + wave + beach“ and found this:
http://25.media.tumblr.com/tumblr_mchrv ... 1_1280.jpg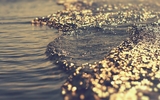
copy the picture and paste it into Gimp in a new image (because this picture is bigger than the canvas we are currently working on)
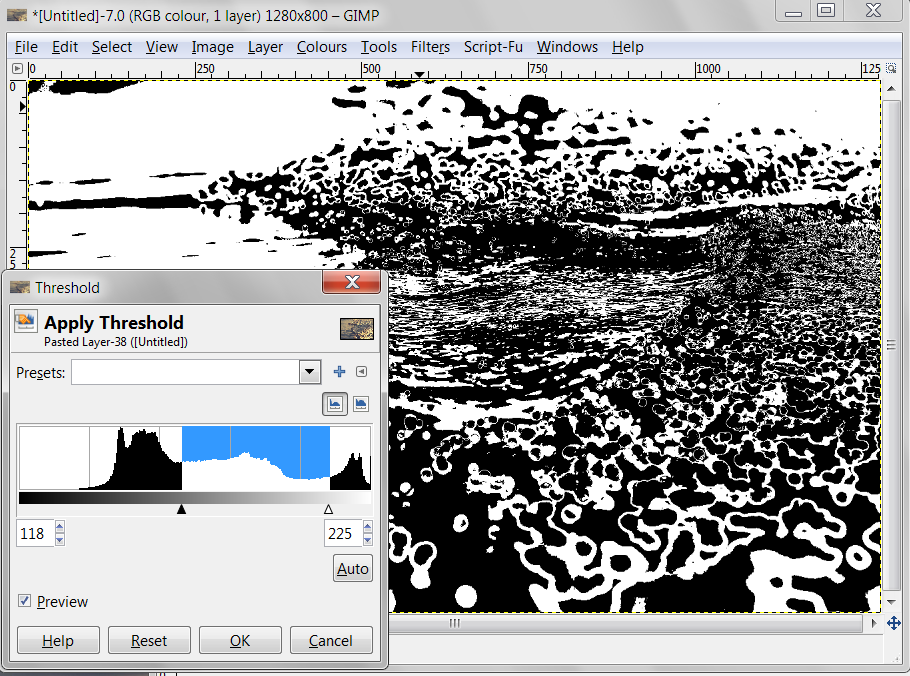
13. go to Colours - > Threshold and apply changes until you get a nice texture
14. for the next step, create on your text layer, a 'Layermask – White (full opacity)'
15. click on the Layermask and paste you b/w image – a floating Selection will appear over your text layer
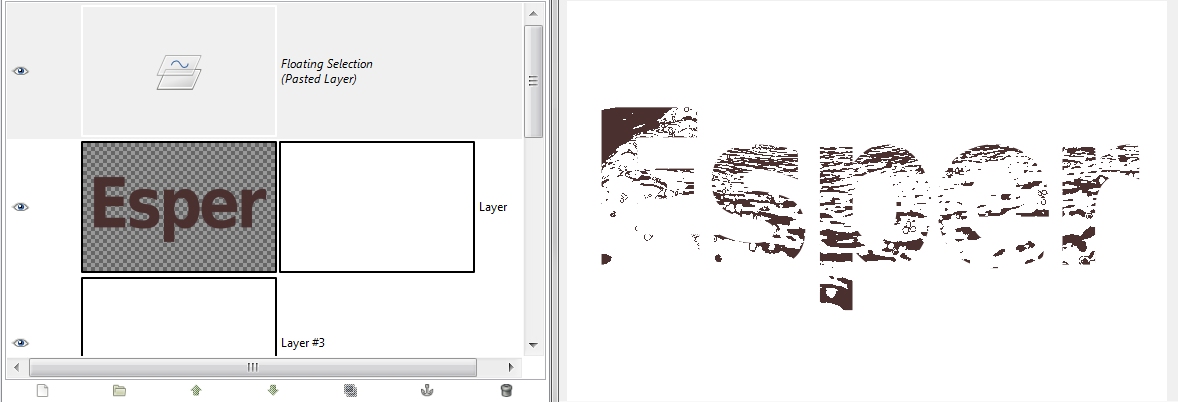
16. what now happens is that everywhere your b/w layer is black, your text will become transparent and the layer underneath it, will shine through. While everywhere your mask is white, it will be opaque.
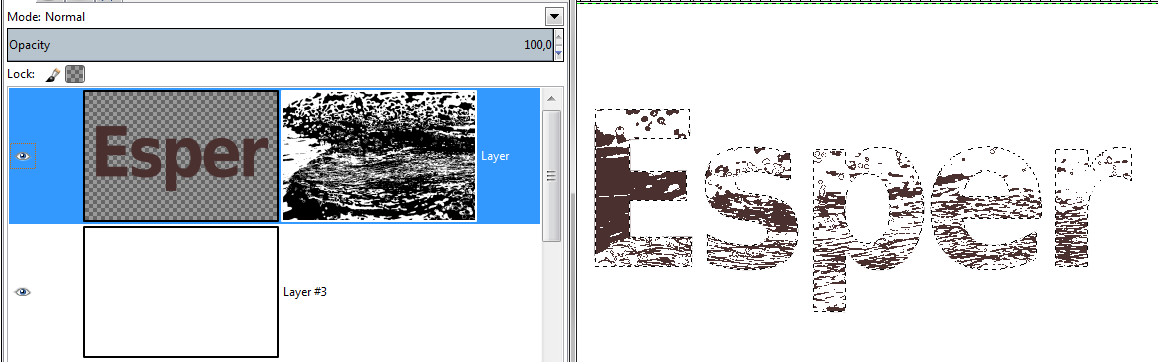
17. try different things with the floating selection, for example:
use the Move Tool to drag the texture around,
use the Rotation Tool to change the angle
use the Scale Tool to make the texture more „dense“
'Invert' the colors to get a different ratio of transparency to opacity
when you are happy with your result, anchor your layer !
18. alpha select your text, invert the selection, then click your layermask and fill with black, so that everything that is not text will be transparent - we want the bottomlayer to shine through !
19. Now you have your textured text ready for the make up phase:
i applied a gradient: black to grey to the background, changed the color of the text by locking the alpha channel and applying a dark blue to a greyish white gradient and finally stroke the outline of the text.
The text you see on the top of the tutorial has an extra layer under the first layer, stroked again with a gradient, thats why the background doesnt shine through.
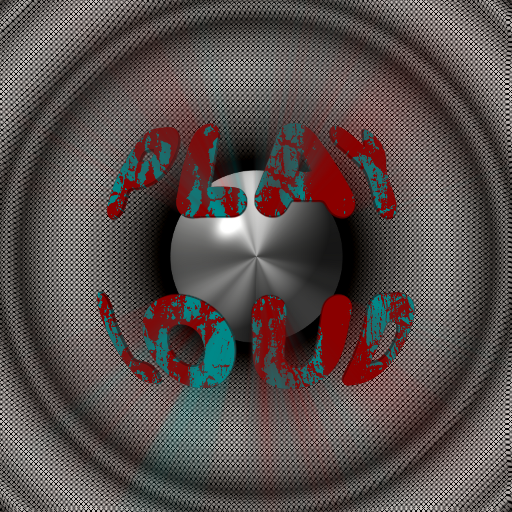
For another example of this technique, go to this thread:
viewtopic.php?f=11&t=5755


