Couple of people have asked for the steps on how the effect was achieved, so here they are.
1. Open a new image in gimp 512px * 512px and fill with white, the image is 512px because I want to make it a tilable pattern, Anything larger than this and gimp will automatically crop it to 512px when used a pattern.
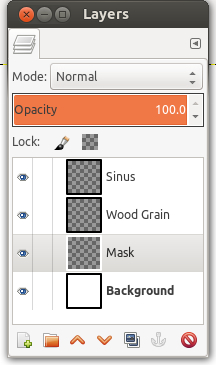
2. Next create 3 new layers by either going Layers>New Layer or by clicking on the "New Layer" Icon in the Layers Dialogue window. Name layers "Mask","Wood Grain" and "Sinus". Select the Layer named "Mask".
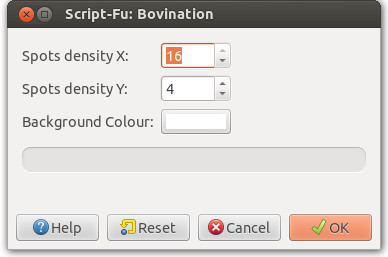
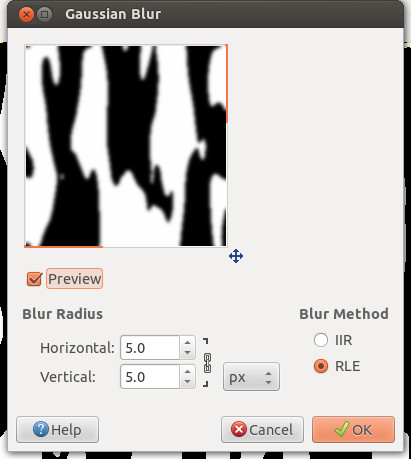
3. Fill "Mask" Layer with white, Go Filters>Alpha to Logo>Bovination use the settings as shown below and click O.K. Two Layers would have also been created in running this filter that we don't need called "Blur" and "Background 1" so just delete these layers. Then Go Filters Blur>Gaussians Blur set to 5 and Click O.K.
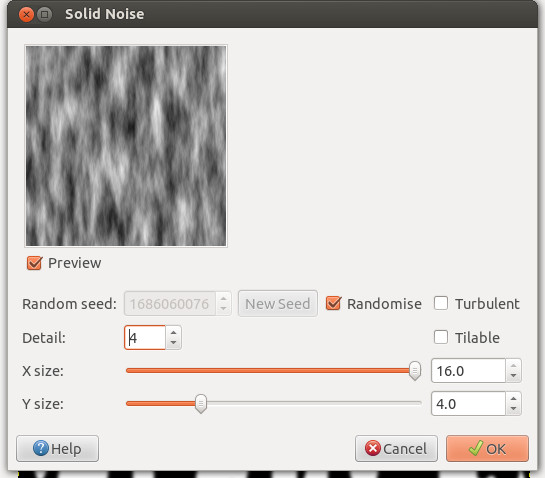
4. Select the Layer Named "Wood Grain", Go Filters>Render>Clouds>Solid Noise and use the settings below.
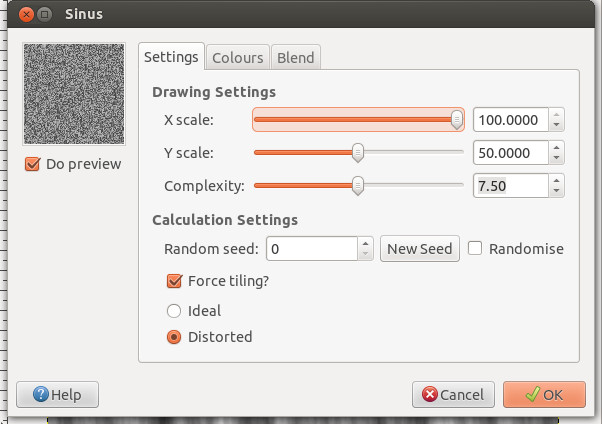
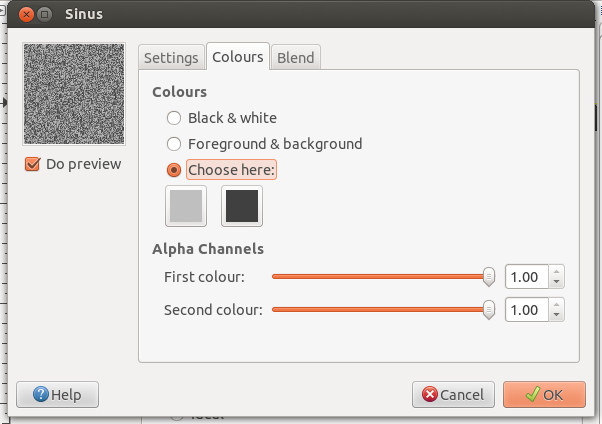
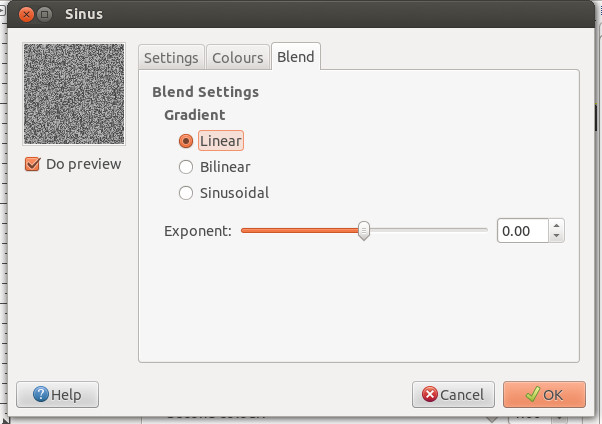
5. Select the Layer Named "Sinus", Go Filter>Render>Pattern>Sinus. Use the settings below, the Hex codes for the two colours are "bfbfbf" and "404040".
Click O.k
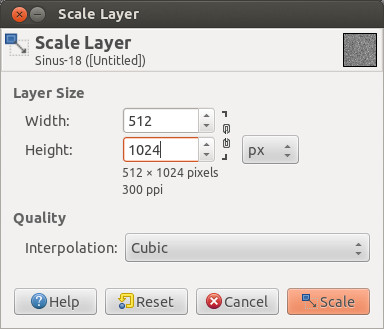
6. Still with the Layer Named "Sinus" selected go Layer>Scale Layer and click on the Chain to unlink the two values and change Height to 1024 and click O.K. Then Go Filter>Blur>Gaussians Blur and with value still set to 5 click O.K. Then Go Layer>Layer to Image Size.
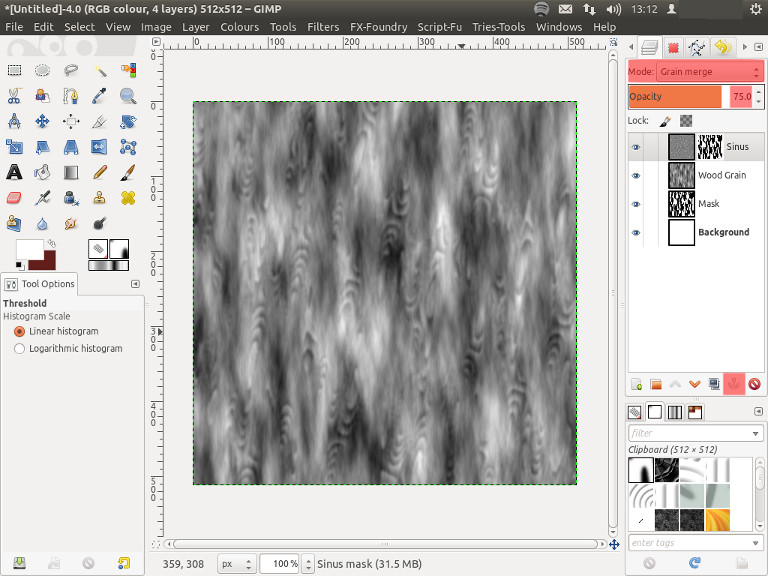
7. Select the Layer Named "Mask" and Go Edit>Copy, Select the Layer Named "Sinus" and Go Layer>Mask>Add Layer Mask, Leave it on the default settings and click Add. Then Go Edit>Paste Into and click the Anchor at the bottom of your Layers Dialogue Window to anchor floating Layer. Then Change the Sinus Layer Mode to "Grain Merge" and reduce the Opacity to 75%.
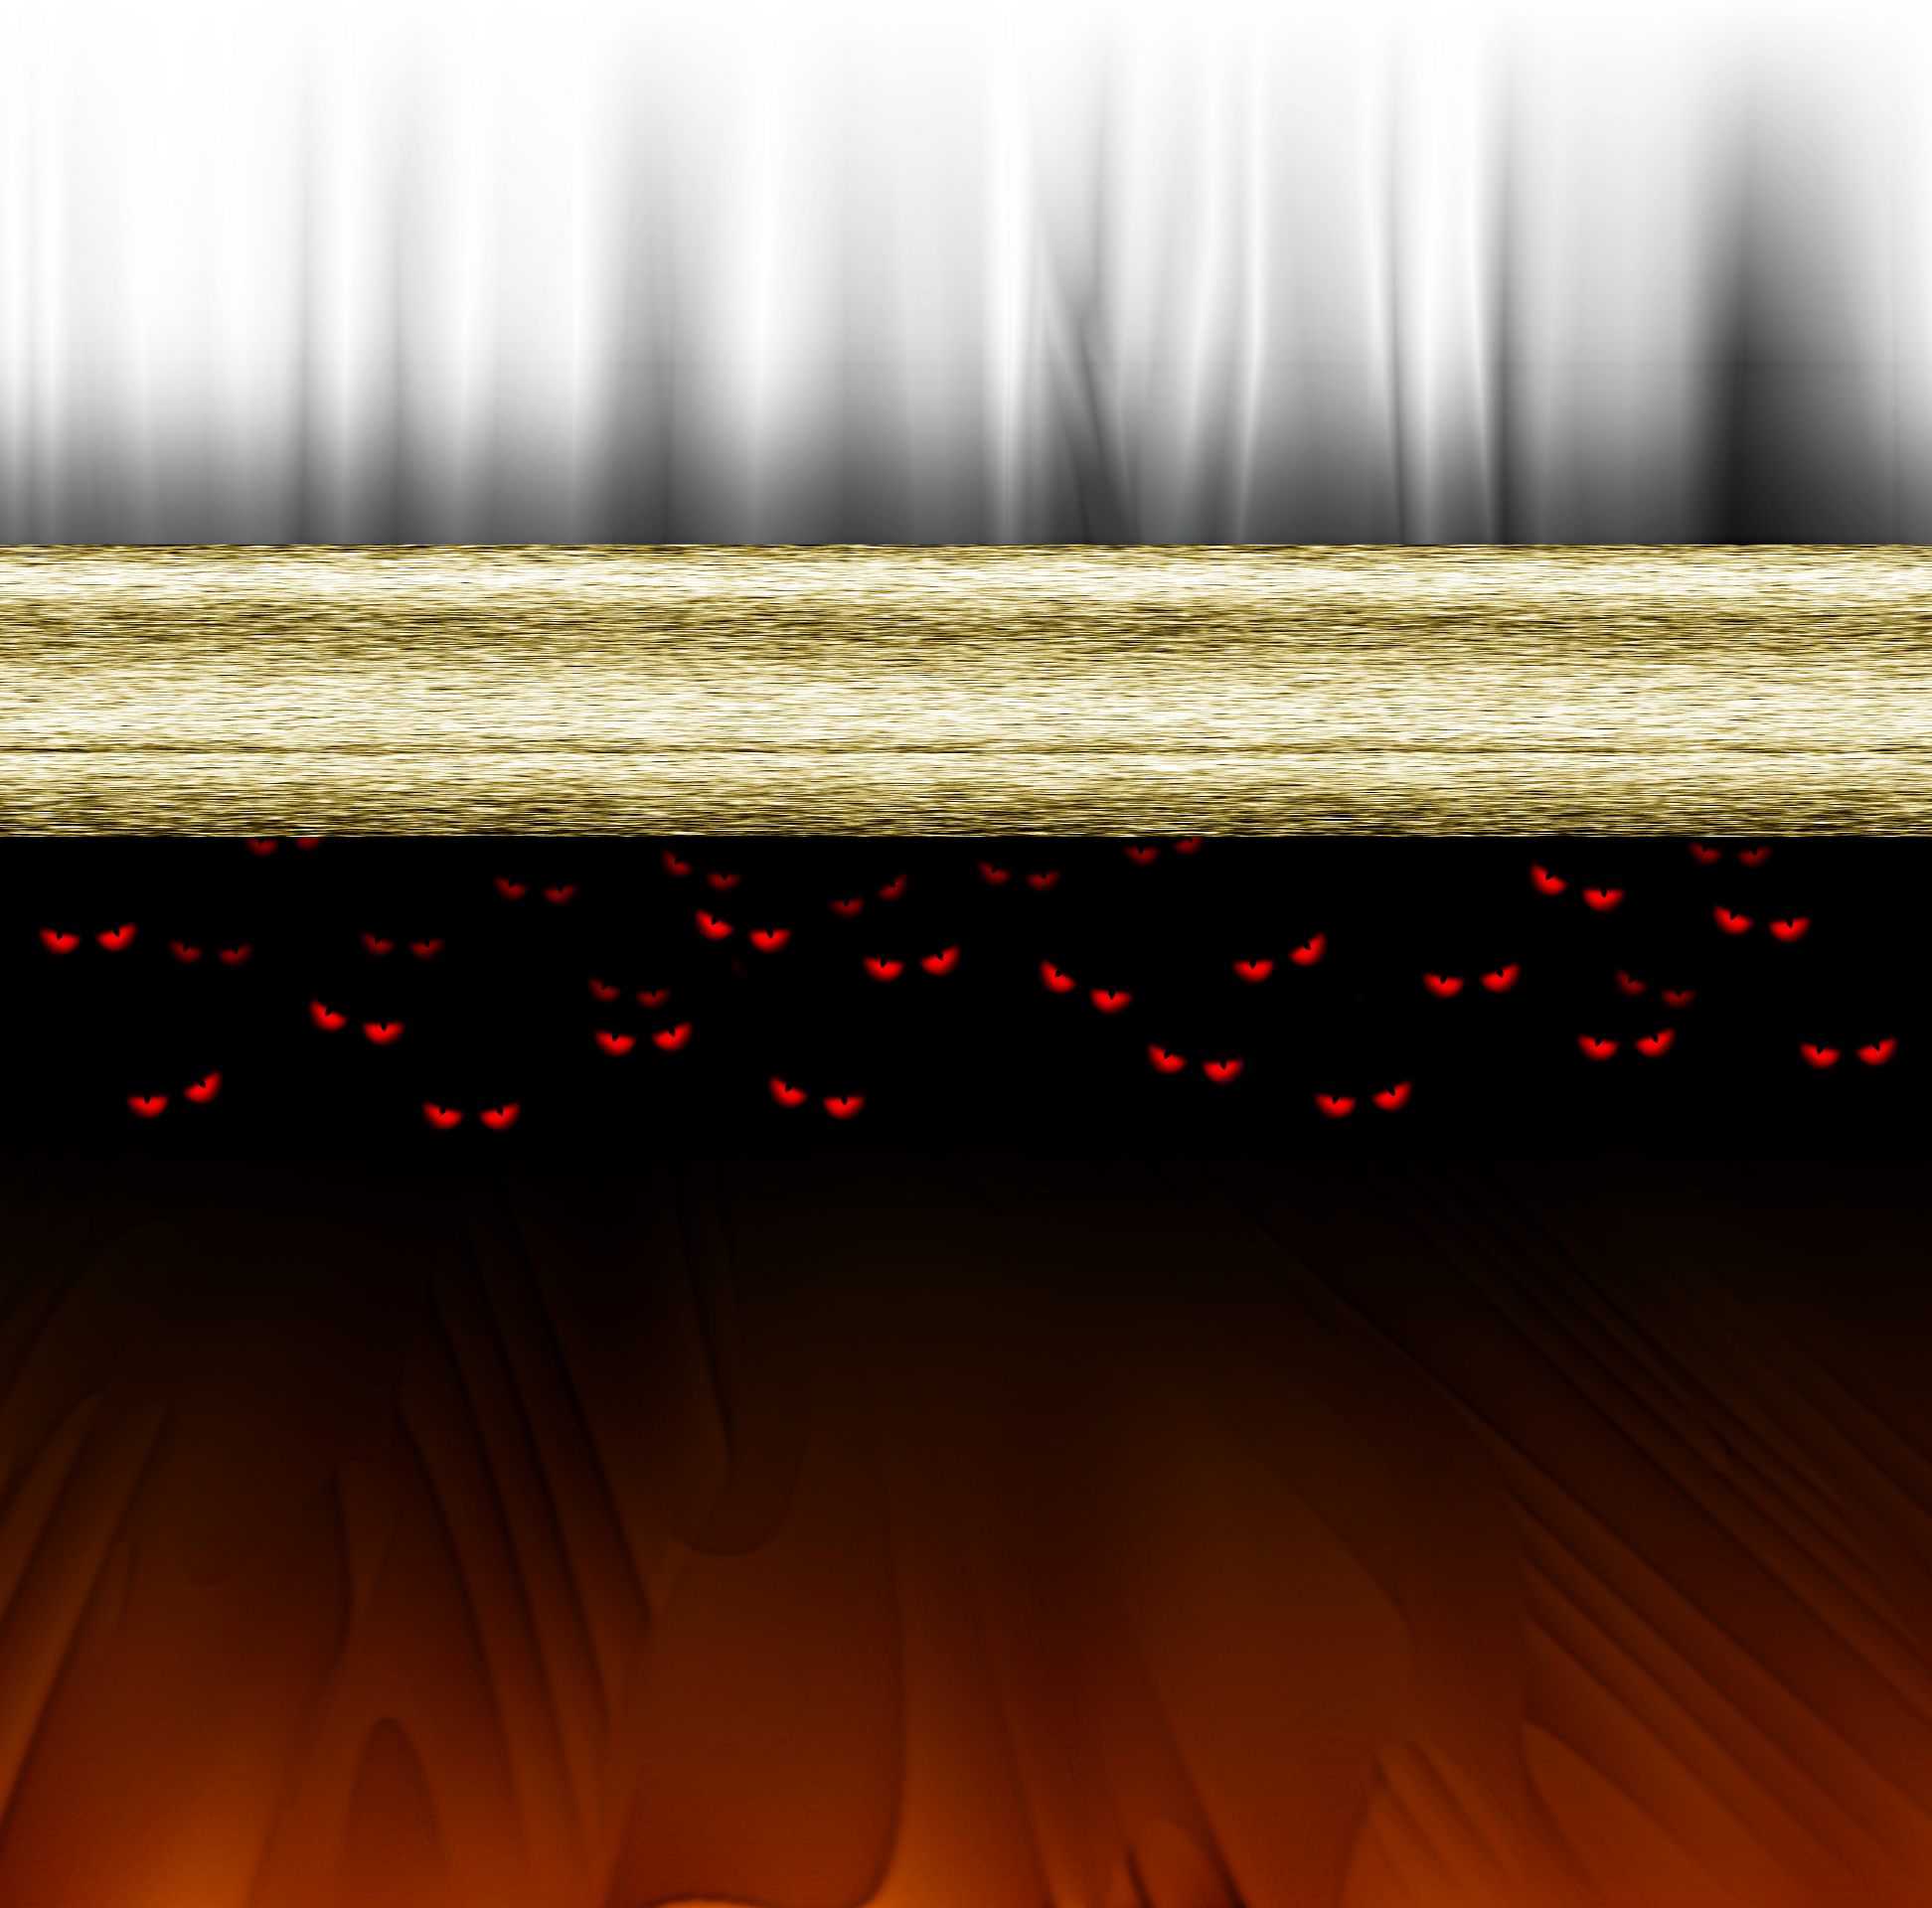
You should now have an Image similar to mine below.
8. With the Layer Named "Sinus" selected Go Layer>Merge Down, you should be left with just three layers "Background","Mask" and "Wood Grain" with the "Wood Grain" Layer selected Go Filter>Map>Make Seamless, This is the point in which our image is now tilable.
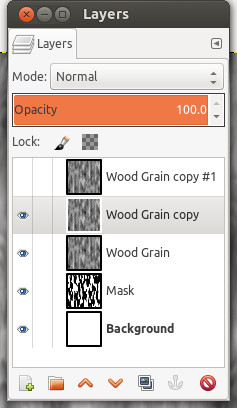
9. With the Layer Named "Wood Grain" still selected Go Layer>Duplicate Layer, repeat, Your layers should now read "Background","Mask","Wood Grain","Wood Grain copy" and "Wood Grain copy#1".
10. Turn off the Layer Named "Wood Grain copy#1" by clicking on the little eye Icon next to layer in the Layers Dialogue Window. Then Select the Layer Named "Wood Grain Copy".
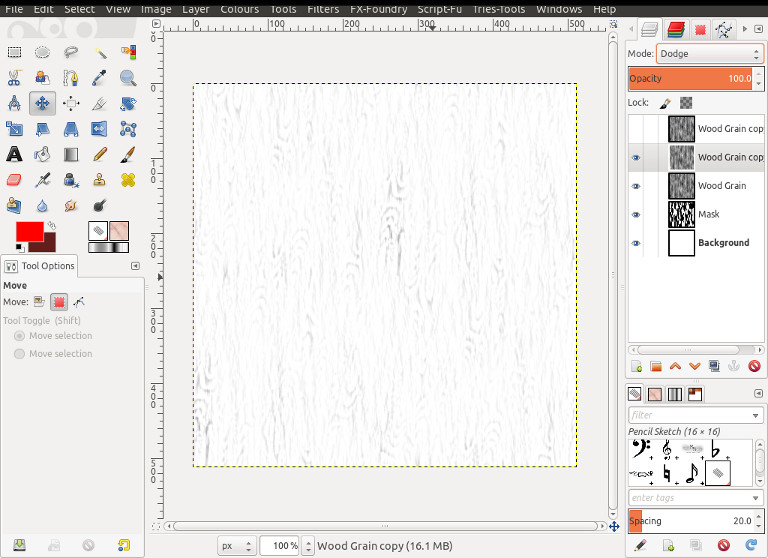
11. With the Layer Named "Wood Grain copy" still selected Go>Colours>Invert, Then Go Filters>Blur>Gaussian Blur make sure values are still set at 5 and click O.K. Change Layer Mode to Dodge, you should now have something similar to the Image below.
12. With the Layer Named "Wood Grain copy" still selected Go Layer>Merge Down, Select the Layer Named "Wood Grain" and Go Layer>Duplicate Layer, Select the Layer Named "Wood Grain copy" and change Layer Mode to Multiply then Go Layer>Merge Down.Then select the Layer Named "Wood Grain" and change Layer Mode to Multiply.
13. Select the Layer Named "Mask" and then Go Layer>New Layer, Rename Layer to "Wood Colour" and click O.K. with this new Layer selected Fill with Colour "b25b28".
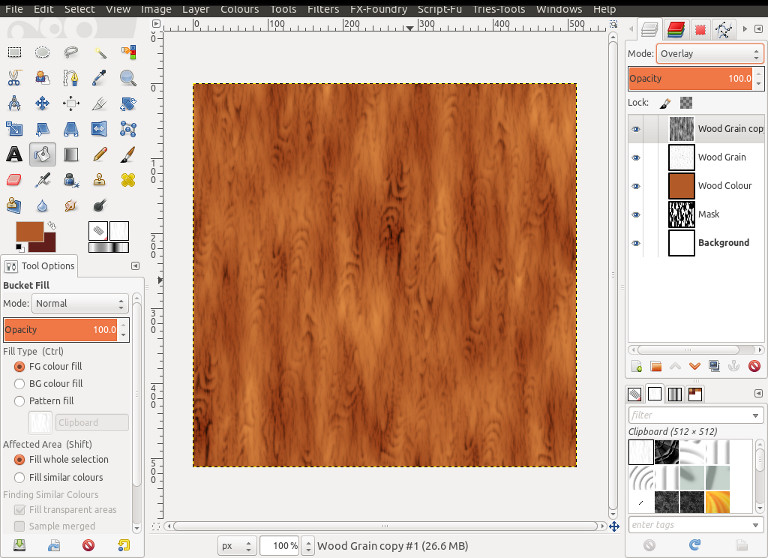
14. Select the Layer Named "Wood Grain copy#1", Make Layer Visible again By clicking on the Eye Icon next to the Layer then change Layer Mode to Overlay. You should be Looking Similar to the Image Below.
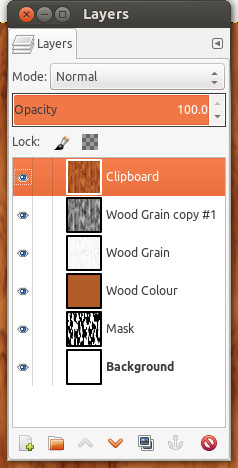
15. Go Edit>Copy Visible then Go Edit>Paste As>New Layer, you should now have a new Layer Named "Clipboard" and this should be the very top layer of your stack.
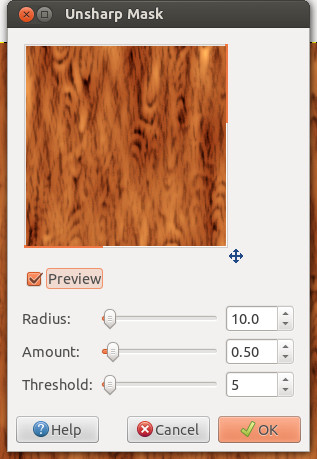
16. With the Layer Named "Clipboard" still selected Go Filters>Enhance>Unsharp Mask and use the settings below.
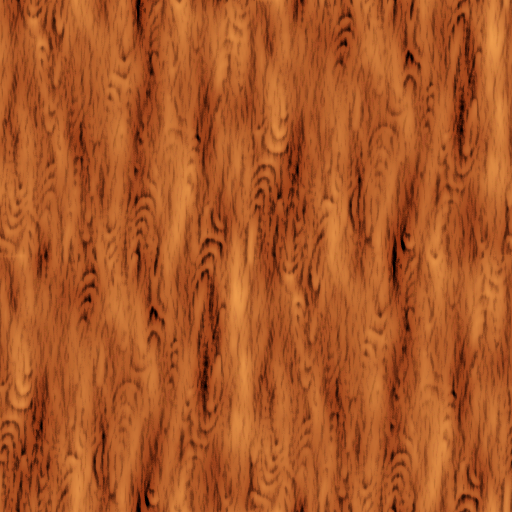
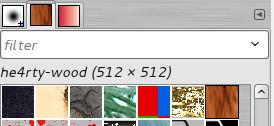
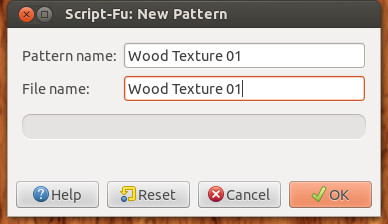
17. That is the texture finished so all we want to do now is save it as a pattern to use with the bucket fill tool. With the Layer Named "Clipboard" still selected Go Edit>Copy then Go Edit>Paste As>New Pattern, this will bring up a new window where we can enter our pattern name, see below. Click O.K.
18. If you now go to your Pattern Dialogue Window you should now find your new pattern.
That its, Special thanks to those who viewed my initial attempts and came up with suggestions to improve the outcome of the texture.