Happy New Year everyone!
I've had that PhotoFont plugin for quite a while now but could never really find a use of it. Until today.
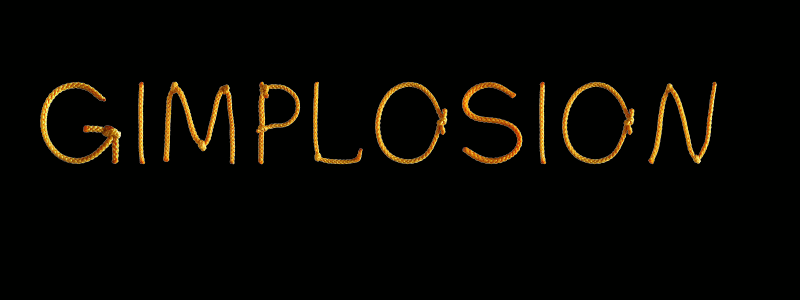
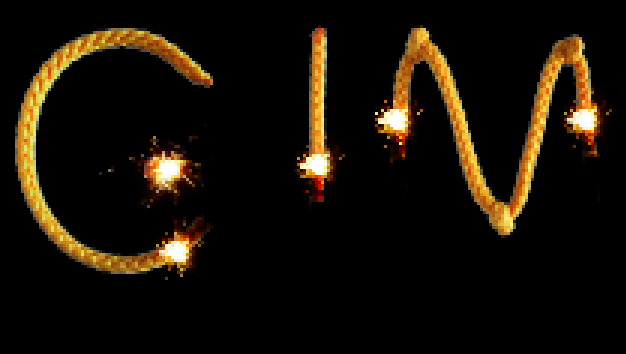
Using Sparkler brushset (kindly provided by Draconian here) and a little bit of imagination made this
animation.
Took about 1 hour to accomplish. It's a GIF file with 214 kb size. Feel free to download and use it.
Edit: noticed after uploading - forgot to delete part of some letters. Fixed
Nevertheless, as promised, I made a tutorial.
It won't be step by step, I'll skip some parts.
Resources:
PSPI and Photofont plugin installation, instructions and HowTo's.
Attachments:
1.
Draconian's Sparkler brush set.Draconian's Sparkler brush set.
2.
Ready animation frames (xcf file)Ready animation frames (xcf file)
The tutorial:
1.Take a deep breath, a cup of coffee, maybe, and get ready for a tedious work, which sometimes will drive you up the wall.
If you messed things up on few occasions, don't worry. I did it more than once.

2.Create a new black 800 x 300 image.
3.Add new transparent layer.
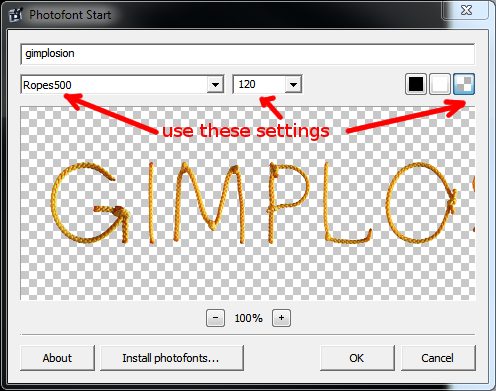
4.Using these Photofont Start plugin settings, type your text and position it at the center.
5.Duplicate layer with photofont text and paint with a Sparkler brush from where you want the burning to start.
Your first two frames are ready.
You're going to create as many frames as needed, it depends on how fast you want the burning to go.
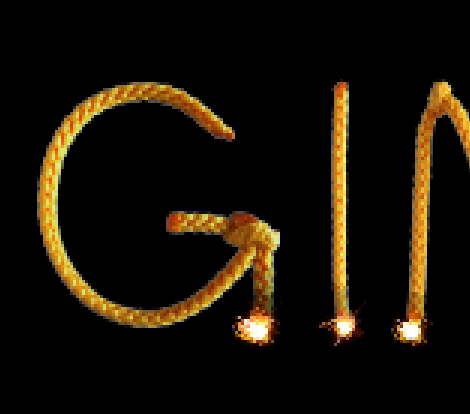
6.Duplicate your first frame for each next frame, continue painting and erasing parts of the letters.
Turn off the visibility of ready frames, leaving just the current frame and the frame below as a reference image.
To create glowing ashes behind the sparkles I used soft round brush

set to black color and Soft Light blending mode.
7.When all frames are ready, combine background layer (black) with every frame and optimize for GIF.
Increase frame delay for the first frame of your animation.
8.Save document as GIF animation.
They say picture's worth a thousand words, so i'm attaching
xcf file.