It is currently Thu Apr 18, 2024 1:44 am


All times are UTC - 5 hours [ DST ]


Post new topic Reply to topic  [ 54 posts ]  Go to page 1, 2, 3  Next
Author Message
 Post subject: Brick Pattern Fun with Neon
PostPosted: Sat Jan 05, 2013 9:17 pm  (#1) 
Offline
Global Moderator
User avatar

Joined: Nov 16, 2011
Posts: 5128
Location: Metro Vancouver, BC
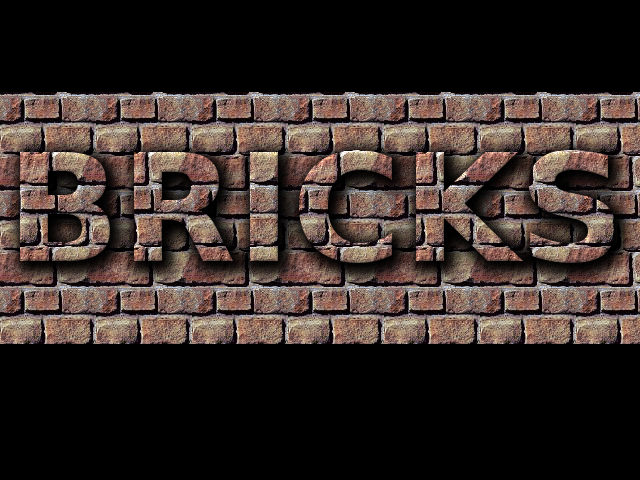
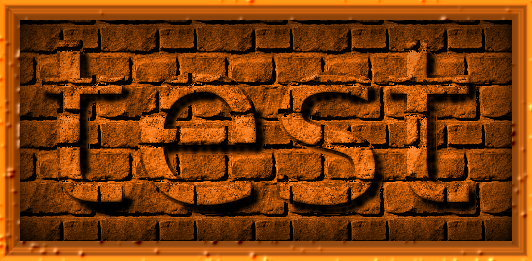
Just a bit of fun with neon text and the bricks pattern.

Image

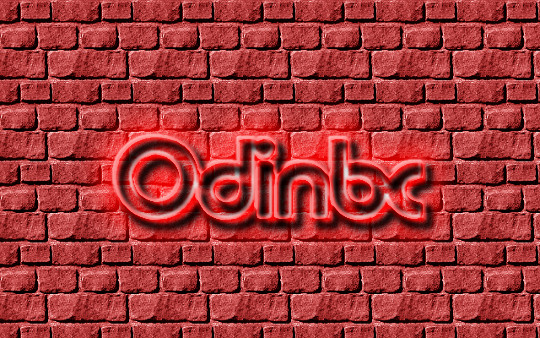
Tutorial originally by Michael J. Hammel author of, The Artist's Guide to GIMP, 2nd Edition.

Creating the Background
Start by creating a background against which the neon light will shine on a white canvas set to the default size (640 × 400 pixels).

  1. Open the Patterns dialog (Dialogs > Patterns), find the Bricks pattern, and then drag that pattern onto the canvas. This fills the canvas with the selected pattern.
  2. Desaturate this layer (Colors > Desaturate).
  3. Click the foreground color box to launch the Change Foreground Color dialog and set the RGB values to 244/0/0 for the deep red shown here. Click OK to close the dialog.

    Image
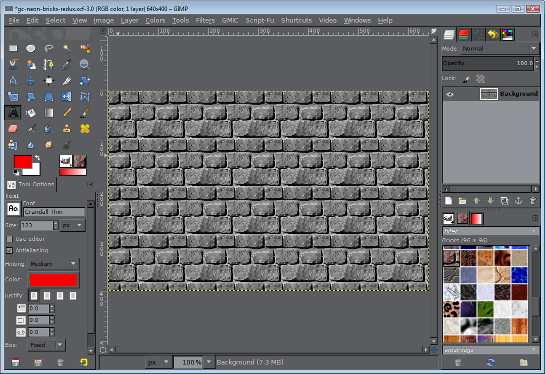
  4. Choose the Bucket Fill tool from the toolbox. In the Tool Options dialog, set the Mode to Soft Light and set the Affected Area to Fill Whole Selection.
  5. Click inside the canvas to color the bricks red.
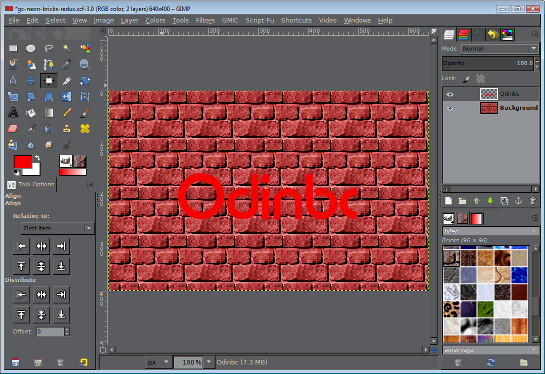
Preparing the Neon Tubes
  1. Choose the Text tool from the toolbox and then choose a font that suits your project. This example uses SoutaneBlack Thin sized to 110 pixels, with letter spacing set to 5.0. Thick fonts like this work well, especially when you’re still learning how to master this technique, but neon signs can have all sorts of shapes, so feel free to experiment.
  2. The text color should be set to the current foreground color, but if it isn’t, set the RGB values to 244/0/0 to match the red in the background.
  3. Click the canvas and type 'You Text'. Use the Align tool to position the text in the center of the canvas.
  4. Expand the text layer boundary to match the image size (Layer > Layer to Image Size). This allows you to add elements to the layer that would otherwise be cut off by the original layer boundary.

    Image
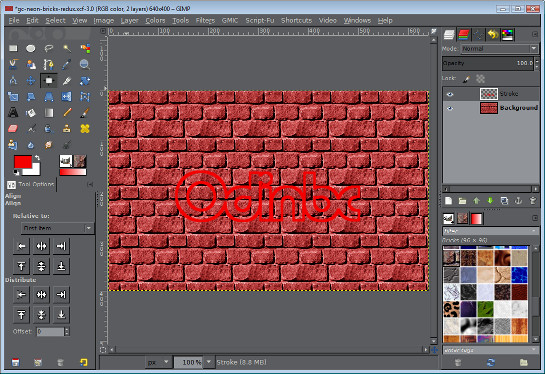
  5. Create a selection of the text’s outline by choosing Layer > Transparency > Alpha to Selection. Save this selection to a channel (Select > Save to Channel), and then double-click the channel name and change it to Outline. You’ll use this channel again later.
  6. Grow the selection by 3 pixels (Select > Grow).
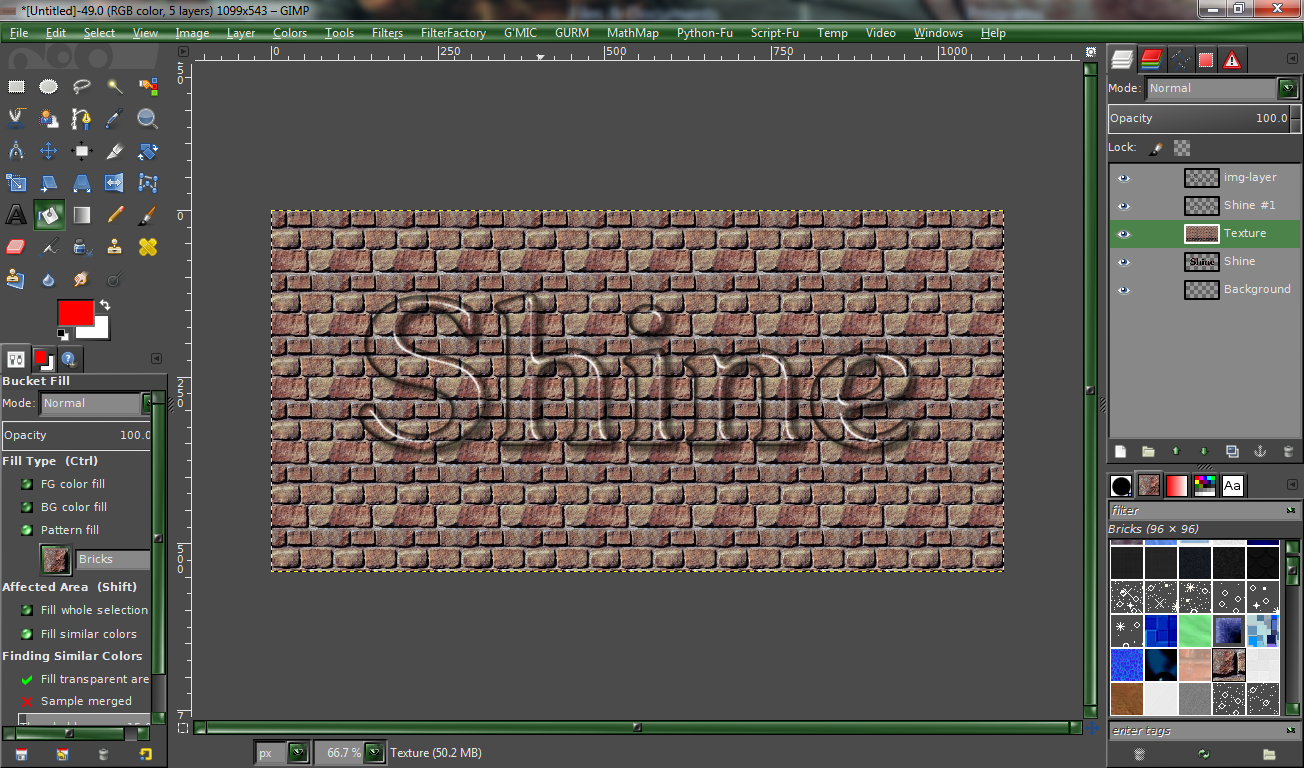
  7. Create a new layer (Layer > New Layer) and name it Stroke. Return to the Layers dialog to see the new layer.
  8. Stroke the selection by choosing Edit > Stroke Selection and setting the Line Width to 5 pixels.
  9. Delete the original text layer and then deselect all (ctrl-shift-A). You now have the outline for creating the sign’s neon tubes.

    Image
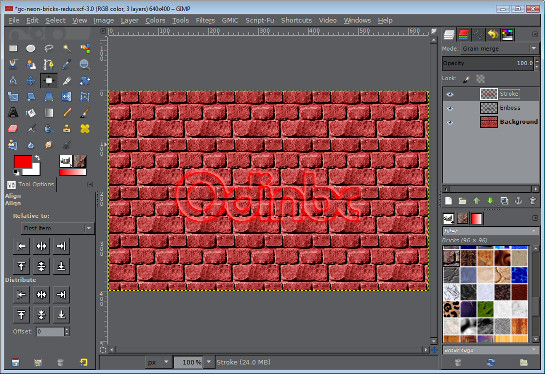
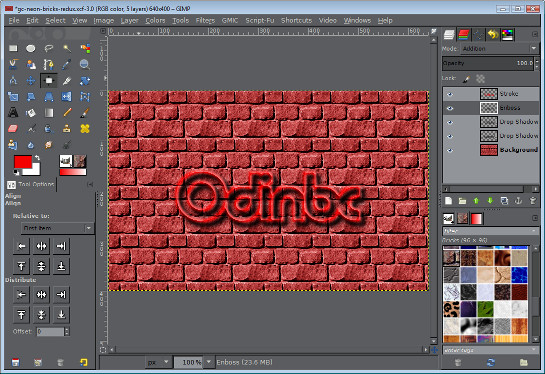
  10. Duplicate the Stroke layer and name the duplicate layer Emboss.
  11. Open the Gaussian Blur filter (Filters > Blur > Gaussian Blur) and apply a blur of 6 pixels to this layer.
  12. Open the Emboss filter (Filters > Distorts > Emboss). Set the Function to Emboss, the Azimuth slider to 43, the Elevation slider to 30, and the Depth slider to 43. These settings give the Emboss layer a cutout appearance. Click OK to apply this filter to the layer.
  13. Lower the Emboss layer in the Layers dialog by choosing Layer > Stack > Lower Layer once.
  14. Set the Mode for the Emboss layer to Addition.
  15. Open the Gaussian Blur filter (Filters > Blur > Gaussian Blur) and apply a blur of 6 pixels to the original Stroke layer. Set the Mode to Grain Merge.

    Image
  16. Add a drop shadow to this layer (Filters > Light and Shadow > Drop Shadow). Offset the drop shadow by setting the Offset X and Offset Y values to 8 pixels. Set the Blur Radius to 6 pixels, set the Opacity slider to 100 percent, and uncheck the Allow resizing checkbox. If you were to instead check the Allow resizing checkbox, it would resize the canvas and place transparent areas around the edges. That’s not what you want for this tutorial. Apply this drop shadow.
  17. The Stroke layer should still be active, but if it isn’t, click the Stroke layer in the Layers dialog to make it active again.
  18. Add a second drop shadow. This time, set the Offset X and Offset Y values to 9 pixels, the Blur Radius to 15 pixels, and the Opacity slider to 100 percent. Again, uncheck the Allow resizing checkbox. Applying these drop shadows raises the neon tubing above the background wall.
  19. Move the Emboss layer above the Drop Shadow layers but below the Stroke layer.Move the Emboss layer above the Drop Shadow layers but below the Stroke layer.
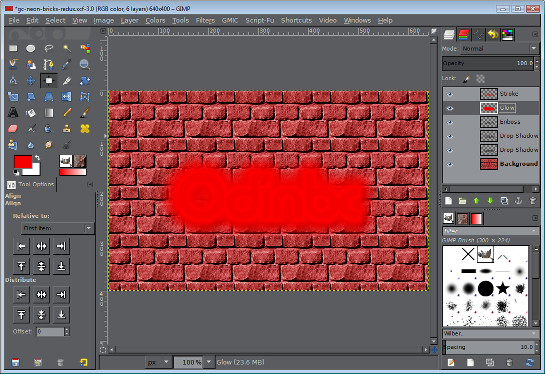
    Image

Adding the Glow
  1. Add a transparent layer by choosing Layer > New Layer and setting the Layer Fill Type to Transparency. Name the new layer Glow.
  2. Retrieve the Outline channel selection from the Channels dialog by clicking that channel and then clicking the Channel to Selection button.
  3. Grow the selection by 25 pixels (Select > Grow). Notice that growing a selection rounds its edges.
  4. Feather the selection by 15 pixels (Select > Feather).
  5. Click the Glow layer in the Layers dialog to make it active. Drag the foreground color from the toolbox into the selection to fill the selection with that color, and then deselect all (ctrl-shift-A).
  6. Open the Gaussian Blur filter (Filters > Blur > Gaussian Blur) and apply a blur of 20 pixels to the Blur layer. Apply this same blur two more times by pressing ctrl-F twice. The amount to blur is up to you. Apply the blur a few more times if you’d like to soften the edges of the glow even more.

    Image
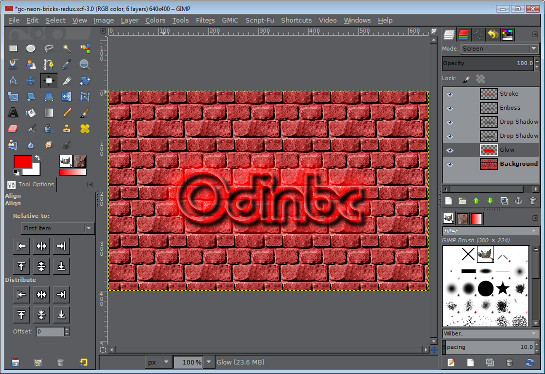
  7. In the Layers dialog, lower the Glow layer to just above the Background layer.
  8. Set the Mode for the Glow layer to Screen.
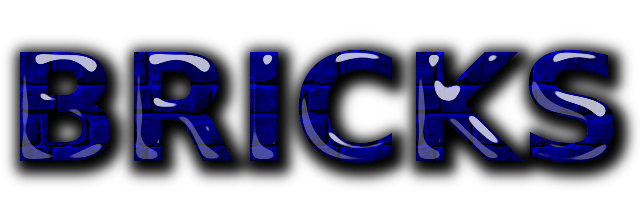
    Image

Adding a Glass-Edged Reflection
  1. Add a new layer (Layer > New Layer). Move it to the top of the stack in the Layers dialog and name it Highlight.
  2. Retrieve the Outline channel selection again. Grow this selection by 2 pixels (Select > Grow).
  3. Set the foreground color to white, and then click the Highlight layer in the Layers dialog to make it active again.
  4. Stroke the selection by choosing Edit > Stroke and setting the Line Width to 4 pixels, and then deselect all (ctrl-shift-A).
  5. Offset this layer by choosing Layer > Transform > Offset and setting the Offset X and Offset Y values to -2 pixels.
  6. Open the Gaussian Blur filter (Filters > Blur > Gaussian Blur) and apply a blur of 2 pixels.
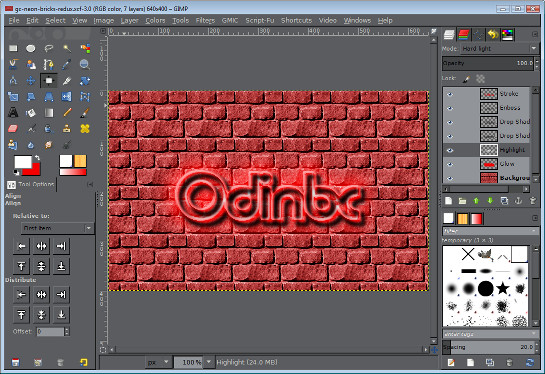
  7. In the Layers dialog, move the Highlight layer to just below the lowest Drop Shadow layer.
  8. Set the Mode for the Highlight layer to Hard Light. This last part is what really makes the neon tubes look realistic. By adding light, you make the tubes appear rounded.

    Image


This was from a tutorial in The Artist's Guide to GIMP, 2nd Edition a fantastic book, well worth buying. The book is not only excellent for beginners, it's a great reference for all levels of users. The beauty of this book is not only the authors knowledge but the way he covers topic.
Highly recommended :bigthup


Attachments:
File comment: Brick Pattern Fun Tutorial (PDF)
Brick-Pattern-Fun.pdf [507.02 KiB]
Downloaded 648 times

_________________
Image
Gimp 2.8.18, Linux, median user
Gimp Chat Tutorials Index
Spirit Bear (Kermode)
Share on Facebook Share on Twitter Share on Orkut Share on Digg Share on MySpace Share on Delicious Share on Technorati
Top
 Post subject: Re: Bricks Pattern Fun
PostPosted: Sun Jan 06, 2013 1:02 am  (#2) 
Offline
Script Coder
User avatar

Joined: Feb 18, 2011
Posts: 4827
Location: Bendigo Vic. Australia
The lighting looks excellent and it's a very nice effect

_________________
Image
No matter how much you push the envelope, it'll still be stationery.


Top
 Post subject: Re: Bricks Pattern Fun
PostPosted: Sun Jan 06, 2013 3:33 am  (#3) 
Offline
Global Moderator
User avatar

Joined: Apr 07, 2010
Posts: 14182
I like that Odin, very nice.

_________________
Image


Top
 Post subject: Re: Bricks Pattern Fun
PostPosted: Sun Jan 06, 2013 4:43 am  (#4) 
Offline
GimpChat Member
User avatar

Joined: Dec 02, 2012
Posts: 203
Location: Cantabria, Spain
Always we can play fun with brick walls...


Attachments:
brickwall.png
brickwall.png [ 458.06 KiB | Viewed 8765 times ]

_________________
Image


My Gimp rides on Antergos (Arch), Linux Mint, Debian and Fedora
Top
 Post subject: Re: Bricks Pattern Fun
PostPosted: Sun Jan 06, 2013 6:44 pm  (#5) 
Offline
Global Moderator
User avatar

Joined: Nov 16, 2011
Posts: 5128
Location: Metro Vancouver, BC
Graechan wrote:
The lighting looks excellent and it's a very nice effect
Thanks Graechan, the author of The Artist's Guide to GIMP is very good at showing all the different methods in his tutorials.
Molly wrote:
I like that Odin, very nice.
Cheers, Molly :)

_________________
Image
Gimp 2.8.18, Linux, median user
Gimp Chat Tutorials Index
Spirit Bear (Kermode)


Top
 Post subject: Re: Bricks Pattern Fun
PostPosted: Sun Jan 06, 2013 6:51 pm  (#6) 
Offline
GimpChat Member
User avatar

Joined: Aug 16, 2012
Posts: 4271
Location: Göteborg, Sweden
odinbc: that's neat. since the tutorial is taken from the book i suppose there's no use asking you to share it?

_________________


Top
 Post subject: Re: Bricks Pattern Fun
PostPosted: Sun Jan 06, 2013 7:13 pm  (#7) 
Offline
Global Moderator
User avatar

Joined: Nov 16, 2011
Posts: 5128
Location: Metro Vancouver, BC
Sorry, it's a long one. I highly recommend the book, it's up-to-date, the authors been involved with Gimp since the beginning (v0.54).

Edit, I just found it, go to the book preview at Google Books (page 247).

_________________
Image
Gimp 2.8.18, Linux, median user
Gimp Chat Tutorials Index
Spirit Bear (Kermode)


Top
 Post subject: Re: Bricks Pattern Fun
PostPosted: Sun Jan 06, 2013 7:55 pm  (#8) 
Offline
GimpChat Member

Joined: Aug 05, 2011
Posts: 606
Location: limestone,ny
Image

Image


Top
 Post subject: Re: Bricks Pattern Fun
PostPosted: Mon Jan 07, 2013 6:09 am  (#9) 
Offline
Global Moderator
User avatar

Joined: Apr 01, 2012
Posts: 7712
Location: On the other side of this screen
Looks good Odinbc.

Thought I would give this one a try. Don't have the book....yet, so didn't use a tutorial.
Image


Would like to try more of the scripts but must be really
dense as I have only been able to get a couple to work. Either I am not putting them in the right place or am doing something wrong.

_________________


Top
 Post subject: Re: Bricks Pattern Fun
PostPosted: Mon Jan 07, 2013 12:41 pm  (#10) 
Offline
Global Moderator
User avatar

Joined: Nov 16, 2011
Posts: 5128
Location: Metro Vancouver, BC
sallyanne wrote:
Looks good Odinbc.

Thought I would give this one a try. Don't have the book....yet, so didn't use a tutorial.
Would like to try more of the scripts but must be really
dense as I have only been able to get a couple to work. Either I am not putting them in the right place or am doing something wrong.
Did you see this link to a preview of the book with tutorials?
Book preview at Google Books (page 247).

I like everyone's experiments with brick :bigthup

_________________
Image
Gimp 2.8.18, Linux, median user
Gimp Chat Tutorials Index
Spirit Bear (Kermode)


Top
 Post subject: Re: Bricks Pattern Fun
PostPosted: Mon Jan 07, 2013 1:29 pm  (#11) 
Offline
Retired Staff
User avatar

Joined: May 22, 2008
Posts: 6947
Location: Somewhere in GIMP
Very nice, Odin. Everyone else, too. I love brick wall images. :yes

_________________
Image
World War IV will be fought with sticks and stones. - Albert Einstein


Top
 Post subject: Re: Bricks Pattern Fun
PostPosted: Mon Jan 07, 2013 5:12 pm  (#12) 
Offline
Script Coder
User avatar

Joined: Feb 18, 2011
Posts: 4827
Location: Bendigo Vic. Australia
I thought I would have a rough try

Image

_________________
Image
No matter how much you push the envelope, it'll still be stationery.


Top
 Post subject: Re: Bricks Pattern Fun
PostPosted: Mon Jan 07, 2013 5:17 pm  (#13) 
Offline
Global Moderator
User avatar

Joined: Nov 16, 2011
Posts: 5128
Location: Metro Vancouver, BC
I like the translucent effect :cool

_________________
Image
Gimp 2.8.18, Linux, median user
Gimp Chat Tutorials Index
Spirit Bear (Kermode)


Top
 Post subject: Re: Bricks Pattern Fun
PostPosted: Mon Jan 07, 2013 5:24 pm  (#14) 
Offline
Script Coder
User avatar

Joined: Feb 18, 2011
Posts: 4827
Location: Bendigo Vic. Australia
But am I close

_________________
Image
No matter how much you push the envelope, it'll still be stationery.


Top
 Post subject: Re: Bricks Pattern Fun
PostPosted: Mon Jan 07, 2013 5:34 pm  (#15) 
Offline
Global Moderator
User avatar

Joined: Apr 07, 2010
Posts: 14182
That is way cool Graechan, how did you get that so shiny and transparent?

_________________
Image


Top
 Post subject: Re: Bricks Pattern Fun
PostPosted: Mon Jan 07, 2013 6:34 pm  (#16) 
Offline
Script Coder
User avatar

Joined: Feb 18, 2011
Posts: 4827
Location: Bendigo Vic. Australia
No secrets here,but if you tell anyone I'll have to kill you

Image

I used the shine logo and kept the layers, then changed the texture layer mode to normal and filled with the bricks pattern, alpha to select the text layer and grow by 25-50 then filled a new layer above the texture layer with color and guass to 200.

_________________
Image
No matter how much you push the envelope, it'll still be stationery.


Top
 Post subject: Re: Bricks Pattern Fun
PostPosted: Mon Jan 07, 2013 6:38 pm  (#17) 
Offline
Global Moderator
User avatar

Joined: Apr 07, 2010
Posts: 14182
Would you really do that? if I told...Anyway, thanks, I forgot about the shine logo. That is very cool

_________________
Image


Top
 Post subject: Re: Bricks Pattern Fun
PostPosted: Mon Jan 07, 2013 6:51 pm  (#18) 
Offline
Script Coder
User avatar

Joined: Feb 18, 2011
Posts: 4827
Location: Bendigo Vic. Australia
Of course not Molly it's just an old saying, there's no secrets at GimpChat , and if the
Image is close enough to the tute in the book mentioned by Odin I think I'll script it

_________________
Image
No matter how much you push the envelope, it'll still be stationery.


Top
 Post subject: Re: Bricks Pattern Fun
PostPosted: Mon Jan 07, 2013 6:59 pm  (#19) 
Offline
Global Moderator
User avatar

Joined: Apr 07, 2010
Posts: 14182
I know you were kidding, anyway with the one eye you would have a problem catching me. BTW, I never did find that tute in that book. I couldn't get to the page.

_________________
Image


Top
 Post subject: Re: Bricks Pattern Fun
PostPosted: Mon Jan 07, 2013 10:43 pm  (#20) 
Offline
Script Coder
User avatar

Joined: Feb 18, 2011
Posts: 4827
Location: Bendigo Vic. Australia
I don't even know what the tute was called, I've just gone on the image, final image from script using defaults is below↓

Image

_________________
Image
No matter how much you push the envelope, it'll still be stationery.


Top
Post new topic Reply to topic  [ 54 posts ]  Go to page 1, 2, 3  Next

All times are UTC - 5 hours [ DST ]


   Similar Topics   Replies 
No new posts Attachment(s) Helper for creating patterns brick

15

No new posts Attachment(s) Seamless brick texture patterns (not helper)

4

No new posts Attachment(s) Neon-Cartoon Abstract.

4

No new posts Attachment(s) Gimp, Wilber, Top Hat, Purple Neon

13

No new posts Attachment(s) GEGL Neon Glowing Edge Detect

2


* Login  


Powered by phpBB3 © phpBB Group