In this tutorial i will show you how to make an Inner Shadow.
Its a simple effect, but i added a few twists for more experienced users.
An Inner Shadow is more or less the same as an Inner Glow (tutorial here:
http://gimpchat.com/viewtopic.php?f=23&t=6391), but mostly with dark colors and an offset.

1. Type your text, i used a canvas 660x260px, with the font 'Aller Display' 165px, Spacing – 4, in medium grey (#808080)
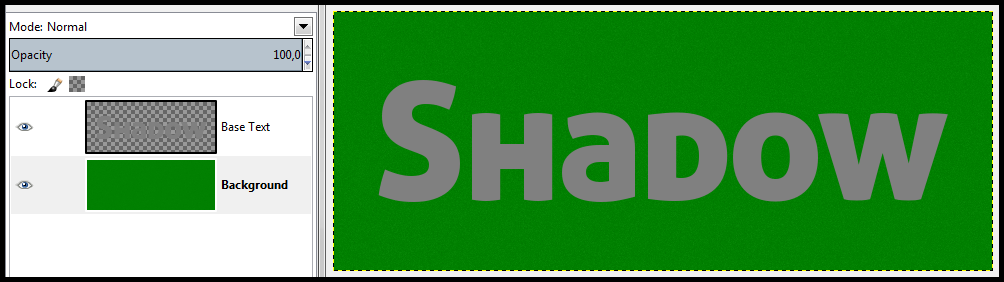
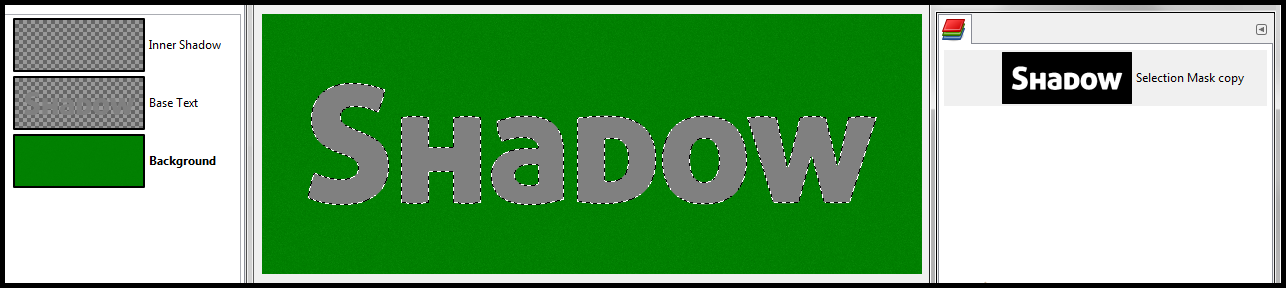
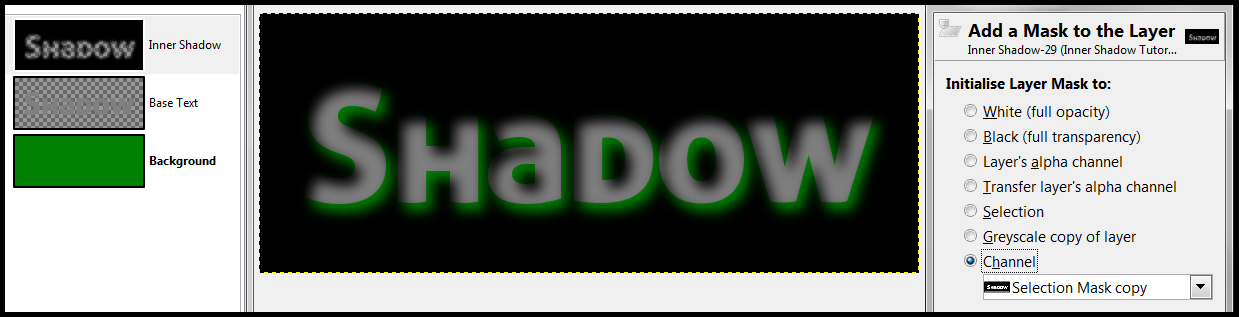
2. Alpha select your text and save it to a channel for future use
3. Create a new transparent layer, name it 'Inner Shadow'
4. Invert the Selection, then fill it with your shadow color (default is black)
everything on your canvas, minus the text, will be in your shadow color now
5. Deselect
6. Gaussian Blur - the higher the values you choose, the more your shadow will reach into the text (i used 20)
7. Now as i said in the beginning, an Inner Shadow is often offset, but how can we judge what offset looks good if we cant see the textboundaries ?
Turn on your channel and change the color of the mask that will provide good contrast
ORhas the same color as your background (i used red for contrast).

Use the 'Move Tool' or the Offset Dialog (Layer → Transform → Offset or CTRL + O) to move your Inner Shadow layer.
If you applied a Bevel before, you should use the same Azimuth (angle of light) to make your 3D look convincing.
The simplest method is clicking your Inner Shadow layer with the 'Move Tool' and then using the Cursor Keys.
I used 6px to the right and 8px down.
In your offset Dialog, thats 6/8.
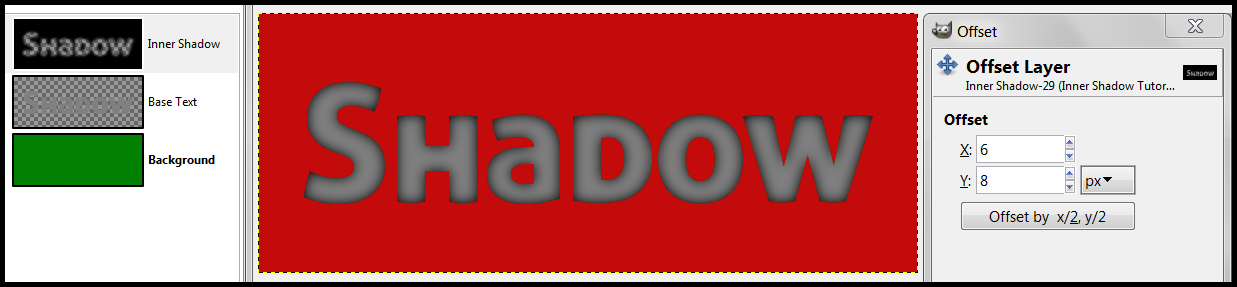
Note how you instantly get a 3D-ish effect.
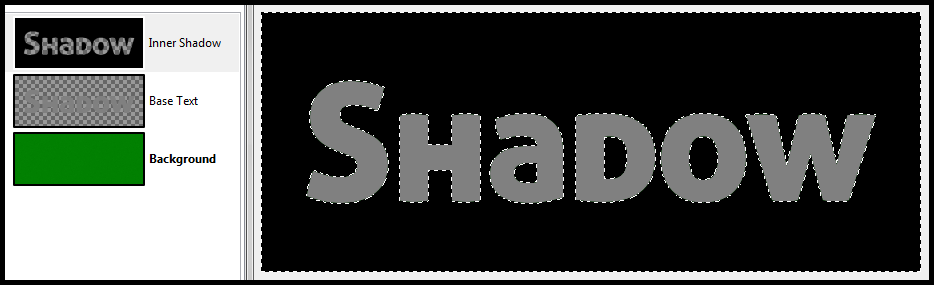
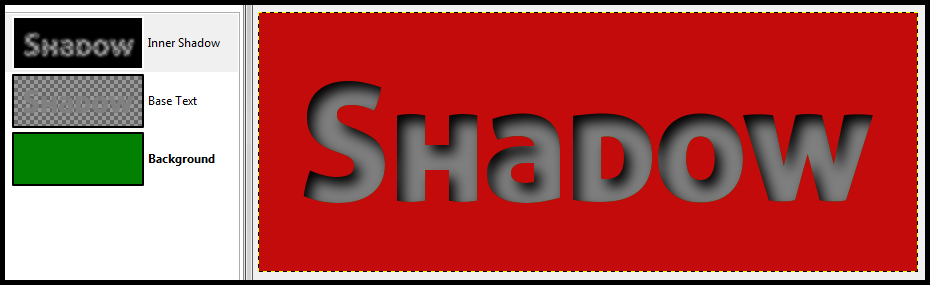
8. Turn off your Channel-Mask
9. To get rid of everything that is outside the textboundaries, right click your Inner Shadow layer and choose 'Channel'
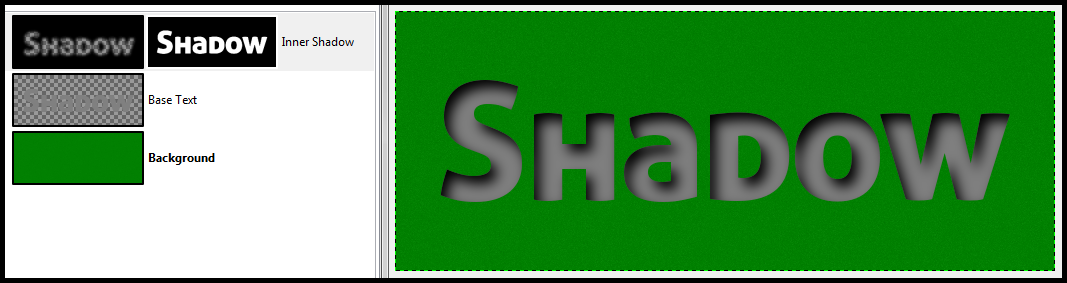
Thats your basic Inner Shadow (no Offset in this example).

10. If you want to tweak your Inner Shadow, you can use the Curves Tool, set it to alpha and drag the curve up or down. This will expand or shrink the blur.
EXPAND

SHRINK
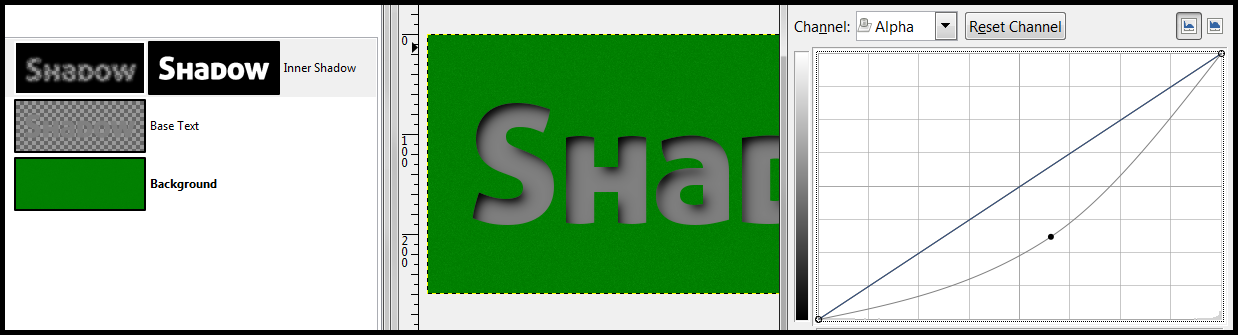
If you want to do more complex stuff with alpha-curves, have a look at my Contours-Tutorial here:
http://gimpchat.com/viewtopic.php?f=10&t=651811. finally adjust the 'Mode' and tune the 'Opacity'. There is no hard rule but with dark colors, Modes like 'Multiply', 'Darken Only' or 'Burn' are your first options. 'Grain Merge' is a good idea when you have a texture underneath that you want to look through. 'Hard Light' and 'Value' have their uses too.
The Default Mode and Opacity in layerfx is 'Multiply' at 75%, so thats something you can always try first if you dont know what to use.
Sometimes 'Normal' and 100% Opacity look good too.
In PS Layer Styles you have something called 'Range'. It changes the „density“ inside the blur.
You can simulate this effect by shrinking your selection before you invert and fill with the shadow-color.
In this example i shrank the selection by 4 before i applied the Gaussian Blur of 20.
So this will give you an Inner Shadow thats darker at the edges.


Here you can see the same Inner Shadow but with an Offset of 6/8:

If you want a very dark Inner Shadow, duplicating the layer can sometimes be a good idea. Like this:

That concludes this tutorial. I hope everybody, newbies and experienced users found something interesting.
To make our final example a bit more interesting, i added a dropshadow, an outer glow and a stroke.
The text layer got noise and the background a bit of bumpmapping.
Attachment:
 Inner Shadow Tutorial - DecoPhase.png [ 211.81 KiB | Viewed 12865 times ]