Am making a chrome letter text tutorial per request. This'll be my first. I discovered some new techniques by trial and error the other night. Have been making chrome text for a few years now, but this technique gives more of a reflected look.
Let's get started.
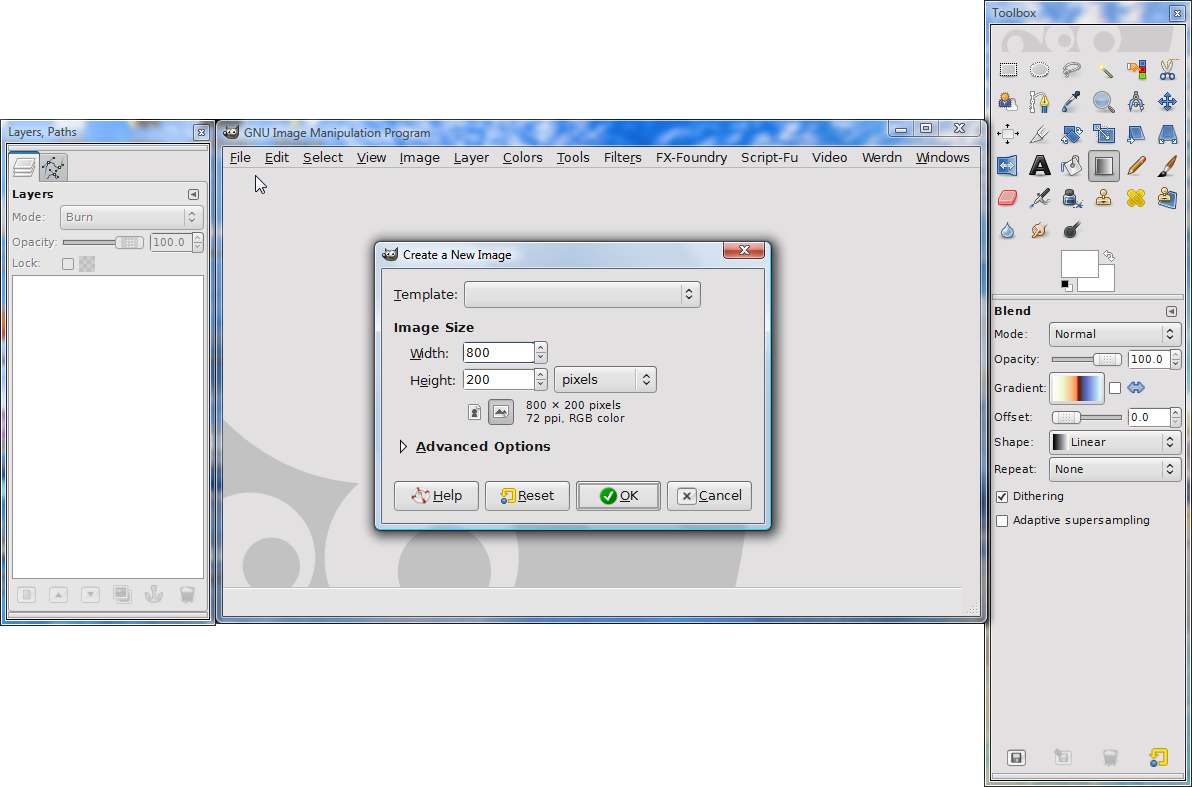
Create a new image, 800x200:
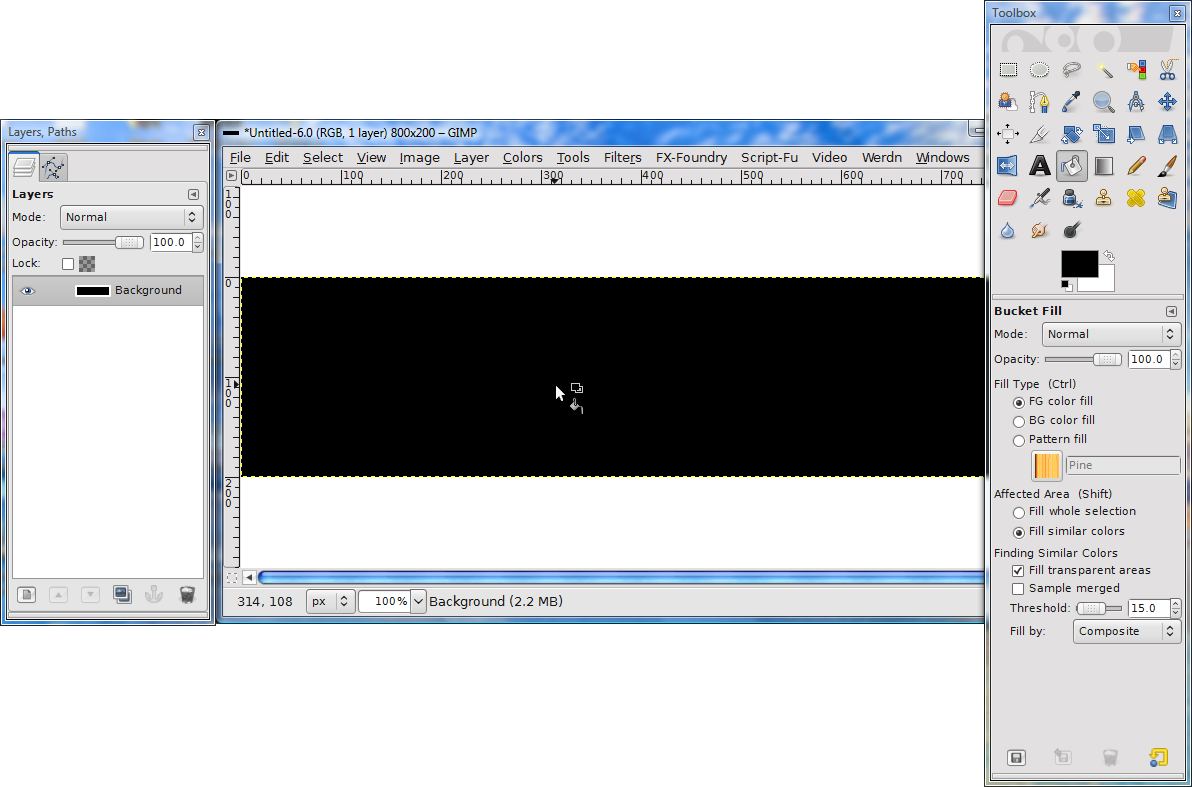
Use the bucket tool, and fill the layer with black:
Use the text tool, and in this case, type in "GIMP", with white letters, 911 Porscha font, size 175:
http://www.dafont.com/911porscha.font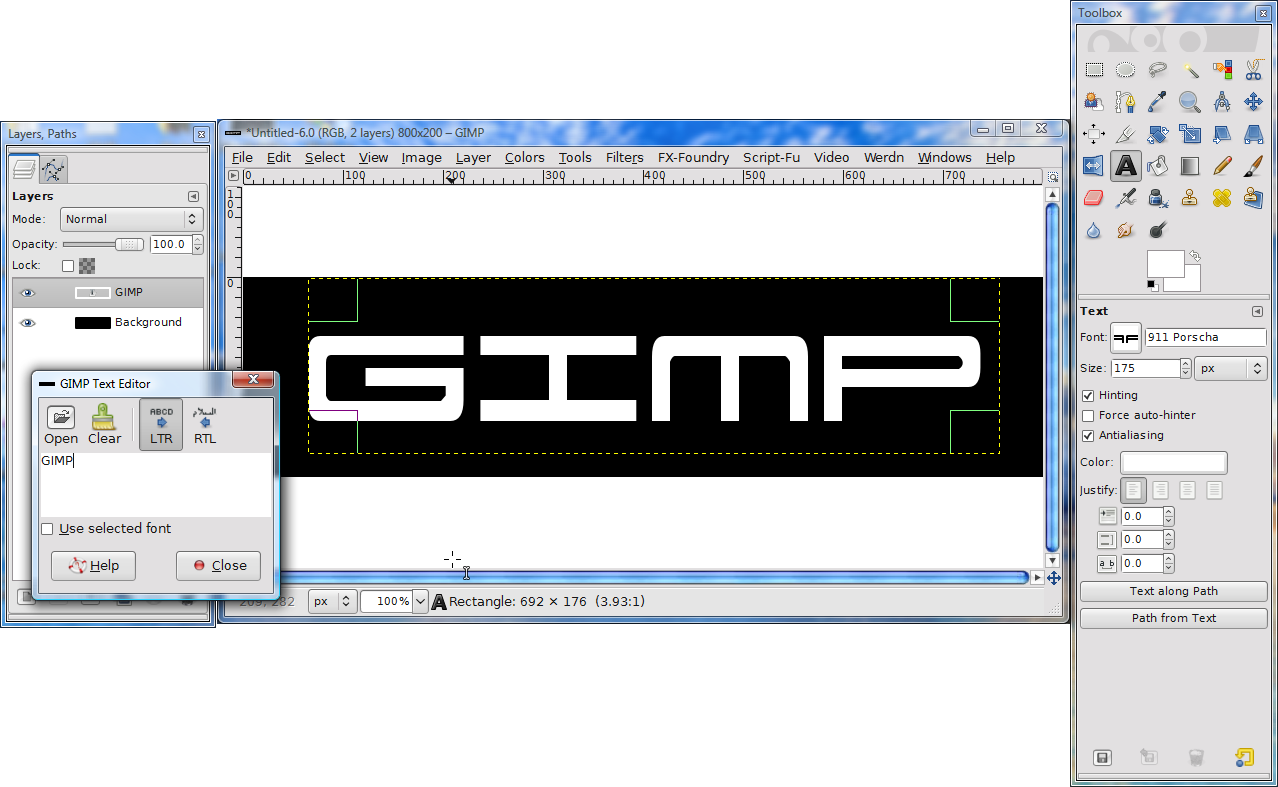
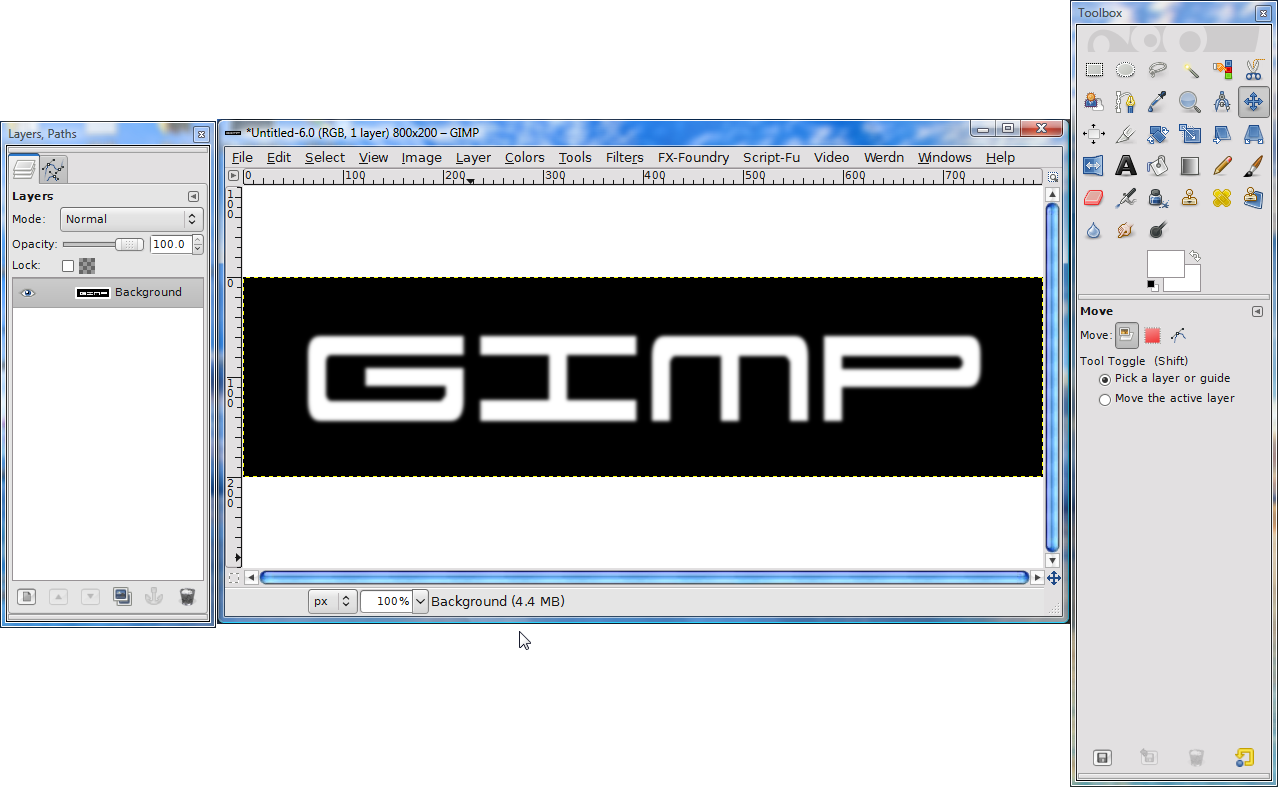
Merge the GIMP layer into the background layer, and give it a Gaussian blur of 5:
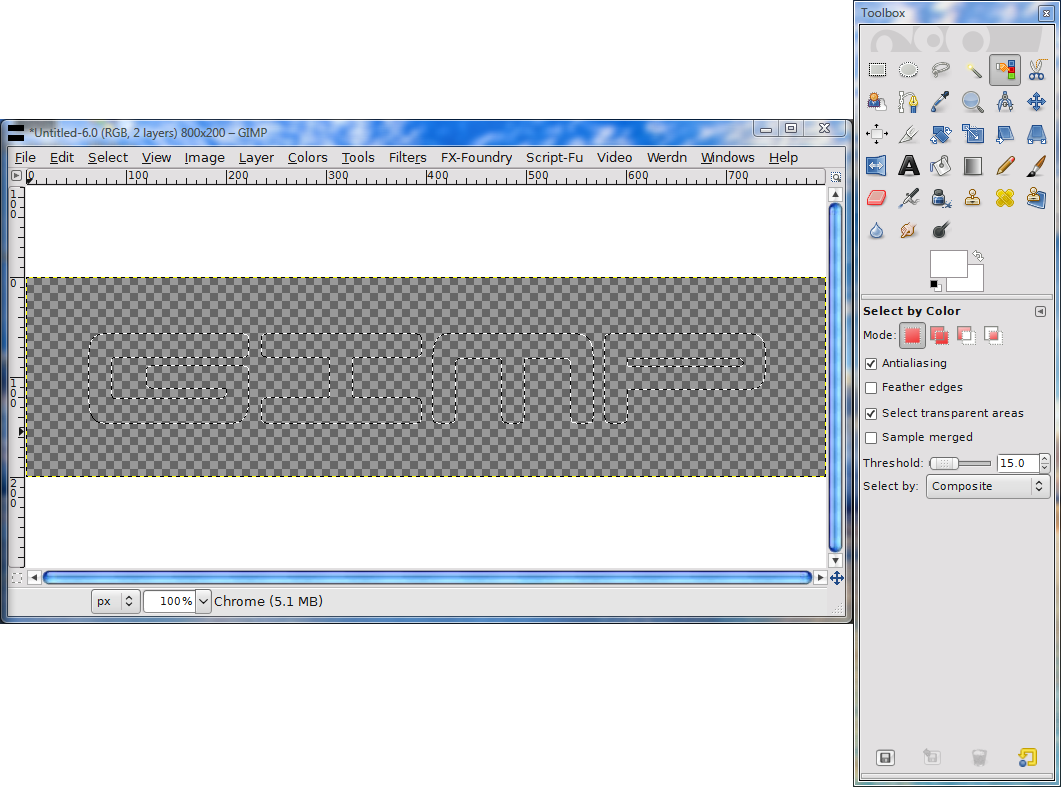
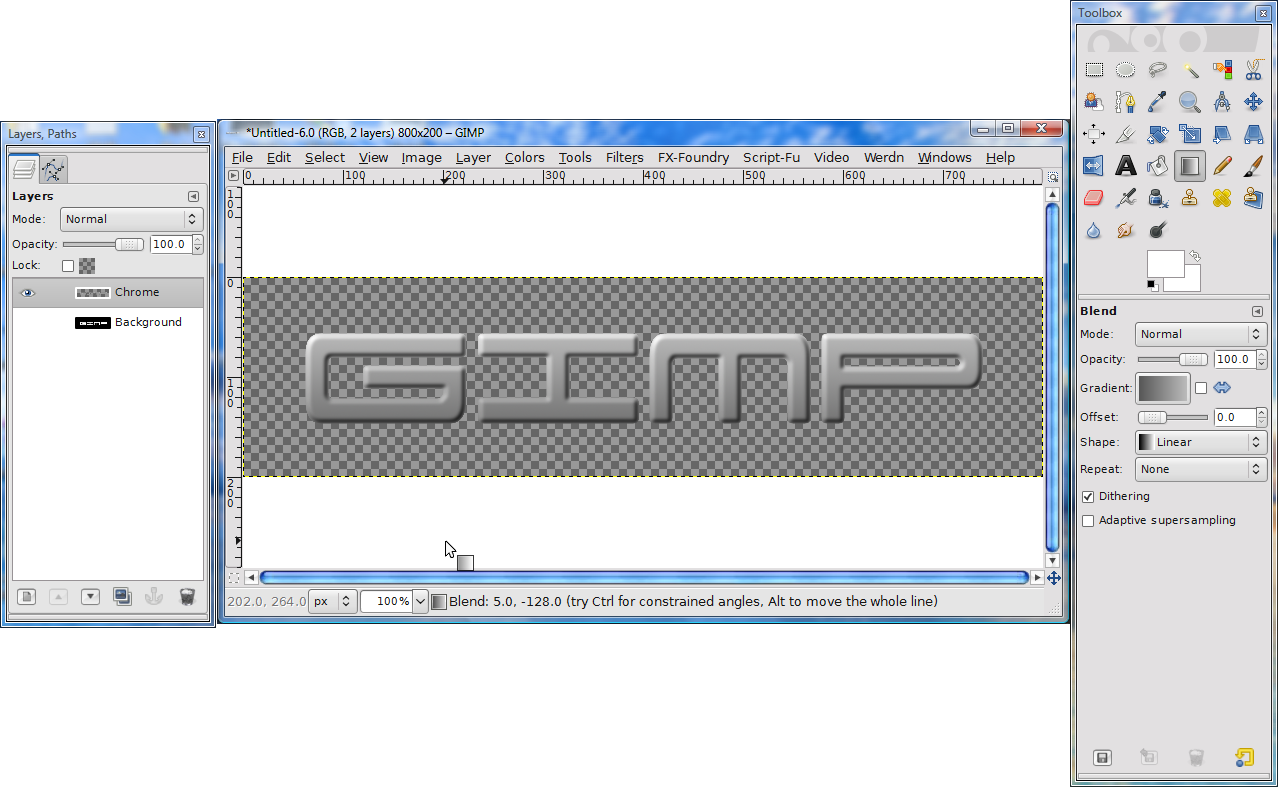
Go to Select>By Color, and click anywhere on the black. Select>Invert the selection, and add a new layer called " Chrome". Click on the eye on the background layer to hide it. Should now look like this:
Choose the custom CHROME gradient, that I'll put here for download. I made this gradient, but feel I made the darker section of the gradient a bit dark. Therefore, stroke the gradient from bottom to top, and start a bit below the selection, like so:
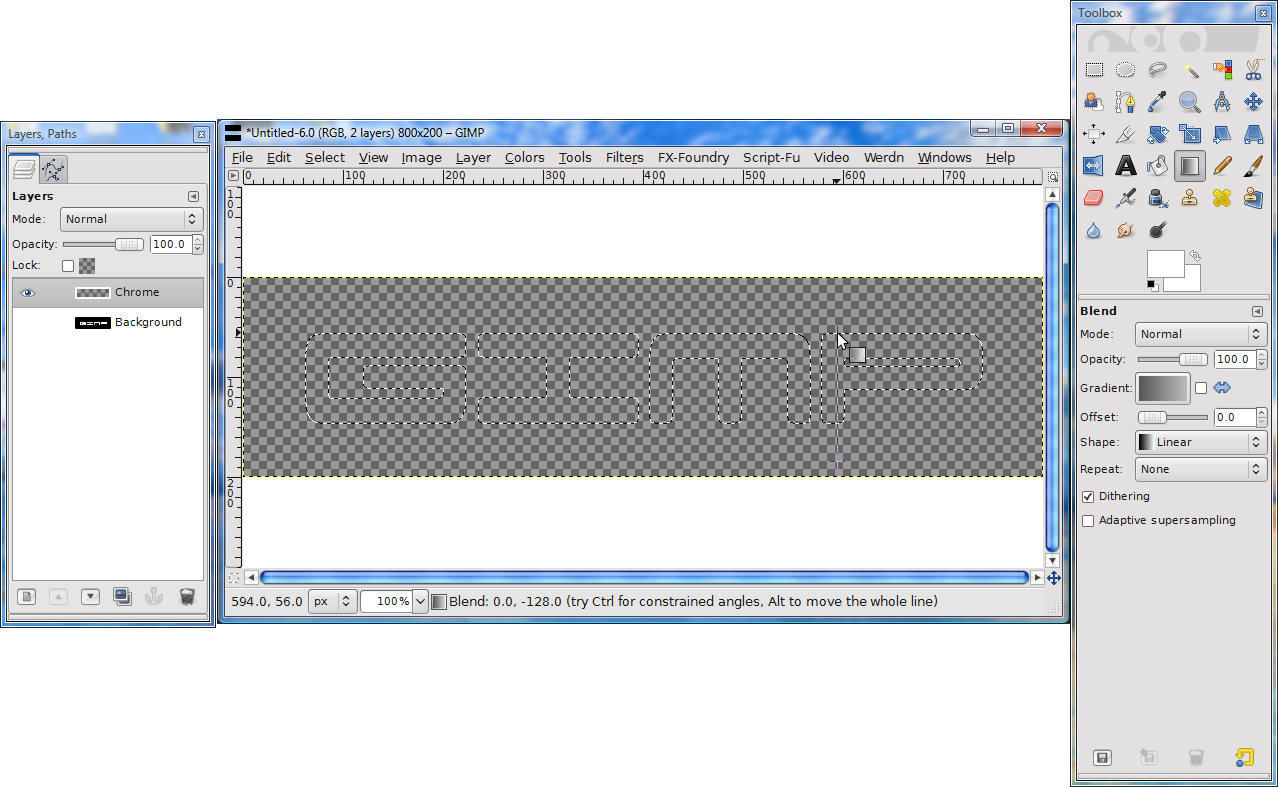
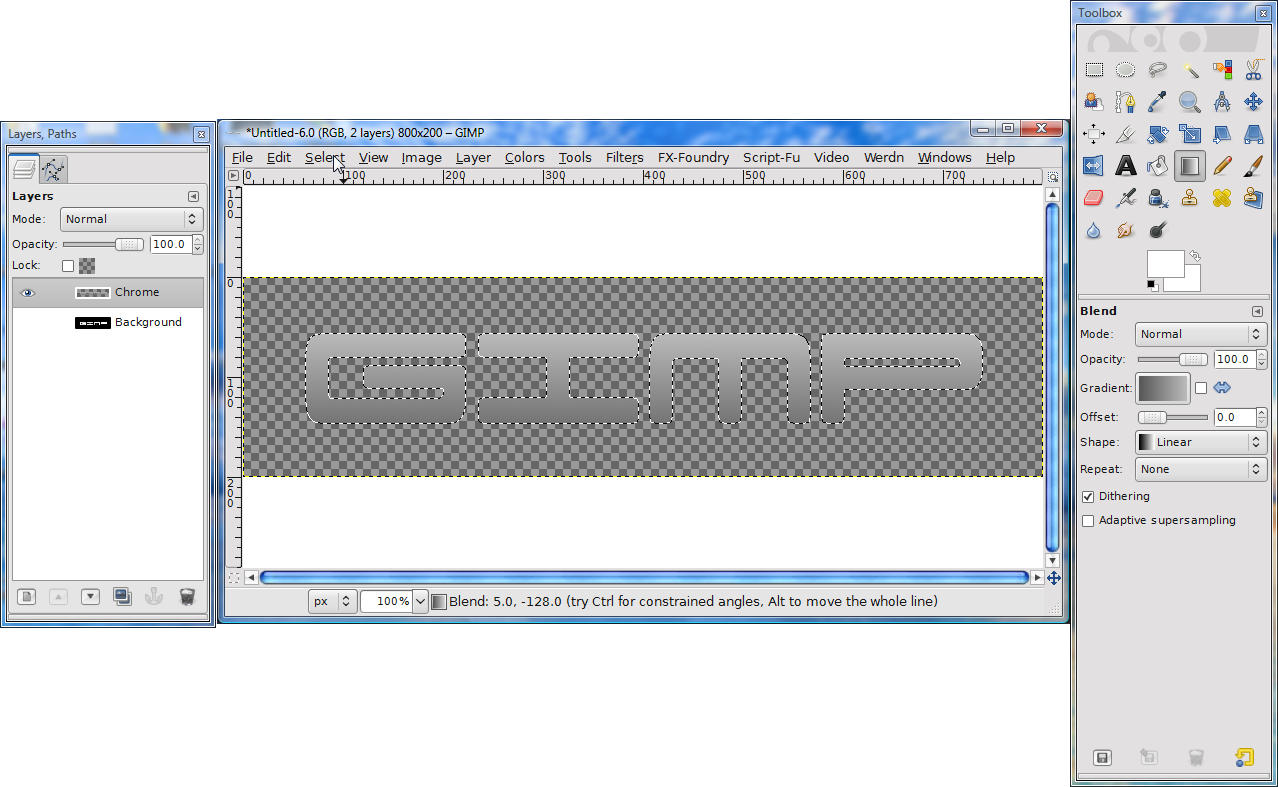
Should now look like this:
Hit Select>None. Go to Filters>Map>Bump Map. Select the background layer, and hit OK:
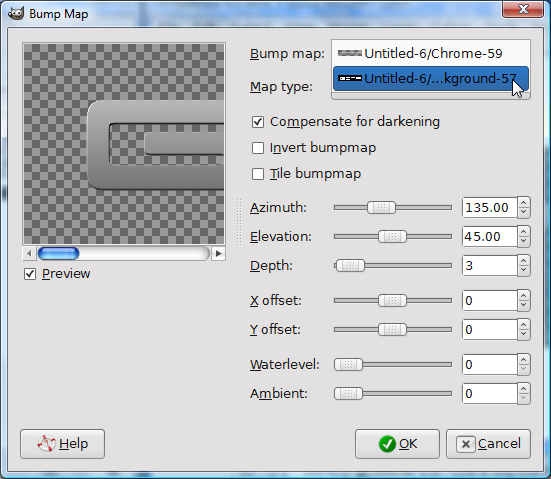
Should look like this:
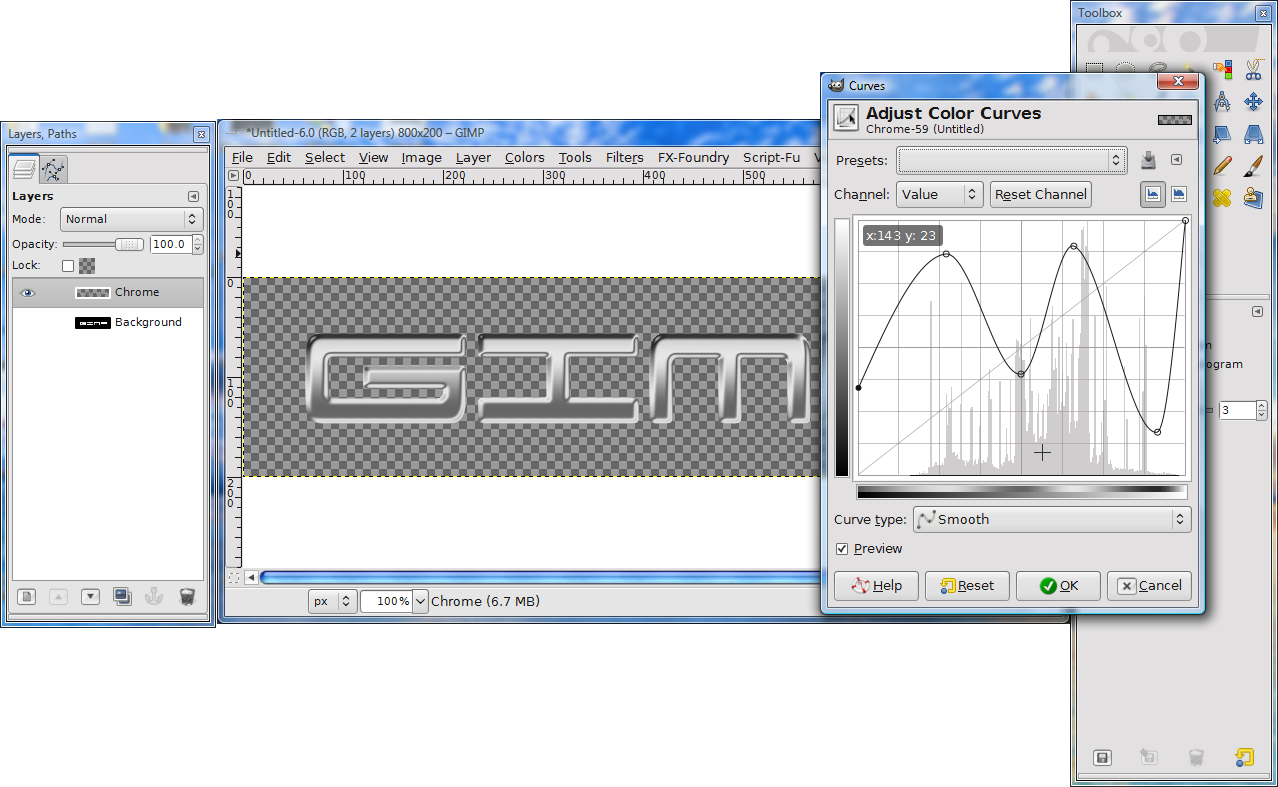
Go to Color>Curves, and adjust it to something like this, then hit OK. As you can see, the letters turn into chrome:
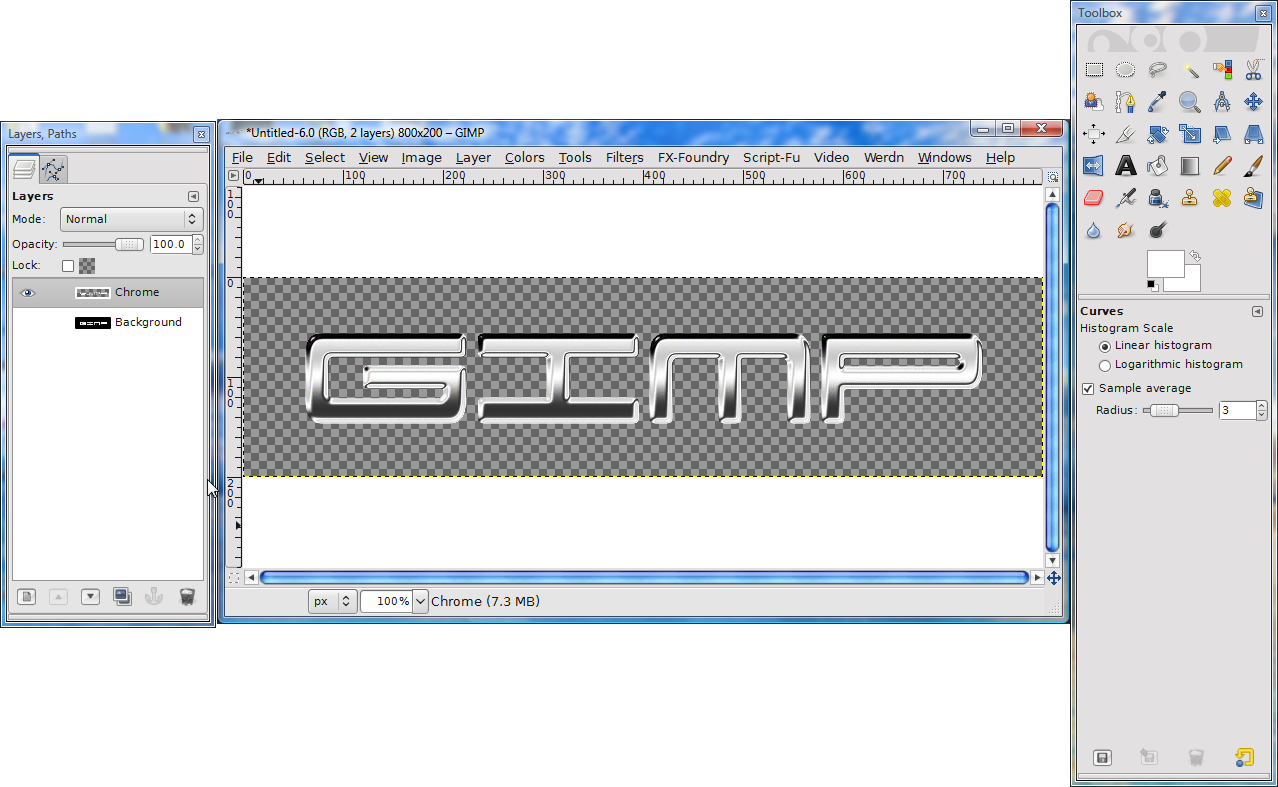
This is where the real "magic" begins. Go to Colors>Map>Alien Map, with stock settings, hit OK. The chrome will really shine up:
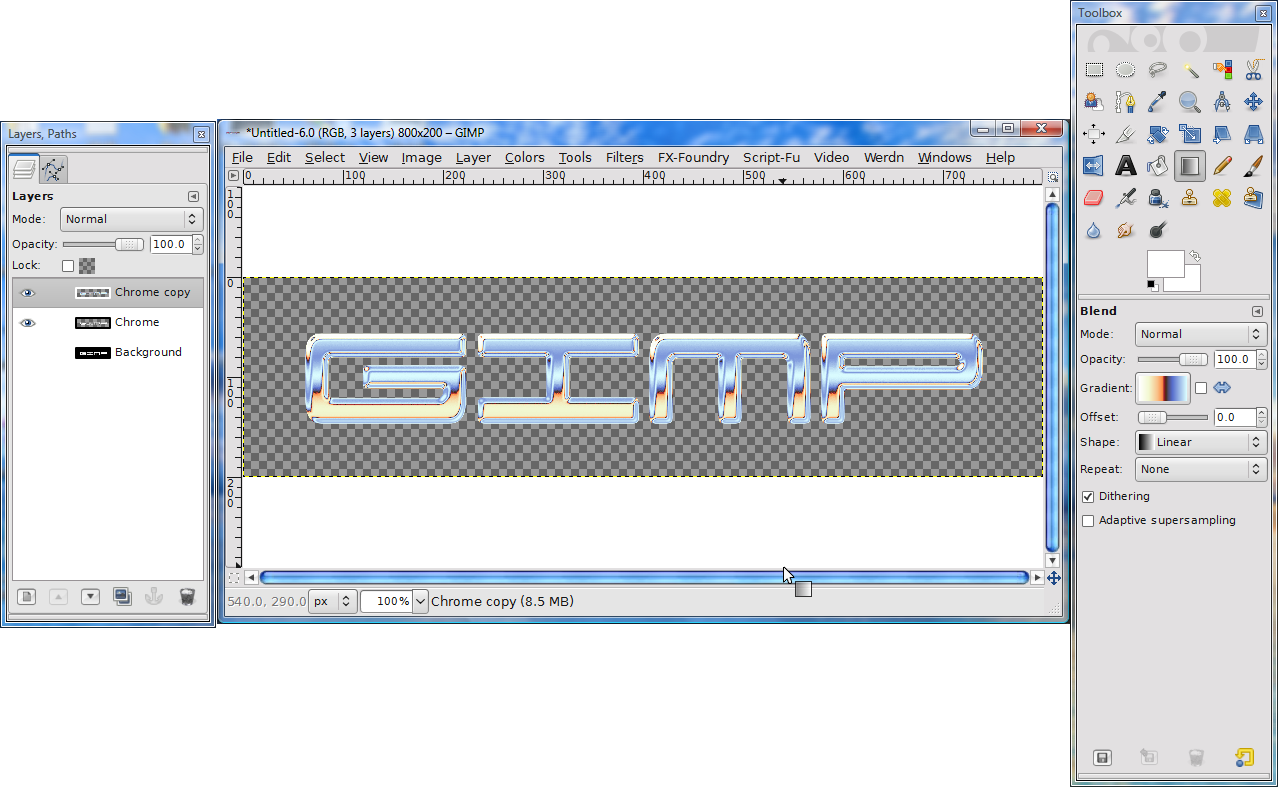
Duplicate the Chrome layer, and go to the blend tool, and select the gradient called, "Sunrise":
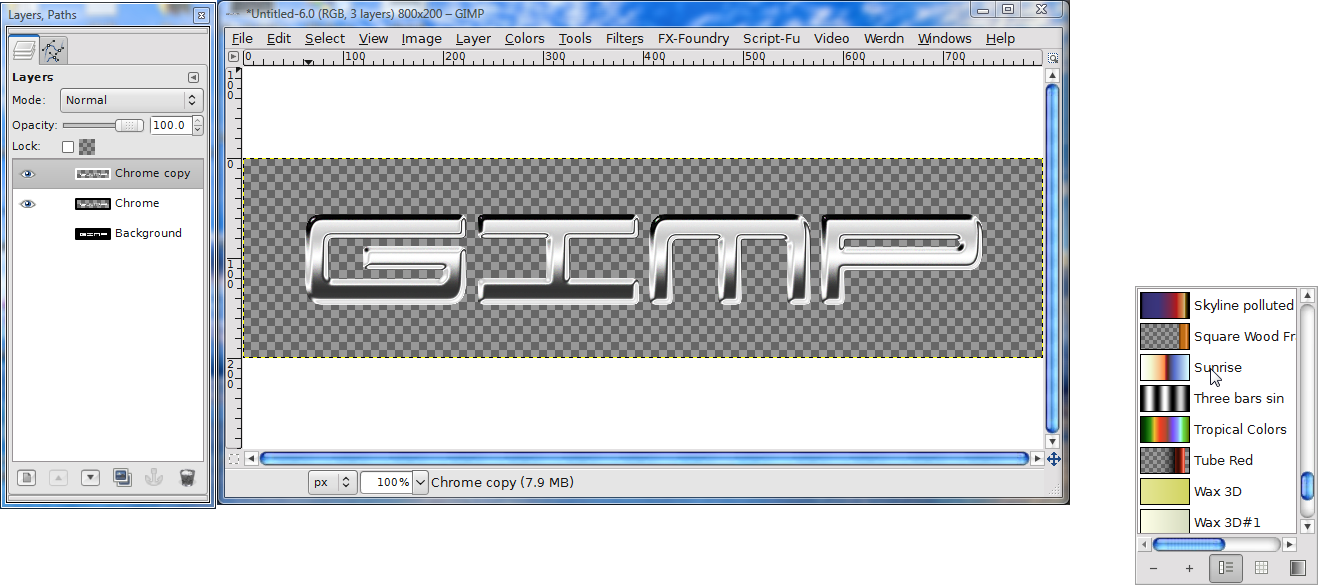
With the Chrome copy selected, go to Colors>Map>Gradient Map, and select it. Should look like this:
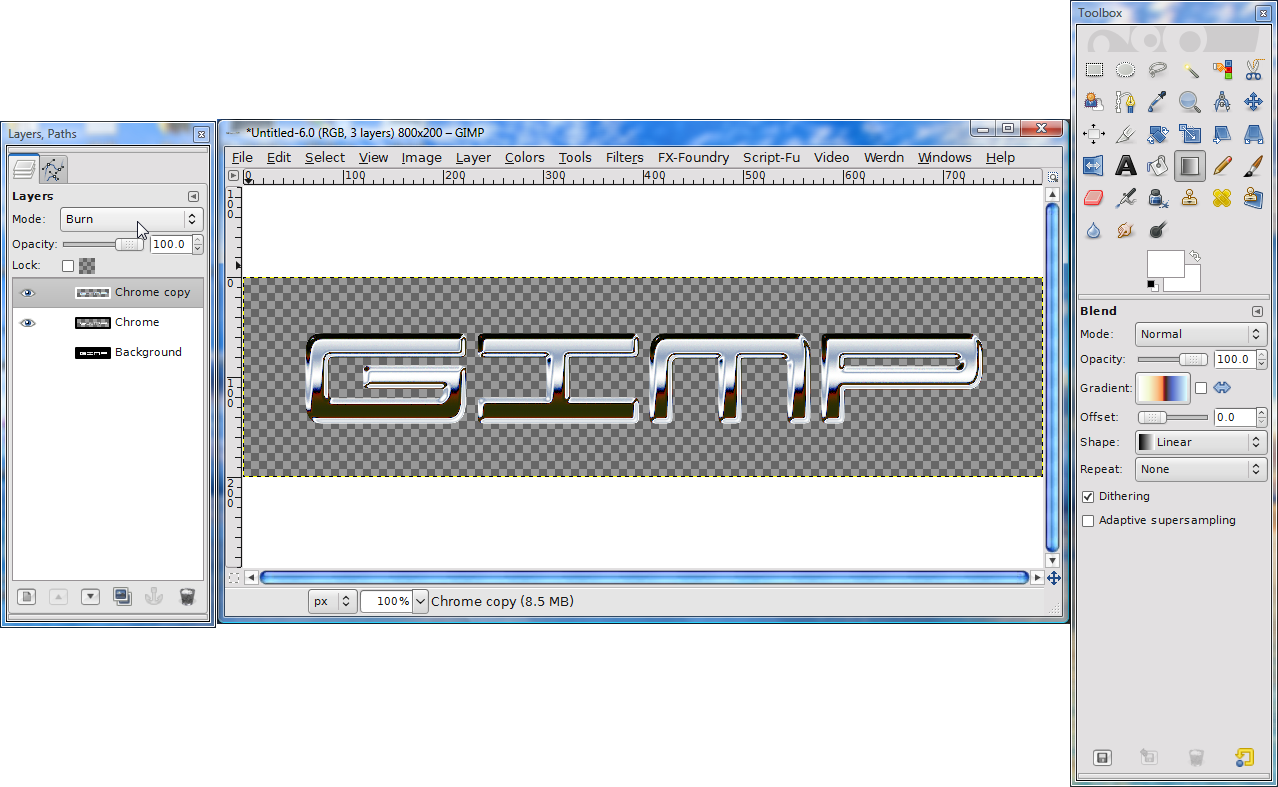
Set the mode on the layers dialog to "burn", and merge the 2 chrome layers. Looks like this:
Finally, alpha to selection the chrome layer, and add a drop shadow. In this case, I set the offsets to 3, and the blur radius to 10. Here's the final result! Thanks for looking.