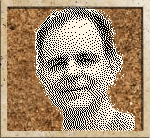
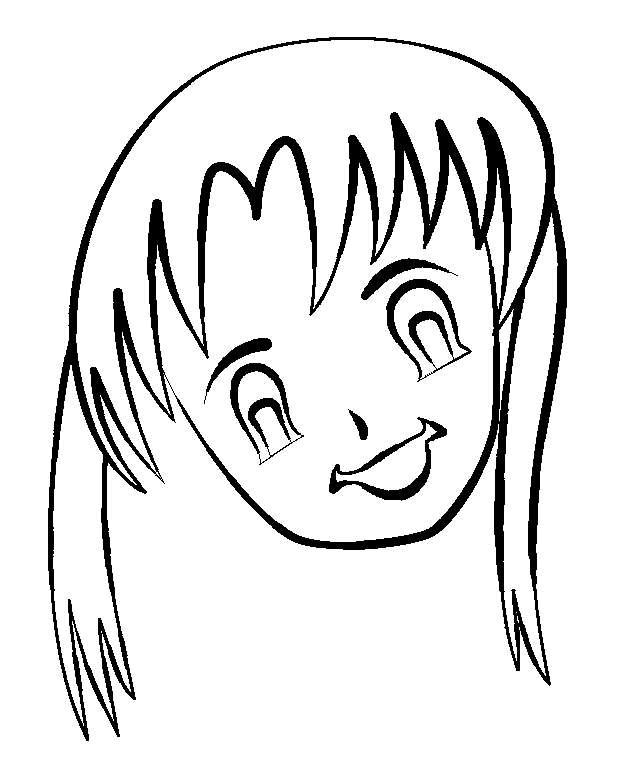
This is a unique way to turn path lines into various thickness lines instead of having to use a Digital Drawing Tablet with Pen Stylus. This is the type of image you can create with this technique.
Different resolutions will give you different results depending on your desired outcome. The image size I'm using is 678x731 which is a pretty small canvas size. You may want to find an image to trace, and resize it before beginning this process.
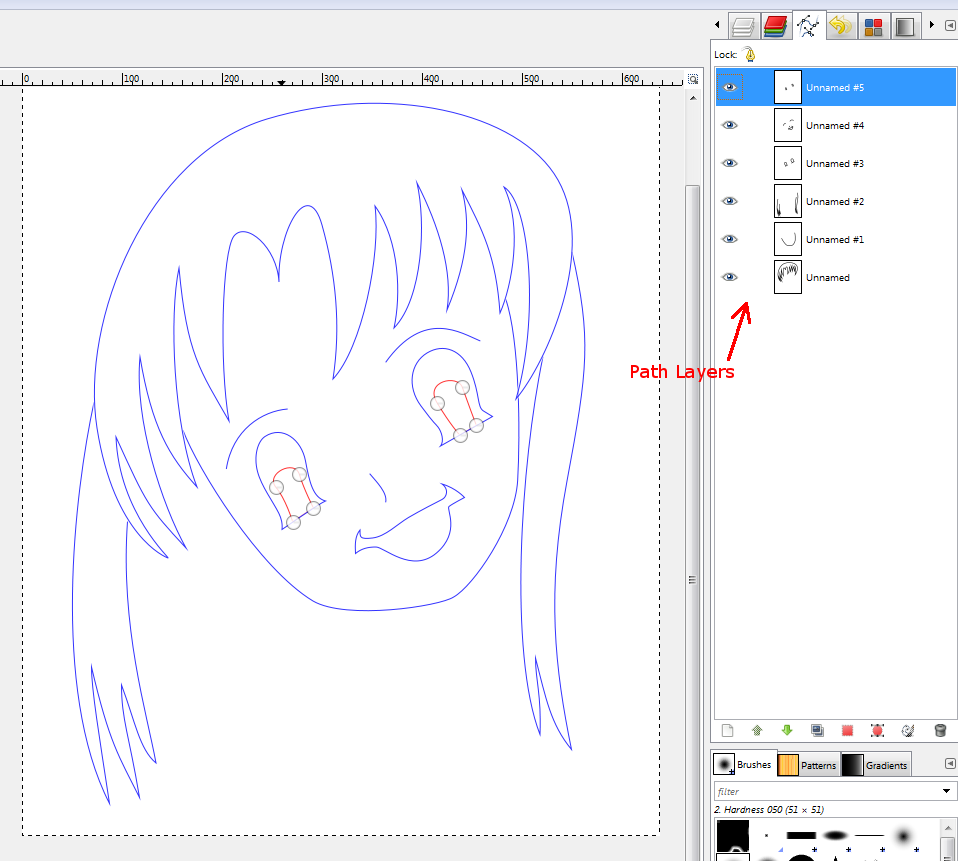
Begin by drawing out all your paths on seperate path layers. If you want unjoined paths to be on the same layer simply hold the shift key and unselect all the endpoints by right clicking them, and then begin a new path on the same layer by continuing on with the path tool. Here's an image that I had traced making several seperate path layers. Notice how I have all the paths turned on to visible by enabling the Eyeball for each Path layer.
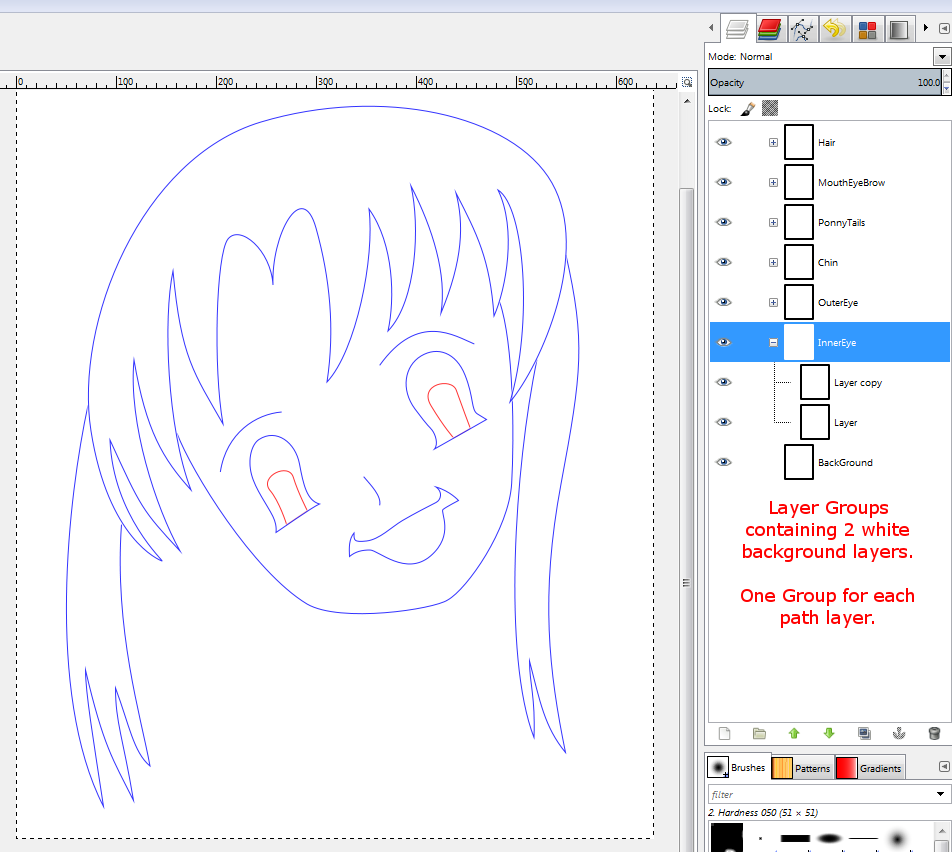
Now what you need to do is keep the white background layer, and make a LAYER GROUP above it by chooosing([Layer][New Layer Group]. The layer mode of this layer group needs to be set to [Darken Only].
And then put two white background canvas layers inside of the group by clicking ([Layer][New Layer]) while the layer group is active or selected. Then you need to change the layer mode of the top white layer to [Dodge].
Once you've created this layer group, duplicate it using ([Layer][Duplicate Layer]) until you have the same number of layer groups as you do path layers. I usually name them so that I can see what each one is going to contain.
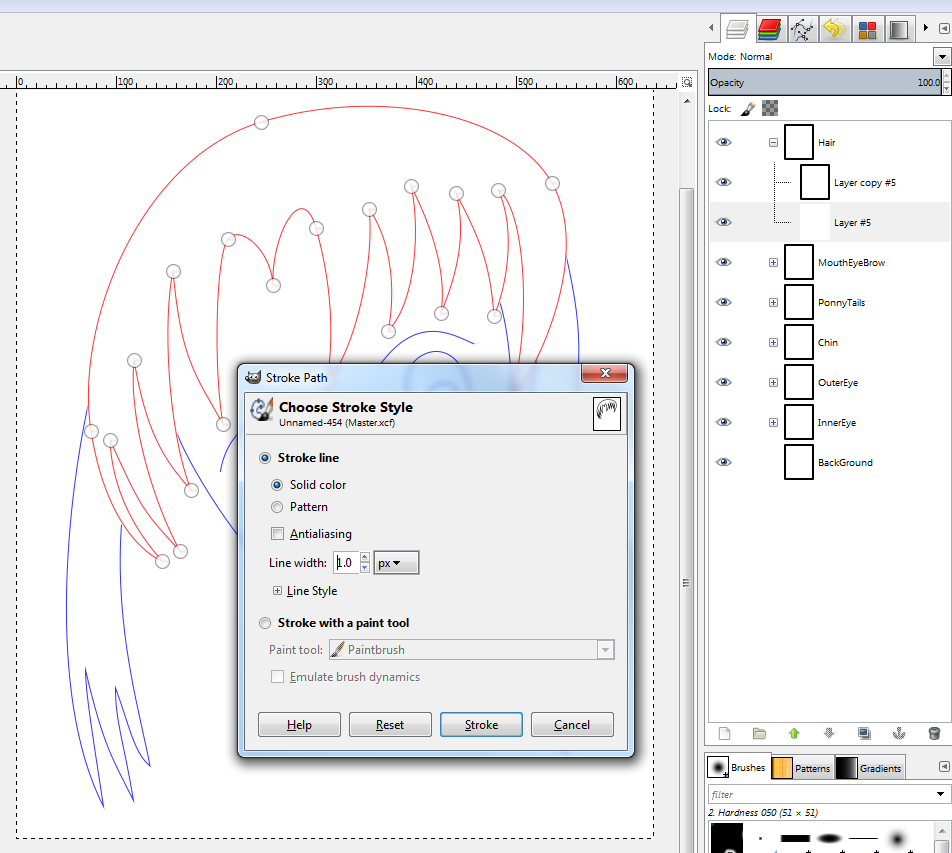
Now with the Paths Tool selected [Alt+Right Mouse click] a path on the canvas area to select it (Not the paths dockable dialog). Make sure you have black as the forground color. Then go to the bottom white layer of each layer group and perform an ([Edit][Stroke Path]) on it. In the Edit Stroke Path dialog box choose [Stroke Line][Solid Color][No Antialias] and a line width of [1.0 px]. This will create a line on the bottom layer of each layer group. Make sure that you perform this while you are on the layer that you wish to draw the line on.
Now you can turn off the visibility of the Path layers by holding Shift while right clicking a Paths Layer Eyeball.
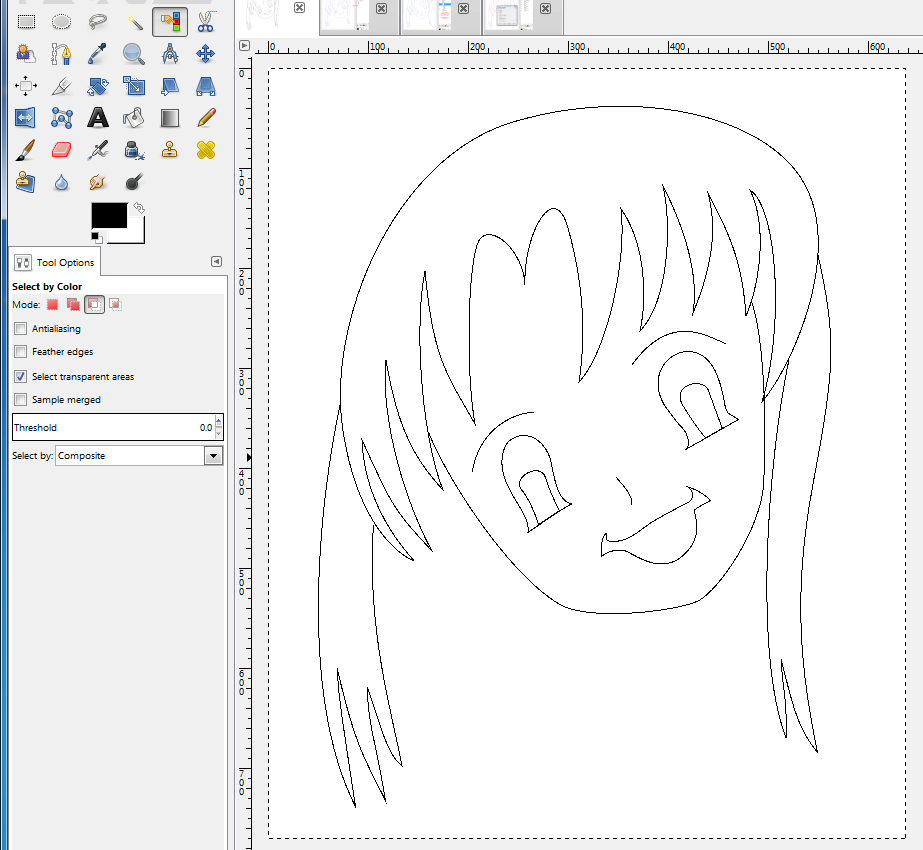
And then you have to revisit each of the bottom white layers of each layer group and make a selection of the black line using the Area Select Tool. You may want to zoom in for better selection accuracy.
With the black selected (on each of the bottom white layers), you need to do a ([Select][Border]) dialog box function on it with about 10 to 15 as the amount, and have the [Feather Border] check box checked. Follow this action by immediately Filling the selection on the choosen layer with a forground color of black ([Edit][fill with FG Color]).

You won't immediately see any changes to the layer. Now (after UNSELECTING THE CURRENT SELECTION), either draw on the Dodge layer above it in the stacking order using a black airbrush, or creating a linear black to white gradient using the Gradient Tool. Experiment with these two brushes until you get the thickness that you want for each line segment on each of the layer groups.
You can also draw to make lines thinner using the white forground color on the airbrush tool.
Sometimes if you're using the gradient tool you can adjust the line thickness using the curves or levels dialog box.
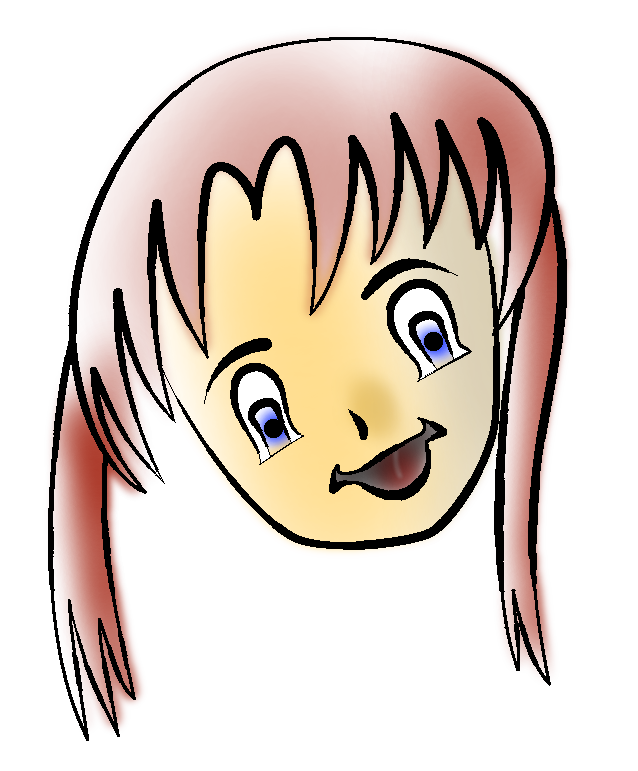
This is what I've come up with for this image.
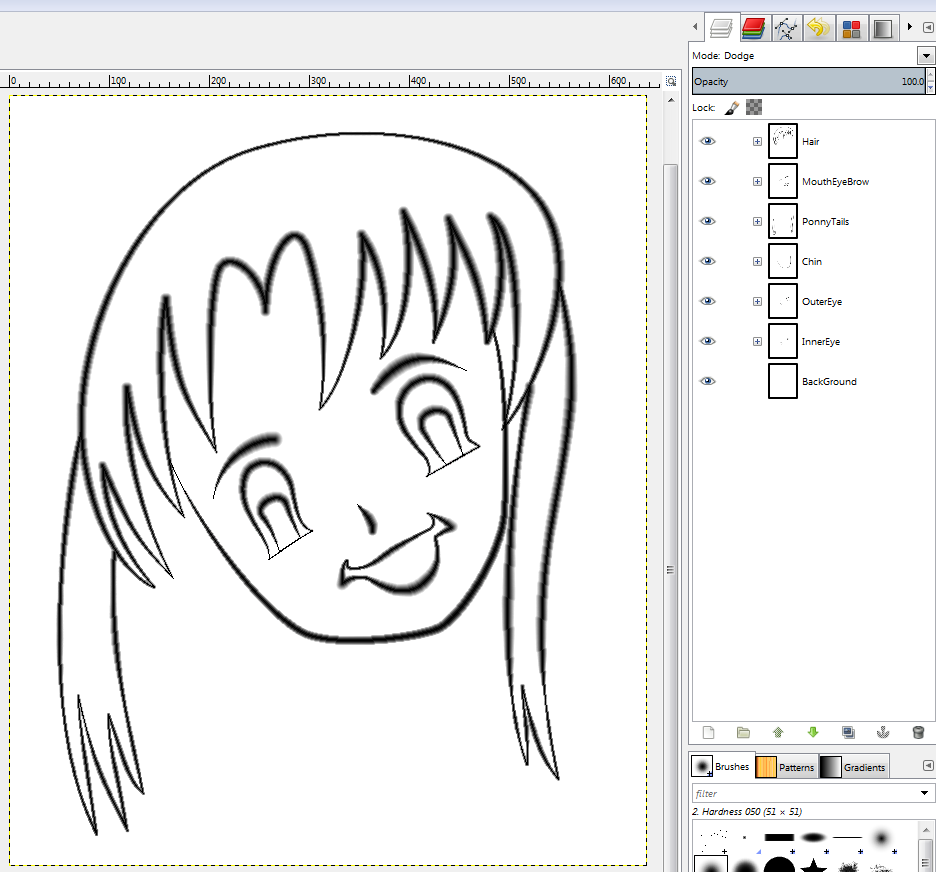
And for the final step you simply create a new layer using the ([Layer][New From Visible]). This layer will be created above the currently highlighted layer in the dockable dialog, but what you will have to do is drag it to the top of the highest layer group. Then just use the ([Color][Threshold]) on it, dragging the slider back and forth until you get the line thickness that you want.
From here you can colorize it or whatever you want.
PeggLeg