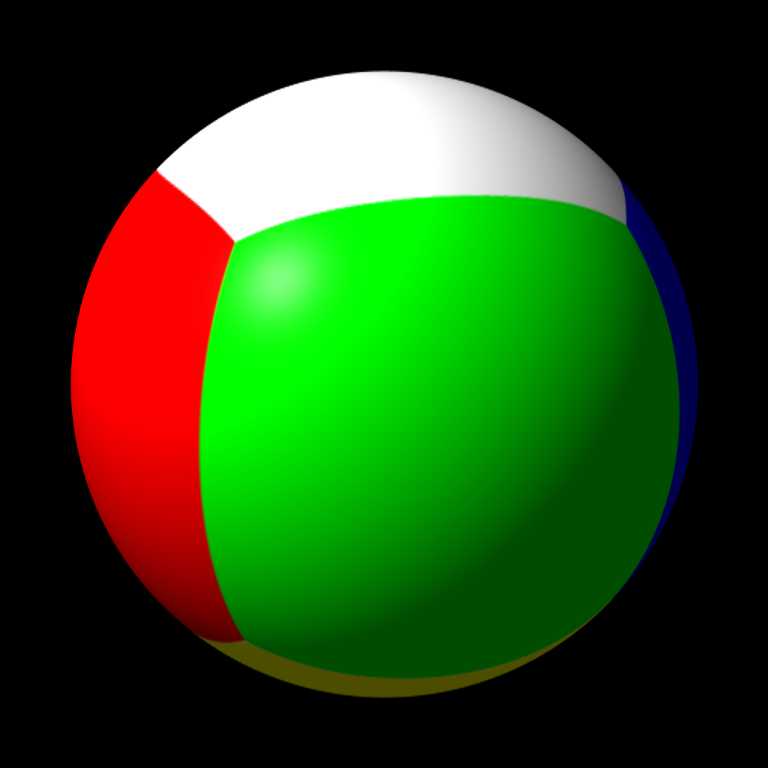
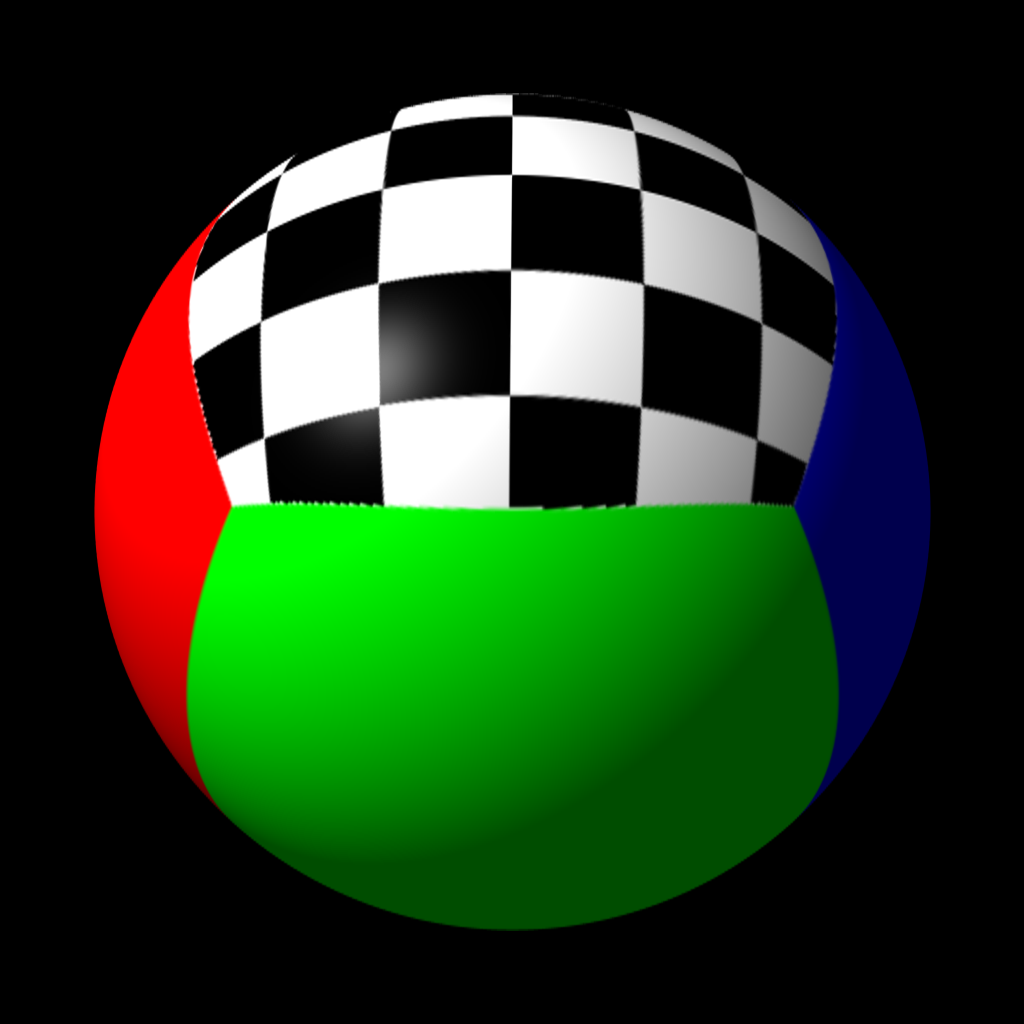
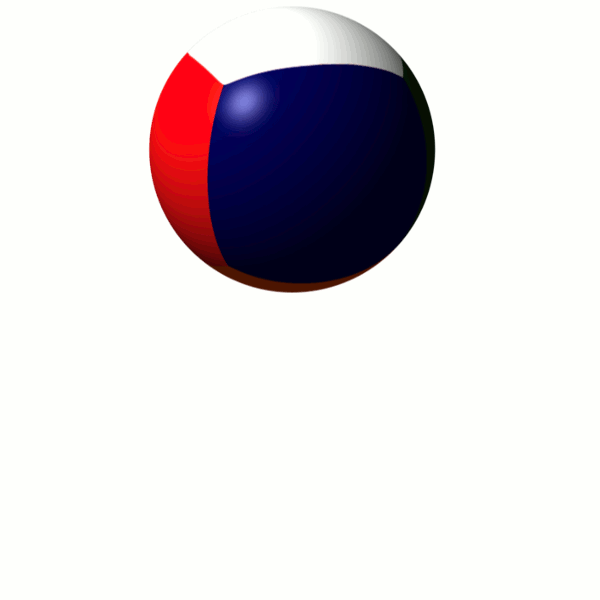
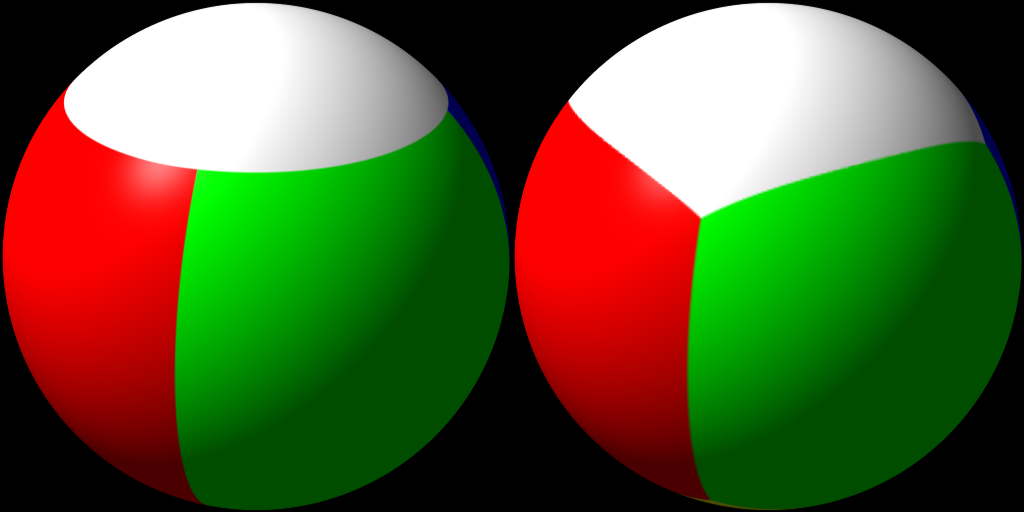
When you normally map to a sphere in gimp you get a pinching effect at the north/south axis (See Left Image), I have been internet searching and playing with gimp to try and get the faces to map evenly (See Right Image).
This tutorial will hopefully explain how I achieved the right side image and be a spring board for improvements of being able to map patterns and photo to a sphere without as much distortion.
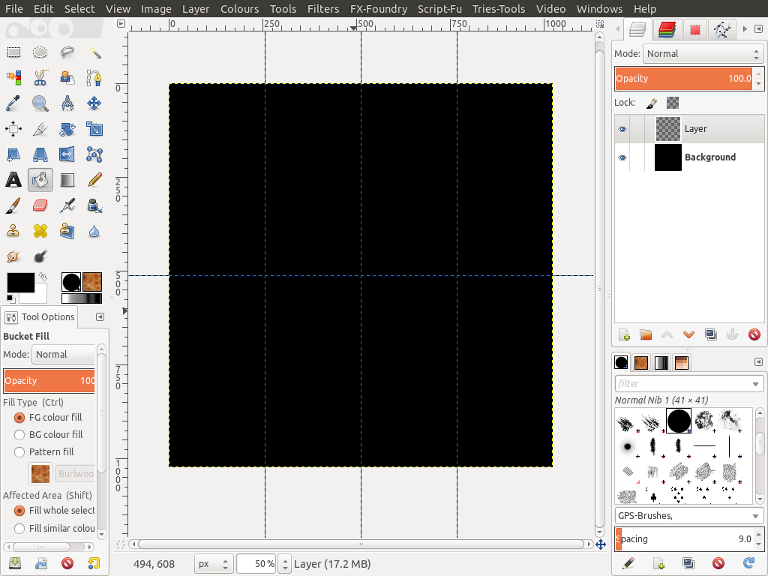
1. Open Gimp and create a new image 1024px * 1024px and fill with Black.
2. Go Images>Guides>New Guides and add a Horizontal Guide at 512px and Vertical Guides at 256,512,768px. Go View and makes sure "Show Guides", "Snap To Guide" and "Snap To Canvas Edge" are ticked.
3. Go Layer>New Layer makes sure "Transparency" is checked and click O.K.
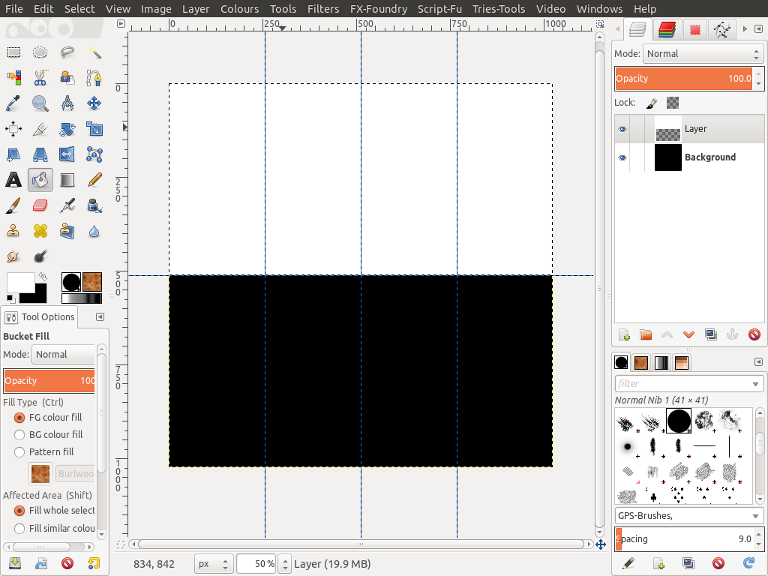
4. From Toolbox choose the "Rectangle Select" tool

and draw a selection across the top half of the image and fill with white.
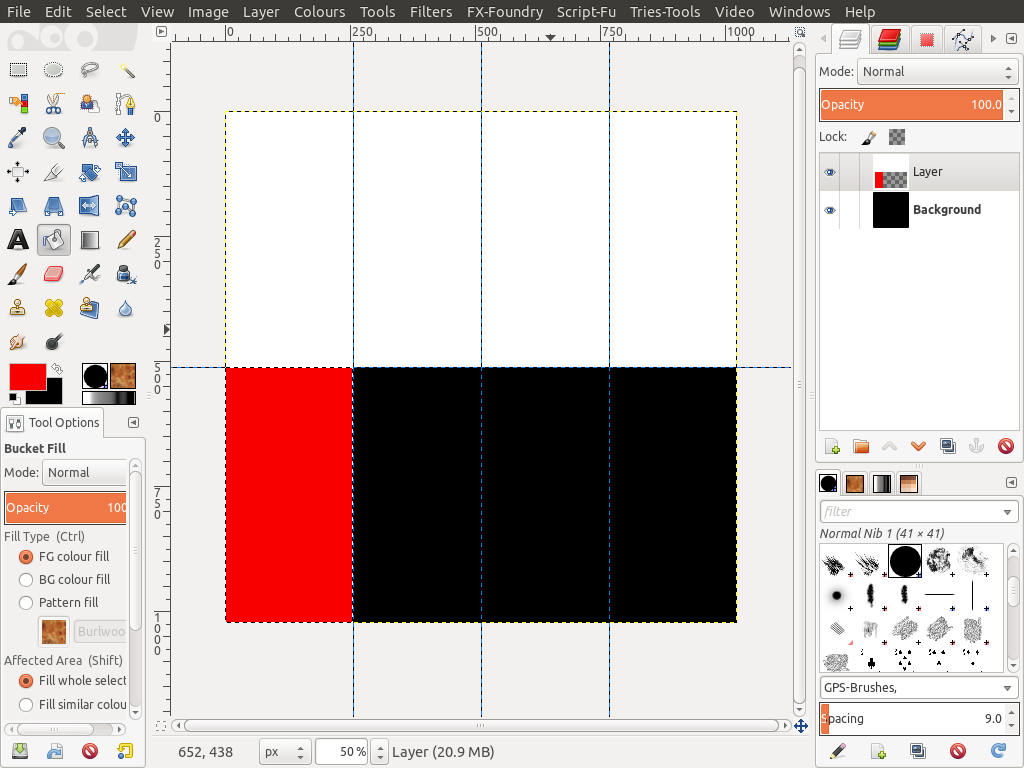
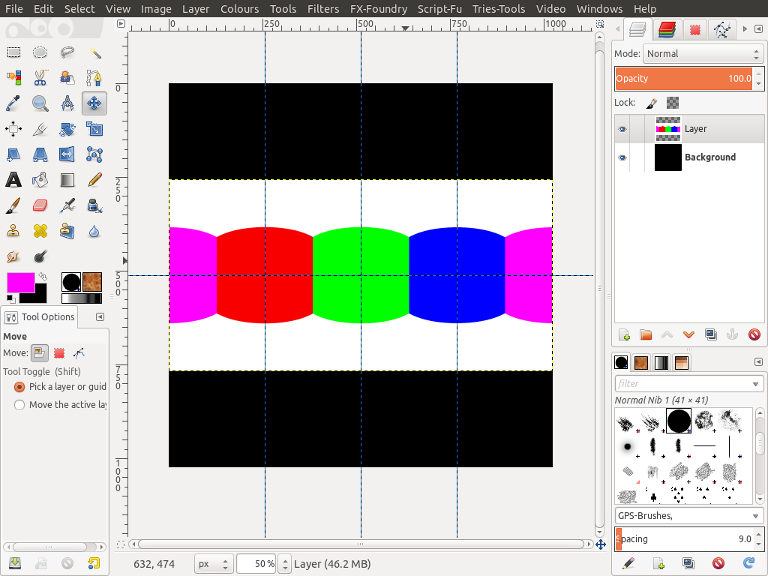
5. Still with the "Rectangle Select" tool draw a selection across the first bottom quarter of the image and fill with red.
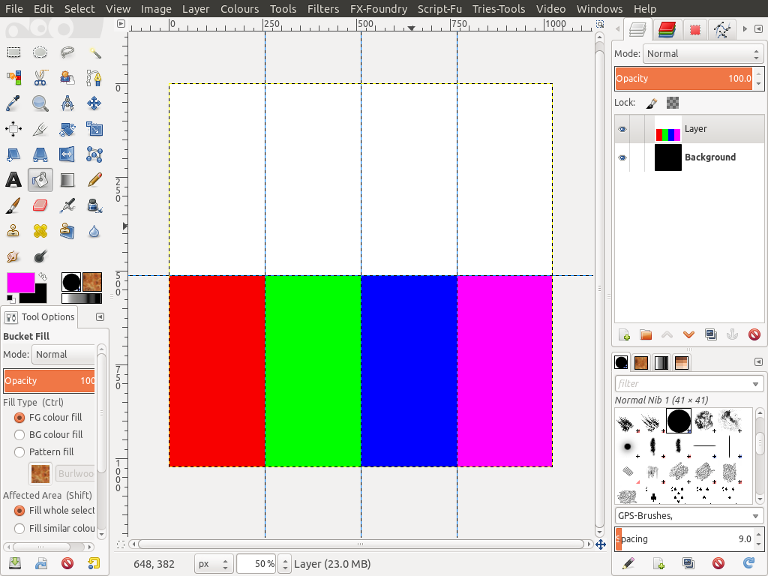
6. Still using the "Rectangle Select" tool work across the image filling each bottom quarter with a different colour, I used Red, Green, Blue and Pink although it doesn't really matter. Once finished Go>Select>None to get rid of the selection. You should be looking similar to the image below.
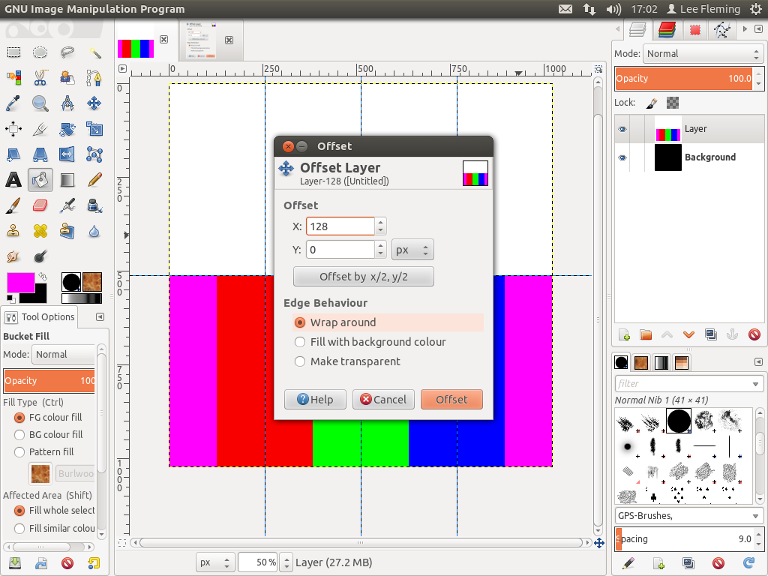
7. Go>Layer>Transform>Offset and set X to 128 and check "Wrap Around" then click offset.
8. Go>Filters>Distort>Polar Coordinates and set "Circle Depth In Percentage" to 50, Also check "Map From Top" and "To Polar".

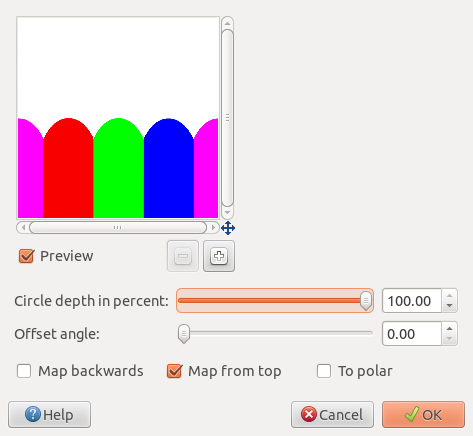
9. Go>Filters>Distort>Polar Coordinates and set "Circle Depth In Percentage" to 100, Also check "Map From Top" and uncheck "To Polar".
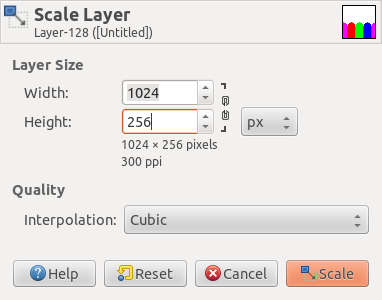
10. Go>Layer>Scale Layer and unlock the chain link and change "Height" to 256px (This is our original Height divided by 4) and click Scale.
11.From the Toolbox choose the "Move" tool

and position the bottom of your layer onto the middle horizontal guide making sure you keep layer central.
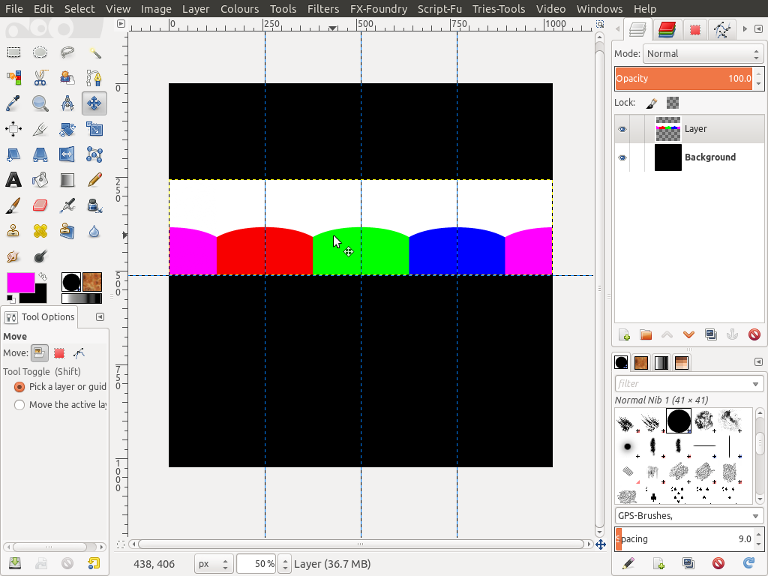
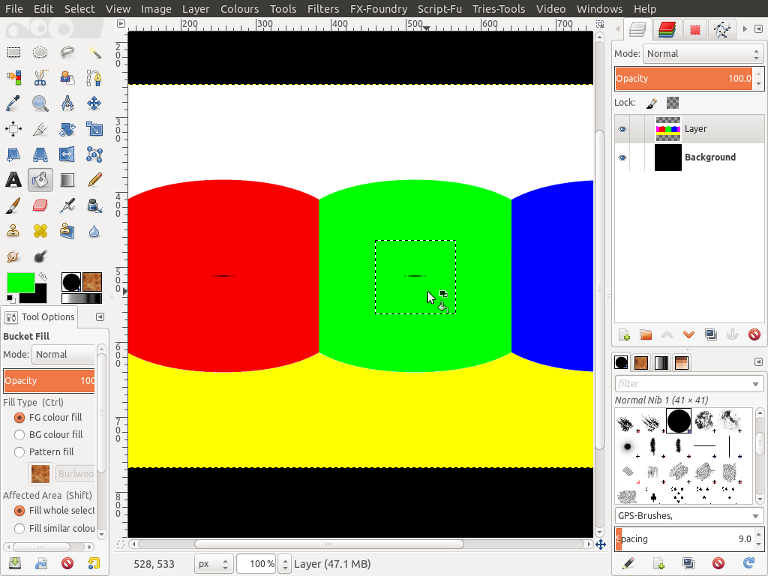
12. Go Layer>Duplicate Layer then Layer>Transform>Flip Vertically, then using the "Move" tool, Position the top of your layer onto the middle horizontal guide making sure you keep layer central. Then Go>Layer>Merge Down. You should be looking similar to the image below.
13. The next part is purely cosmetic but if you Go>View and untick show guides, then Zoom into the image you will see that across the middle line where the two images where joined there are some artefacts left behind from the polar mapping. I basically created a Rectangle selection around these parts an filled with the appropriate colour. I also used the "Fuzzy Select" tool

to select the bottom white section and changed the colour to yellow.
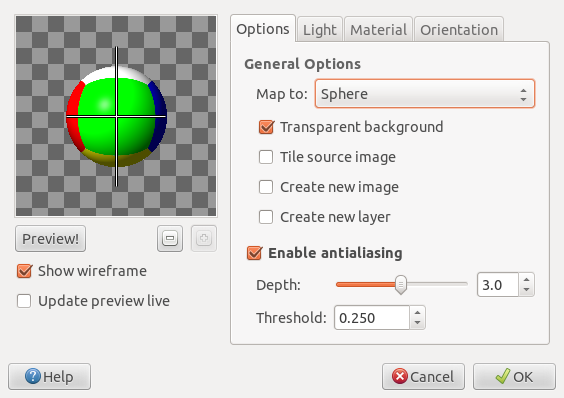
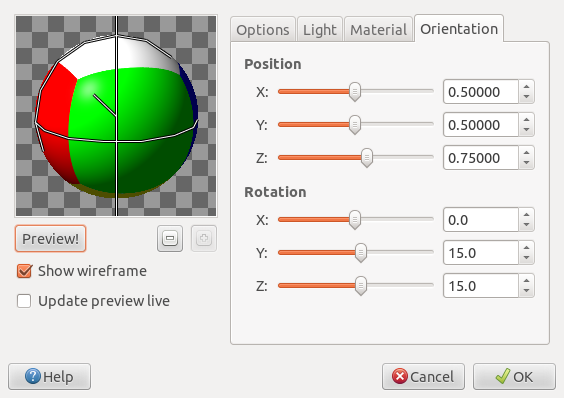
14. Time to Map the Sphere, Go>Filters>Map>Map Object, the only tabs we are concerned with is the "Options" and "Orientation". Under the "Options" tab set "Map To" to Sphere and check "Transparent Background". Under the "Orientation" tab set the "Position" value Z to 0.75000 and under "Rotation" change Y and Z to 15, But do have a play with these settings to see the sphere map in full.
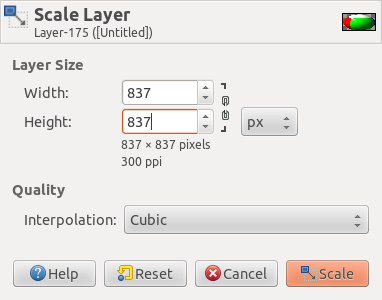
15. Now you've probably noticed that our sphere is very elongated, don't worry. Go>Layer>AutoCrop then Go>Layer>Scale Layer and unlock the chain link and change "Height" to 837px (This should be the same dimension as the width), Then click "Scale".
16. That's our Sphere Cube finished.