It is currently Fri Apr 19, 2024 8:24 pm


All times are UTC - 5 hours [ DST ]


Post new topic Reply to topic  [ 16 posts ] 
Author Message
 Post subject: Nic Nac Text Effect
PostPosted: Sat Nov 30, 2013 5:09 am  (#1) 
Offline
GimpChat Member
User avatar

Joined: Aug 30, 2012
Posts: 2174
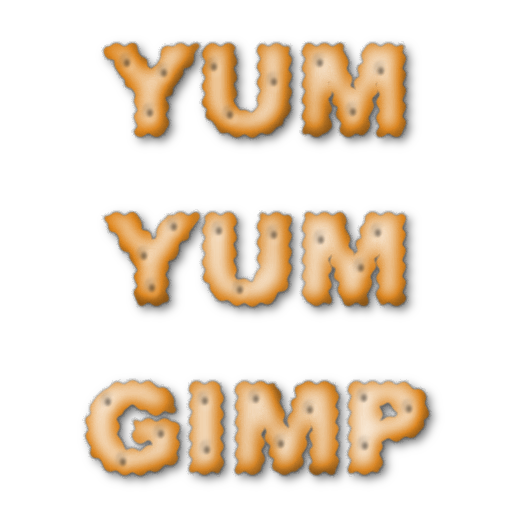
After reading about the request in this thread, I decided I'd have a go at trying to make my own "Nic Nac" text from scratch, Its not perfect but does a reasonable job I think and worth sharing how the effect was achieved.

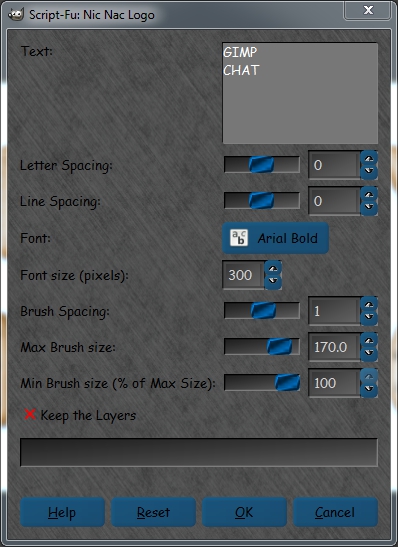
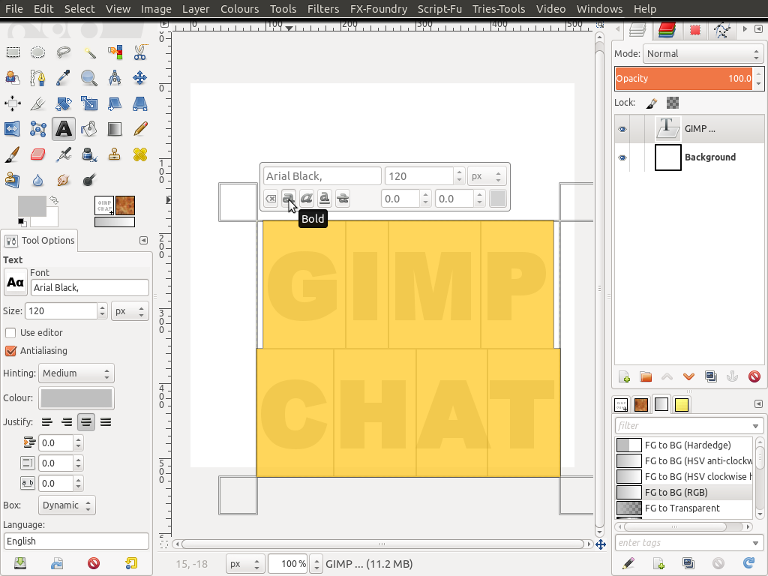
1. Open Gimp and create a new image 512px * 512Px and fill image with white. Change your foreground colour to light grey "bfbfbf" and select the Text tool :text.
2. Select the font "Arial Black" and set size to 120px, Click anywhere on your layer to activate text box and enter your text(I have used capital letters only), Then highlight your text just as you would in any word document and click the bold icon.

Image

3. Go Layer>Autocrop Layer and select the Move tool :move and position your text roughly in the centre of your canvas then go Layer>Layer to Image Size.
4. Go Filters>Distort>Ripple and use the settings shown below

Image

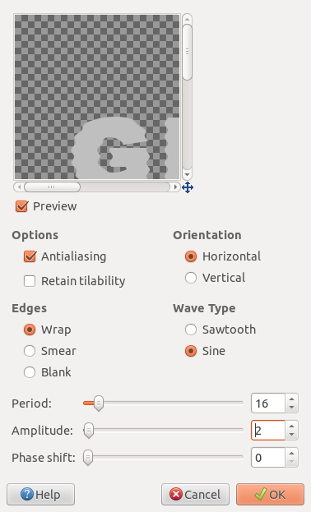
5. Go Filters>Distort>Ripple but this time change the "Orientation" to vertical.
6. Go Filters>Blur>Gaussian Blur and set Horizontal and Vertical to 5 and click OK.
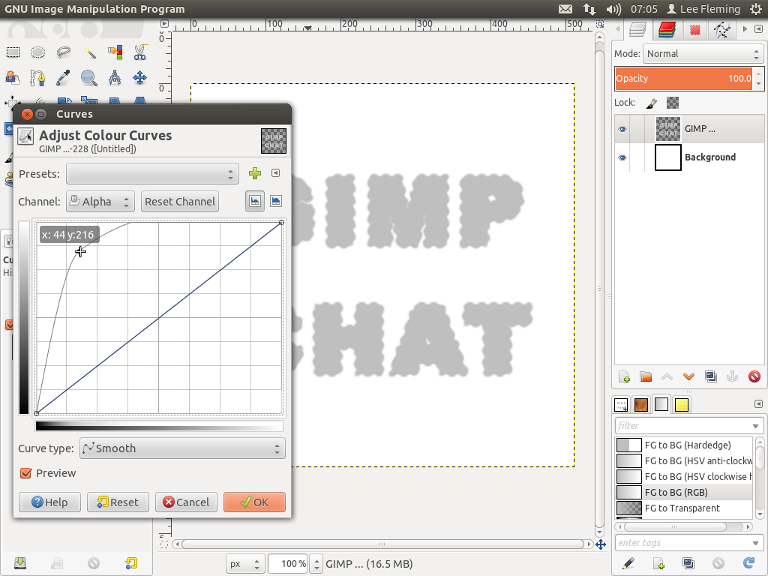
7. Go Colour>Curves and change "Channel" to alpha, then click and hold the middle of the diagonal line then drag curve upwards until the X value reads 44.

Image

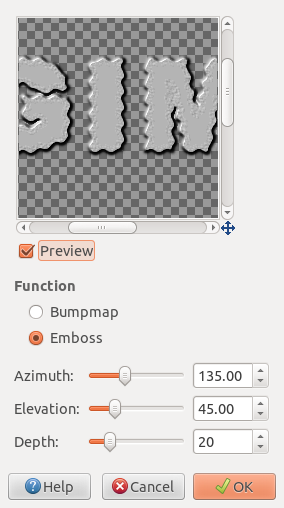
8. Go Layer>Duplicate Layer and select your duplicated layer, then Go>Filters>Distort>Emboss and use the settings below.

Image

9. Go Filters>Blur>Gaussian Blur and change Horizontal and Vertical to 25 and click OK. Then change Layer Mode to "Grain Merge"

Image

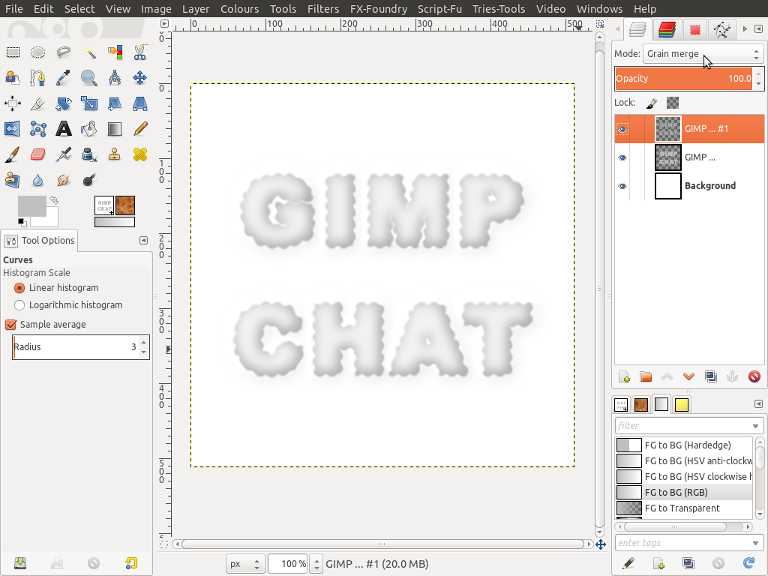
10. Select your original Text layer(Should be the middle layer of the three) and Go>Layer>Transparency>Alpha to Selection, then Go>Select>Invert.
11. Select your top Layer and Go>Edit>Clear, then Go>Layer>Merge Down.
12. Duplicate your Text Layer Twice and change the top two Layer Modes to Multiply.

Image

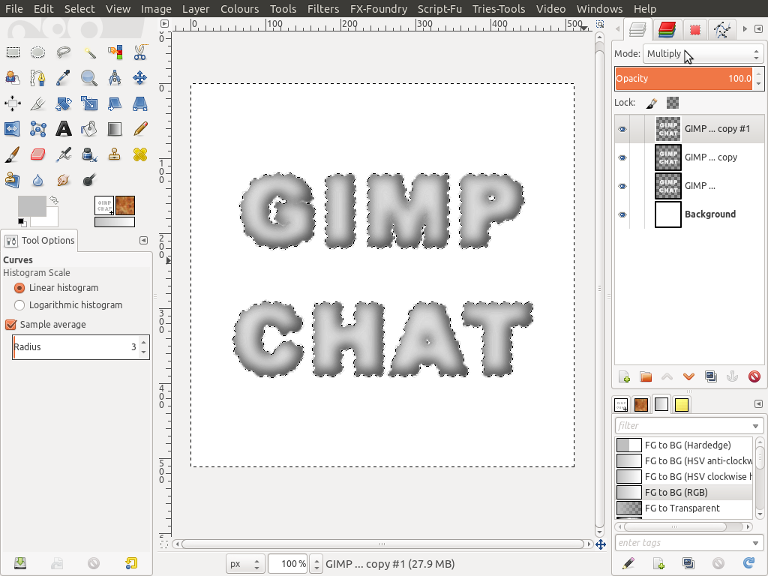
13. Go select>Invert, then Go>Layer>New Layer and create a new transparent layer, select this layer.
14. Go>Filters>Render>Clouds>Solid Noise and run on default settings. Change Layer Mode to Overlay and Reduce Opacity to 75.

Image

15. Go>Layer>New Layer and create a new transparent layer and fill selection with the colour e7c399, Change Layer Mode to Colour, Then Go>Select>None.

Image

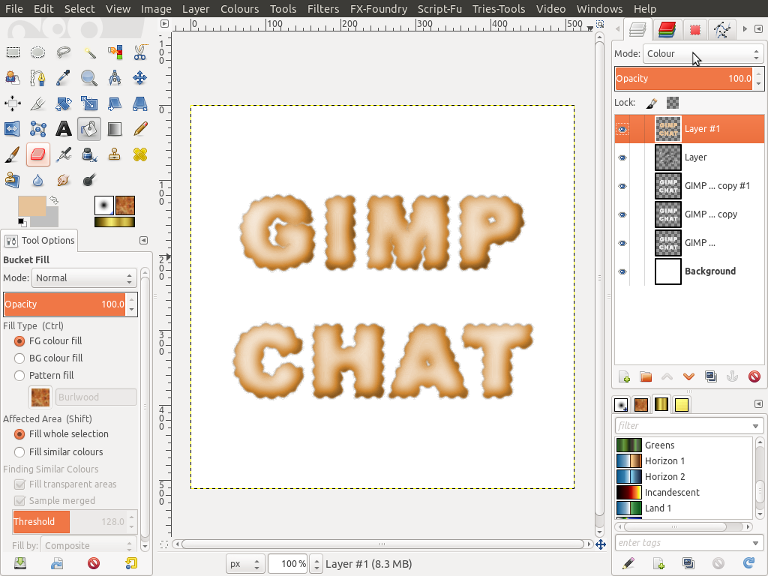
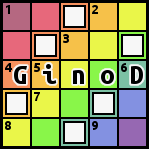
You should be looking similar to the above image, Now we are going to create a brush so we can add the dough prick marks.

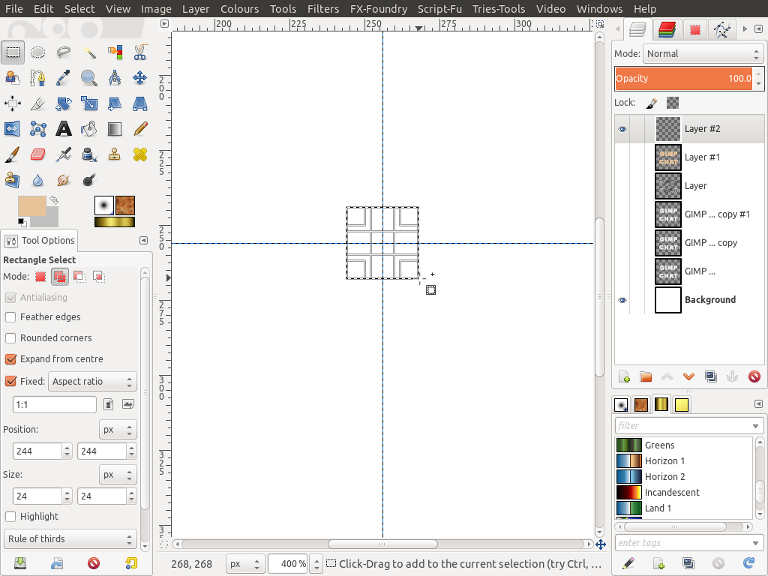
16. Turn off all layers apart from your white Background layer and add two new guides one horizontal and One Vertical position doesn't overly matter so long as they are somewhere in the middle of your layer.

17. Go>Layer>New Layer, then select the rectangle select tool :rectsel and check the option "expand from centre" then from your guide cross draw a selection until both size values equal 24. I have increased zoom to 400% just to make it easier visually.

Image

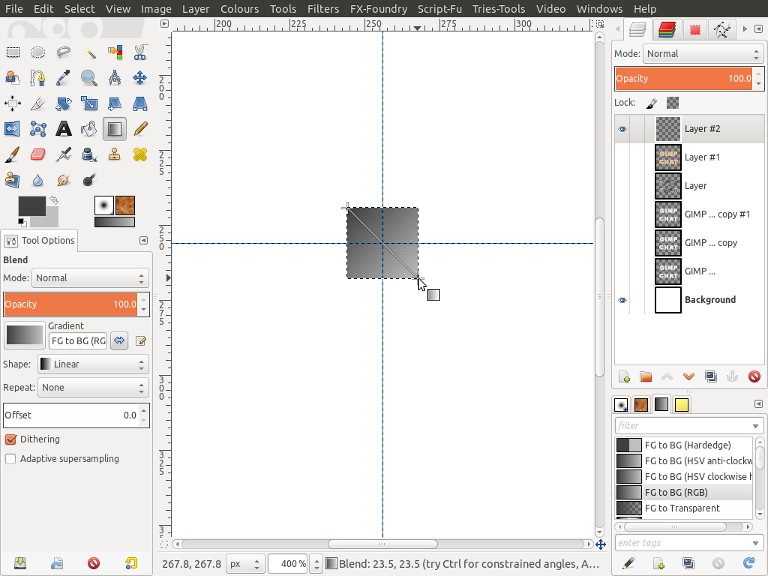
18. Make sure your Background Colour is set to bfbfbf and your Foreground Colour is set to 404040, then select the Blend tool :blend and make sure gradient select is Fg to Bg (RGB) and shape is set to "Linear" then Blend from Top left corner of your selection to Bottom Right Corner.

Image

19. Go>Select>None, Select the Crop Tool :crop check the options "Current Layer Only" and "expand from centre" then from your guide cross draw a selection until size are 18 and 24 then Click inside box to crop layer.

Image

20. Go>Layer>Layer to Image Size then Go>Blur>Gaussian Blur and set Horizontal and Vertical to 5 and click Ok.
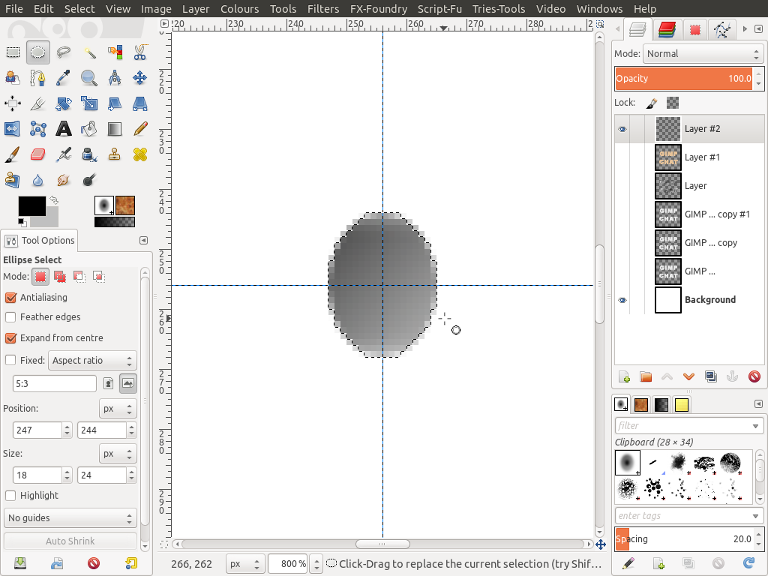
21. Select the Ellipse Select tool :elipse and check the option "expand from centre" then from your guide cross draw a selection until size are 18 and 24. Then Go>Select>Invert and Edit>Clear.

Image

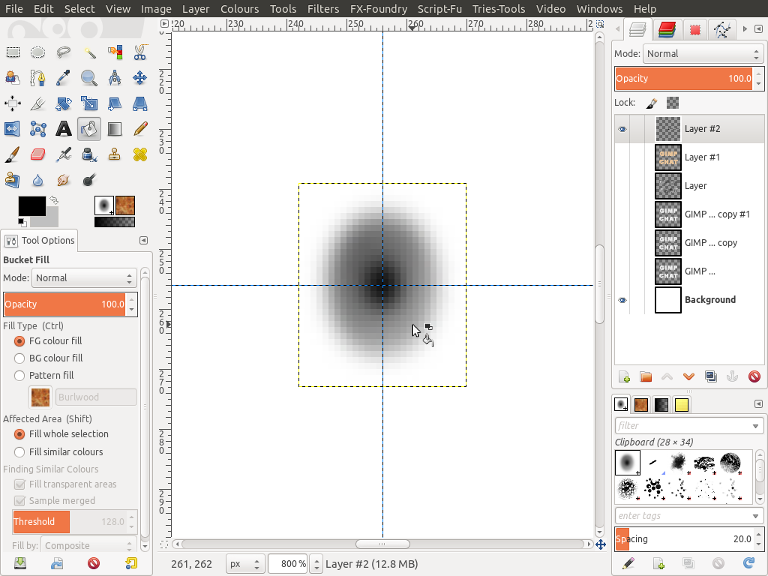
22. Change Foreground colour to Black 000000 and with the Ellipse selection tool draw a selection from your centre cross until sizes are 6 and 8. Then fill selection with Black.
23. Go>Select>None then Go>Filters>Blur Gaussians Blur and set Horizontal and Vertical to 5 and click Ok.
24. Go>Layer>Autocrop Layer then Go>Edit>Copy.

Image

25. Go>Layer>New Layer and create a new transparent layer, Turn off your new brush Layer and switch back on your text layers, Then select the new layer you have just created.
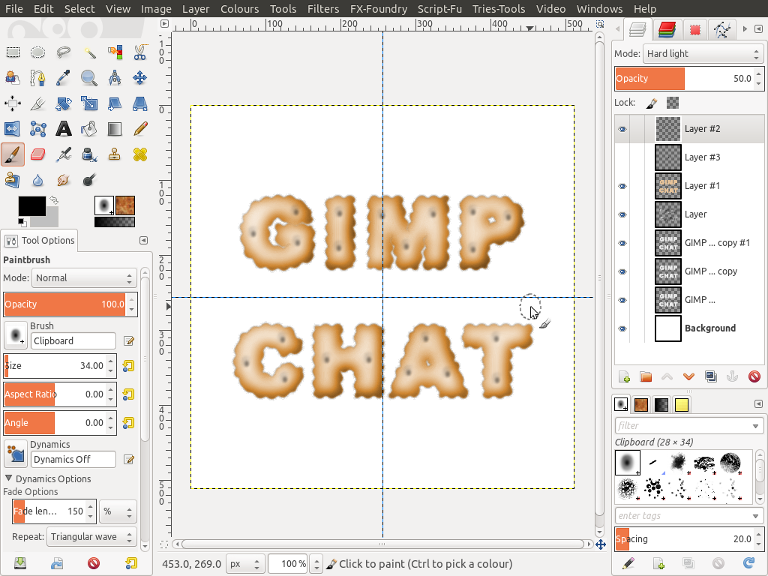
26. Select the Paintbrush tool :brush and make sure brush selected is our recently copied layer and brush dynamics is off, also click the icon next to brush size so brush is the correct dimensions.

Image

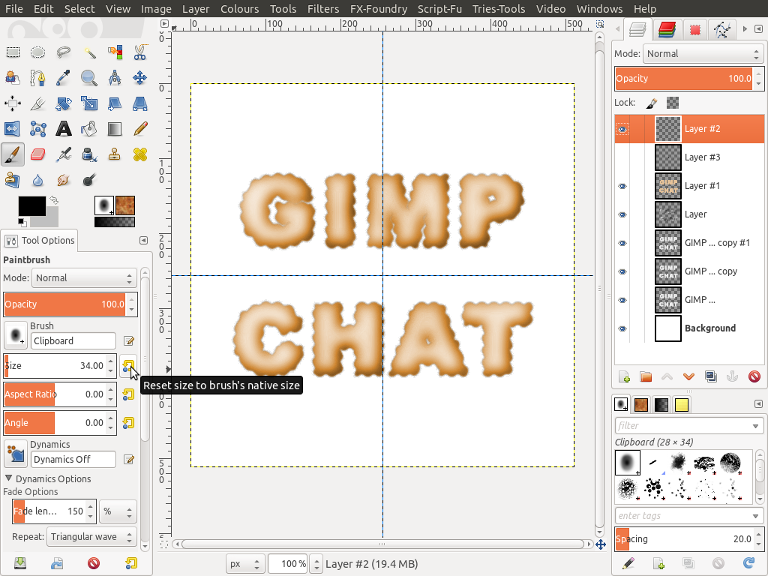
27. On your new layer paint where you would like the indents to be, see below.
Change Layer Mode to "Hard Light" and reduce Opacity to 50.

Image

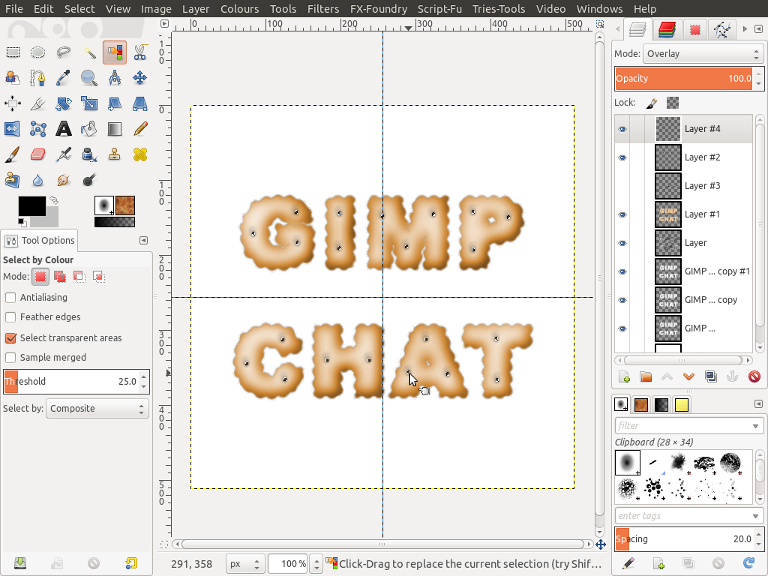
28. Select the Colour Selection tool :colsel and set threshold to 25 and click somewhere in the middle of your brush strokes to select the centres. Create a new layer and fill selection with Black and change Layer Mode to Overlay.

Image

29. Then with Top Layer Selected Go>Select>None then Go>Filters>Blur Gaussians Blur and set Horizontal and Vertical to 2 and click Ok.
30. Select our original brush layer, should be second from top, Go>Layer>Distort Ripple and use the settings shown previously except change the "Amplitude" value to 1, repeat the Ripple but change the "Orientation" setting from vertical to horizontal.
31. Select your original text Layer, should be the layer just above your white Background and then Go>Filters>Light and Shadow>Drop Shadow and run on default settings.

Image

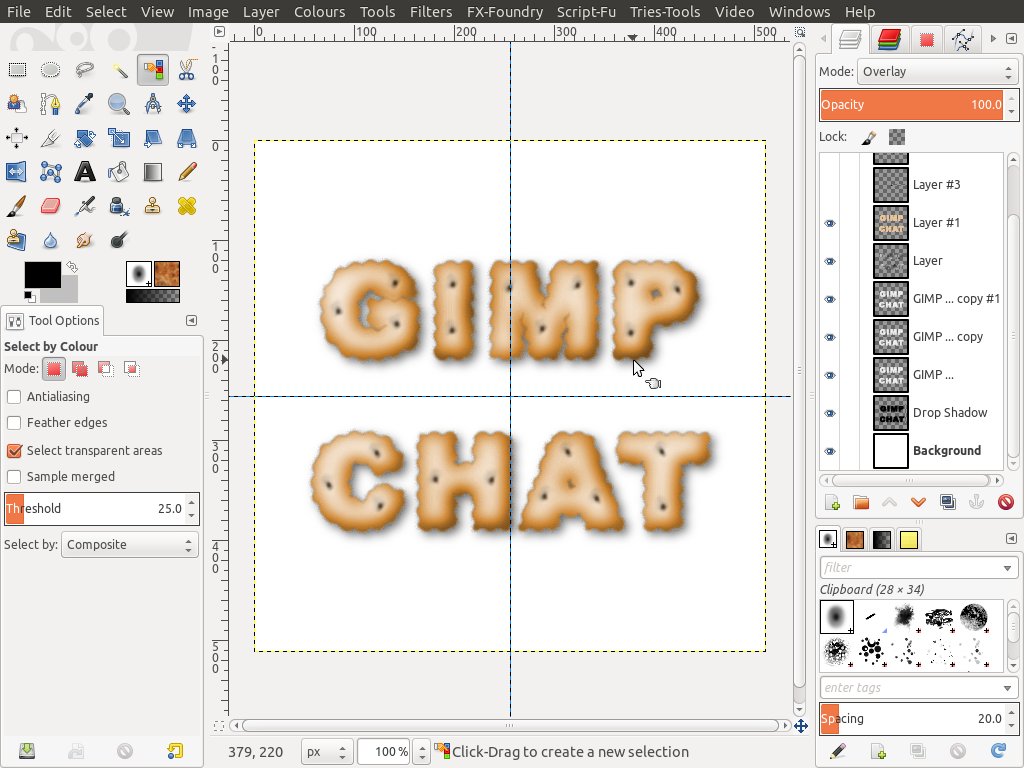
That's it, Have fun.

_________________
Image


Share on Facebook Share on Twitter Share on Orkut Share on Digg Share on MySpace Share on Delicious Share on Technorati
Top
 Post subject: Re: Nic Nac Text Effect
PostPosted: Sat Nov 30, 2013 5:18 am  (#2) 
Offline
Global Moderator
User avatar

Joined: Apr 07, 2010
Posts: 14182
Very nice He4rty. I made a pdf for it. I will try this later. Thanks for sharing


Attachments:
's NicNac Text.pdf [1.41 MiB]
Downloaded 412 times

_________________
Image
Top
 Post subject: Re: Nic Nac Text Effect
PostPosted: Sat Nov 30, 2013 5:30 am  (#3) 
Offline
GimpChat Member
User avatar

Joined: Aug 30, 2012
Posts: 2174
Thanks Molly and nice avatar.

_________________
Image


Top
 Post subject: Re: Nic Nac Text Effect
PostPosted: Sat Nov 30, 2013 5:34 am  (#4) 
Offline
GimpChat Member
User avatar

Joined: Jul 17, 2012
Posts: 2770
very well written, he4rty !


Top
 Post subject: Re: Nic Nac Text Effect
PostPosted: Sat Nov 30, 2013 5:59 pm  (#5) 
Offline
GimpChat Member
User avatar

Joined: Jun 25, 2013
Posts: 142
Location: Wyoming, Michigan
Worlds_best_crackers?
Attachment:
biskit.png
biskit.png [ 336.51 KiB | Viewed 7883 times ]

_________________
Image
http://tonysteeleebw.deviantart.com/


Top
 Post subject: Re: Nic Nac Text Effect
PostPosted: Sat Nov 30, 2013 11:18 pm  (#6) 
Offline
GimpChat Member
User avatar

Joined: Aug 30, 2012
Posts: 2174
Esper - Thanks for the Comment
Tony - Good work, took me a couple of seconds to notice the "Gimp" text.

_________________
Image


Top
 Post subject: Re: Nic Nac Text Effect
PostPosted: Sun Dec 01, 2013 10:34 am  (#7) 
Offline
GimpChat Member
User avatar

Joined: Aug 16, 2012
Posts: 4271
Location: Göteborg, Sweden
he4rty: that's a very realistic looking biscuit text! nice work - i'm not trying tutorials atm but this is definitely on the list for when i start doing them again.

_________________


Top
 Post subject: Re: Nic Nac Text Effect
PostPosted: Mon Dec 02, 2013 12:51 pm  (#8) 
Offline
GimpChat Member
User avatar

Joined: Aug 30, 2012
Posts: 2174
AnMal wrote:
he4rty: that's a very realistic looking biscuit text! nice work - i'm not trying tutorials atm but this is definitely on the list for when i start doing them again.


Thanks for the Comment, I must admit, I don't do many tutorials but do still enjoy reading through them for tips and ideas.

_________________
Image


Top
 Post subject: Re: Nic Nac Text Effect
PostPosted: Mon Dec 02, 2013 12:58 pm  (#9) 
Offline
Global Moderator
User avatar

Joined: Apr 07, 2010
Posts: 14182
Nice job as usual Tony.

_________________
Image


Top
 Post subject: Re: Nic Nac Text Effect
PostPosted: Mon Dec 02, 2013 1:39 pm  (#10) 
Offline
Script Coder
User avatar

Joined: Nov 06, 2012
Posts: 239
Location: Italy
Thanks, he4rty.

I agree with Esper: your tutorials are always well written and easy to understand. :smiley2

_________________
Gino D's GIMP scripts: https://sites.google.com/site/ginodonig/gimp-scripts


Top
 Post subject: Re: Nic Nac Text Effect
PostPosted: Mon Dec 02, 2013 1:49 pm  (#11) 
Offline
GimpChat Member
User avatar

Joined: Aug 30, 2012
Posts: 2174
Thank you Gino D, I find that quite a compliment considering I was in remedial reading classes until the age of 11.

_________________
Image


Top
 Post subject: Re: Nic Nac Text Effect
PostPosted: Mon Dec 02, 2013 11:19 pm  (#12) 
Offline
Script Coder
User avatar

Joined: Feb 18, 2011
Posts: 4827
Location: Bendigo Vic. Australia
Excellent Tutorial He4rty

Image
Image

_________________
Image
No matter how much you push the envelope, it'll still be stationery.


Top
 Post subject: Re: Nic Nac Text Effect
PostPosted: Tue Dec 03, 2013 1:38 am  (#13) 
Offline
GimpChat Member
User avatar

Joined: Jun 25, 2013
Posts: 142
Location: Wyoming, Michigan
molly wrote:
Nice job as usual Tony.

Thanks

_________________
Image
http://tonysteeleebw.deviantart.com/


Top
 Post subject: Re: Nic Nac Text Effect
PostPosted: Tue Dec 17, 2013 2:37 pm  (#14) 
Offline
GimpChat Member
User avatar

Joined: Dec 10, 2013
Posts: 1004
Ok now I'm hungry - excellent tutorial for someone like me, a newbie. Thank you!

Image

_________________
Image
Macbook Air - MacOS Sierra 10.12
McGimp 2.8.14
G'mic 1.6.5


Top
 Post subject: Re: Nic Nac Text Effect
PostPosted: Wed Dec 18, 2013 12:10 pm  (#15) 
Offline
GimpChat Member
User avatar

Joined: Aug 30, 2012
Posts: 2174
Dalia - Nice results and glad you managed to follow the tutorial OK.

_________________
Image


Top
 Post subject: Re: Nic Nac Text Effect
PostPosted: Wed Dec 18, 2013 2:09 pm  (#16) 
Offline
GimpChat Member
User avatar

Joined: Dec 10, 2013
Posts: 1004
Thank you he4rty - it is an excellently well written tutorial.

_________________
Image
Macbook Air - MacOS Sierra 10.12
McGimp 2.8.14
G'mic 1.6.5


Top
Post new topic Reply to topic  [ 16 posts ] 

All times are UTC - 5 hours [ DST ]


   Similar Topics   Replies 
No new posts Attachment(s) GEGL Text cut out effect

25

No new posts a 3d lines text effect

1

No new posts Attachment(s) Honeycomb text effect plugin

9

No new posts Attachment(s) Wired Text Effect plugin

6

No new posts Attachment(s) Bubble wrap text effect plugin

2


* Login  


Powered by phpBB3 © phpBB Group