In this tutorial, I will show you how to create some glowing tribal art in a few simple steps. This tutorial is based on similar techniques described in this Photoshop (PS) tutorial:
http://www.tutorialwiz.com/metallic_background/ However, because GIMP's Wave Plugin does not function exactly like the one for PS, I created a script which we will use to in our artwork.
This tutorial is pretty easy and assumes the user is familiar with basic tools, such as changing colors, using brushes, changing layer modes, etc. However, if I'm not clear with my information, please feel free to ask.
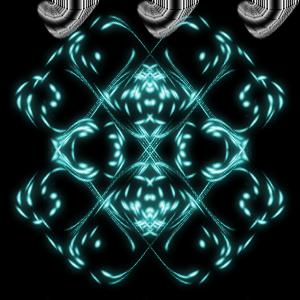
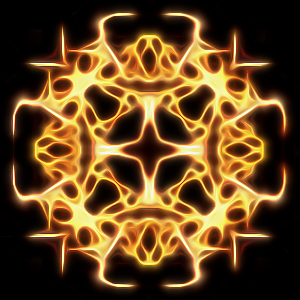
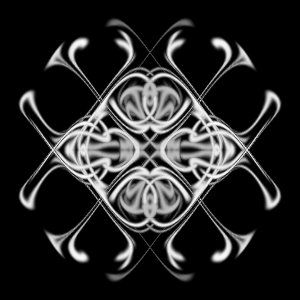
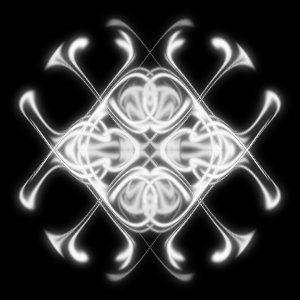
Here's an example of the tribal art we will be creating:

Here's
the script. It can be found under Script-Fu/Fencepost/Render/Metallic/Ripple Texture3...
Let's begin!
Step 1Create a new black image of the desired background size. I'm using a 300 X 300, but you use whatever you want.
 Step 2
Grab a brush and paint on your image in dots, lines, or even symbols. I like using whites and grays to provide depth. Even try different brush sizes. Here's mine. NOTE: I originally hosted this on GIMPER.net and I used their name in the image below.

 Step 3
Go to Script-Fu/Fencepost/Render/Metallic/Ripple Texture3...... and the following dialog will appear:
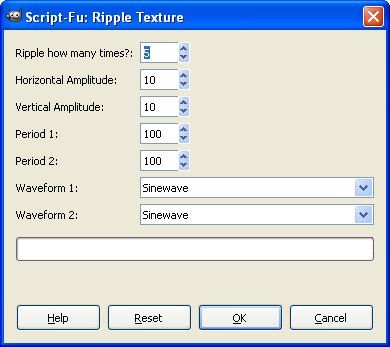
I'm going to use the default settings, but feel free to experiment. After you've picked your settings, click OK. Here's my result....
 Step 4
Duplicate this layer, set its layer mode to Lighten Only
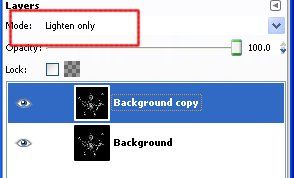
And flip the layer horizontally (Layer > Transform > Flip Horizontally). You can flip it vertically, but we'll need to flip again in just a minute and, if you flipped vertically this time, you'll need to flip horizontally then.
Here's the result with the layer flipped and set to Lighten Only.
 Step 5
With the upper layer still active, merge both layers together (Layer > Merge Down). You should now only have 1 layer.
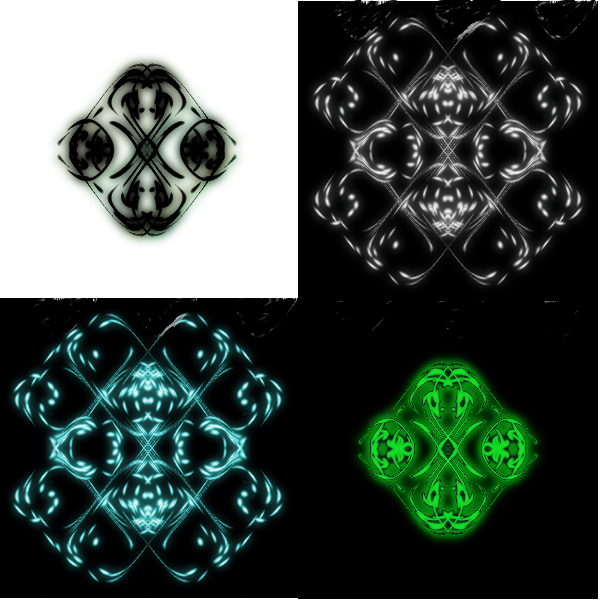
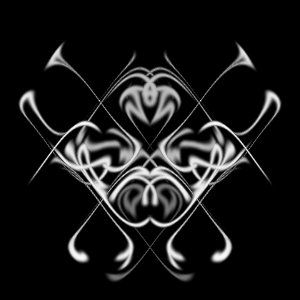
Step 6Duplicate the layer and, like before, set its mode to Lighten Only and flip it vertically (Layer > Transform > Flip Vertically). In Step 4, if you flipped your layer vertically then, you need to do this one horizontally.
Merge these 2 layers together (Layer > Merge Down). Here's the result:
 Step 7
Duplicate this layer and blur the duplicate layer a bit (Filters > Blur > Gaussian Blur...). I'm using 15 X 15.
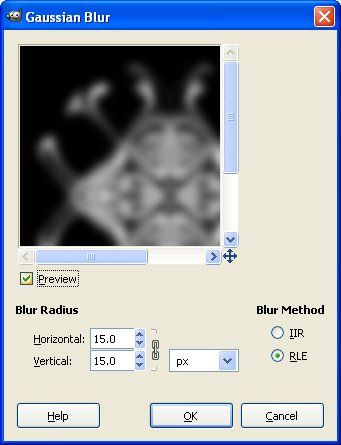
The upper layer will now be blurred. Set its blend mode to something that makes it glow above the bottom layer; I'm using Screen.
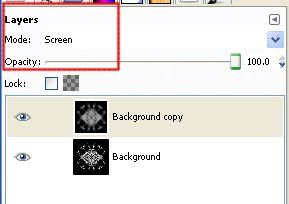
 Step 8
One last time, merge the two layers together (Layer > Merge Down)
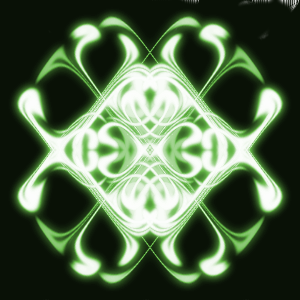
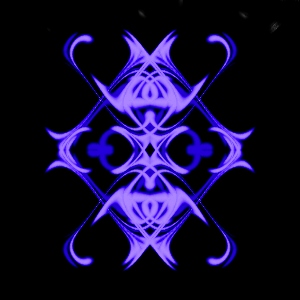
Step 9Color your image using one of GIMP's color tools. I'm using the default Colorize settings (Color > Colorize...)
Well, that was easy! Hope you learned something new and enjoyed making tribal art. Make sure you show me your results and, if you need help, feel free to post your questions here.
Cheers!
Art