It is currently Fri Apr 26, 2024 2:44 am


All times are UTC - 5 hours [ DST ]


Post new topic Reply to topic  [ 76 posts ]  Go to page 1, 2, 3, 4  Next
Author Message
 Post subject: Gimp Tips and Tricks
PostPosted: Wed Dec 05, 2012 10:53 pm  (#1) 
Offline
GimpChat Member
User avatar

Joined: Aug 30, 2012
Posts: 2174
Following on from some of the discussions of late, I thought it might be a good Idea to have a thread just for sharing tips and tricks we might of picked up along the way, so here is that thread.

I would ask that you don't rely to any of the posts in this thread but rather keep it so that each post contains a tip or trick and therefore will become a valuable resource for Gimpers.If you would like more info on a particular post then maybe you could open up a new discussion topic or search the forums to see if it has already been discussed.

First off then the Colour Selection Dialogue

Image

_________________
Image


Last edited by he4rty on Wed Jan 30, 2013 9:55 am, edited 2 times in total.

Share on Facebook Share on Twitter Share on Orkut Share on Digg Share on MySpace Share on Delicious Share on Technorati
Top
 Post subject: How to insert text from a text file in your image
PostPosted: Thu Dec 06, 2012 1:51 am  (#2) 
Offline
GimpChat Member
User avatar

Joined: Sep 22, 2012
Posts: 2089
Location: US
Nice idea, he4rty!


Next tip: How to insert text from a text file in your image.

GIMP won't let you open text files from the Open Image browser window. You won't even see anything but image files.
So, how to insert ready text from a text file instead of typing it?

Activate Text tool and in the tool options choose the font and size you want your text to appear in your image.
Drag a text box over canvas where you want your text to be placed.
Right-click anywhere on the text box area and dialog window will open
Image

Click on Open text file and choose the text file. Click Open.
Now your text will appear with exact font and size you've chosen.
Image

Now you can edit your text.
Note: supported formats are .txt and partially .rtf (rtf needs some more editing and removing formatting info)


Top
 Post subject: Just for fun, configure the Blend Tool
PostPosted: Thu Dec 06, 2012 4:12 am  (#3) 
Offline
Script Coder
User avatar

Joined: Apr 23, 2010
Posts: 1553
Location: not from Guildford after all
Just for fun, configure the Blend Tool :blend 
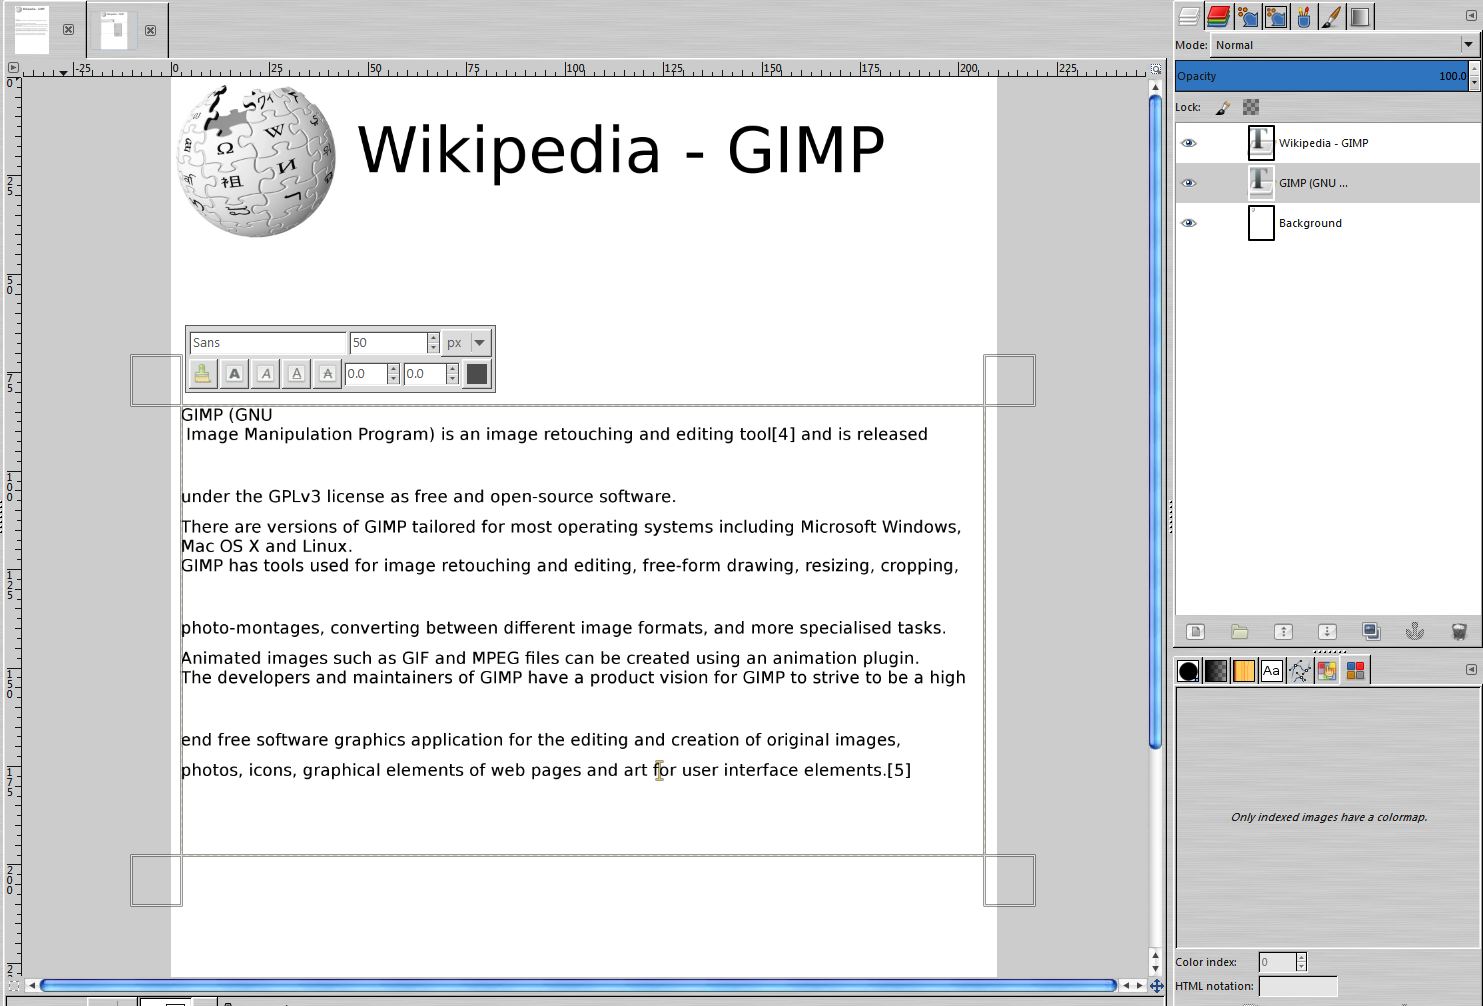
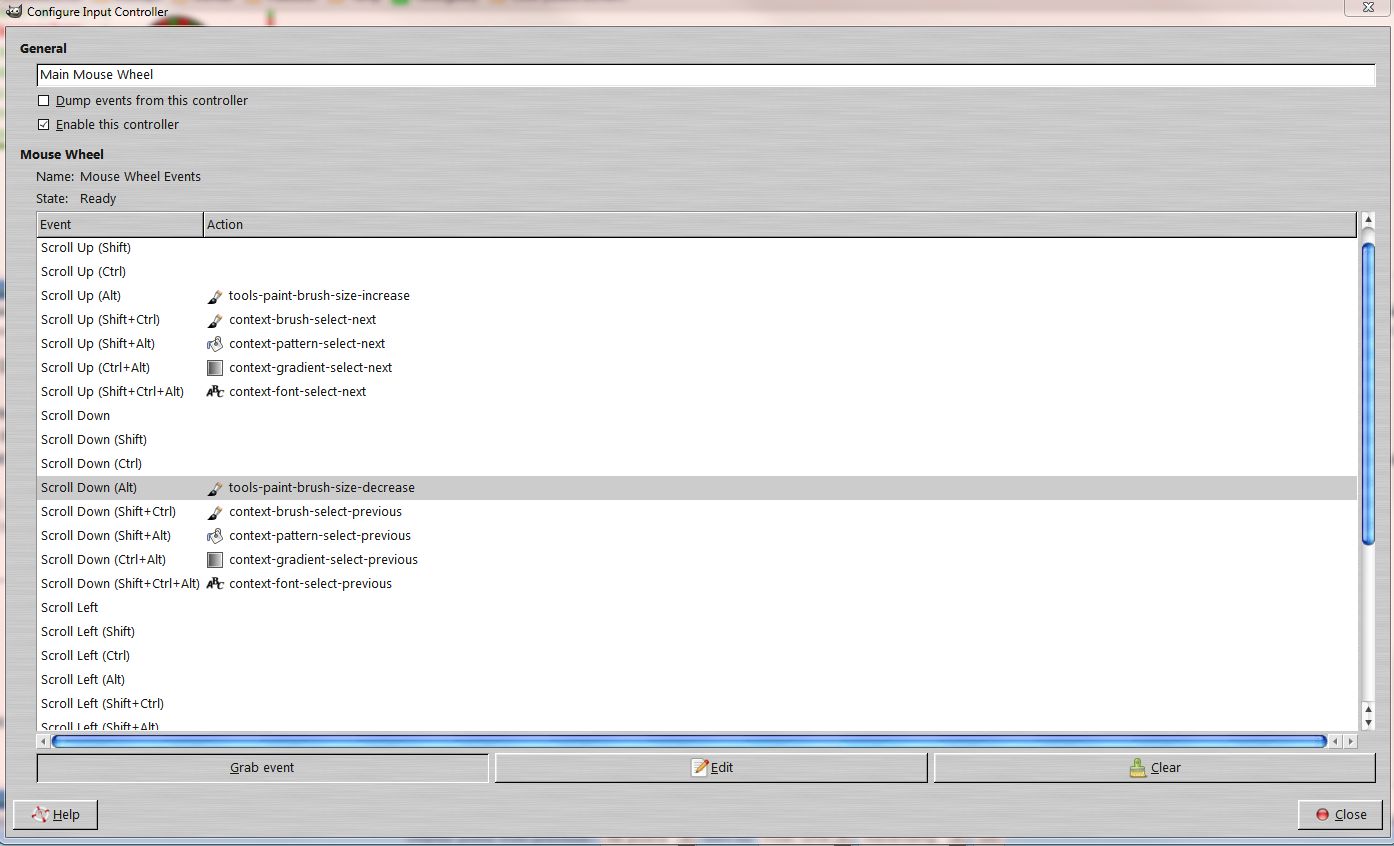
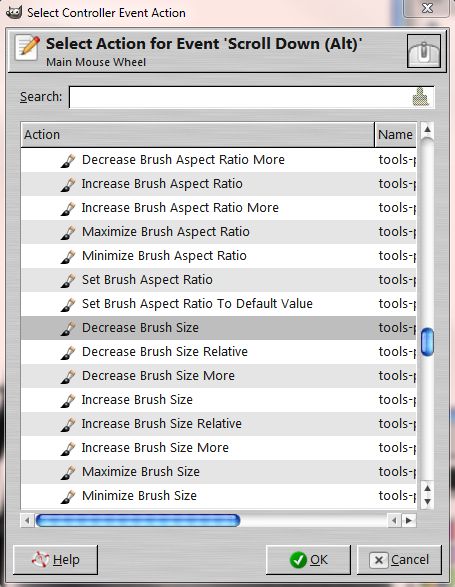
with the following settings:
Attachment:
SS-molecules.png
SS-molecules.png [ 15.7 KiB | Viewed 22079 times ]

then paint short strokes on a black canvas to create overlapping spheres:
Attachment:
molecules.png
molecules.png [ 33.12 KiB | Viewed 22079 times ]

_________________
Any sufficiently primitive technology is indistinguishable from a rock.


Top
 Post subject: Re: Gimp Tips and Tricks
PostPosted: Thu Dec 06, 2012 4:29 am  (#4) 
Offline
Global Moderator
User avatar

Joined: Apr 07, 2010
Posts: 14182
Saul, when you say paint short strokes, are you meaning that you still use the blend tool or the paint brush.
put my settings the same as shown in your post and started with a black bg. I did a short stroke with the blend tool and it turned my layer white. I then tried it with the paint brush and that doesn't work.

_________________
Image


Top
 Post subject: Use Iwarp on the stock wood Pattern
PostPosted: Thu Dec 06, 2012 4:39 am  (#5) 
Offline
Script Coder
User avatar

Joined: Apr 23, 2010
Posts: 1553
Location: not from Guildford after all
Molly, make sure that you have the gradient direction reversed (or that you swap the default colors so that BG is black and FG is white).

Another quickie: use Iwarp on the stock wood Pattern to make it more realistic.

Attachment:
wood.jpg
wood.jpg [ 48.8 KiB | Viewed 22074 times ]


Iwarp also works well with other stock patterns to make interesting textures.
Attachment:
swirly.jpg
swirly.jpg [ 53.37 KiB | Viewed 22074 times ]

_________________
Any sufficiently primitive technology is indistinguishable from a rock.


Top
 Post subject: Change amplication
PostPosted: Thu Dec 06, 2012 6:17 am  (#6) 
Offline
GimpChat Member
User avatar

Joined: Sep 24, 2010
Posts: 12518
My all time favorite is change amplication. Say you have a layer that you dup and may subtle changes like sharpen for blur or whatever. What you do for change amplification is to dup the base (not edited) layer and move it to the top then set the result to Grain Extract then merge down. You will get a grayish like Highpass result. For change amplification, just set the layer to Grain Merge (or for less effect, Overlay). Dup it as many times as you like to amplify the change. I do this so often that it hurts. Can be used for saturation boost too and so many other things that you change. Not sure if a script was ever done for this, but I've discovered this trick accidently many years when I said to myself, what can I use Grain Extract/Grain Merge for. lol

Another thing to experiment with is blurring the change layer to smooth the effect; I do this once in a while to reduce artifacting due to over sharpening change. Sometimes as well, I copy the base layer on top and set it to color, saturation (or twice setting the top layer to Saturation) to keep the colors intact since amplication may cause color abberations. :)

_________________
Lyle

Psalm 109:8

Image


Top
 Post subject: Re: Gimp Tips and Tricks
PostPosted: Thu Dec 06, 2012 8:27 am  (#7) 
Offline
Global Moderator
User avatar

Joined: Apr 07, 2010
Posts: 14182
Just to add to Saul's post, I tried this with different color foregrounds and it gives very nice effects also.


Image

_________________
Image


Top
 Post subject: Mouse Tricks #1
PostPosted: Thu Dec 06, 2012 10:06 am  (#8) 
Offline
GimpChat Member

Joined: Aug 05, 2011
Posts: 606
Location: limestone,ny
Nice Molly and thanks SaulGoode, that's fun to play with something new

Image

couple of things i do that i'm sure everyone already knows
I hardly ever use the bucket tool, i just drag from the patterns or FG/BG colors onto the canvas or selection
I also use the scroll wheel to change layer modes instead of using the drop down arrow


Top
 Post subject: Mouse Tricks #2
PostPosted: Thu Dec 06, 2012 10:20 am  (#9) 
Offline
GimpChat Member
User avatar

Joined: Sep 22, 2012
Posts: 2089
Location: US
alc59 wrote:
couple of things i do that i'm sure everyone already knows
I hardly ever use the bucket tool, i just drag from the patterns or FG/BG colors onto the canvas or selection
I also use the scroll wheel to change layer modes instead of using the drop down arrow


I use mouse wheel with Alt key (gotta set it in Preferences) to adjust the size of the paint tools, eraser, etc. Find it very useful since i can change size on the fly while drawing a line or erasing.

Here are some other tips that would be helpful for GIMP beginners.
1.Left-click+Shift on eye icon or chain in layers dialog makes visible/linkeded only this layer, click again and all layers become visible/linked.
2.Link a few layers and apply some Transform Tools (Move, Scale and Rotate tools) to a stack of layers. Only linked layers will be transformed.


Last edited by K1TesseraEna on Fri Oct 17, 2014 3:39 pm, edited 1 time in total.

Top
 Post subject: Keyboard Shortcuts
PostPosted: Thu Dec 06, 2012 1:15 pm  (#10) 
Offline
Retired Staff
User avatar

Joined: May 22, 2008
Posts: 6947
Location: Somewhere in GIMP
I love keyboard shortcuts and have a lot of them that I've configured.

Most of the Alt + Keyboard numbers and Alt + Numpad numbers are available to make new shortcuts. The number pad numbers are separate from the keyboard numbers so you have about 20 available Alt + shortcuts. Be sure the NumLock key is on when you use the number pad.

My most recent one is a keyboard shortcut to Discard Text info. It's so annoying to try and add a new text layer to an image that already has one. The text editor jumps up and wants to know if you want to alter the text or make a new layer, etc. My keyboard shortcut prevents that. Discard Text Information is also available in the Layer right-click menu.

I keep a list of my shortcuts handy but most of the ones I use frequently I know by heart.

Access the Keyboard shortcut menu in Edit > Keyboard Shortcuts.

_________________
Image
World War IV will be fought with sticks and stones. - Albert Einstein


Top
 Post subject: Using Liquid Rescale plugin...
PostPosted: Thu Dec 06, 2012 1:53 pm  (#11) 
Offline
GimpChat Member

Joined: Apr 12, 2010
Posts: 5870
I don't want take too much space here, one of my favorite trick ( done usually more softly BUT to make the examples more clear i used much more dramatic settings ) is here

viewtopic.php?f=11&t=5933

_________________
My 3D Gallery on Deviantart http://photocomix2.deviantart.com/
Main gallery http://www.flickriver.com/photos/photocomix-mandala/
Mandala and simmetry http://www.flickriver.com/photos/photocomix_mandala/

Image

Mrs Wilbress


Top
 Post subject: Re: Group Dialogs Tip
PostPosted: Thu Dec 13, 2012 7:00 am  (#12) 
Offline
GimpChat Member
User avatar

Joined: Aug 30, 2012
Posts: 2174
In the window where you can scroll through the various tabs, I.E Layers, paths, Palettes etc. If you right click on the two scroll arrows you will jump to either the first or last tab.

_________________
Image


Top
 Post subject: Brush to Native Size
PostPosted: Sat Dec 15, 2012 8:33 am  (#13) 
Offline
Retired Staff
User avatar

Joined: May 22, 2008
Posts: 6947
Location: Somewhere in GIMP
All those brushes you made in 2.6 are resized in 2.8. If you want to use them in their native size, click the button to the right of the sizing window to do that.

Image

_________________
Image
World War IV will be fought with sticks and stones. - Albert Einstein


Top
 Post subject: Drag and Drop Bucket fill
PostPosted: Sun Dec 16, 2012 11:29 am  (#14) 
Offline
GimpChat Member
User avatar

Joined: Sep 22, 2012
Posts: 2089
Location: US
One of the tricks in GIMP that can speed up the workflow.

Bucket fill tool. You don't even have to activate Bucket fill tool. To fill the layer/image with foreground/background color or pattern just
drag with left mouse button pressed from the fg/bg color box or pattern from the patterns list over canvas area and drop.


Top
 Post subject: Rearrange the Toolbox icons
PostPosted: Wed Dec 19, 2012 11:36 pm  (#15) 
Offline
GimpChat Member
User avatar

Joined: Oct 07, 2011
Posts: 180
You can rearrange the tool icons into any arrangement with dragNdrop.

EditMenu > Preferences > Toolbox > in Tools configuration >>>>> drag and drop to the order you like.

They will change order instantly in real time.


Last edited by Barbie on Wed Dec 19, 2012 11:42 pm, edited 1 time in total.

Top
 Post subject: Increase Filter Speed
PostPosted: Wed Dec 19, 2012 11:42 pm  (#16) 
Offline
GimpChat Member
User avatar

Joined: Sep 24, 2010
Posts: 12518
If you use selections before running filters, you can go to view, uncheck selection (ctrl t) and your filters will execute 2 to 5 times faster (no joke; some day, they will fix this). :)

_________________
Lyle

Psalm 109:8

Image


Top
 Post subject: Quickly Hide Layers
PostPosted: Thu Dec 20, 2012 9:10 am  (#17) 
Offline
GimpChat Member
User avatar

Joined: Sep 06, 2011
Posts: 368
Location: US, Ohio
hold in the Shift key and left-click on a layer. This will hide all layers except for the one you clicked on.

How much time have you wasted NOT knowing this one? Haha.


Top
 Post subject: Quickly Link/unlink Layers
PostPosted: Thu Dec 20, 2012 10:15 am  (#18) 
Offline
GimpChat Member

Joined: Aug 05, 2011
Posts: 606
Location: limestone,ny
same way to link/unlink them


Top
 Post subject: Re: Gimp Tips and Tricks
PostPosted: Thu Dec 20, 2012 11:24 pm  (#19) 
Offline
Retired Staff
User avatar

Joined: May 22, 2008
Posts: 6947
Location: Somewhere in GIMP
K1TesseraEna wrote:
I use mouse wheel with Alt key (gotta set it in Preferences) to adjust the size of the paint tools, eraser, etc. Find it very useful since i can change size on the fly while drawing a line or erasing.
I must be doing it wrong. When I go to the brush sizing option, I click disable which changes to new accelerator, and then hold down the Alt key and press on the scroll button which makes it disabled.

Image

_________________
Image
World War IV will be fought with sticks and stones. - Albert Einstein


Top
 Post subject: Mouse Tricks #2a
PostPosted: Fri Dec 21, 2012 12:06 am  (#20) 
Offline
GimpChat Member
User avatar

Joined: Sep 22, 2012
Posts: 2089
Location: US
Hey, Oregonian!

You have to set it in Preferences>Input Controllers. In the Additional Input Controllers dialog window add mouse wheel to the Active Controllers (if it's not added already).

Image

Then double click on Main Mouse Wheel and new window will pop up.
Image

Find Scroll down (Alt) option, Grab Event and Edit. Another dialog window pops up.
In that window Select Action for Scroll Down (Alt) event - go to Tools and scroll down until you find Decrease Brush Size option. Click OK.

Image

Then go back to Grab Event dialog and do the same for Scroll Up (Alt) - Increase brush size.

Scroll Up/Down + Alt gives me fine tuning of the brush size without having to go to the brush Size sliders in the tool options.
I find it very convenient. But you can set it to Relative/More if you like.


P.S. Since GIMP have shared settings for some tools, the changes will apply to Eraser, Pencil, Airbrush, Dodge/burn, etc. tools automatically.


Top
Post new topic Reply to topic  [ 76 posts ]  Go to page 1, 2, 3, 4  Next

All times are UTC - 5 hours [ DST ]


   Similar Topics   Replies 
No new posts Any tips for managing an 'epic' map? I appear to be CPU bound.

0


* Login  


Powered by phpBB3 © phpBB Group