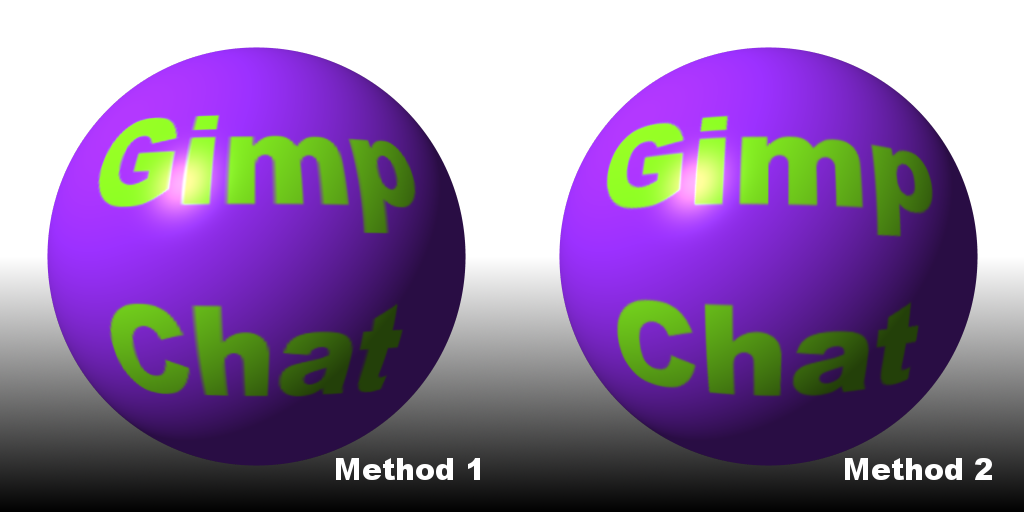
In this tutorial we will be looking at two methods that can be used to map text onto a sphere, I'd just like to add that these are not my ideas, what you'll be reading is how I have interpreted others thoughts and methods into Gimp.
Method 1. This is the more traditional method and one which I have shared before but never in tutorial form, so some of you may know this technique already.
Method 2. This has come about because I have been researching "equirectangular images" although I have not been able to create a whole sphere yet, I have managed to map one face. So this second method although a bit more involved will cover this technique.
Personally, I prefer the second method but do understand it will be a matter of preference as to which you will prefer and think looks the best.
I will be using Gimp 2.8.8 for this tutorial but due to the filters being used it should cover a range of gimp installations.
Method 1 & 2This part of the tutorial is required for both methods.
1. Open Gimp and go New>Image, Create an image of 512px * 512px, you can create any size you would like but it needs to be a square canvas.
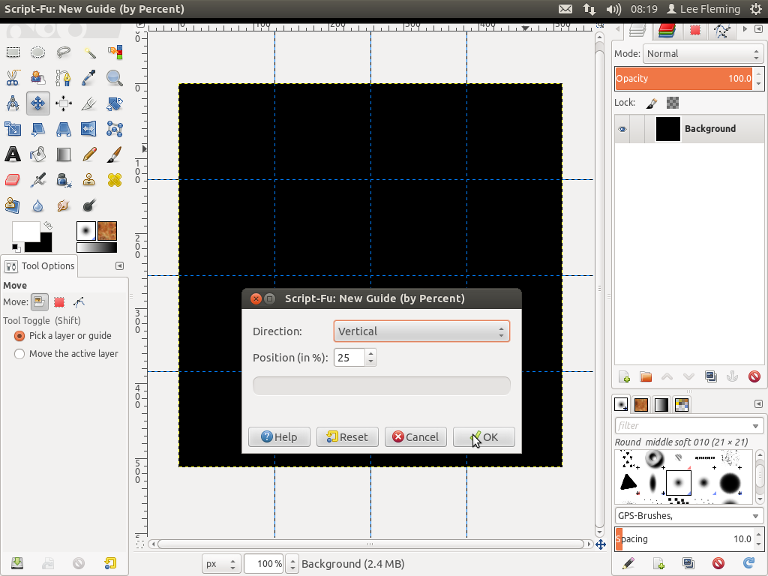
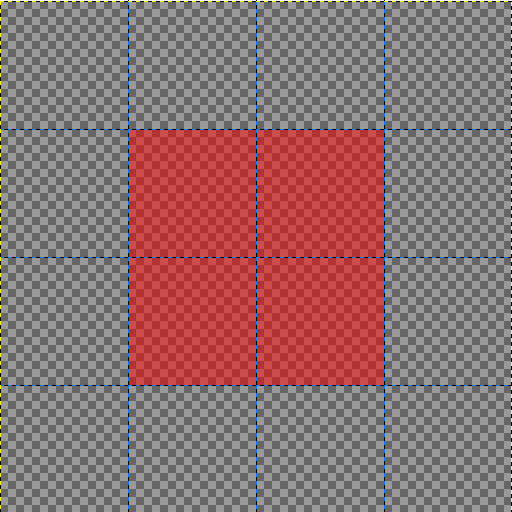
2.Go View and make sure "Show Guides" and "Snap to Guide" are ticked, if not just click on the phrase to tick. Go Image>Guides>New Guides (by percent) and add horizontal and vertical guides at 25%, 50% & 75%.
3. Set background colour to Black (000000) and set foreground colour to White (ffffff) then select the Blend Tool

, Change gradient to "FG to BG (RGB)" and set "Shape" to "Linear". Starting on the 50% Horizontal guide click and drag cursor to bottom of your canvas, you can follow the guides or hold the "Ctrl" key down to get a straight blend.

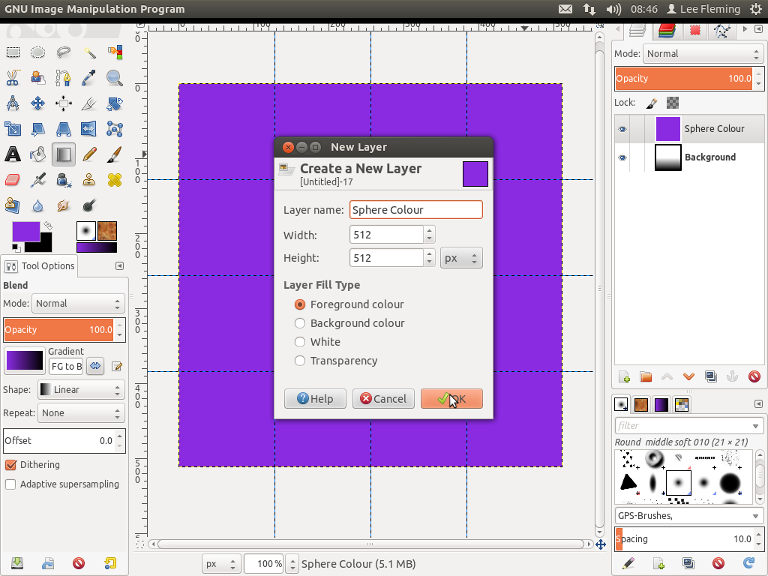
4. Set foreground colour to Blue Violet (8a2be2), Then go Layer>New Layer, rename layer to "Sphere Colour" and check "Foreground Colour", click OK.
5. Next we're going to enter our text but before we do I just want to mention something important. The square canvas will map around the complete sphere, so part of our image will be hidden when mapped as this will be at the back of the sphere, to make sure we don't lose any text we will need to make sure that the text is kept within the red shaded area below.
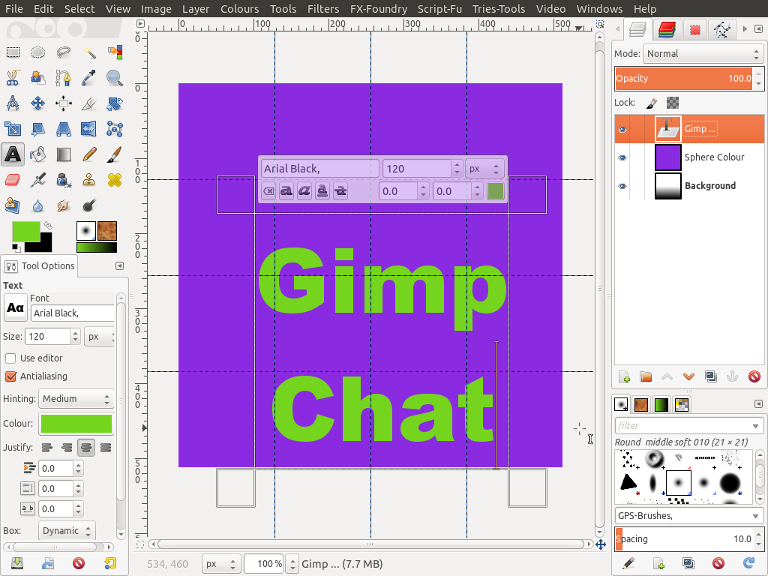
6. Set foreground colour to Green (75d41d) and select the Text Tool

, I will be using the font "Ariel Black" and size 120px, I have also set "Justify" to "Centred". Click anywhere on your canvas and enter your text. Note, I have purposely made my text bigger than the shaded rectangle above just to show how to rescale the text to fit.
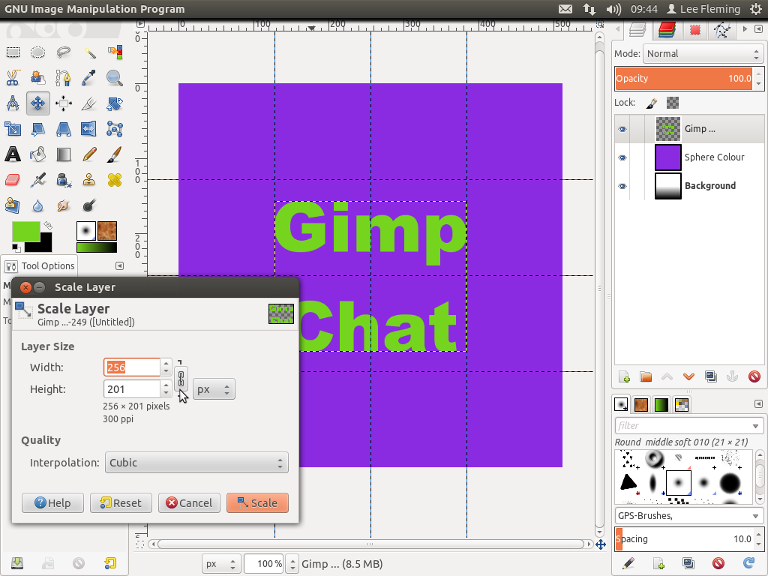
7. Go>Layer>Autocrop Layer, then select the Move Tool

and position your layer in the centre of your canvas. Go>Layer>Scale Layer, we need to set the largest value to 50% of our canvas size, in this example my canvas is 512px so 50% would be 256px. The larger value is "width" so I am going to change this value to 256, Also make sure the chain next to the input boxes is linked as this will scale the layer proportionally.
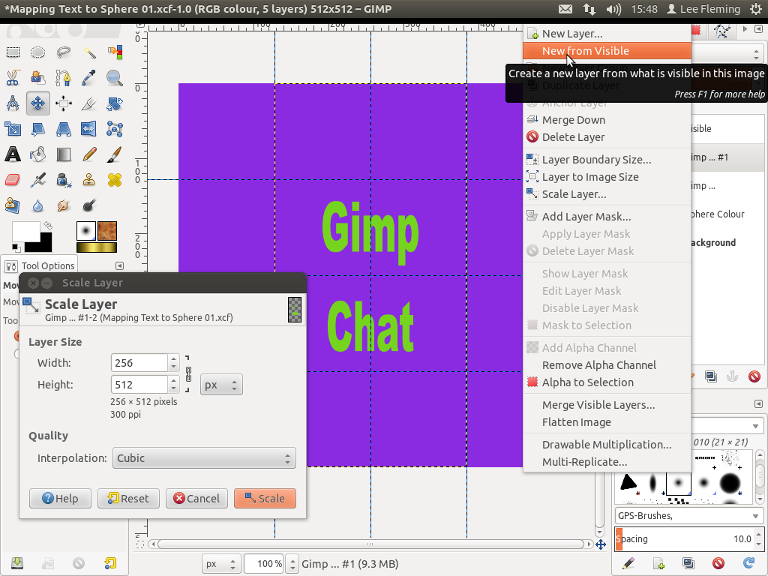
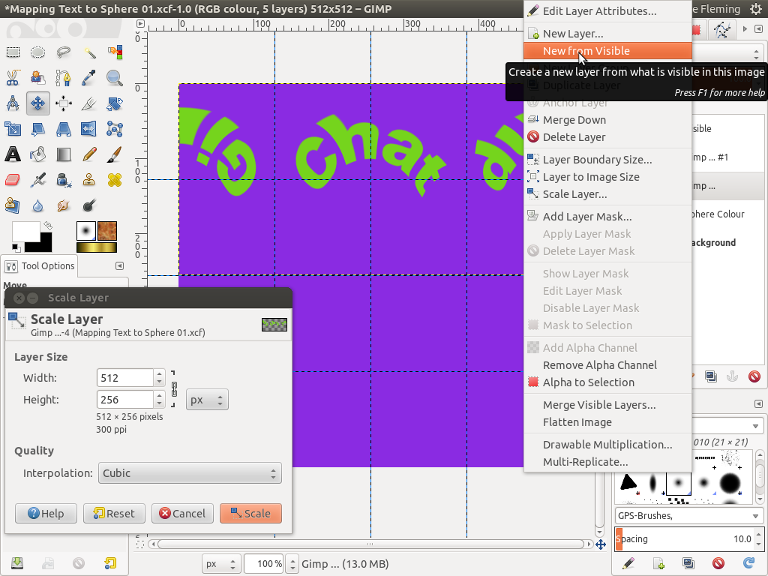
8. Go>Layer>Layer to Image Size, then go Layer>duplicate Layer. Click the "Eye Icon" to turn off our original text layer and then select the duplicate layer. Now the two tutorials will split, so follow the next steps for Method 1 or skip Down to Step 12 for Method 2.
Method 19. Go>Layer>Scale Layer and unlock the chain link by clicking on it, Then change width to 256px or half the size of your original canvas, Click OK. Next right click in layers dialogue and select "New from Visible". Select this new layer.
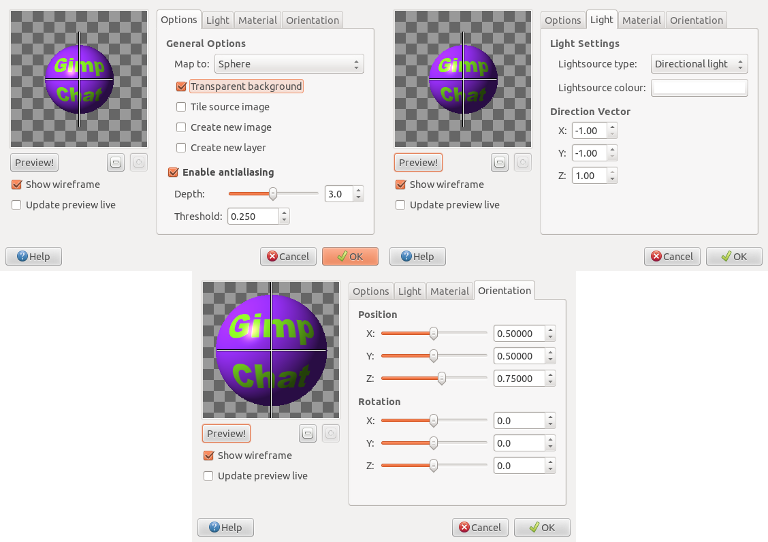
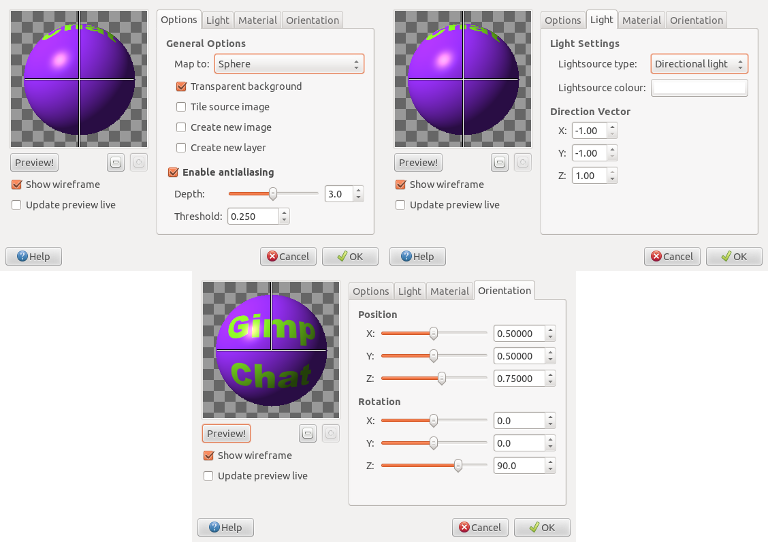
10. Go>Map>Map Object and change settings to those shown Below and click OK.
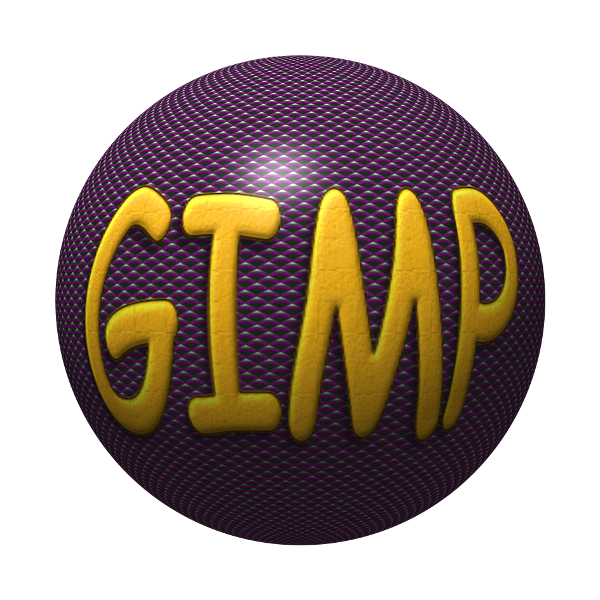
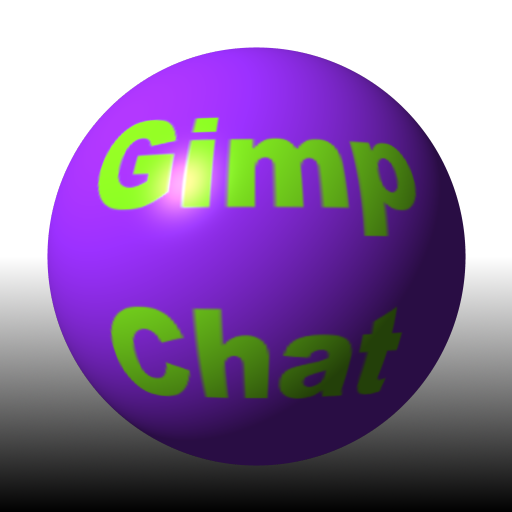
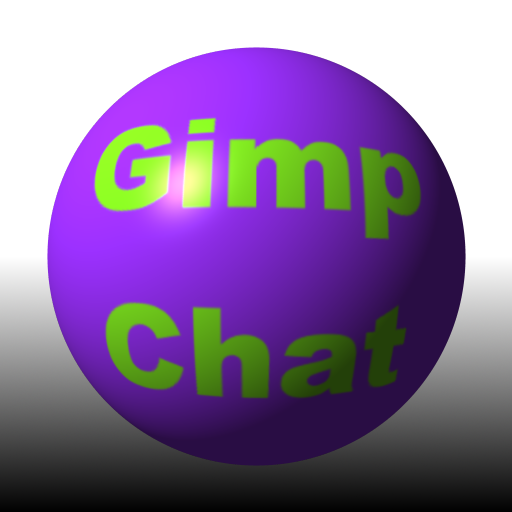
11. That's the first sphere completed, just click the Eye Icon to turn off the text layer and the sphere colour layer.
 Method 2
12. If you have followed method 1 then you will need to turn off your newly created sphere layer and switch back on the sphere colour layer and your original text layer. Select the text layer.
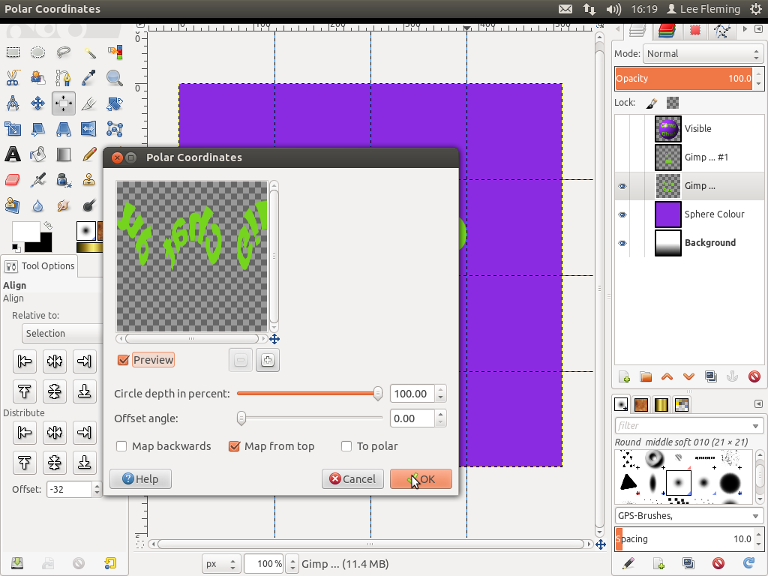
13. Go Filter>Distort>Polar Coordinates and use the settings shown below, then go Layer>Transform>Flip Horizontally.
14. Go>Layer>Scale Layer and unlock the chain link by clicking on it, Then change height to 256px or half the size of your original canvas, Click OK. Select the Move Tool
and postion your layer to the top and centre of canvas. Next right click in layers dialogue and select "New from Visible". Select this new layer.
15. Go>Map>Map Object and change settings to those shown Below and click OK.
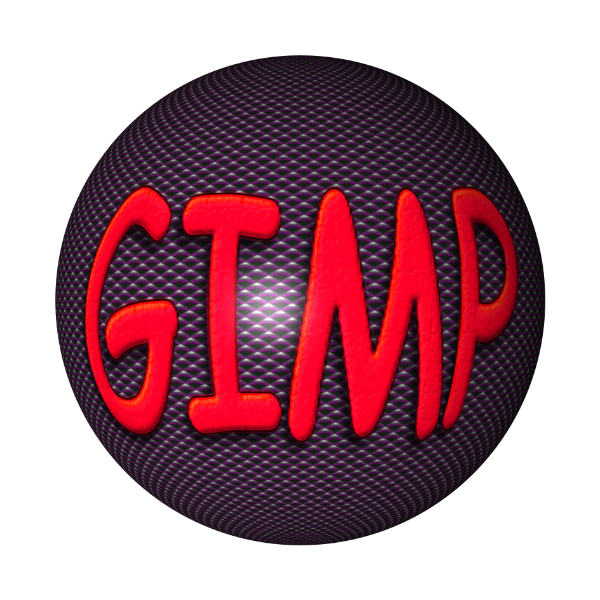
16. That's the second sphere completed, just click the Eye Icon to turn off the text layer and the sphere colour layer.
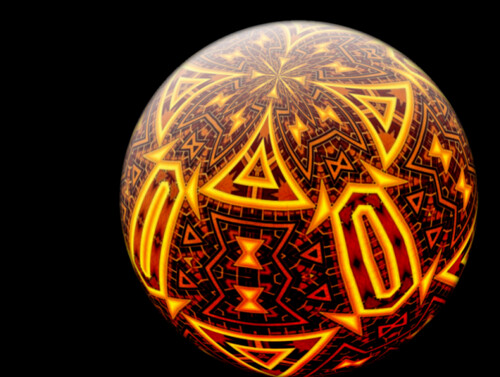
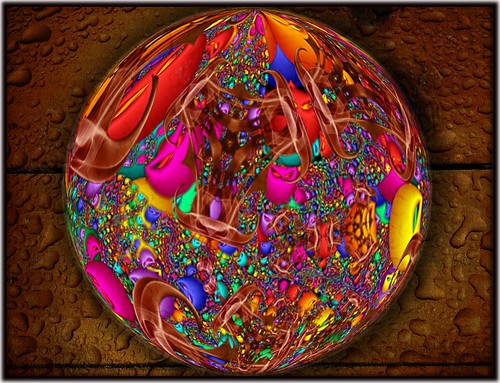
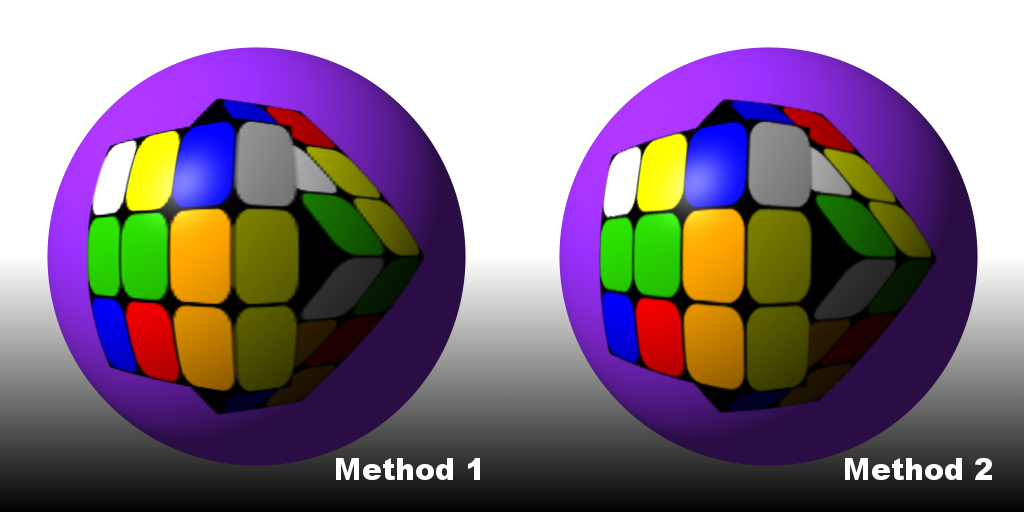
These techniques don't have to stop at just text, images can be mapped as well, so long as you keep within the red square as mentioned earlier. Here is an example of a Rubic cube I made and have mapped to the sphere.
Happy Gimping.
Hearty.