It is currently Wed Apr 24, 2024 2:31 am


All times are UTC - 5 hours [ DST ]


Post new topic Reply to topic  [ 39 posts ]  Go to page 1, 2  Next
Author Message
 Post subject: A Gimp Tutorial Challenge
PostPosted: Sun Dec 26, 2010 10:49 pm  (#1) 
Offline
GimpChat Member
User avatar

Joined: May 16, 2010
Posts: 14709
Location: USA
Anyone interested in seeing what it takes to re-create this effect in Gimp? :paint

Image

_________________
Image
Edmund Burke nailed it when he said, "The only thing necessary for the triumph of evil is for good men to do nothing."


Share on Facebook Share on Twitter Share on Orkut Share on Digg Share on MySpace Share on Delicious Share on Technorati
Top
 Post subject: Re: A Gimp Tutorial Challenge
PostPosted: Sun Dec 26, 2010 11:26 pm  (#2) 
Offline
GimpChat Member

Joined: Aug 27, 2010
Posts: 491
:yesnod


Top
 Post subject: Re: A Gimp Tutorial Challenge
PostPosted: Mon Dec 27, 2010 10:08 am  (#3) 
Offline
Former Member
User avatar

Joined: Nov 17, 2010
Posts: 618
Location: Rockford, IL
Definitely, that would be a hard effect to create as with the masking, and using map object to get the text to go along the body, may be easier with the cage transformation tool, but this would be pretty cool to see how it's done.


Top
 Post subject: Re: A Gimp Tutorial Challenge
PostPosted: Mon Dec 27, 2010 4:31 pm  (#4) 
Offline
GimpChat Member
User avatar

Joined: May 16, 2010
Posts: 14709
Location: USA
I actually tried it with 2 kittens hugging each other.One black one white.I used the white one as the text layer and tried a displacement map...didn't work, at least for me anyways.Tried the iWarp tool, and got better results along the edges and what not.

Original image:
Image

This in my opinion would be a real hard challenge for even an experienced Gimp user. =)
I would love to see this get a tutorial by the second issue of The Gimper so i can add it.

_________________
Image
Edmund Burke nailed it when he said, "The only thing necessary for the triumph of evil is for good men to do nothing."


Top
 Post subject: Re: A Gimp Tutorial Challenge
PostPosted: Mon Dec 27, 2010 4:36 pm  (#5) 
Offline
GimpChat Member
User avatar

Joined: Jul 04, 2010
Posts: 2253
Location: Retired Moderator Slowly Returning to the Living.
Rod wrote:
I would love to see this get a tutorial by the second issue of The Gimper so i can add it.


Did the first issue ever come out? I never heard back about helping and was never given the access on gimper.net

_________________
Artists aren't crazy! We're eccentric! ~G.M. Ross

Image

My Sigs = My Photos
Check out my work at http://www.flickr.com/photos/photomastergreg.


Top
 Post subject: Re: A Gimp Tutorial Challenge
PostPosted: Mon Dec 27, 2010 4:51 pm  (#6) 
Offline
Global Moderator
User avatar

Joined: Oct 06, 2010
Posts: 4045
Did you try using Warp (not i-warp), like in the Candy tutorial on GIMP Users? Use a bump mapped image of a solid object, then make the printed text layer the target? Just a thought, I haven't tried it in this capacity, yet.

_________________
"In order to attain the impossible, one must attempt the absurd."
~ Miguel de Cervantes


Top
 Post subject: Re: A Gimp Tutorial Challenge
PostPosted: Mon Dec 27, 2010 9:24 pm  (#7) 
Offline
GimpChat Member
User avatar

Joined: May 16, 2010
Posts: 14709
Location: USA
PhotoMaster wrote:
Rod wrote:
I would love to see this get a tutorial by the second issue of The Gimper so i can add it.


Did the first issue ever come out? I never heard back about helping and was never given the access on gimper.net

I thought David gave you access already Greg. You were already a member so i thought he mentioned giving you access to the Gimper Magazine Staff area of the site.Log into Gimper.net and see if your avatar has Gimper Staff over it.If it doesn't let me know, or David know.

No the first issue is still in the works. :)

I will give the warp idea a try, sounds promising....thanks.

_________________
Image
Edmund Burke nailed it when he said, "The only thing necessary for the triumph of evil is for good men to do nothing."


Top
 Post subject: Re: A Gimp Tutorial Challenge
PostPosted: Mon Dec 27, 2010 10:37 pm  (#8) 
Offline
GimpChat Member
User avatar

Joined: May 16, 2010
Posts: 14709
Location: USA
I got some interesting results with Filters/Distort/Lens Distortion.
Not quite correct, but you can see where the outer edges seem to roll out of the text.
Image

I included the xcf which includes
The original image
White-kitty render
Black-kitty render
lorem ipsum text layer
white bg layer
kitty text overlay layer

Ready to manipulate for anyone who is interested in giving it a go. :)


Attachments:
text-flow.xcf [1.28 MiB]
Downloaded 249 times

_________________
Image
Edmund Burke nailed it when he said, "The only thing necessary for the triumph of evil is for good men to do nothing."
Top
 Post subject: Re: A Gimp Tutorial Challenge
PostPosted: Tue Dec 28, 2010 1:00 pm  (#9) 
Offline
Former Member
User avatar

Joined: Nov 17, 2010
Posts: 618
Location: Rockford, IL
I gotta try this sometime, won't be able to try it till the weekend, cause of work. (on break right now)


Top
 Post subject: Re: A Gimp Tutorial Challenge
PostPosted: Tue Dec 28, 2010 1:04 pm  (#10) 
Offline
GimpChat Member

Joined: Aug 27, 2010
Posts: 491
A combination of Filters / Distorts / Lens Distortion and Filters / Light & Shadow / Apply Lens seems to be a start. Tried a few other effects but not caring for the results as of yet ...


Top
 Post subject: Re: A Gimp Tutorial Challenge
PostPosted: Wed Dec 29, 2010 8:50 am  (#11) 
Offline
GimpChat Member
User avatar

Joined: May 16, 2010
Posts: 14709
Location: USA
It isn't an easy effect to re-create. =)
I will give it another go this weekend also. :paint

_________________
Image
Edmund Burke nailed it when he said, "The only thing necessary for the triumph of evil is for good men to do nothing."


Top
 Post subject: Re: A Gimp Tutorial Challenge
PostPosted: Wed Dec 29, 2010 5:23 pm  (#12) 
Offline
GimpChat Member
User avatar

Joined: Jul 04, 2010
Posts: 2253
Location: Retired Moderator Slowly Returning to the Living.
Still fighting with Best Buy to get my brand new power computer (that I have been without for weeks) replaced/repaired. If/When I finally get a fully working machine going, I will be trying this out. I did have luck with this style of art years ago (done with Gimp) but don't remember how I did it.

_________________
Artists aren't crazy! We're eccentric! ~G.M. Ross

Image

My Sigs = My Photos
Check out my work at http://www.flickr.com/photos/photomastergreg.


Top
 Post subject: Re: A Gimp Tutorial Challenge
PostPosted: Wed Dec 29, 2010 8:01 pm  (#13) 
Offline
GimpChat Member
User avatar

Joined: May 16, 2010
Posts: 14709
Location: USA
Sounds good PhotoMaster.Hope you get your baby back soon! =)

_________________
Image
Edmund Burke nailed it when he said, "The only thing necessary for the triumph of evil is for good men to do nothing."


Top
 Post subject: Re: A Gimp Tutorial Challenge
PostPosted: Wed Dec 29, 2010 9:13 pm  (#14) 
Offline
GimpChat Member
User avatar

Joined: Oct 19, 2010
Posts: 376
Location: North Central Ohio, USA
PM,
What gives? You're sick, your computer is sick...

_________________
Life Truth: #12
My cat is a worst typist than I am.


Top
 Post subject: Re: A Gimp Tutorial Challenge
PostPosted: Wed Dec 29, 2010 10:03 pm  (#15) 
Offline
GimpChat Member
User avatar

Joined: Sep 24, 2010
Posts: 12516
Gave it a try using Imageskil's Displacement filter (it's free. Works great in GIMP; not so well in CS5; lol). :)

http://www.imageskill.com/products_index.html


Attachments:
196_hugging-project.png
196_hugging-project.png [ 386.18 KiB | Viewed 2482 times ]

_________________
Lyle

Psalm 109:8

Image
Top
 Post subject: Re: A Gimp Tutorial Challenge
PostPosted: Thu Dec 30, 2010 1:35 pm  (#16) 
Offline
Former Member
User avatar

Joined: Nov 17, 2010
Posts: 618
Location: Rockford, IL
This is definitely worth a tutorial.


Top
 Post subject: Re: A Gimp Tutorial Challenge
PostPosted: Thu Dec 30, 2010 1:55 pm  (#17) 
Offline
GimpChat Member
User avatar

Joined: May 16, 2010
Posts: 14709
Location: USA
Thanks Lyle ill give it a go with the imageskill filter too. =)

_________________
Image
Edmund Burke nailed it when he said, "The only thing necessary for the triumph of evil is for good men to do nothing."


Top
 Post subject: Re: A Gimp Tutorial Challenge
PostPosted: Fri Dec 31, 2010 1:30 pm  (#18) 
Offline
GimpChat Member

Joined: Apr 12, 2010
Posts: 5870
i have no idea how this was done, if we found how to maybe we will get even closer

Image

Alas...this was done manually 20h of work

Image

_________________
My 3D Gallery on Deviantart http://photocomix2.deviantart.com/
Main gallery http://www.flickriver.com/photos/photocomix-mandala/
Mandala and simmetry http://www.flickriver.com/photos/photocomix_mandala/

Image

Mrs Wilbress


Top
 Post subject: Re: A Gimp Tutorial Challenge
PostPosted: Fri Dec 31, 2010 4:11 pm  (#19) 
Offline
GimpChat Member
User avatar

Joined: Sep 24, 2010
Posts: 12516
I ran across this program (not free though but they do have a trial period) that does this PC. I'm nearly 100% sure that's the program that these renders were done in. Still lots of work. :)

http://www.pingotec.com/

_________________
Lyle

Psalm 109:8

Image


Top
 Post subject: Re: A Gimp Tutorial Challenge
PostPosted: Fri Dec 31, 2010 5:06 pm  (#20) 
Offline
Global Moderator
User avatar

Joined: Oct 06, 2010
Posts: 4045
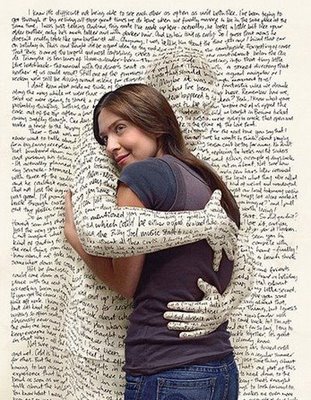
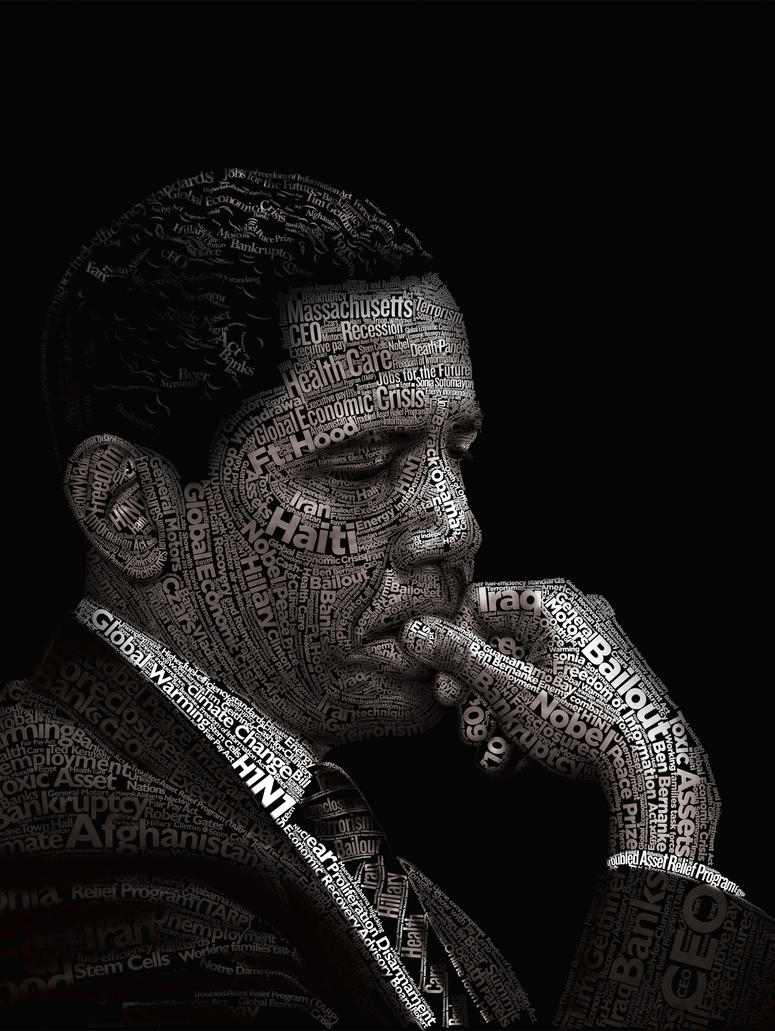
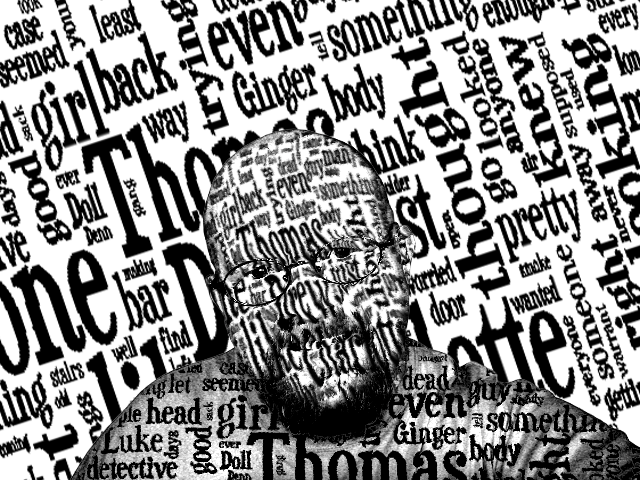
It might seem like I am being over-the-top (I'm not, really - more like overly optimistic), but something tells me that creating images with text is as simple as finding a way to wrap one layer (the text) over a 3D-like normal map. It would involve not only bumping, but warping those points to elevated targets on a mapped image. So, this got me to thinking about G'MIC 3D extrusion and the ability to use dots or wireframes on the image. What if, instead of dots or wireframes, we were allowed to map a layer of choice, instead, namely the text layer of brightly colored, varying sizes of text?

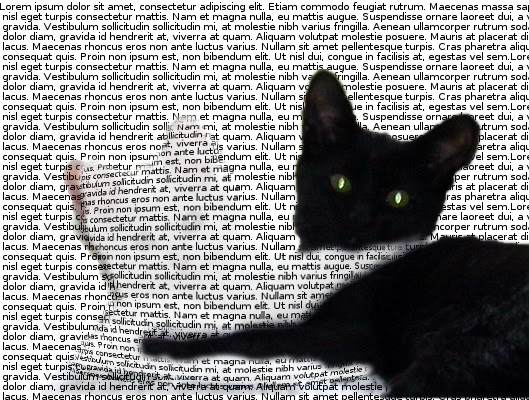
Currently, with a layer of transparent text, the input layer option isn't playing nice with the extruded image. Certainly someone with far superior coding skills could simplify that process by including the ability to permit an input layer to follow the same mapping parameters of dots or wire frames. Am I making sense to anyone?

I tried to play this a hundred different ways, using nothing but GIMP and/or G'MIC (no other outside plug-ins/filters were incorporated). And like others, I'm still not convinced or satisfied with the normal displace, bump, or normal mapping process. It just leaves images too distorted and fuzzy. Maybe Mike is right, cage deformation might be the tool that gets us close.

Image

_________________
"In order to attain the impossible, one must attempt the absurd."
~ Miguel de Cervantes


Top
Post new topic Reply to topic  [ 39 posts ]  Go to page 1, 2  Next

All times are UTC - 5 hours [ DST ]


   Similar Topics   Replies 
No new posts Attachment(s) Challenge

14

No new posts Attachment(s) Directed Challenge

111

No new posts Attachment(s) Free Challenge

102

No new posts Attachment(s) GMIC Challenge

24

No new posts Attachment(s) Circlismic the Tutorial.

7


* Login  


Powered by phpBB3 © phpBB Group